

Each illustrated step shows a full-screen view first, followed by a close-up with the same figure number. Use the Location path and full screen to find the control, then read its settings in the close-up.
Cart add abandonment sends email or LINE reminders containing cart products to customers who added items but left before starting checkout.
- How abandonment scenarios differ
- Before you begin
- Create the scenario
- Set up a second or third message
- Edit the automatically created email
- Edit the automatically created LINE message
- Preview cart abandonment products in LINE
- Products and purchase restart links
- Test and enable the scenario
- Check delivery results
- Related pages
How abandonment scenarios differ
| Scenario | Customer activity |
|---|---|
| Browse abandonment | Viewed products, then left without adding to cart or starting checkout |
| Cart add abandonment | Added products to cart, then left without starting checkout |
| Checkout abandonment | Started checkout but did not complete the purchase |
When checkout or a purchase is detected, cart add abandonment reminders are suppressed. Use a checkout abandonment scenario for reminders after checkout has started.
Before you begin
- Confirm that activity tracking is available on your store and cart activity can be linked to a customer in StoreCRM. Reminders cannot be sent to visitors whose identity cannot be determined.
- For email, check the customer's email delivery eligibility. For LINE, check the customer's LINE connection and messaging eligibility.
- If Shopify or another app also sends abandonment reminders, review those settings to avoid overlapping notifications.
Create the scenario
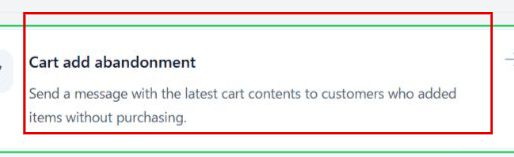
- Open Scenario, start adding a new scenario, and select Cart add abandonment under Cart Abandonment / Checkout Abandonment.
Figure 01 — Full screen | Location: Scenario → Add a new scenario → Choose a Scenario Trigger
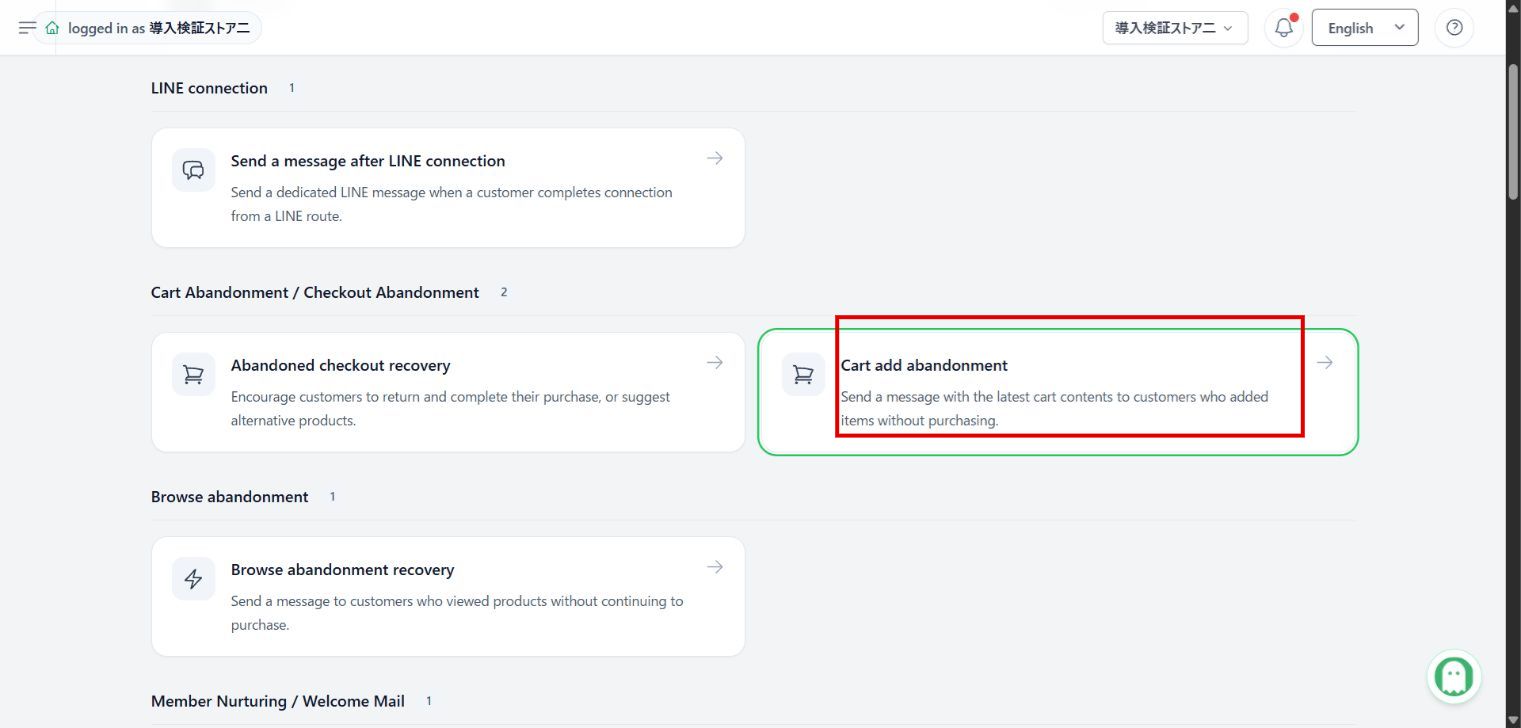
Figure 01 — Red-box detail
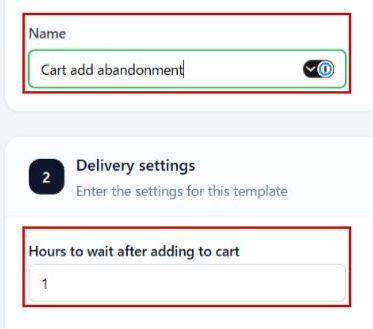
- Enter the Name and set Hours to wait after adding to cart. The default is 1 hour and the range is 1–48 hours. Timing is based on the last cart activity, such as adding an item or changing its quantity. Reopening the cart page alone does not extend the wait.
Figure 02 — Full screen | Location: Scenario → Cart add abandonment → Create Scenario (top)
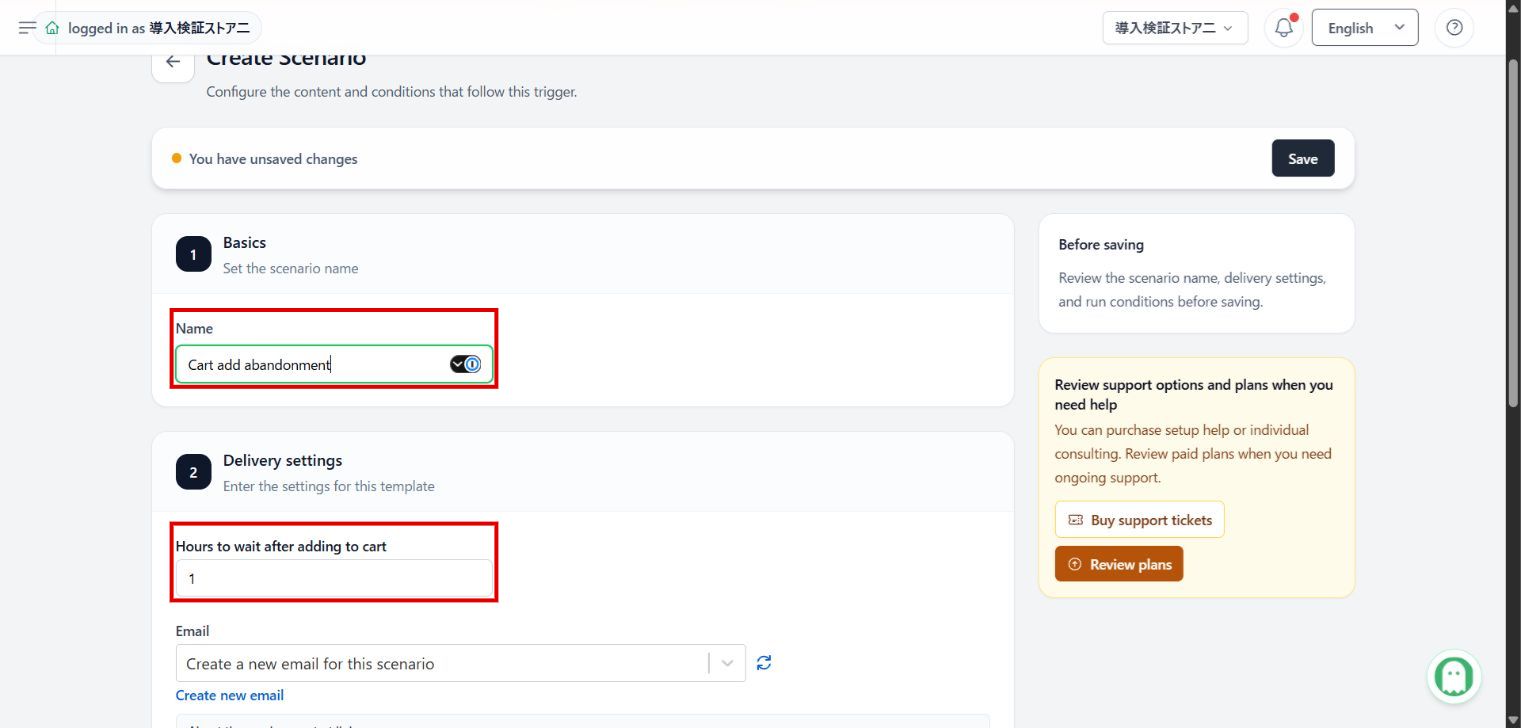
Figure 02 — Red-box detail
- Under Email, select Create a new email for this scenario. If you use an existing email, choose one that can insert cart products. The editing steps are described below.
Figure 03 — Full screen | Location: Create Scenario → Delivery settings → Email
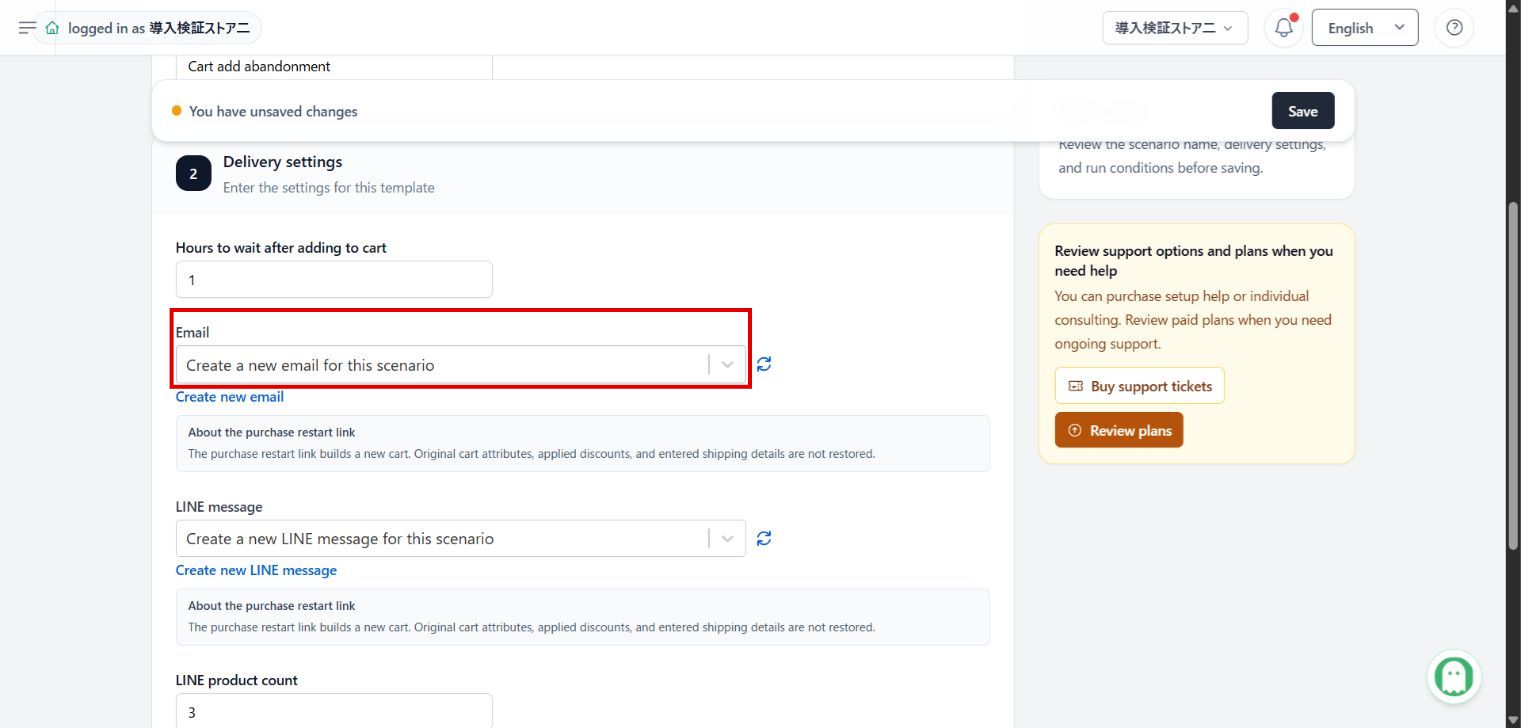
Figure 03 — Red-box detail

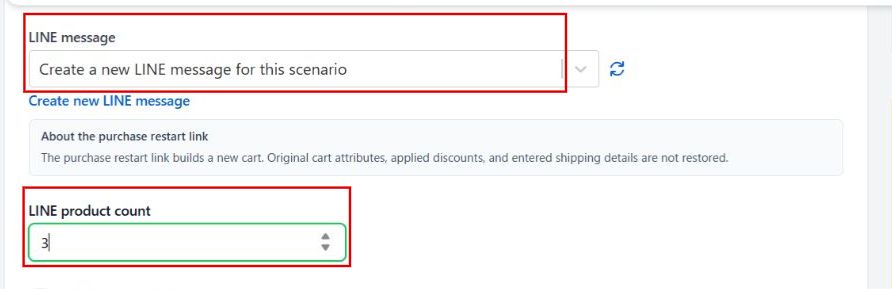
- Under LINE message, select Create a new LINE message for this scenario, then set LINE product count. The default is 3 and the range is 1–10. Products depend on the recipient's cart information. You can also use email or LINE on its own.
Figure 04 — Full screen | Location: Create Scenario → Delivery settings → LINE message (below Email)
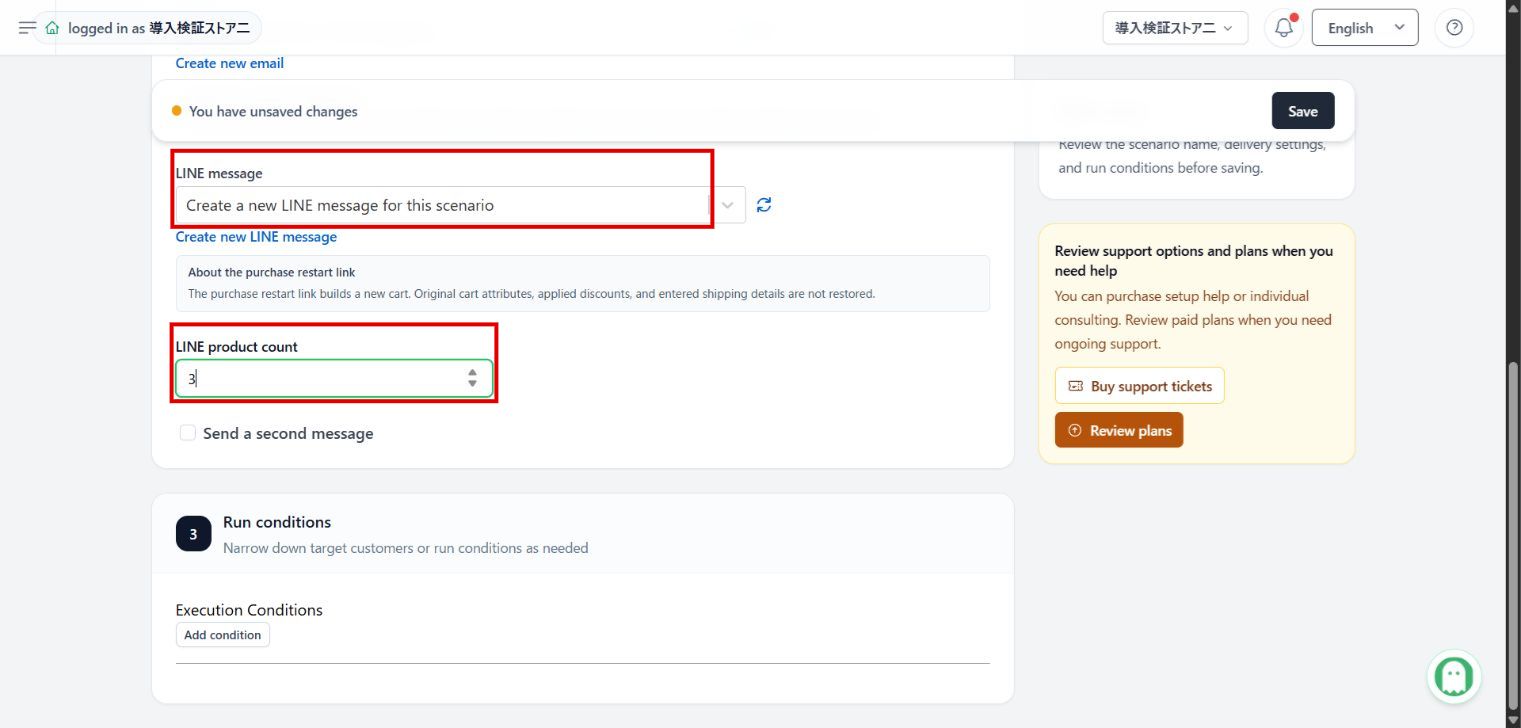
Figure 04 — Red-box detail
- Narrow the audience in Execution Conditions if needed, then select Save at the top. After saving, open the automatically created email and LINE messages to edit them.
Set up a second or third message
- Enable Send a second message.
- Set Hours before the second message and select the second email and LINE message. To use different content from the first message, select and edit a message for the second step.
Figure 05 — Full screen | Location: Create Scenario → Delivery settings → Second message (below LINE product count)
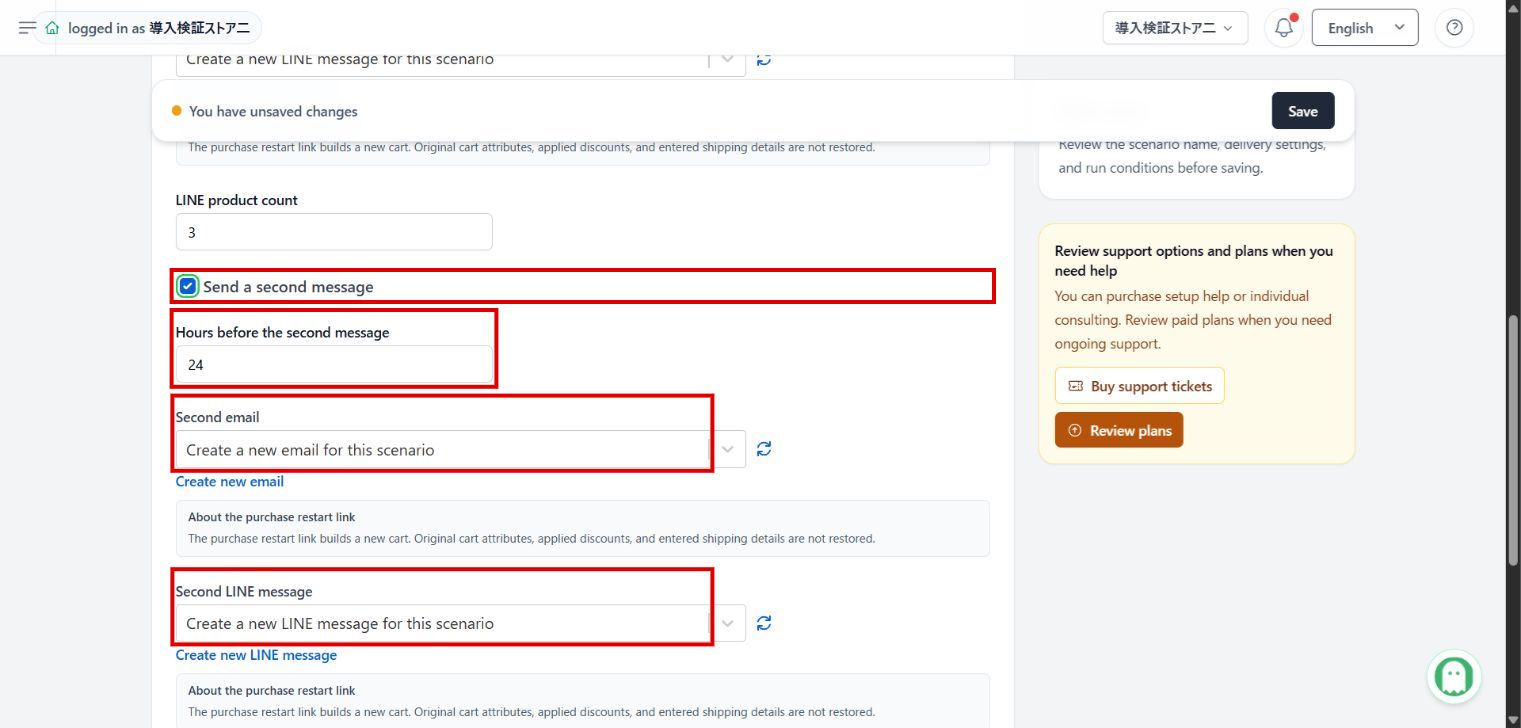
Figure 05 — Red-box detail
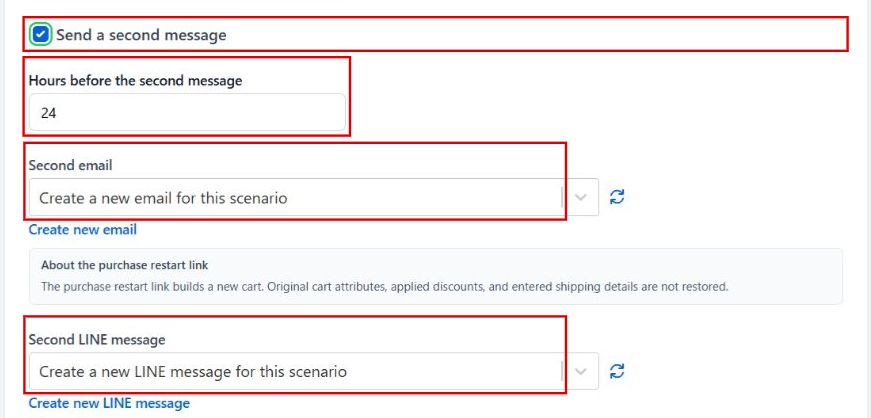
- To send another follow-up, enable Send a third message below and configure its wait and messages. Leave unused messages disabled.
Each follow-up wait can be 1–720 hours; the default is 24 hours. The standard form supports up to three messages. For example, the first can wait 1 hour and the second 24 hours after the first. Further cart activity, checkout, or a purchase can affect eligibility, so delivery at the exact configured time is not guaranteed.
Edit the automatically created email
1. Open the email from the scenario
In the saved scenario's details, click the message name under Email. You can open the message under LINE message from the same area.
Figure 06 — Full screen | Location: Scenario Details → Settings → Details → Email / LINE message
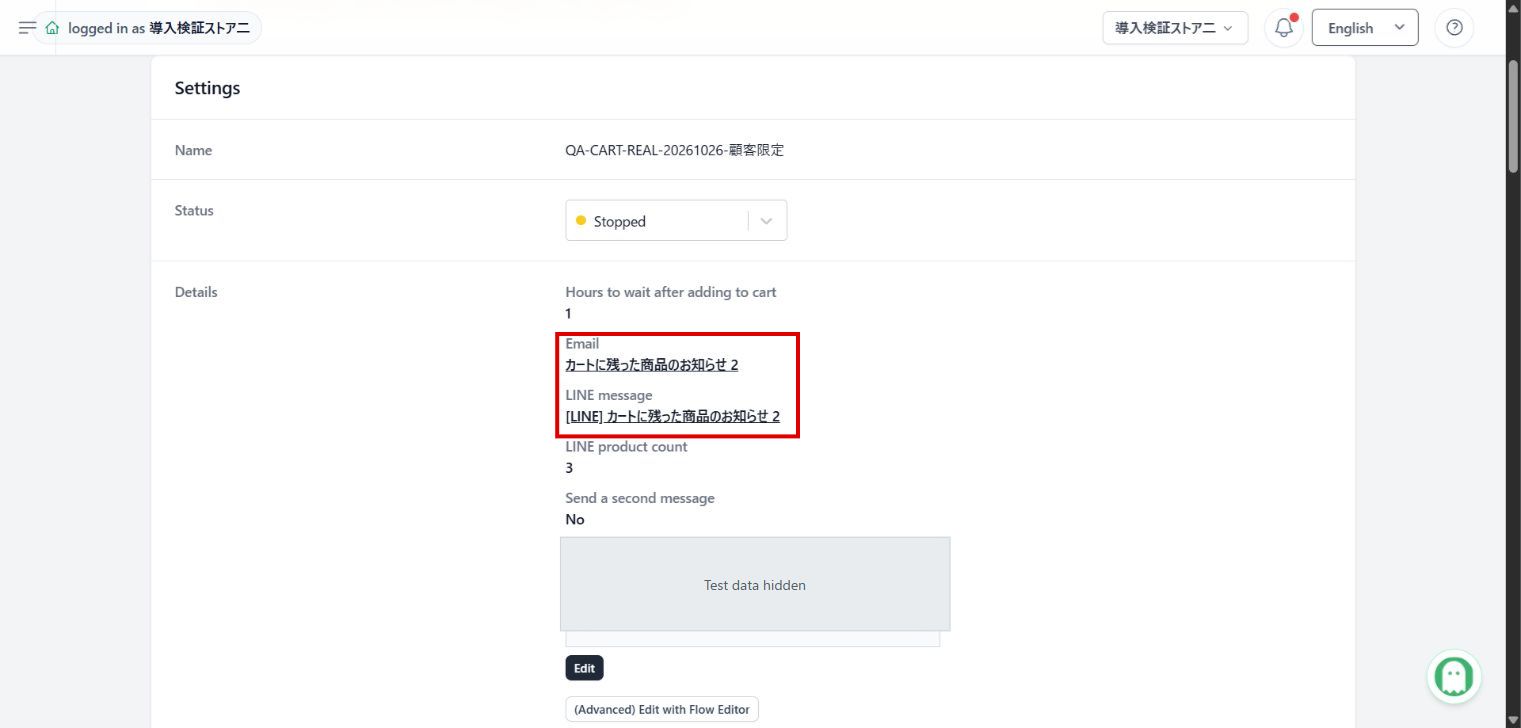
Figure 06 — Red-box detail
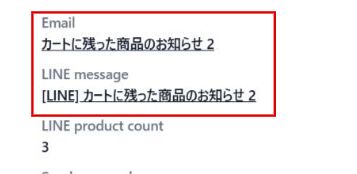
To change the subject, use Edit beside Email Subject on the email details screen. To edit the body, selectEdit beside HTML Email Body.
Figure 07 — Full screen | Location: Email Details → Scroll down → HTML Email Body
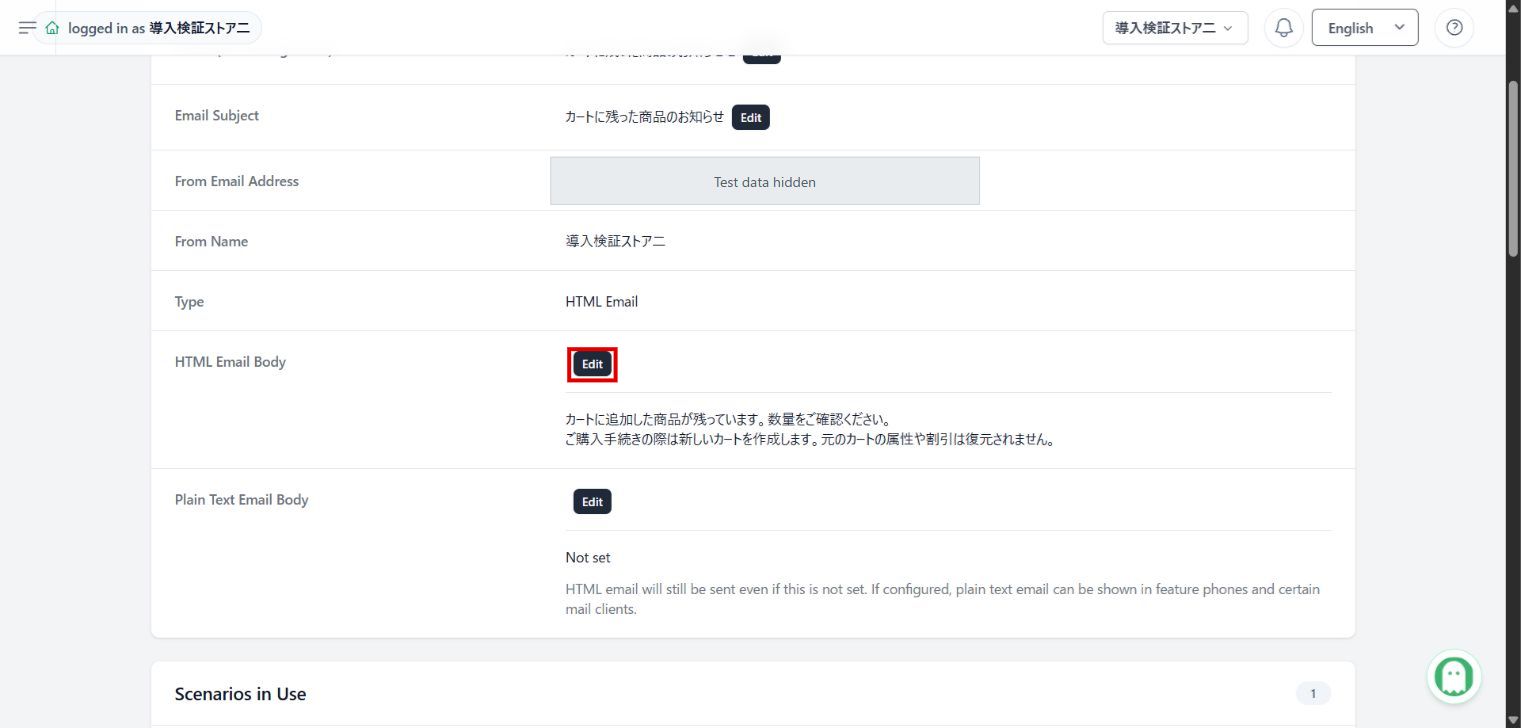
Figure 07 — Red-box detail

2. Edit the introductory text
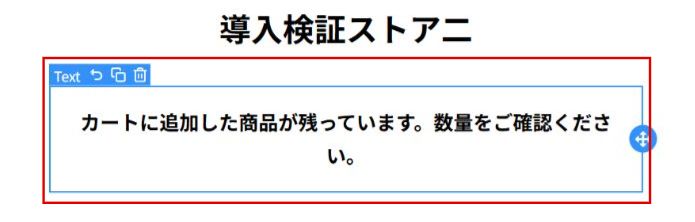
Select the text in the center of the editor and change the introduction to suit your store. This text block is separate from the product cards. You do not need to type fixed product names or quantities into the introduction.
Figure 08 — Full screen | Location: Email Details → Edit HTML Email Body → Text block in the center
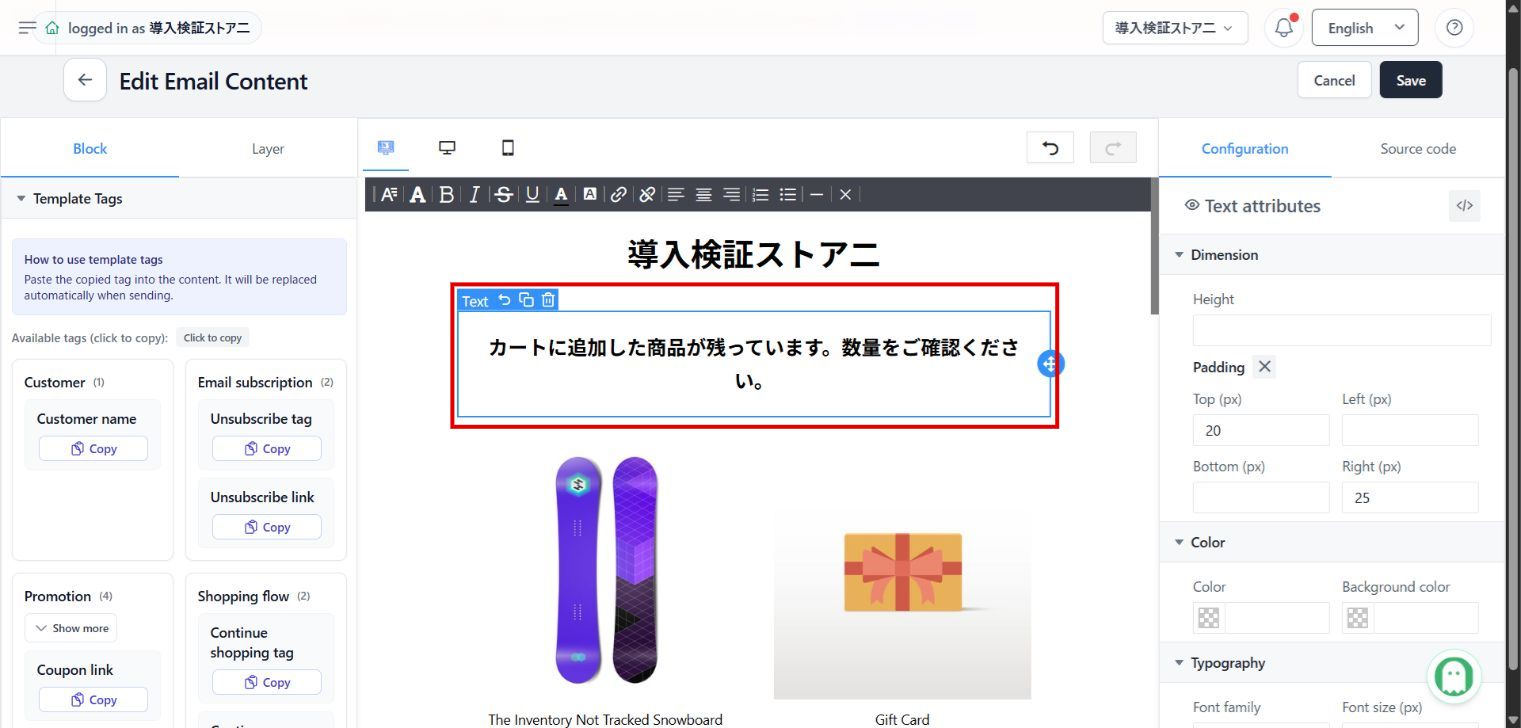
Figure 08 — Red-box detail
3. Keep automatic cart product selection
Select the block containing the products to open its settings on the right. The automatically created email uses a Shopify Collection product block.
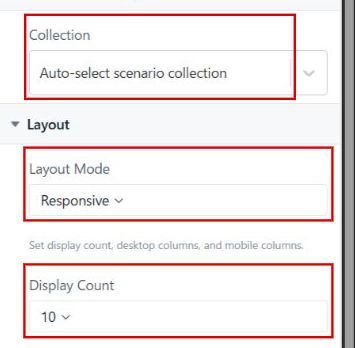
- Keep Collection set toAuto-select scenario collection. A fixed store collection will not be replaced with the recipient's cart products.
- Set Layout Mode to Responsive, then choose Display Count. Adjust Desktop Columns and Mobile Columns below if needed.
Figure 09 — Full screen | Location: Edit Email Content → Select the product block in the center → Right-hand settings panel
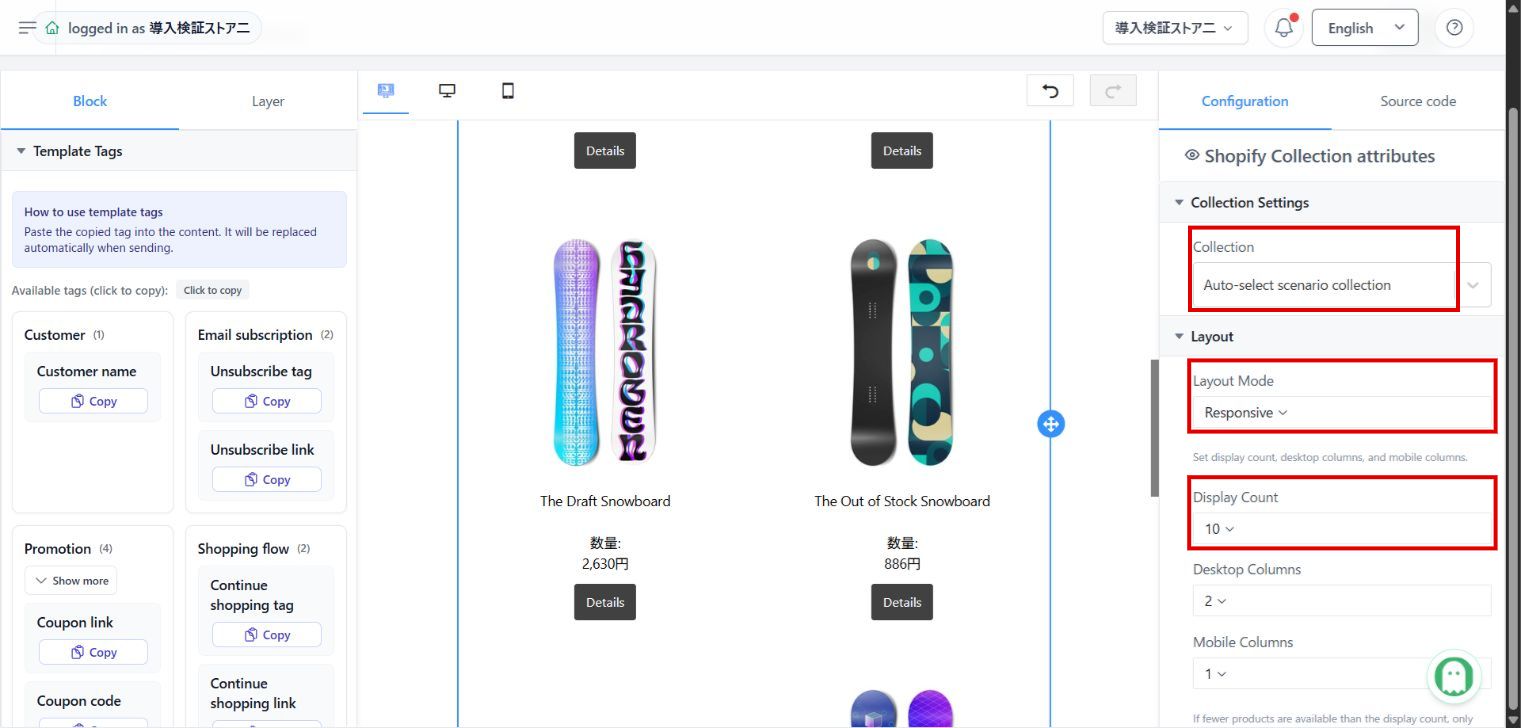
Figure 09 — Red-box detail
4. Check product name, quantity, and price placeholders
Under Display Content → Content, edit the text shown for each product. Move to the lower lines of the field to check quantity and price. The following example preserves the automatically generated placeholders; you can translate the label before the quantity.
text

{product.title}

{product.variant_name}

Quantity: {product.quantity}

{product.price}
{product.quantity} inserts the cart quantity and{product.price} inserts the price. Keep the{...} placeholders and edit labels or placement around them instead of replacing them with fixed values.
Figure 10 — Full screen | Location: Edit Email Content → Scroll down the right-hand product settings panel → Display Content → Content
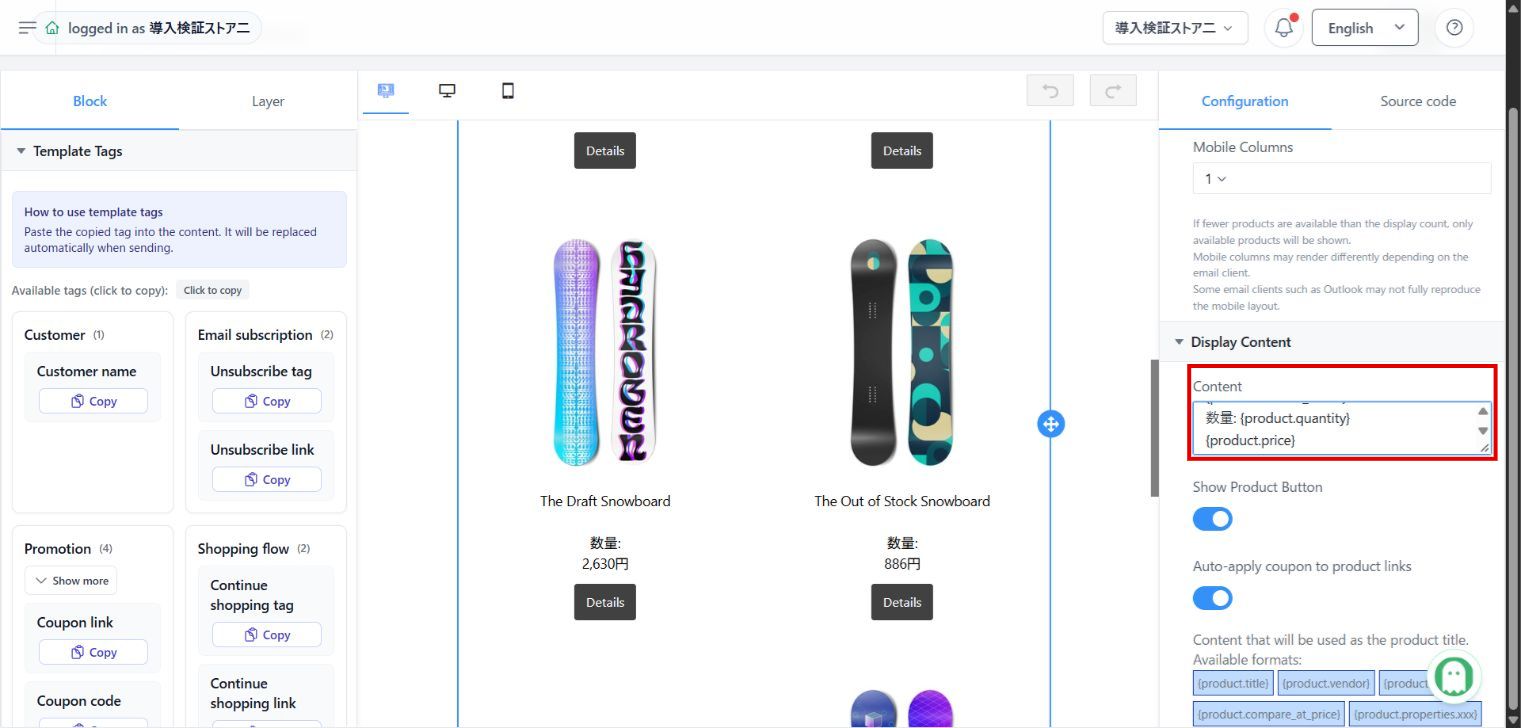
Figure 10 — Red-box detail
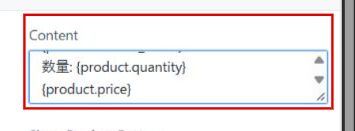
Product previews use sample data. A sample without cart quantity data may show a blank quantity. Verify actual quantities and the purchase restart link in a received test email as well. When finished, select Save at the top.
Edit the automatically created LINE message
Click the message name under LINE message in the scenario details, then select Edit for the body in the LINE message details. The generated message has two blocks:introductory text and a cart abandonment product carousel.
1. Edit the text introduction
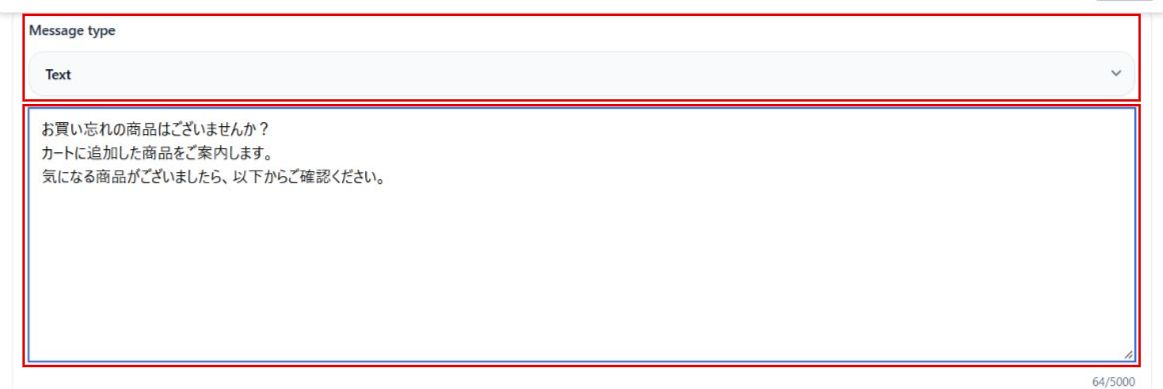
The first block has Message type set to Text. Rewrite the introduction in its text field to suit your store.
Figure 11 — Full screen | Location: LINE Message Details → Edit body → First Text block
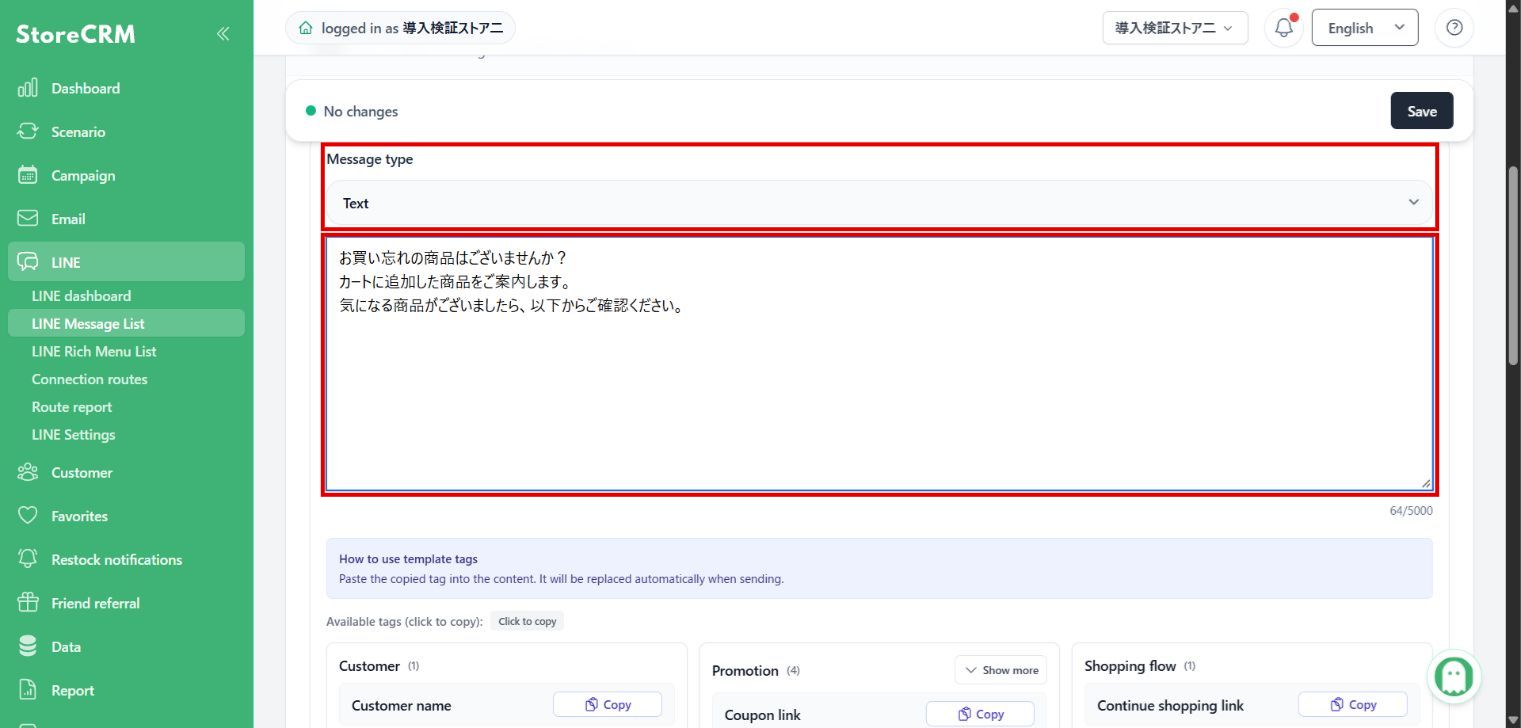
Figure 11 — Red-box detail
2. Configure the cart abandonment product carousel
Scroll down to the second block.
- Keep Message type set toCart abandonment product carousel. Do not switch it to the browse abandonment carousel, a regular image, or a Flex Message.
- Set the upper limit with Number of products (1-10). Check the scenario's LINE product count setting as well.
- Alternative Text is used in notifications. Enter a useful description such as “Cart products”. It is not a field for fixing individual product names or images.
Figure 12 — Full screen | Location: Edit LINE Message → Scroll below the introductory text and template tags → Second message block
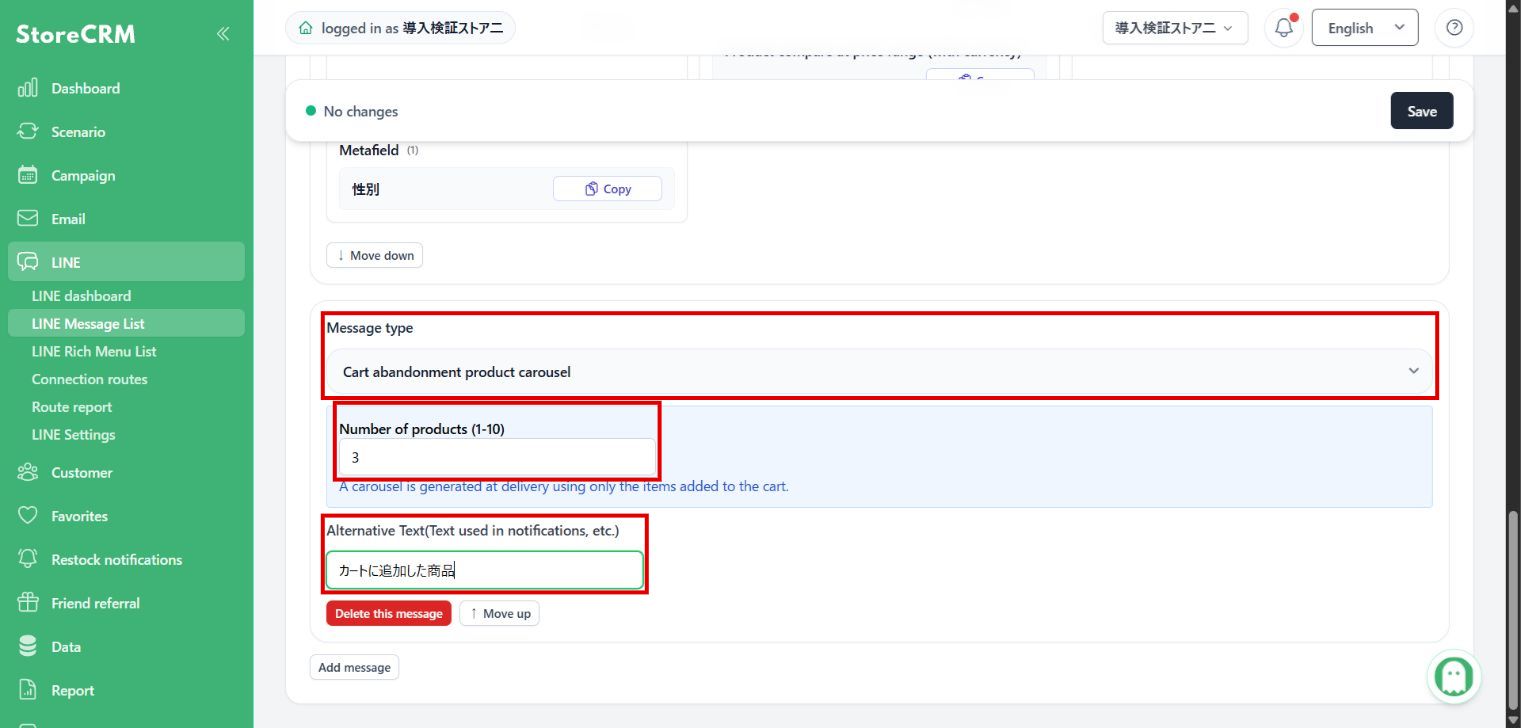
Figure 12 — Red-box detail
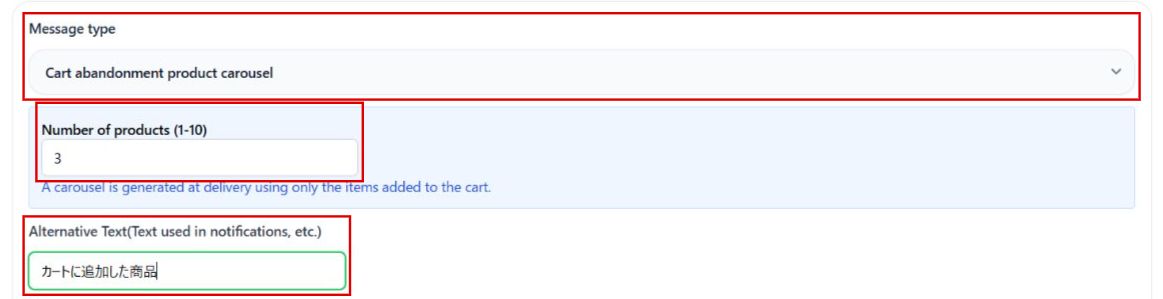
Even if you only change the introductory text, keep the second product carousel. Product cards and checkout-resumption links are generated at delivery time. You can review a sample with Product card preview in the LINE editor and detail view. A sample does not determine the actual delivery audience, so also send a test to the designated LINE test recipient and check products, quantities, and links. After editing, click Save at the top of the screen.
Preview cart abandonment products in LINE
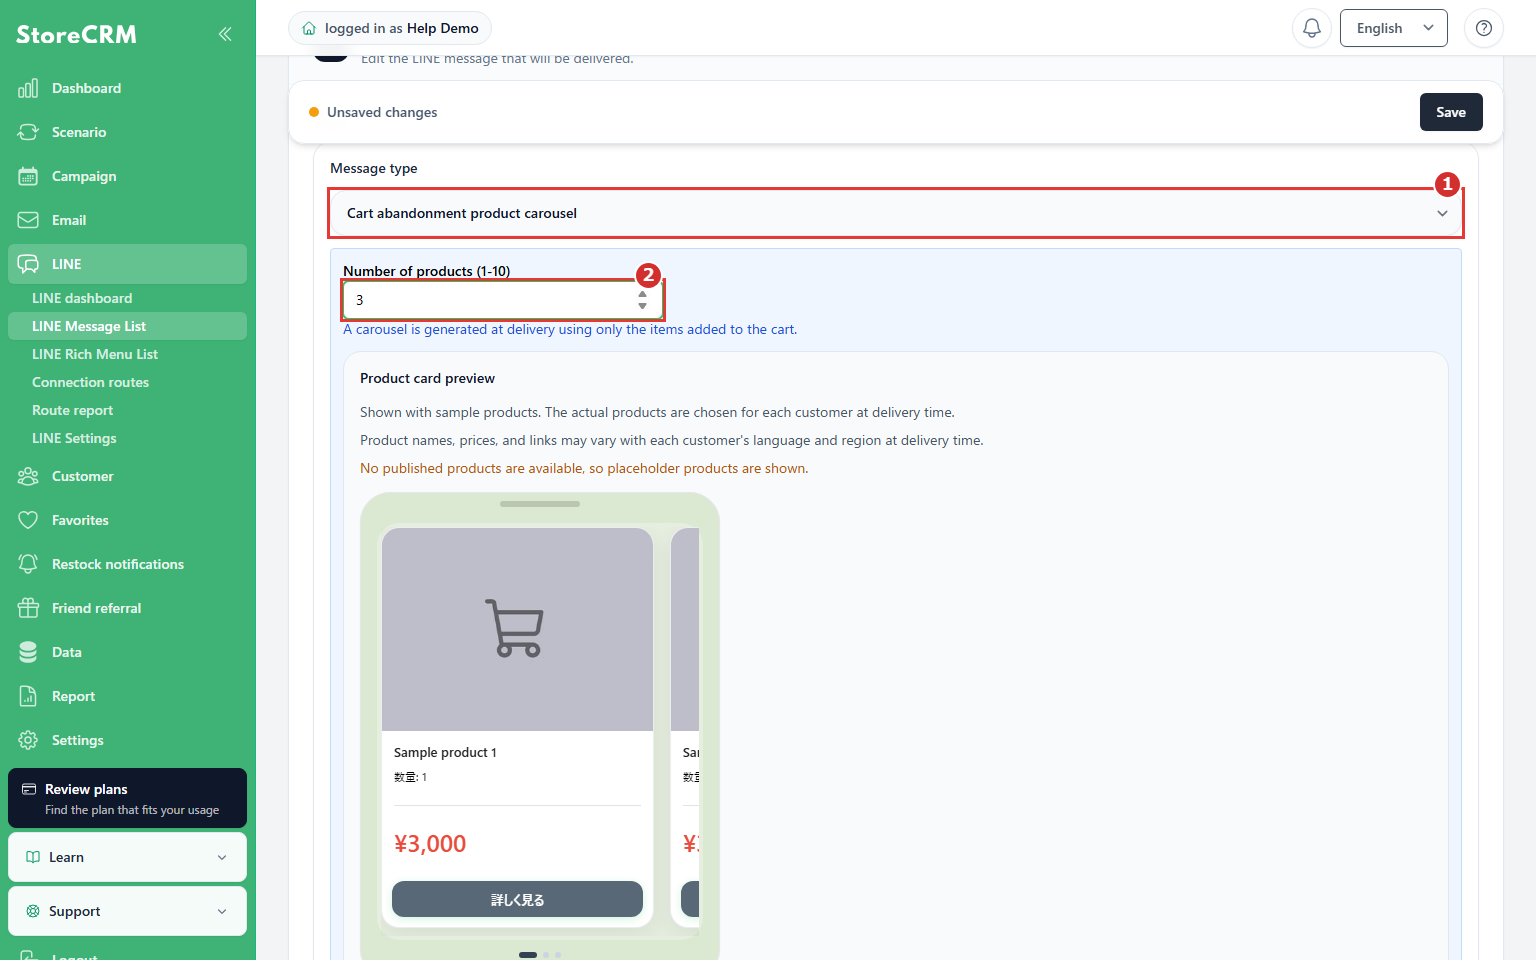
1. Set the product card type and count
Where: Body editor for the LINE message used by the scenario
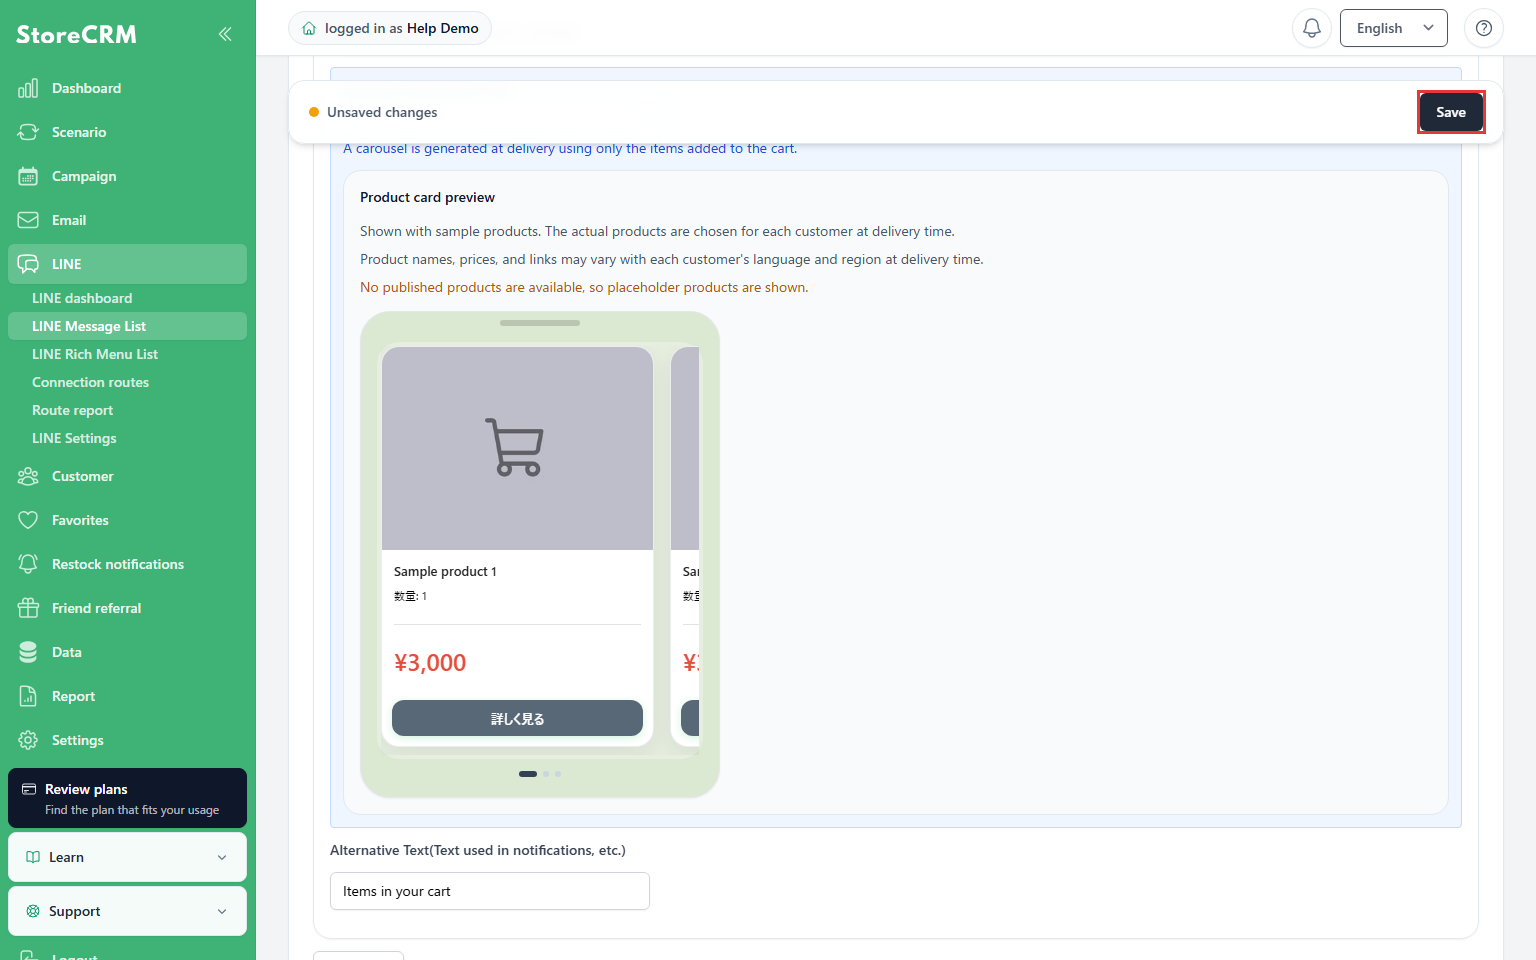
Select 1 the cart abandonment product cards and set 2 the product limit. Keep the product cards when editing only the introductory text.
Check: The example sets the limit to 3.
2. Review sample product cards
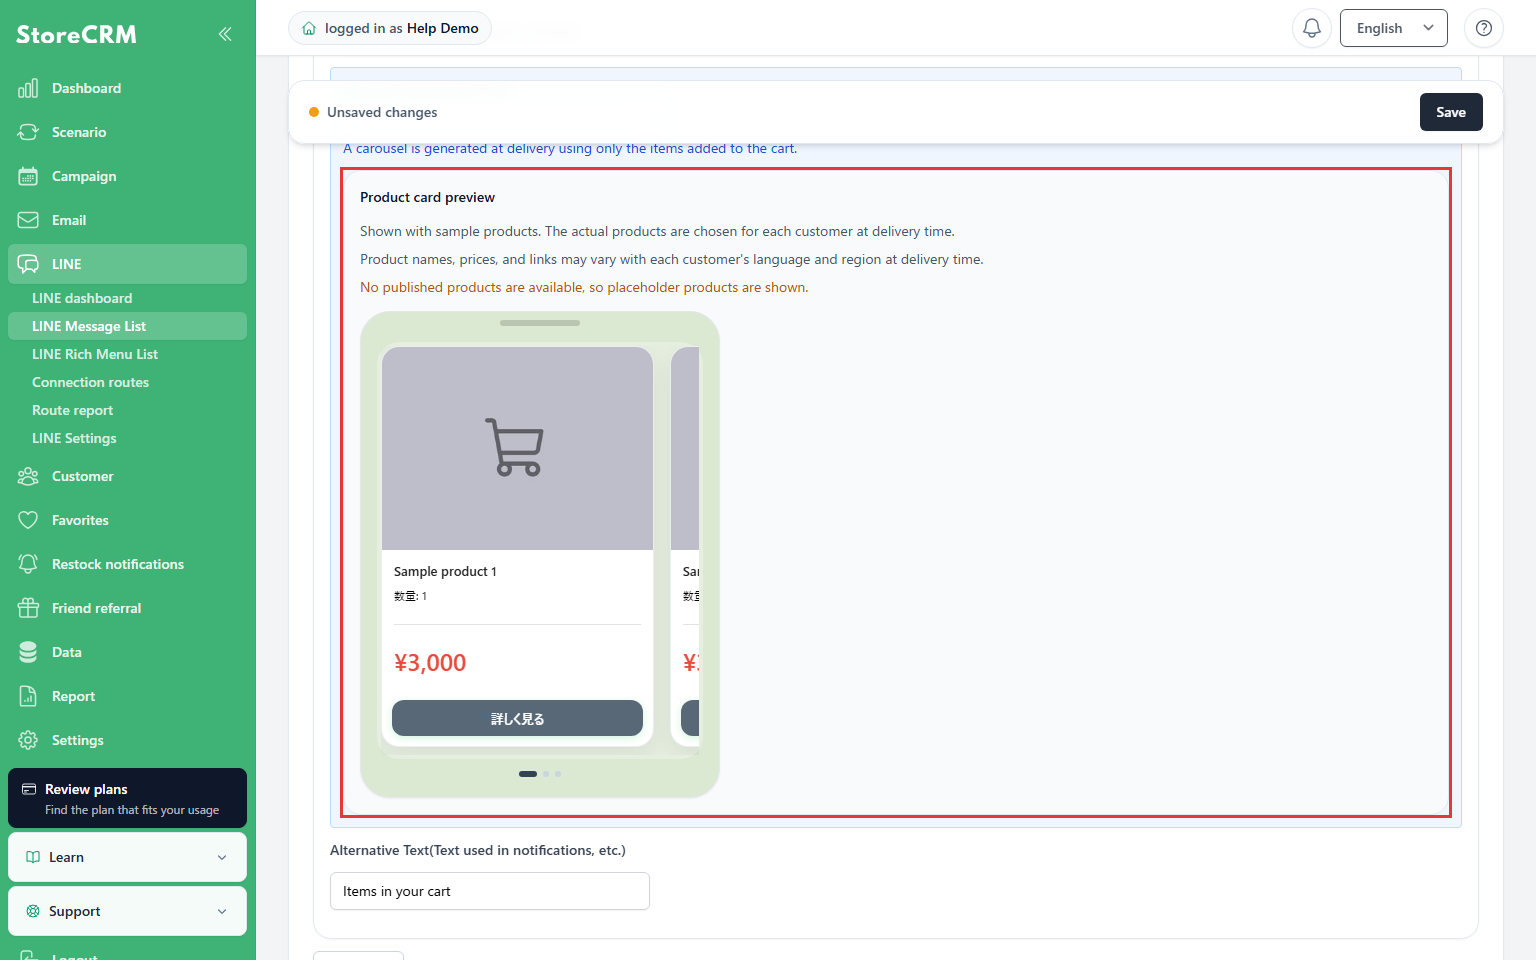
Where: Product card preview in the editor
Check the card layout and product limit. Sample products are shown when no published products are available, as in this example.
Check: This is a display sample, not the final recipient’s products, quantities, or links.
3. Save the changes
Where: Save bar at the top
Review the settings and preview, then click Save.
Check: Message details open.
4. Check the saved message
Where: Message body in details
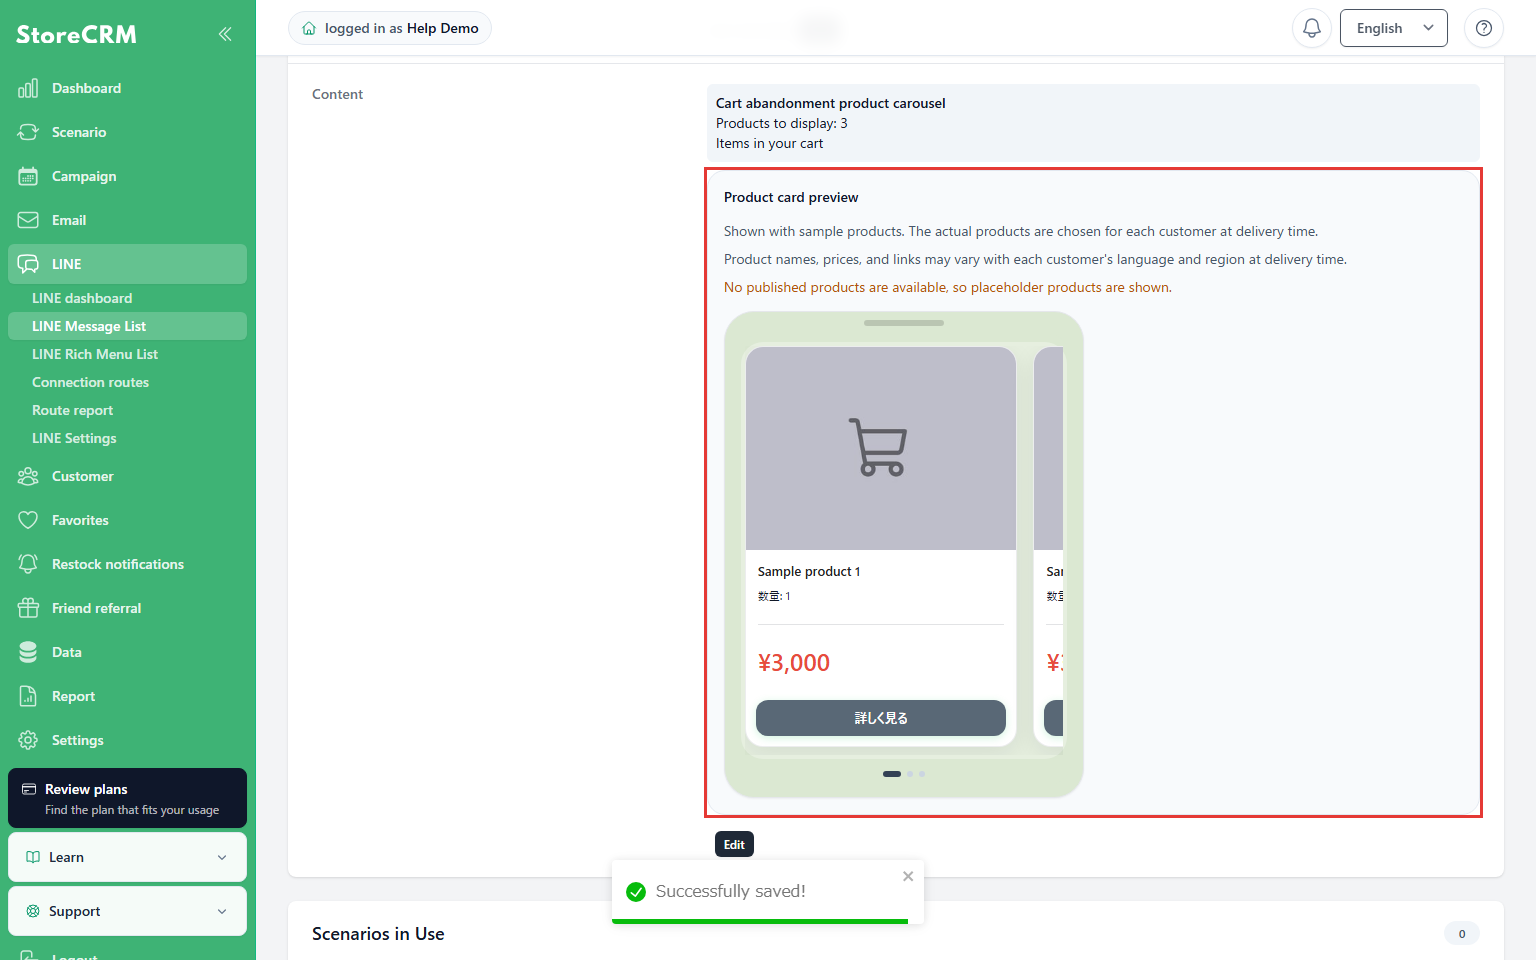
Review the saved body and card preview. Also use a test send to the designated LINE test recipient to check actual product substitution.
Check: Samples are available in both editor and details. Failure to load a preview alone does not mean saving or delivery failed.
The latest cart is rechecked immediately before delivery. Quantities reflect that cart; empty carts and confirmed purchases or checkout activity suppress delivery. Delivery is also suppressed if no eligible items remain after removing deleted or unavailable products.
Products and purchase restart links
Messages use the available cart products and quantities. Removed or unpurchasable items are excluded; no reminder is sent when no products remain available for the message. Sending is also suppressed when the cart is emptied or checkout or a purchase is detected.
A purchase restart linkbuilds a new cartcontaining the suggested products and quantities. It does not restore original cart attributes, applied discounts, entered shipping details, or other checkout information. Check the products, quantities, and prices shown on the storefront before purchasing.
If country-specific or market-specific pricing cannot be determined, the notification may show the product's base price, which can differ from the storefront price.
Test and enable the scenario
- Select Test this scenario on the saved scenario to check its settings and processing flow.
- To check actual email or LINE output, verify the email test destination and LINE test recipient, then send a test and review products, quantities, and links. The LINE editor and detail view can show product samples. Samples can differ from the final content rendered for each recipient.
- Separately from a scenario test, restrict a verification scenario to your test customer and check the path from actual storefront cart activity to delivery. A test send alone does not verify that cart activity triggers the scenario.
- After checking the configuration and results, set the scenario Status to Active. Test mode does not send to your regular customers. Before disabling it, check the effect on other active scenarios as well.
Check delivery results
Review processing results in the scenario's Execution History. Use Cart add abandonment targets and exclusions to filter decisions by period, exclusion reason, and channel.
If no message is sent, check whether the customer can be identified and contacted, the cart still contains products, and checkout or a purchase has not been completed. Analytics data is temporarily unavailable. does not mean delivery failed. Check the execution history and message delivery histories. If the issue persists, contact support with the screen and the time you checked it.
 English
 Japanese