

Table of Contents
Add a new scenario
Click on "Add new scenario.
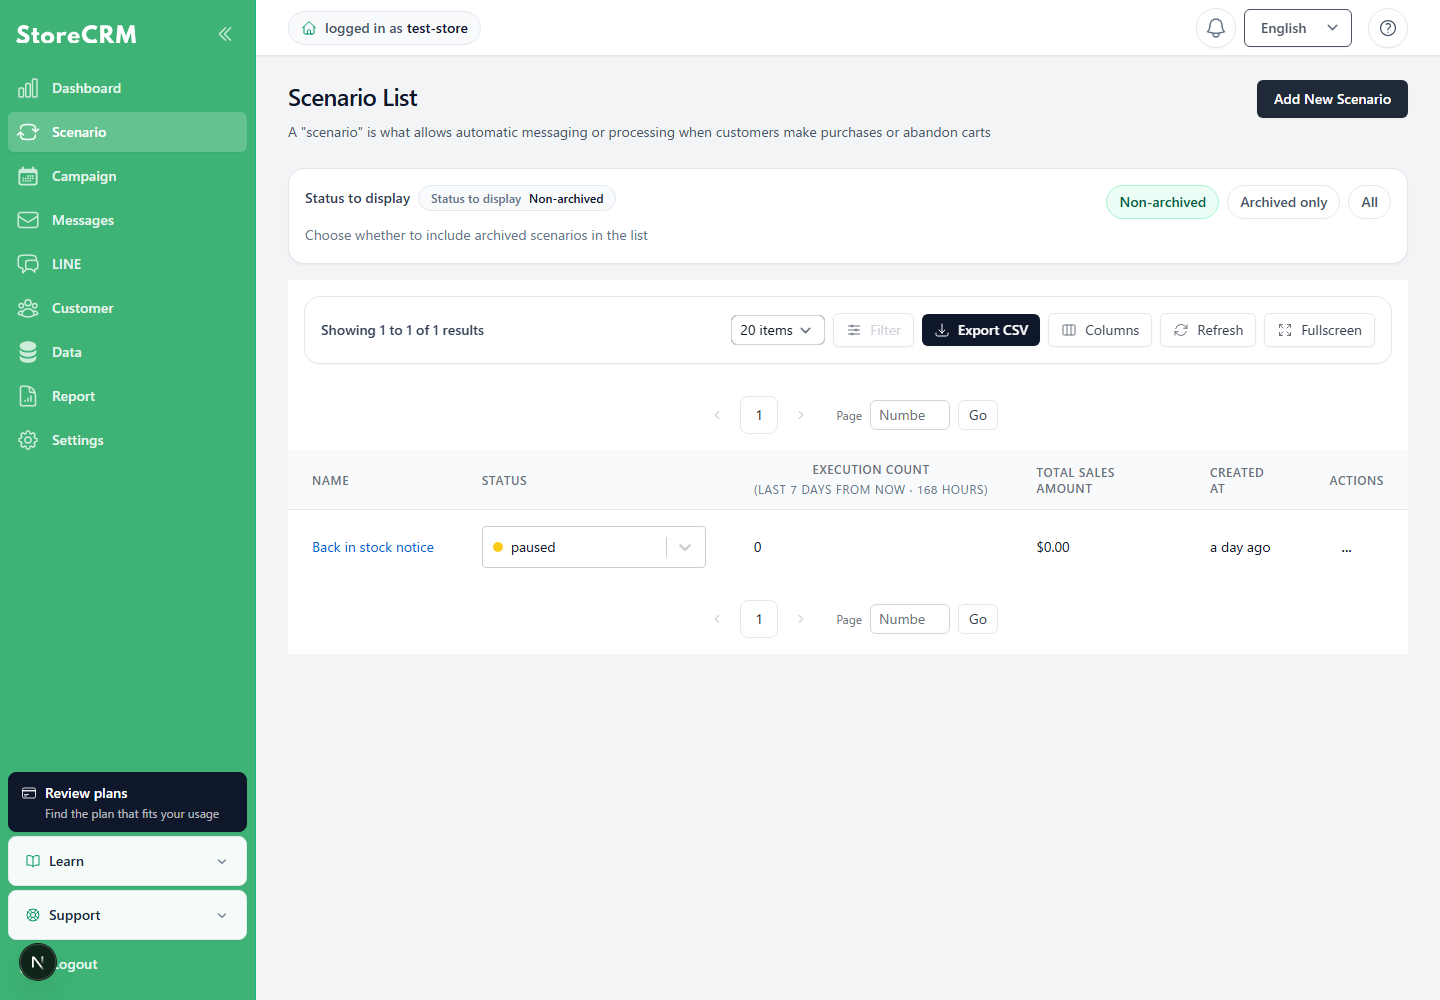
Click on the scenario you wish to create from the template.
- As an example, we have selected [Notify me of restocking].
- As for the type of scenario,here for more information.
- How to set up scenarios other than restocking notifications,here for more information.
![Select [Send restock notification] from the scenario trigger list.](https://storecrm.com/help/wp-content/uploads/2023/10/main-storecrm-en-scenario-restock-template-20260903.png)
3. when creating multiple scenarios, it is recommended that the scenario name be unique.
As an example, "Re-order notification is made - 20241001".
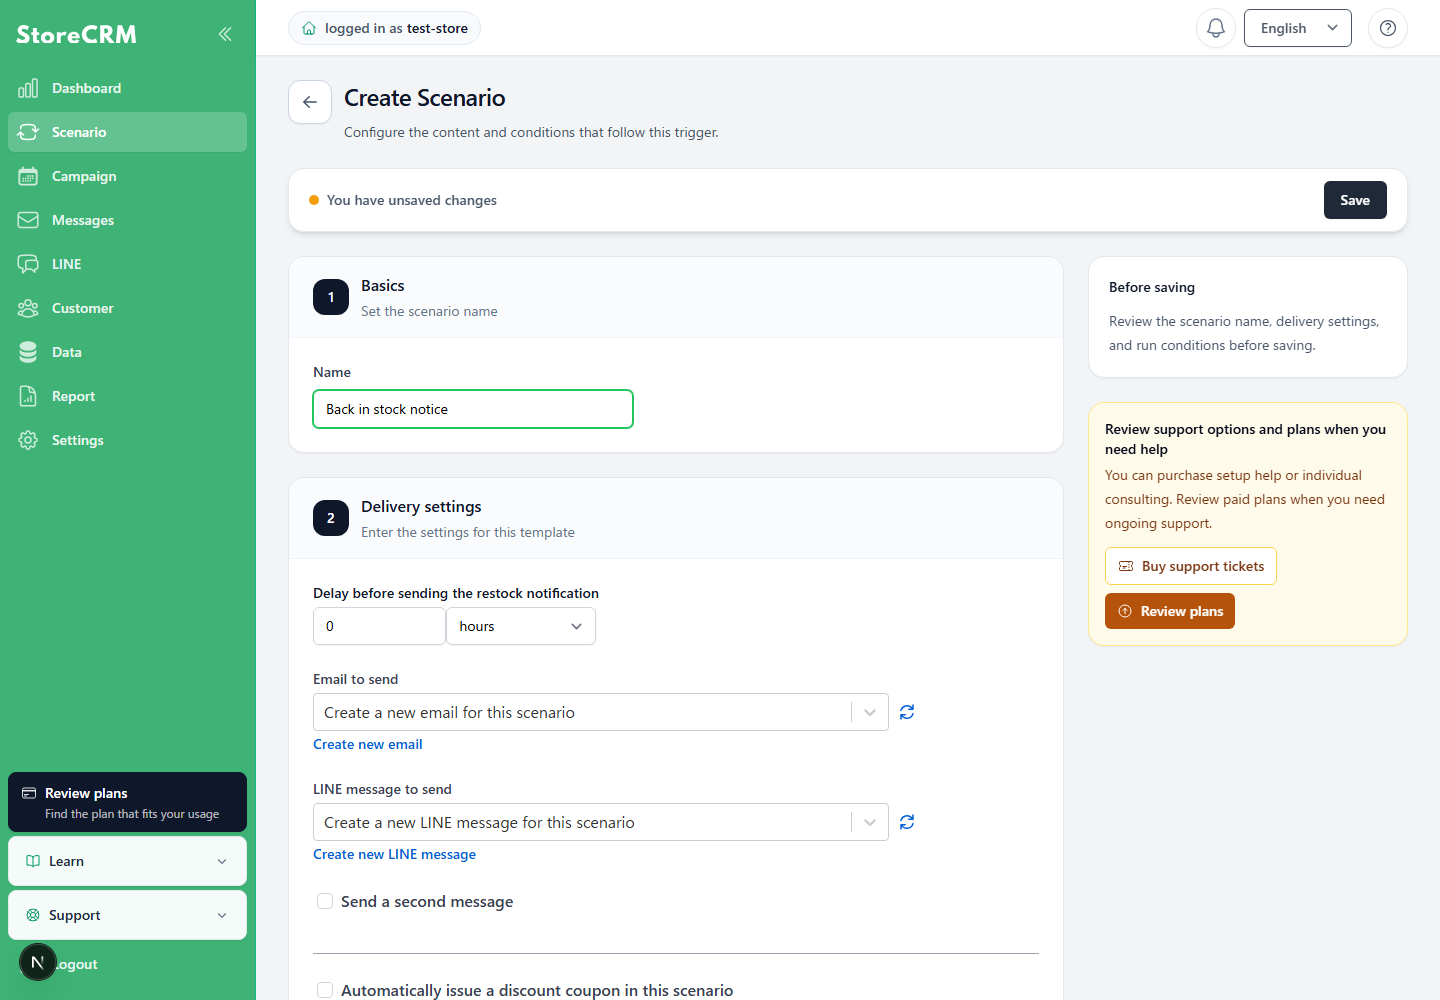
4. set the time before the restocking notification is sent.
- As an example, we set the time to "10 minutes".
- An email will be sent 10 minutes after the inventory count is changed from 0 to 1 or more in Shopify -> [Manage Products].
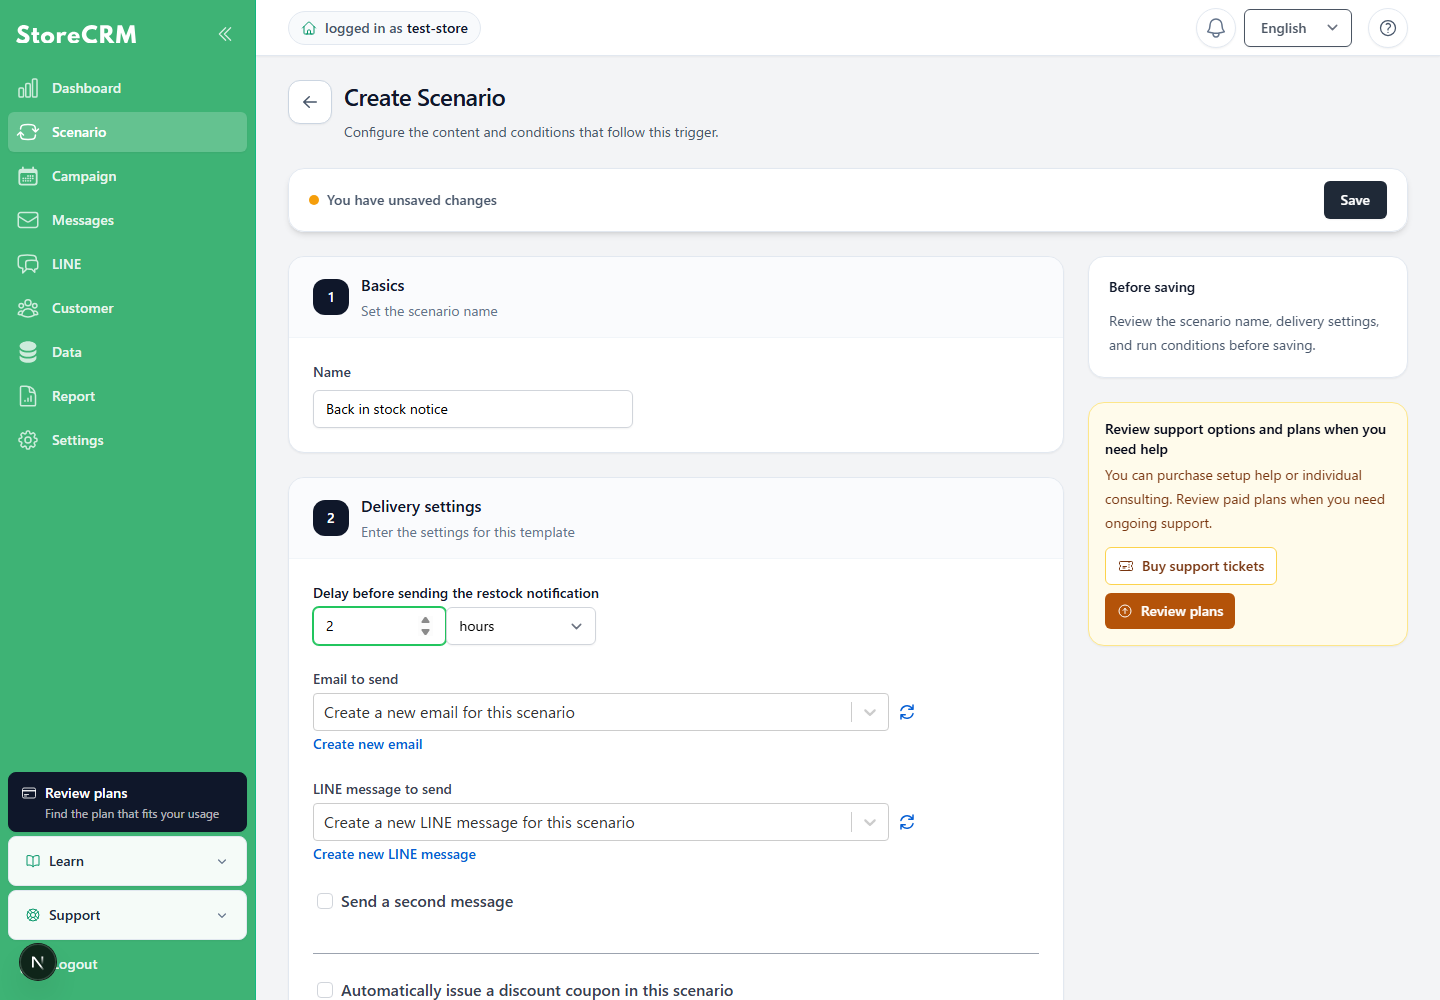
Select the content of the e-mail to be sent.
You can also create a new email.

When there are many templates, enter a template name in the search field above the list to filter it. Search email and LINE templates in their respective selectors.
- For email, in addition to an existing template, you can select[Create a new email]or[Do not send an email].
- For LINE, in addition to an existing template, you can select[Create a new LINE message]or[Do not send a LINE message].
- If you cannot find a template you created or updated, refresh the list and search again.
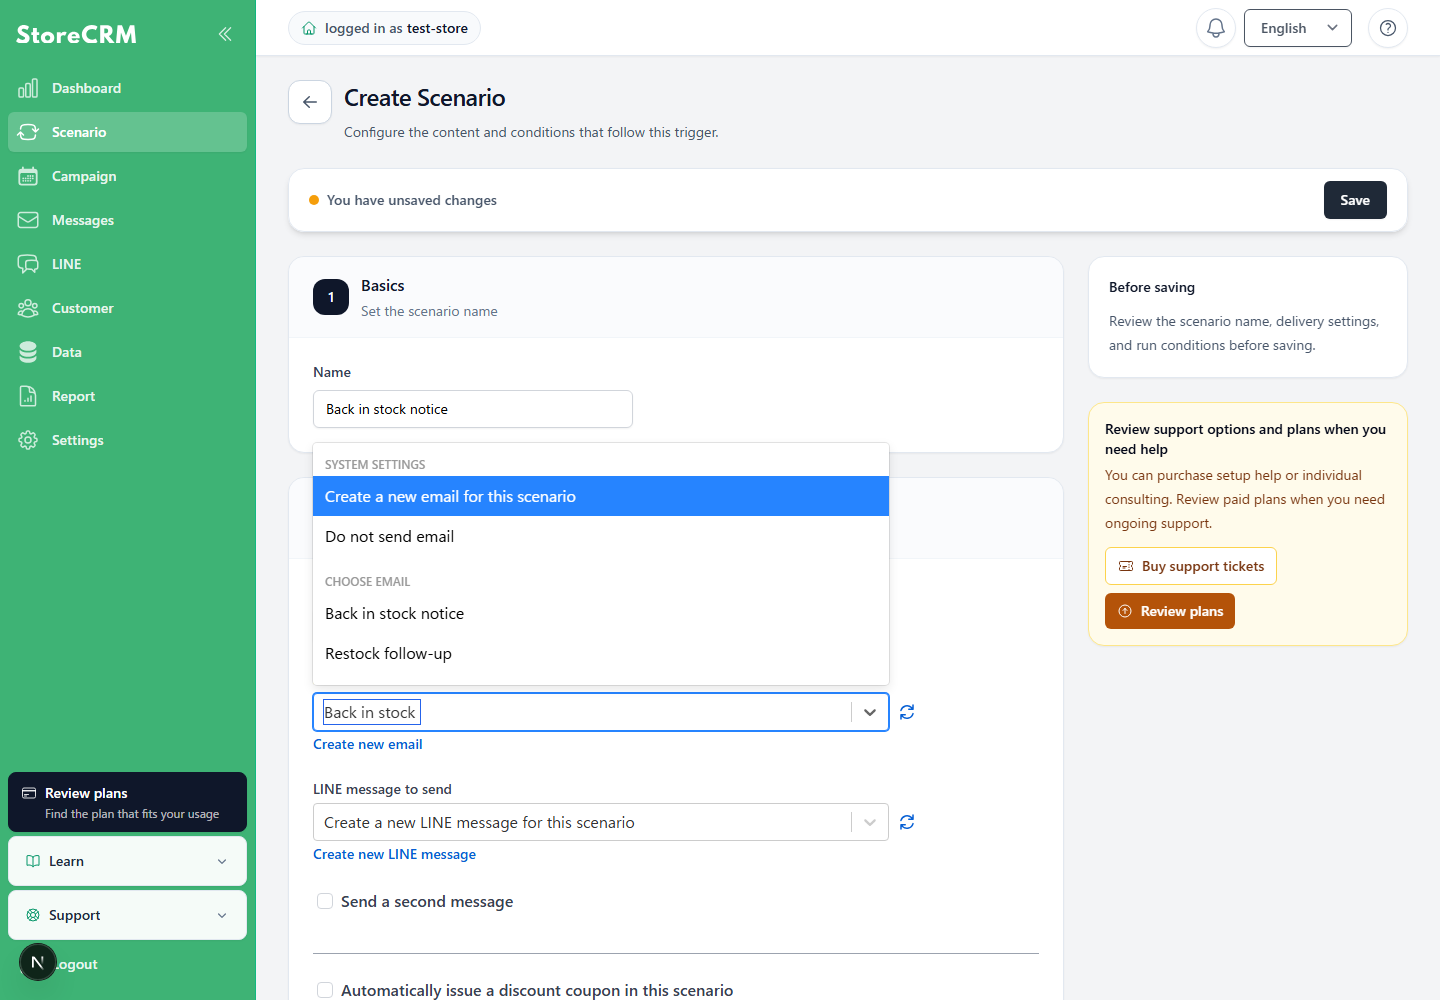
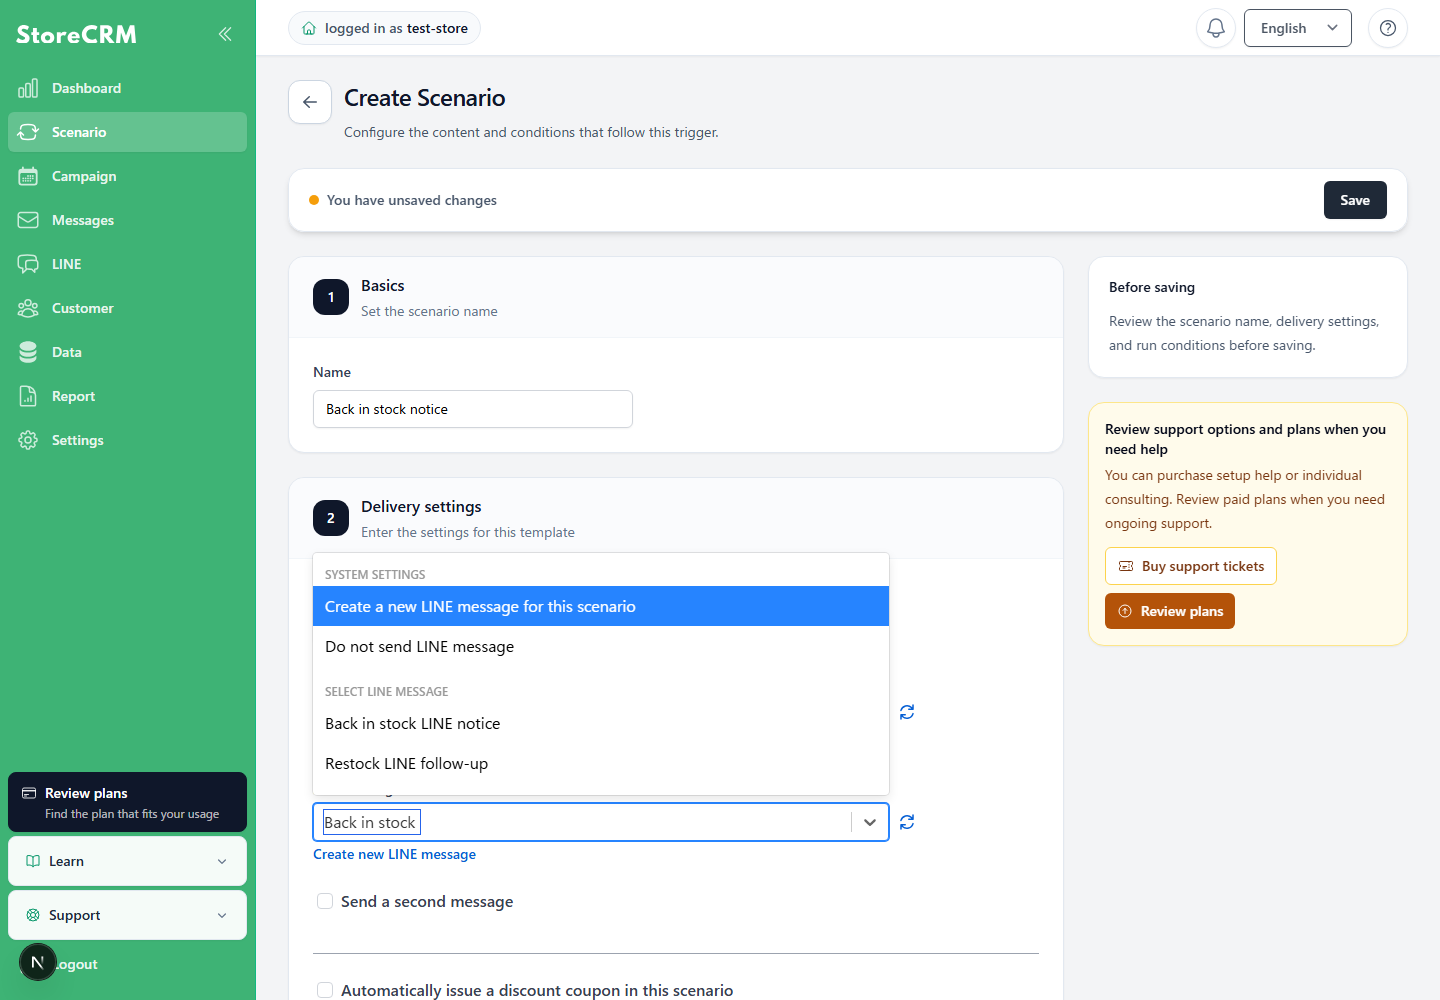
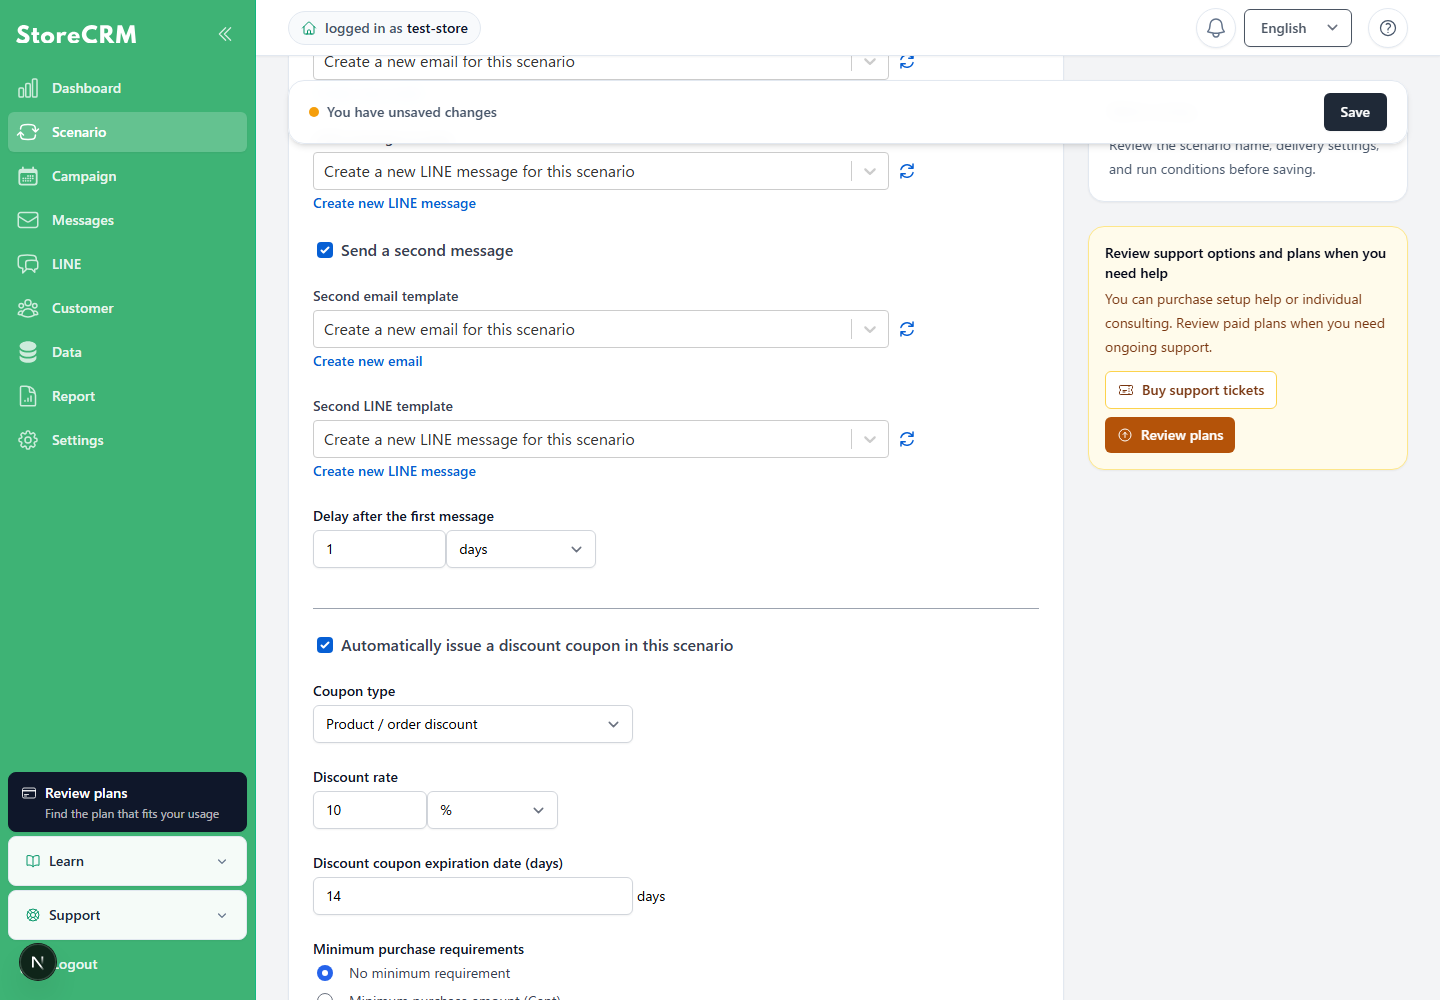
6. check the box to send a second e-mail.
- Select the content of the second e-mail.
- Set how many hours later a second email will be sent.
- As an example, we set the time to "20 minutes".
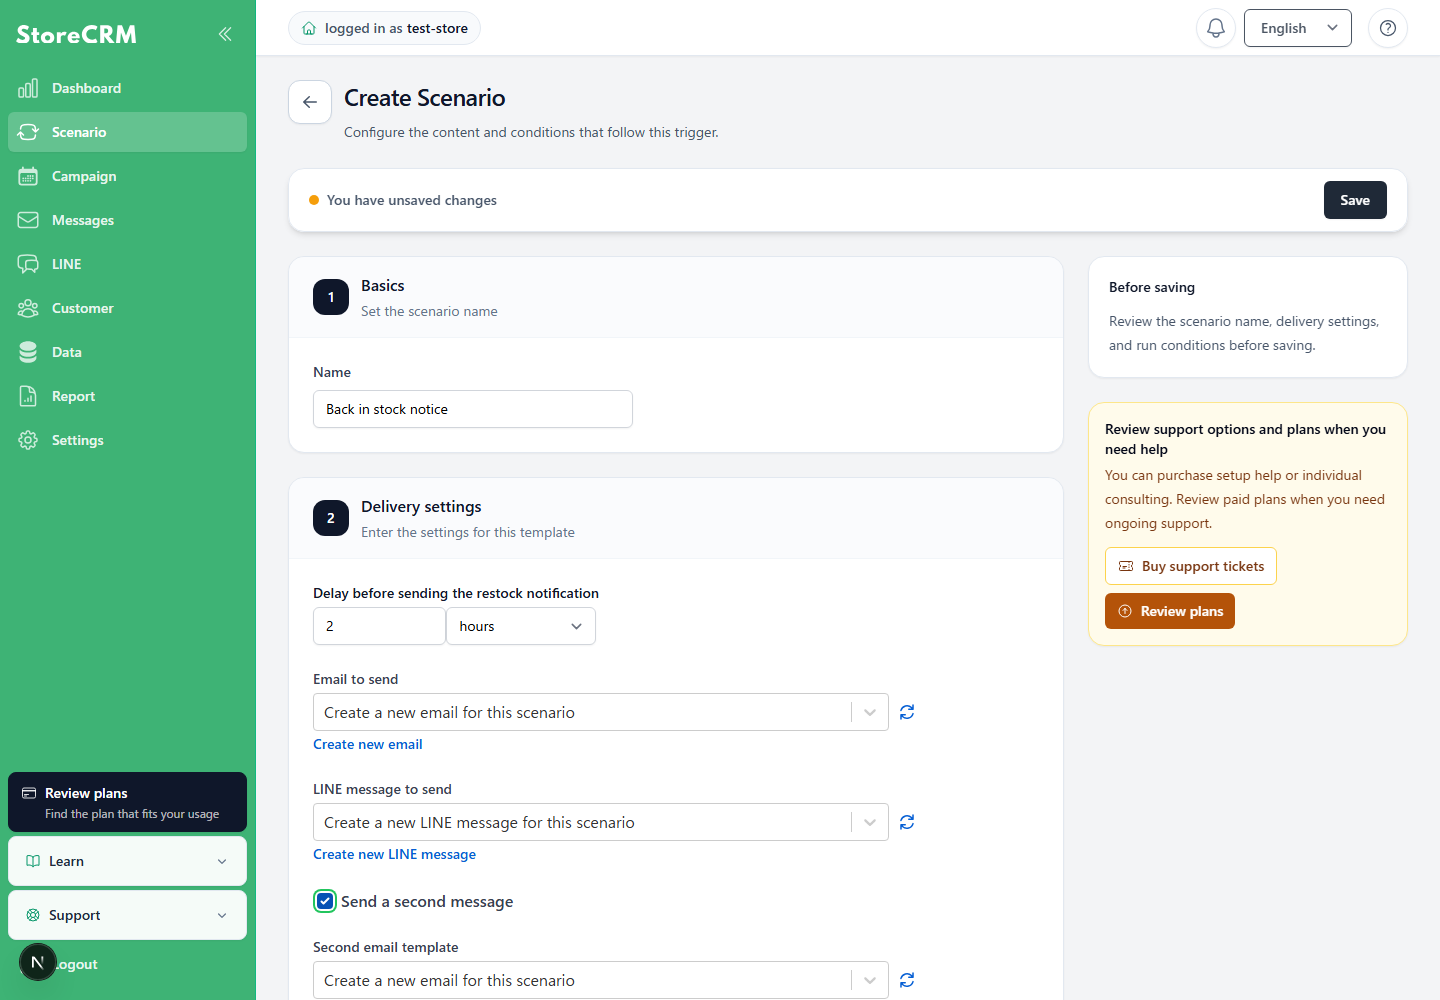
7. check the "Automatically issue discount coupons in this scenario" checkbox if you would like to add coupons to the emails you send.
- For information on how to add a coupon,here for more information.
- When setting a second or subsequent coupon, each coupon will also be issued with a unique string of characters.
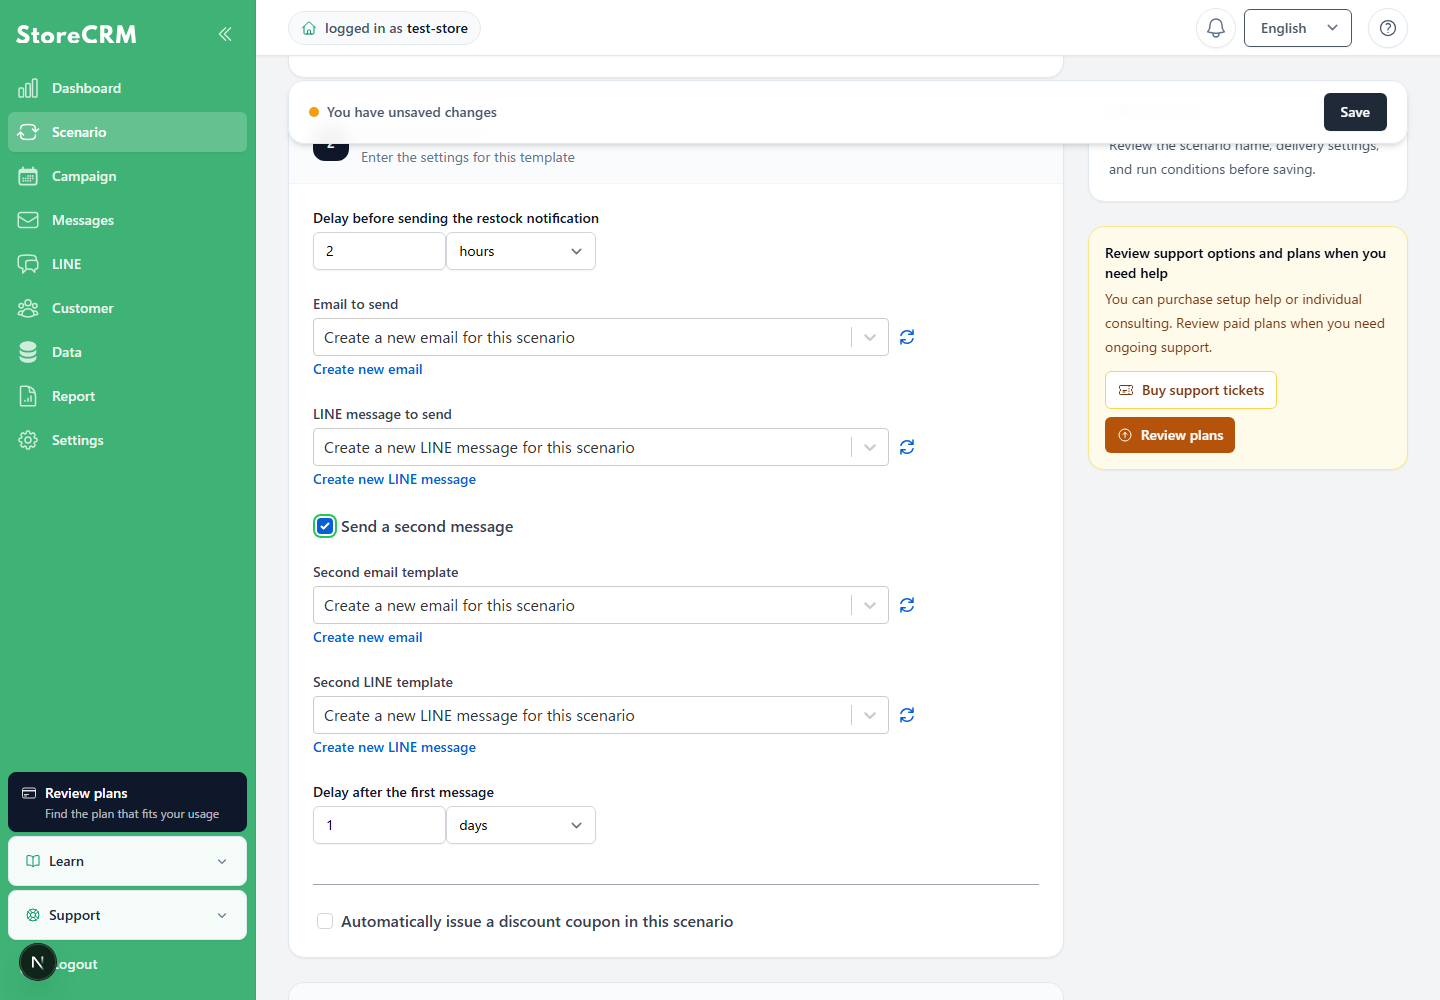
8. set the discount rate for the coupon.
As an example, "10%.
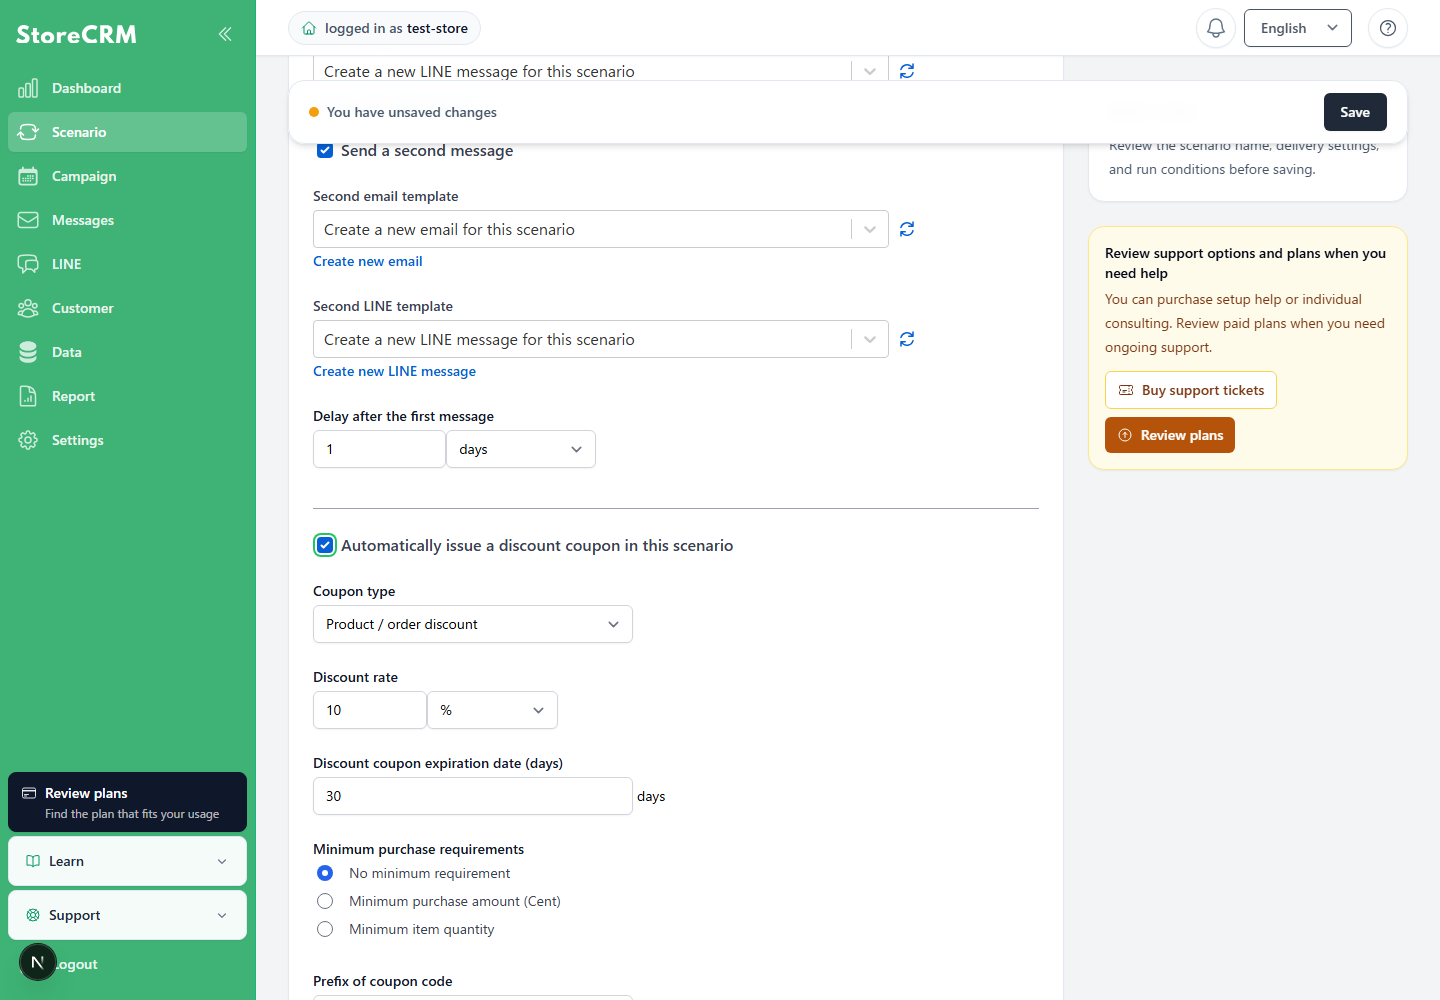
9. set the expiration date of the coupon.
As an example, "30 days" was used.
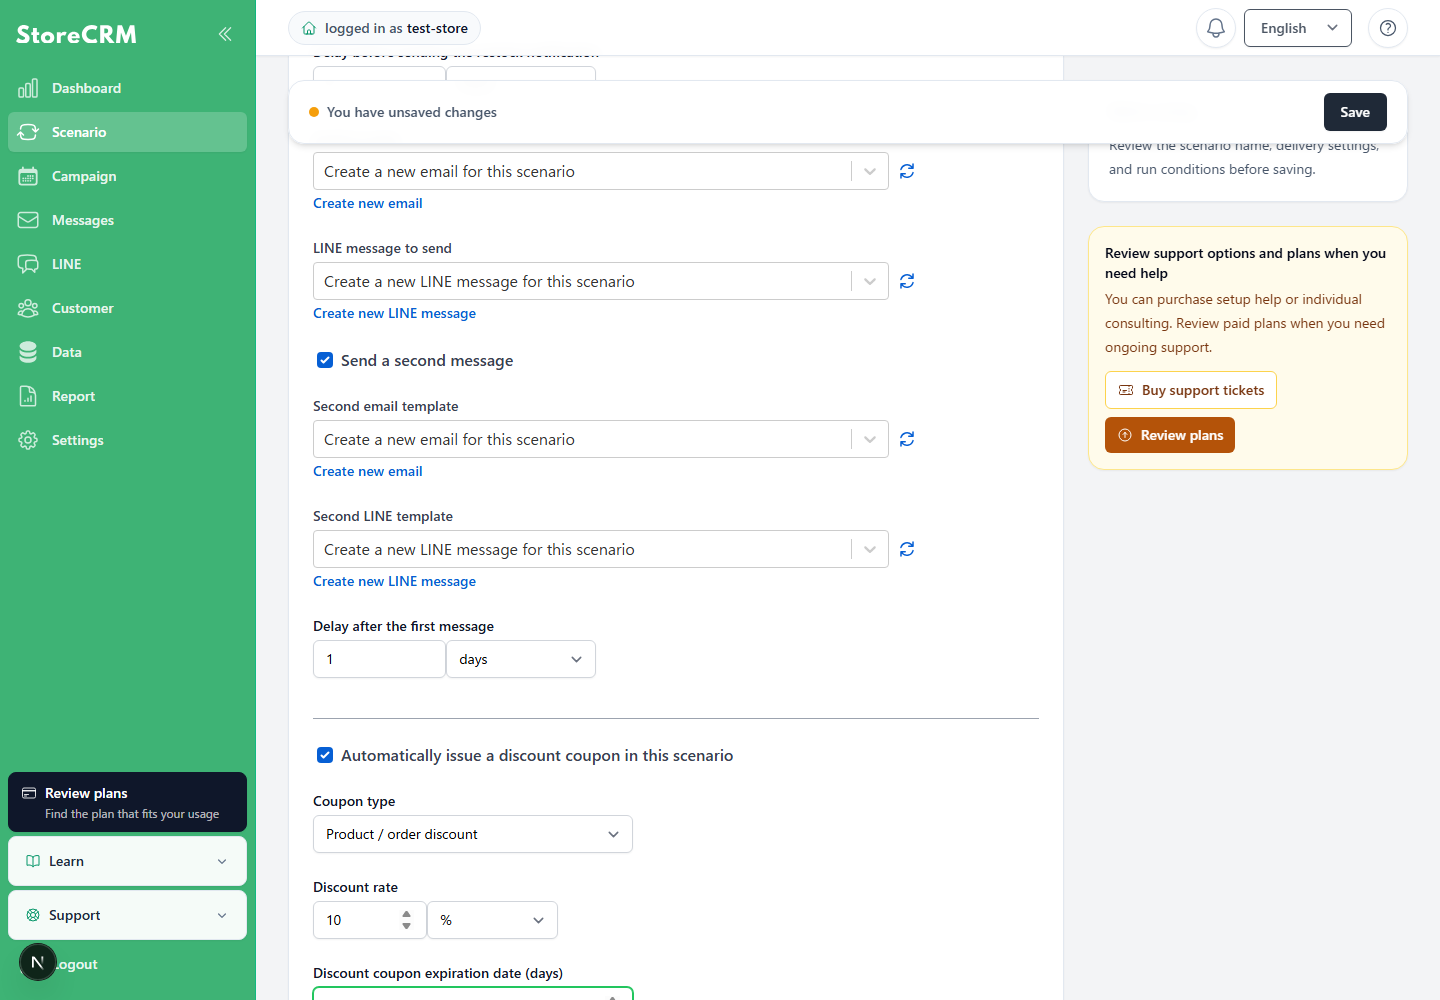
If you do not want to send further emails once the coupon has been used, check the "Do not send further emails once coupon has been used" checkbox.
11. set the minimum purchase requirement under which the coupon can be used.
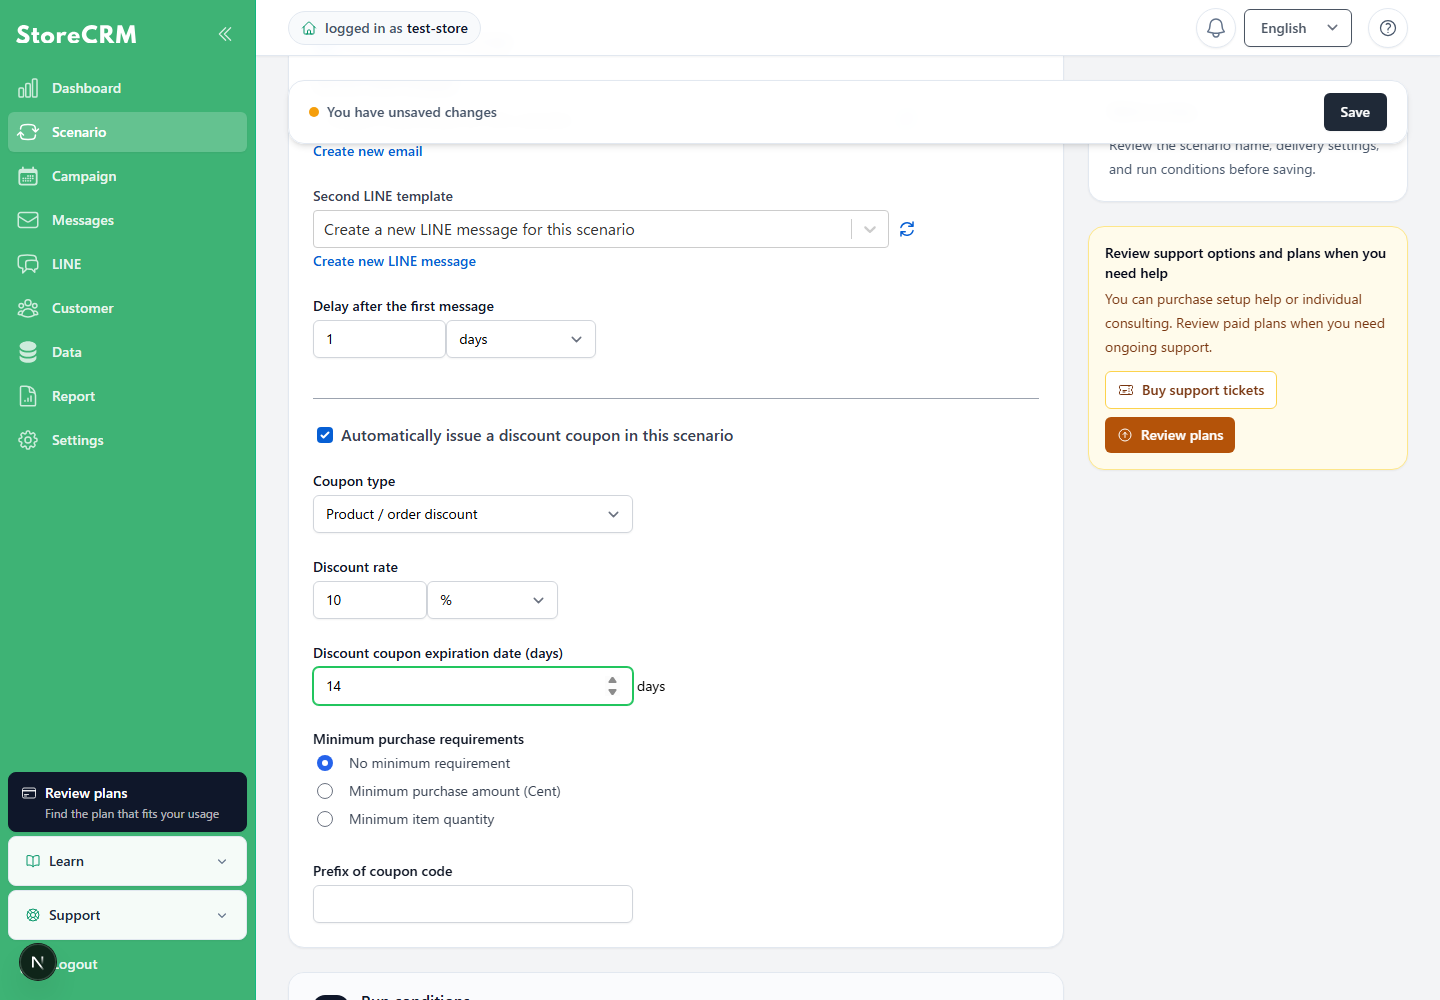
Set the first string of the coupon.
If set to StoreCRM-, a coupon like "StoreCRM-JNFPHHI7" will be issued.
To set up a scenario targeted to a specific product or customer, click "Add condition" to set it up.
For the conditions under which the scenario is executed,here for more information.
![Select [Add condition] to narrow the target audience.](https://storecrm.com/help/wp-content/uploads/2023/10/main-storecrm-en-scenario-condition-add-20260903.png)
When settings are complete, click "Save".
![Review the settings and select [Save].](https://storecrm.com/help/wp-content/uploads/2023/10/main-storecrm-en-scenario-save-20260903.png)
15. enable scenarios.
Scenario has been set up and activated.
![Select [Active] for the status on the scenario details screen.](https://storecrm.com/help/wp-content/uploads/2023/10/main-storecrm-en-scenario-enable-20260903.png)
Browse abandonment scenario
Create a browse abandonment scenario
Related pages
 English
  Japanese