

This guide explains how to offer Google and Shop sign-in for Shopify’s new customer accounts, including first-time linking, identity verification and disconnection. Your store must already have StoreCRM connected as its identity provider. If it is not connected, first complete the new-customer-account connection procedure in the LINE integration guide.
Provider availability and your store’s on/off selections are separate. An unavailable provider cannot be enabled. Google and Shop sign-in do not add LINE friends or link LINE IDs.
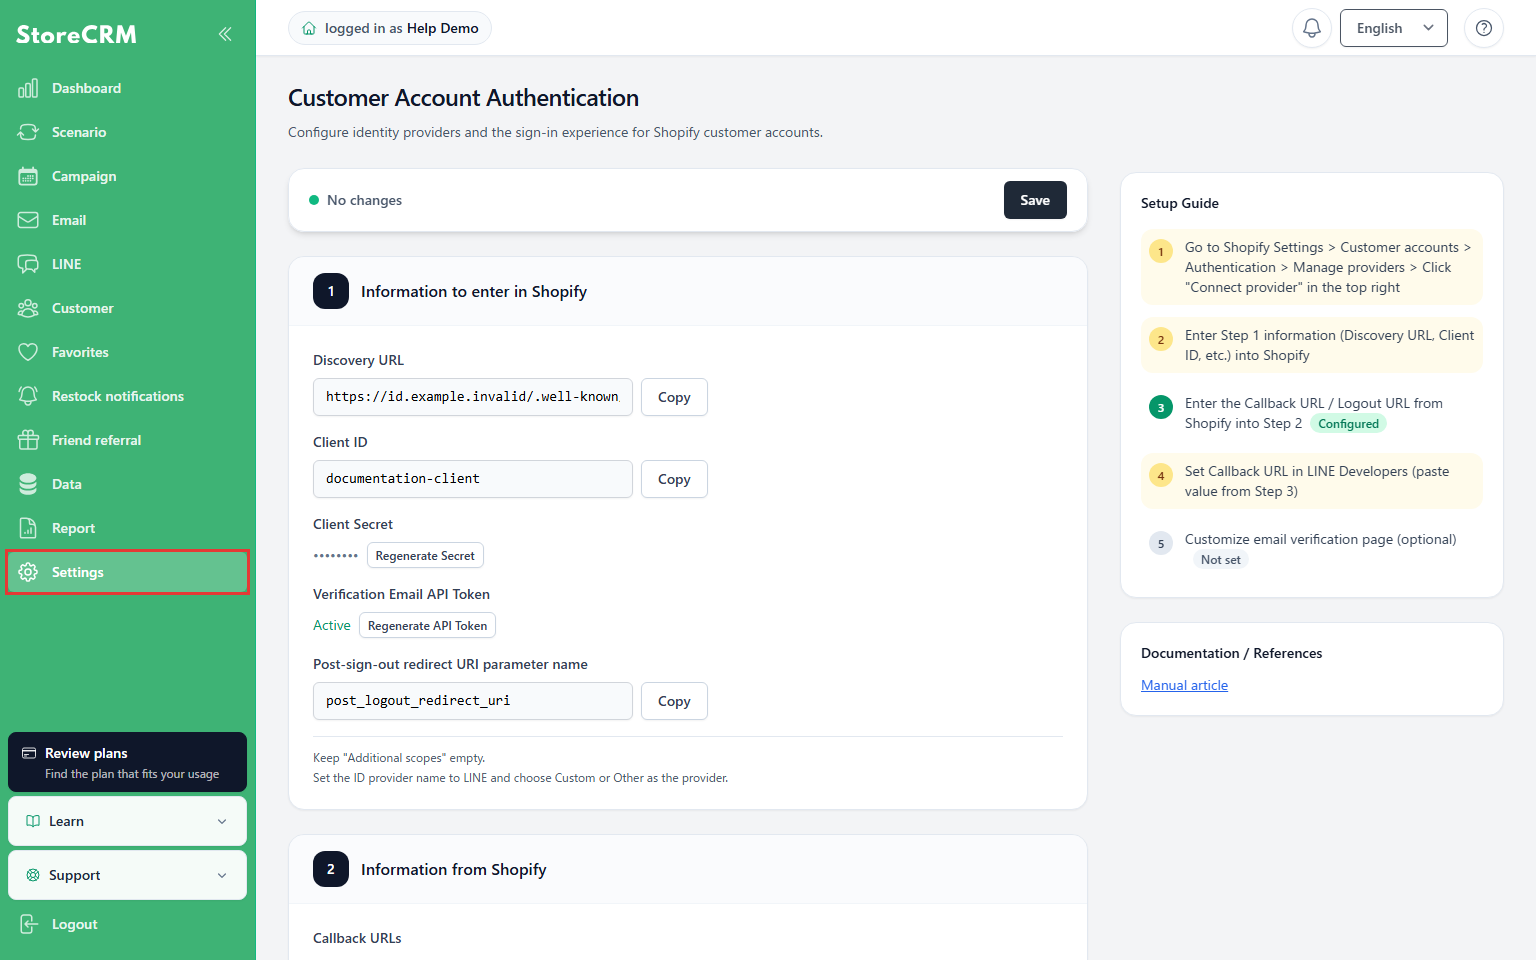
1. Open Settings
Where: StoreCRM left navigation
Click Settings.
Check: The settings menu opens.
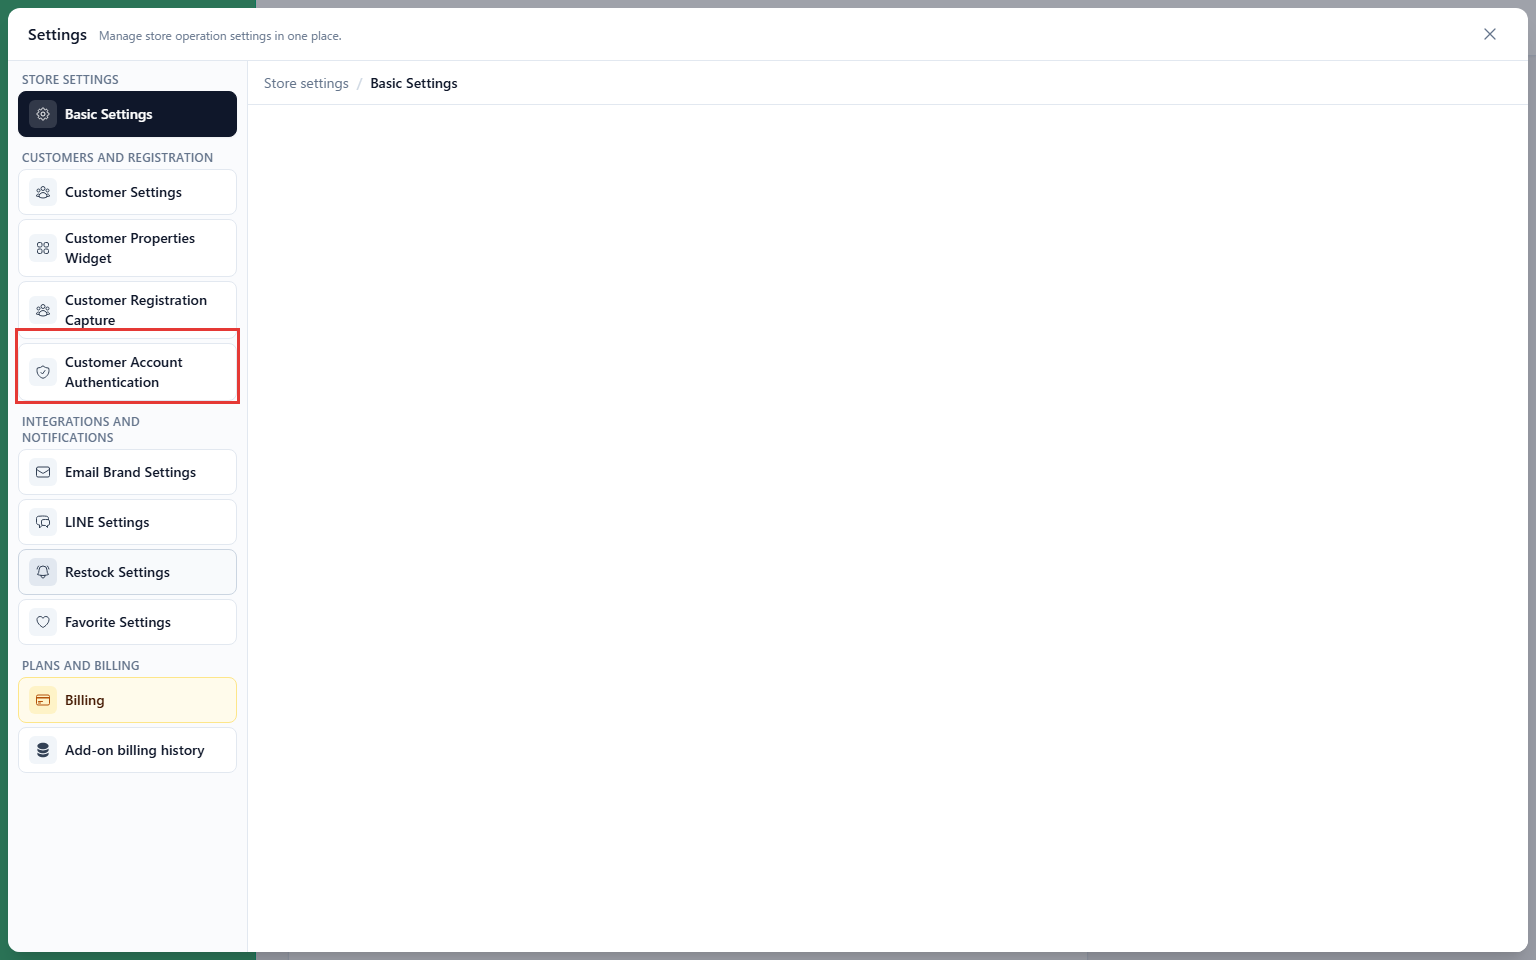
2. Open Customer Account Authentication
Location: Settings menu
Select Customer Account Authentication.
Check: The identity-provider and sign-in settings open.
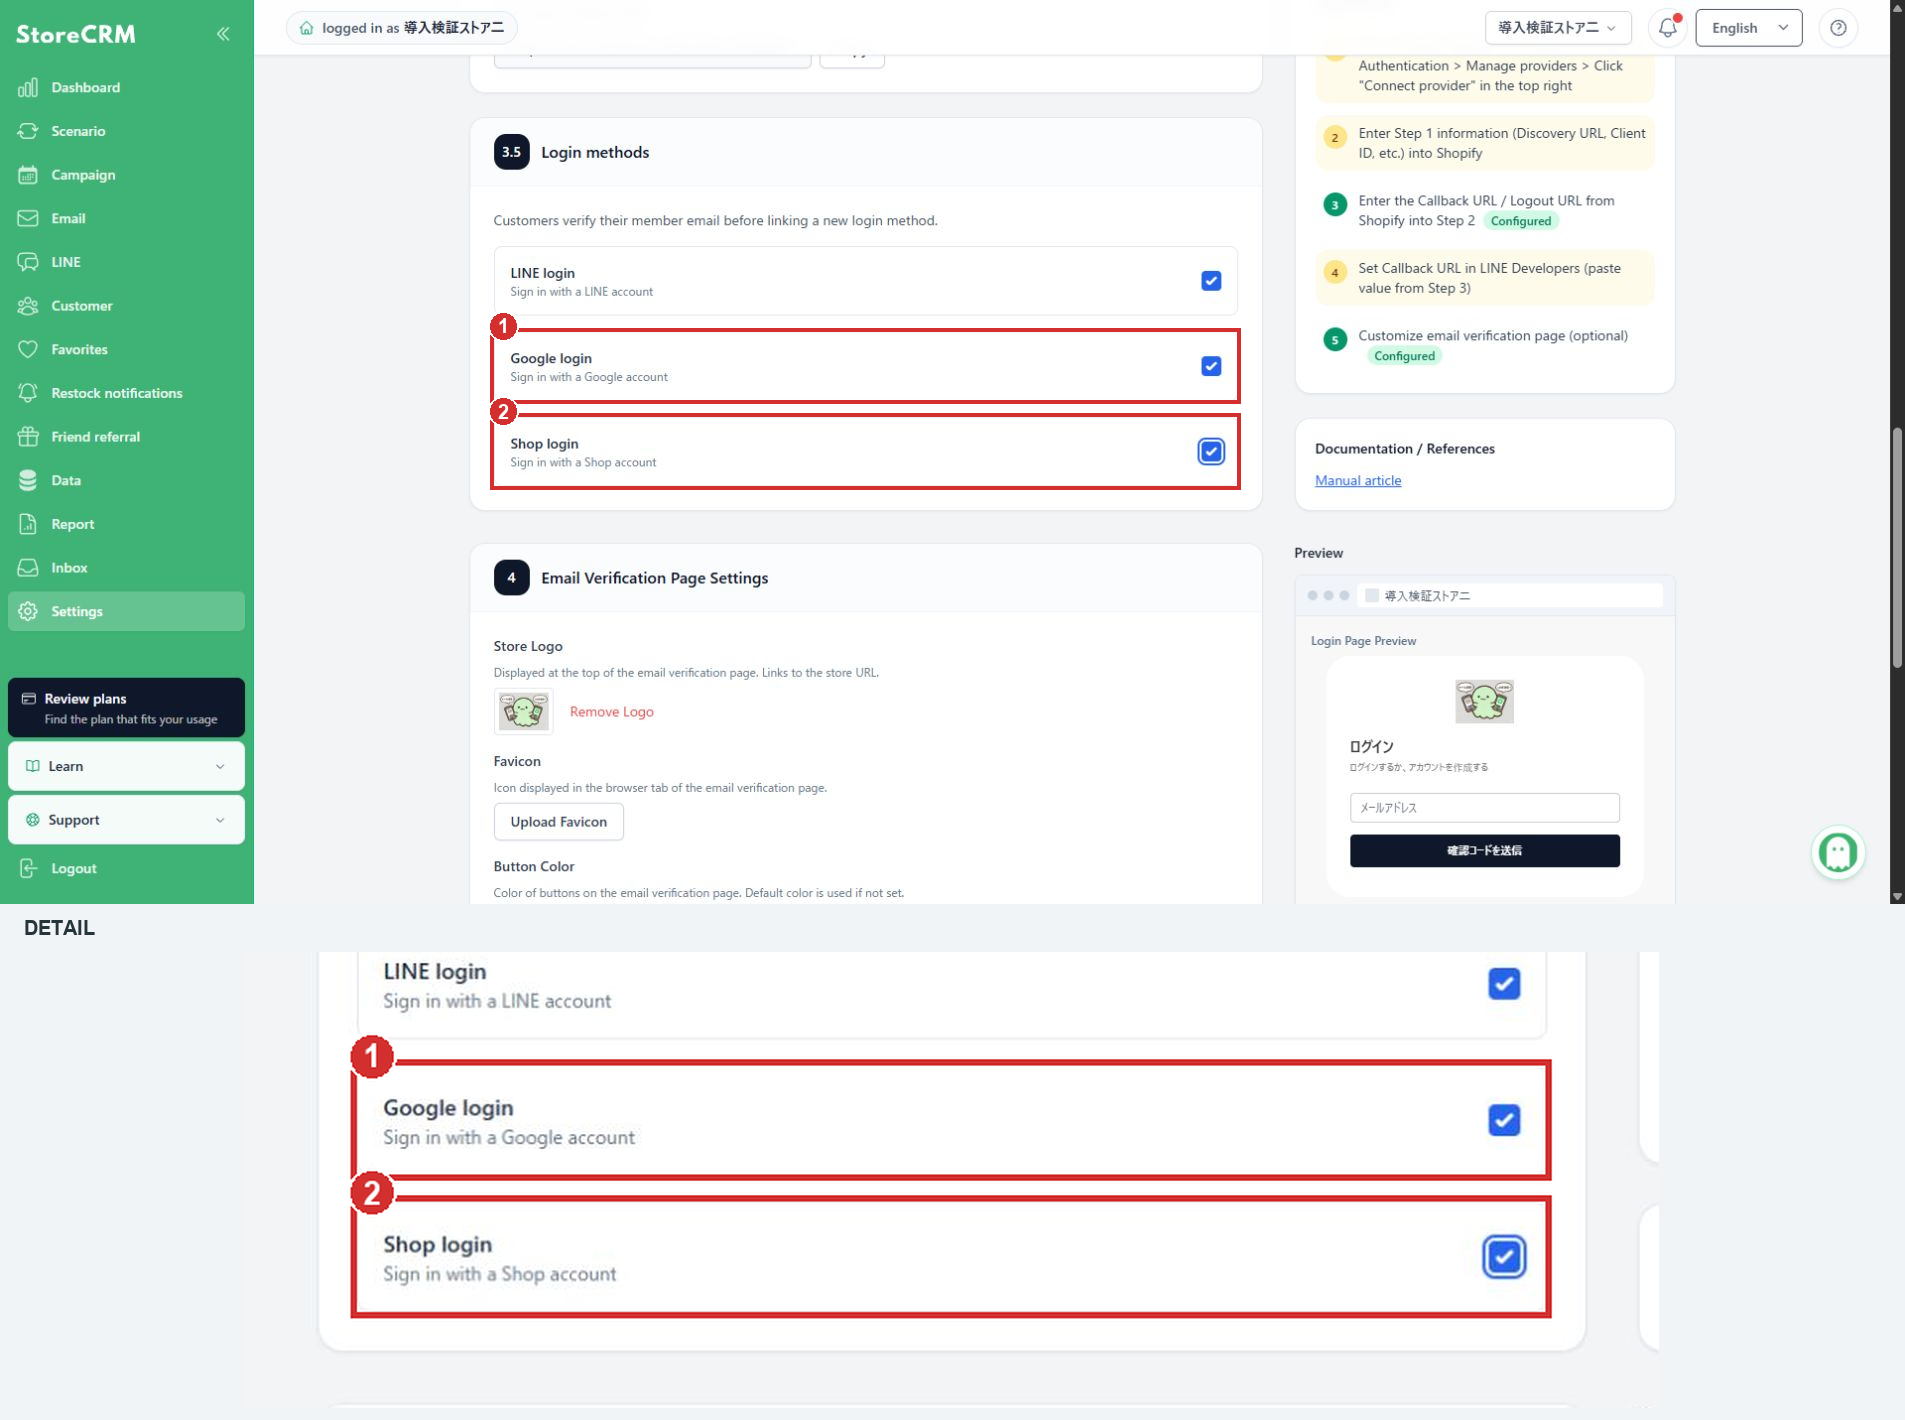
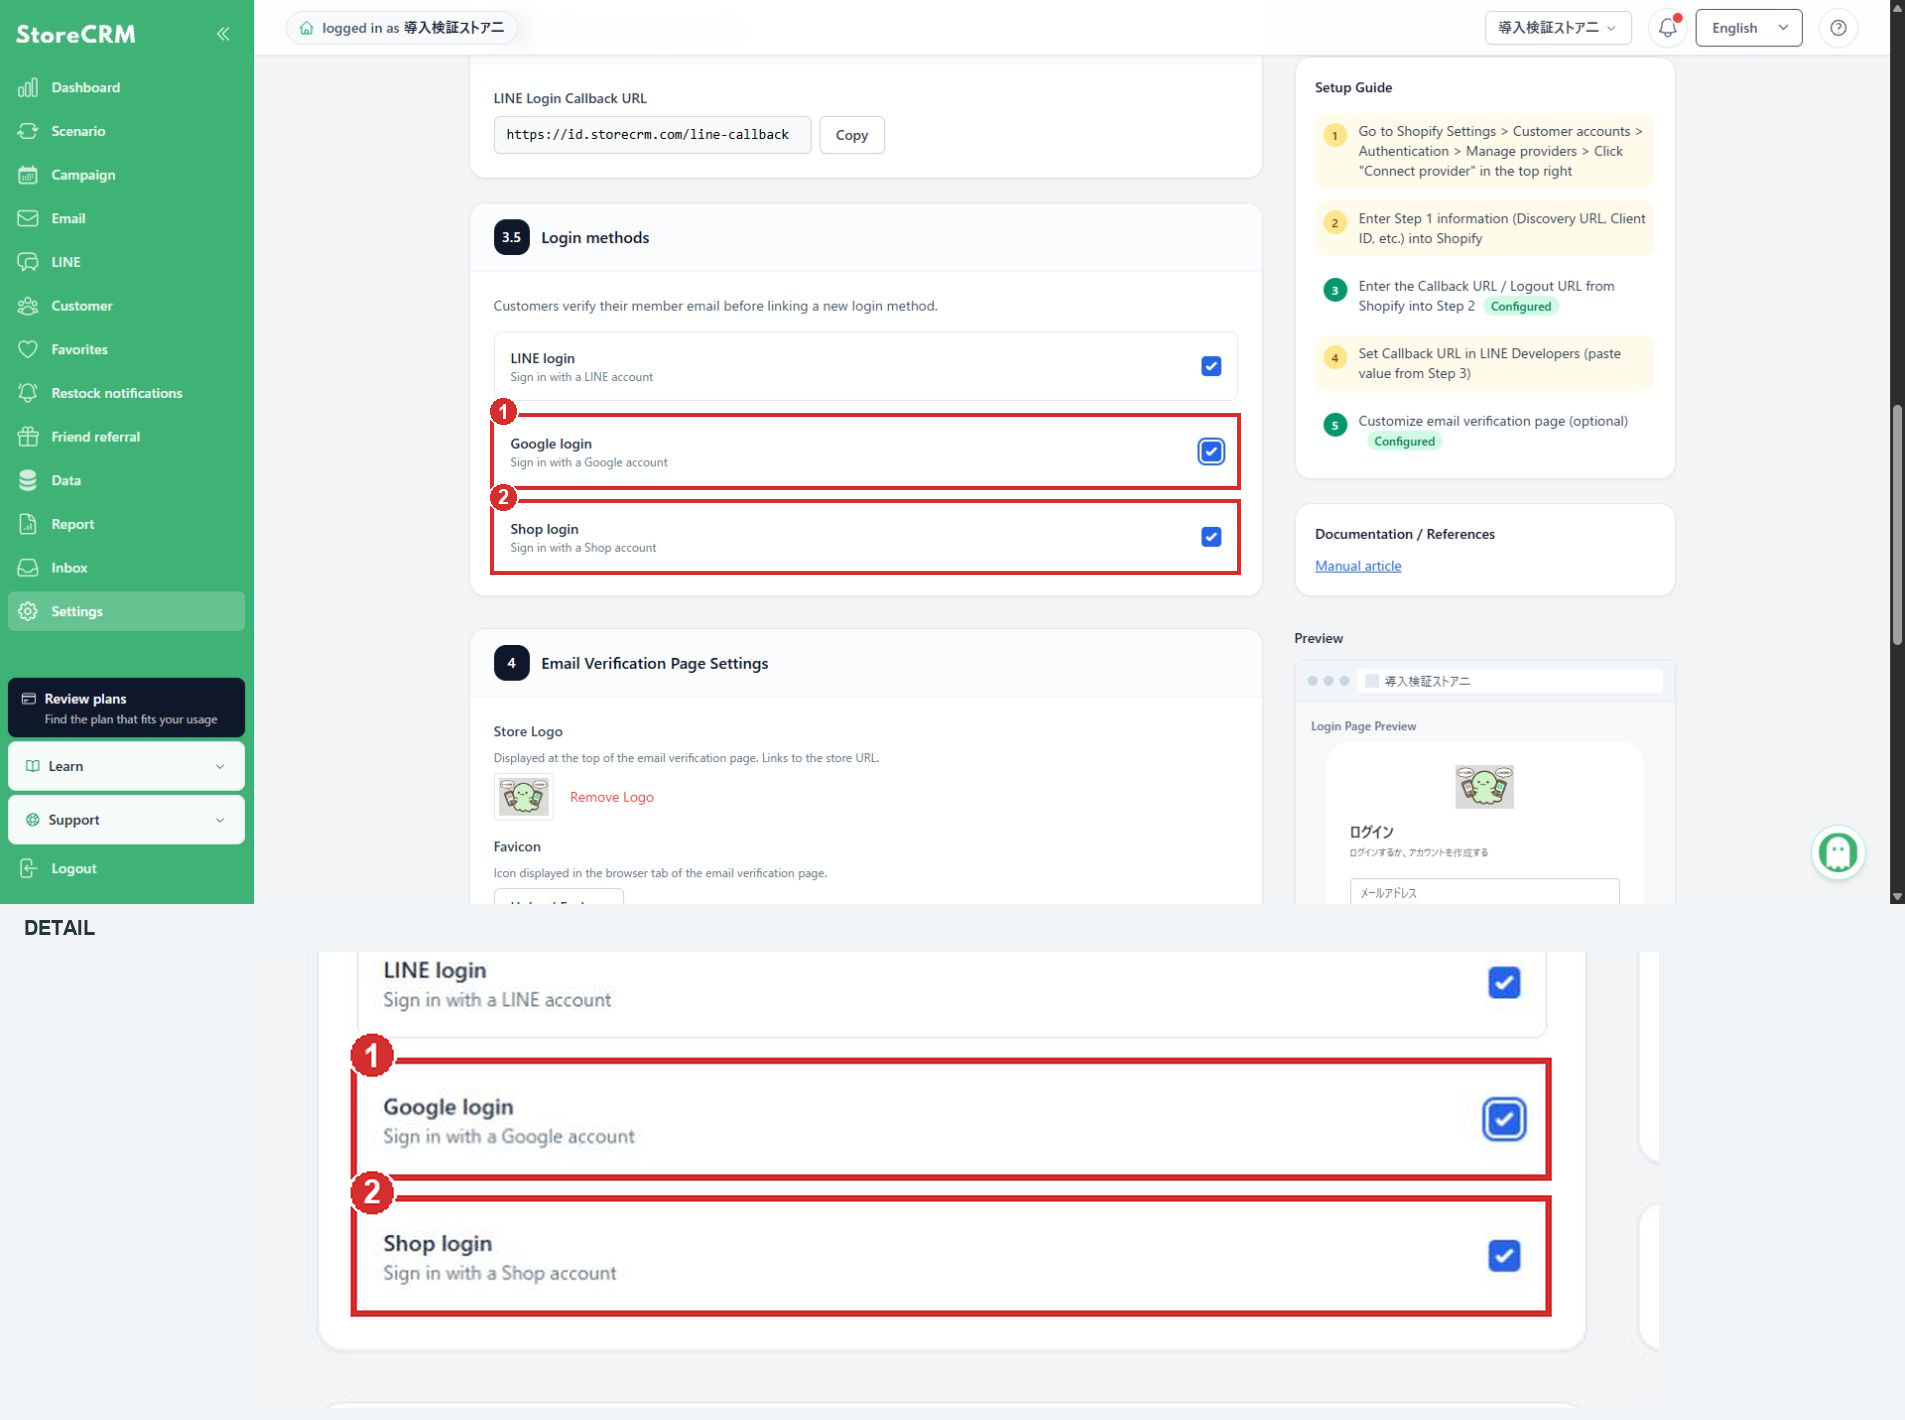
3. Select Google and Shop
Location: 3.5 Login methods
Select ① Google login and/or ② Shop login. You can enable either one independently. Keep the existing LINE setting on if you also want to continue offering LINE.
Check: The selected options are checked. The changes have not been saved yet.
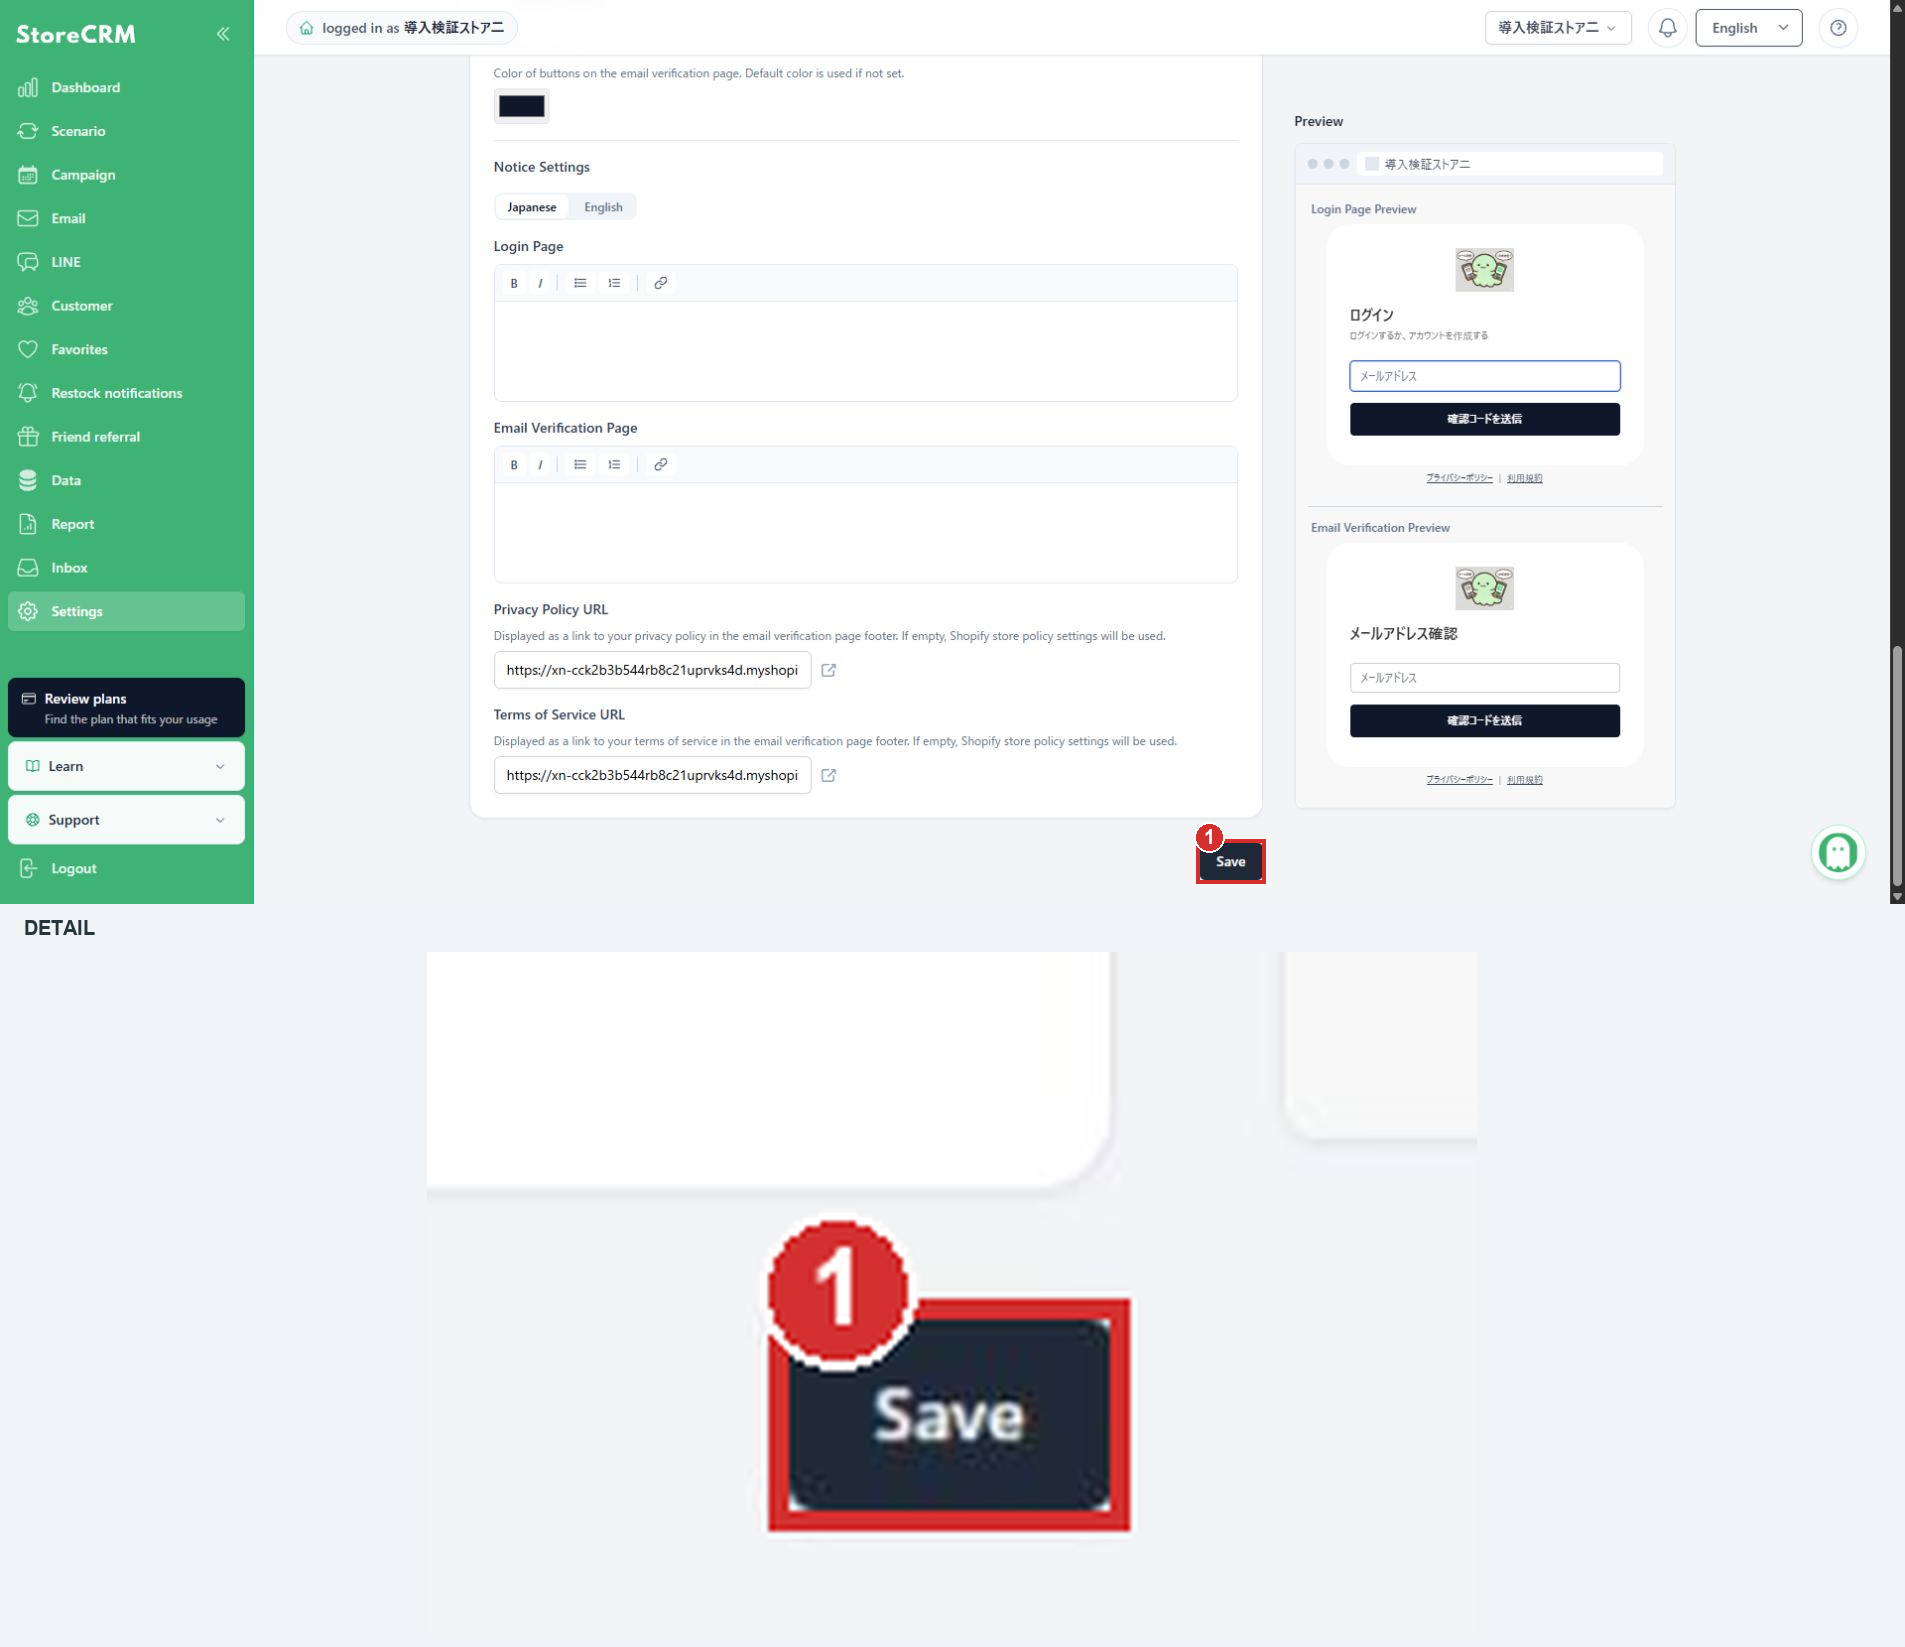
4. Save your selection
Location: Bottom of the settings form
Select Save and wait for the save to complete before leaving the page.
Check: A save confirmation appears.
5. Reopen the page and check the options
Location: Login methods in Customer Account Authentication
Reopen the settings page and verify that the selections for ① Google and ② Shop remain checked. The example has both providers enabled.
Check: The saved login methods are retained.
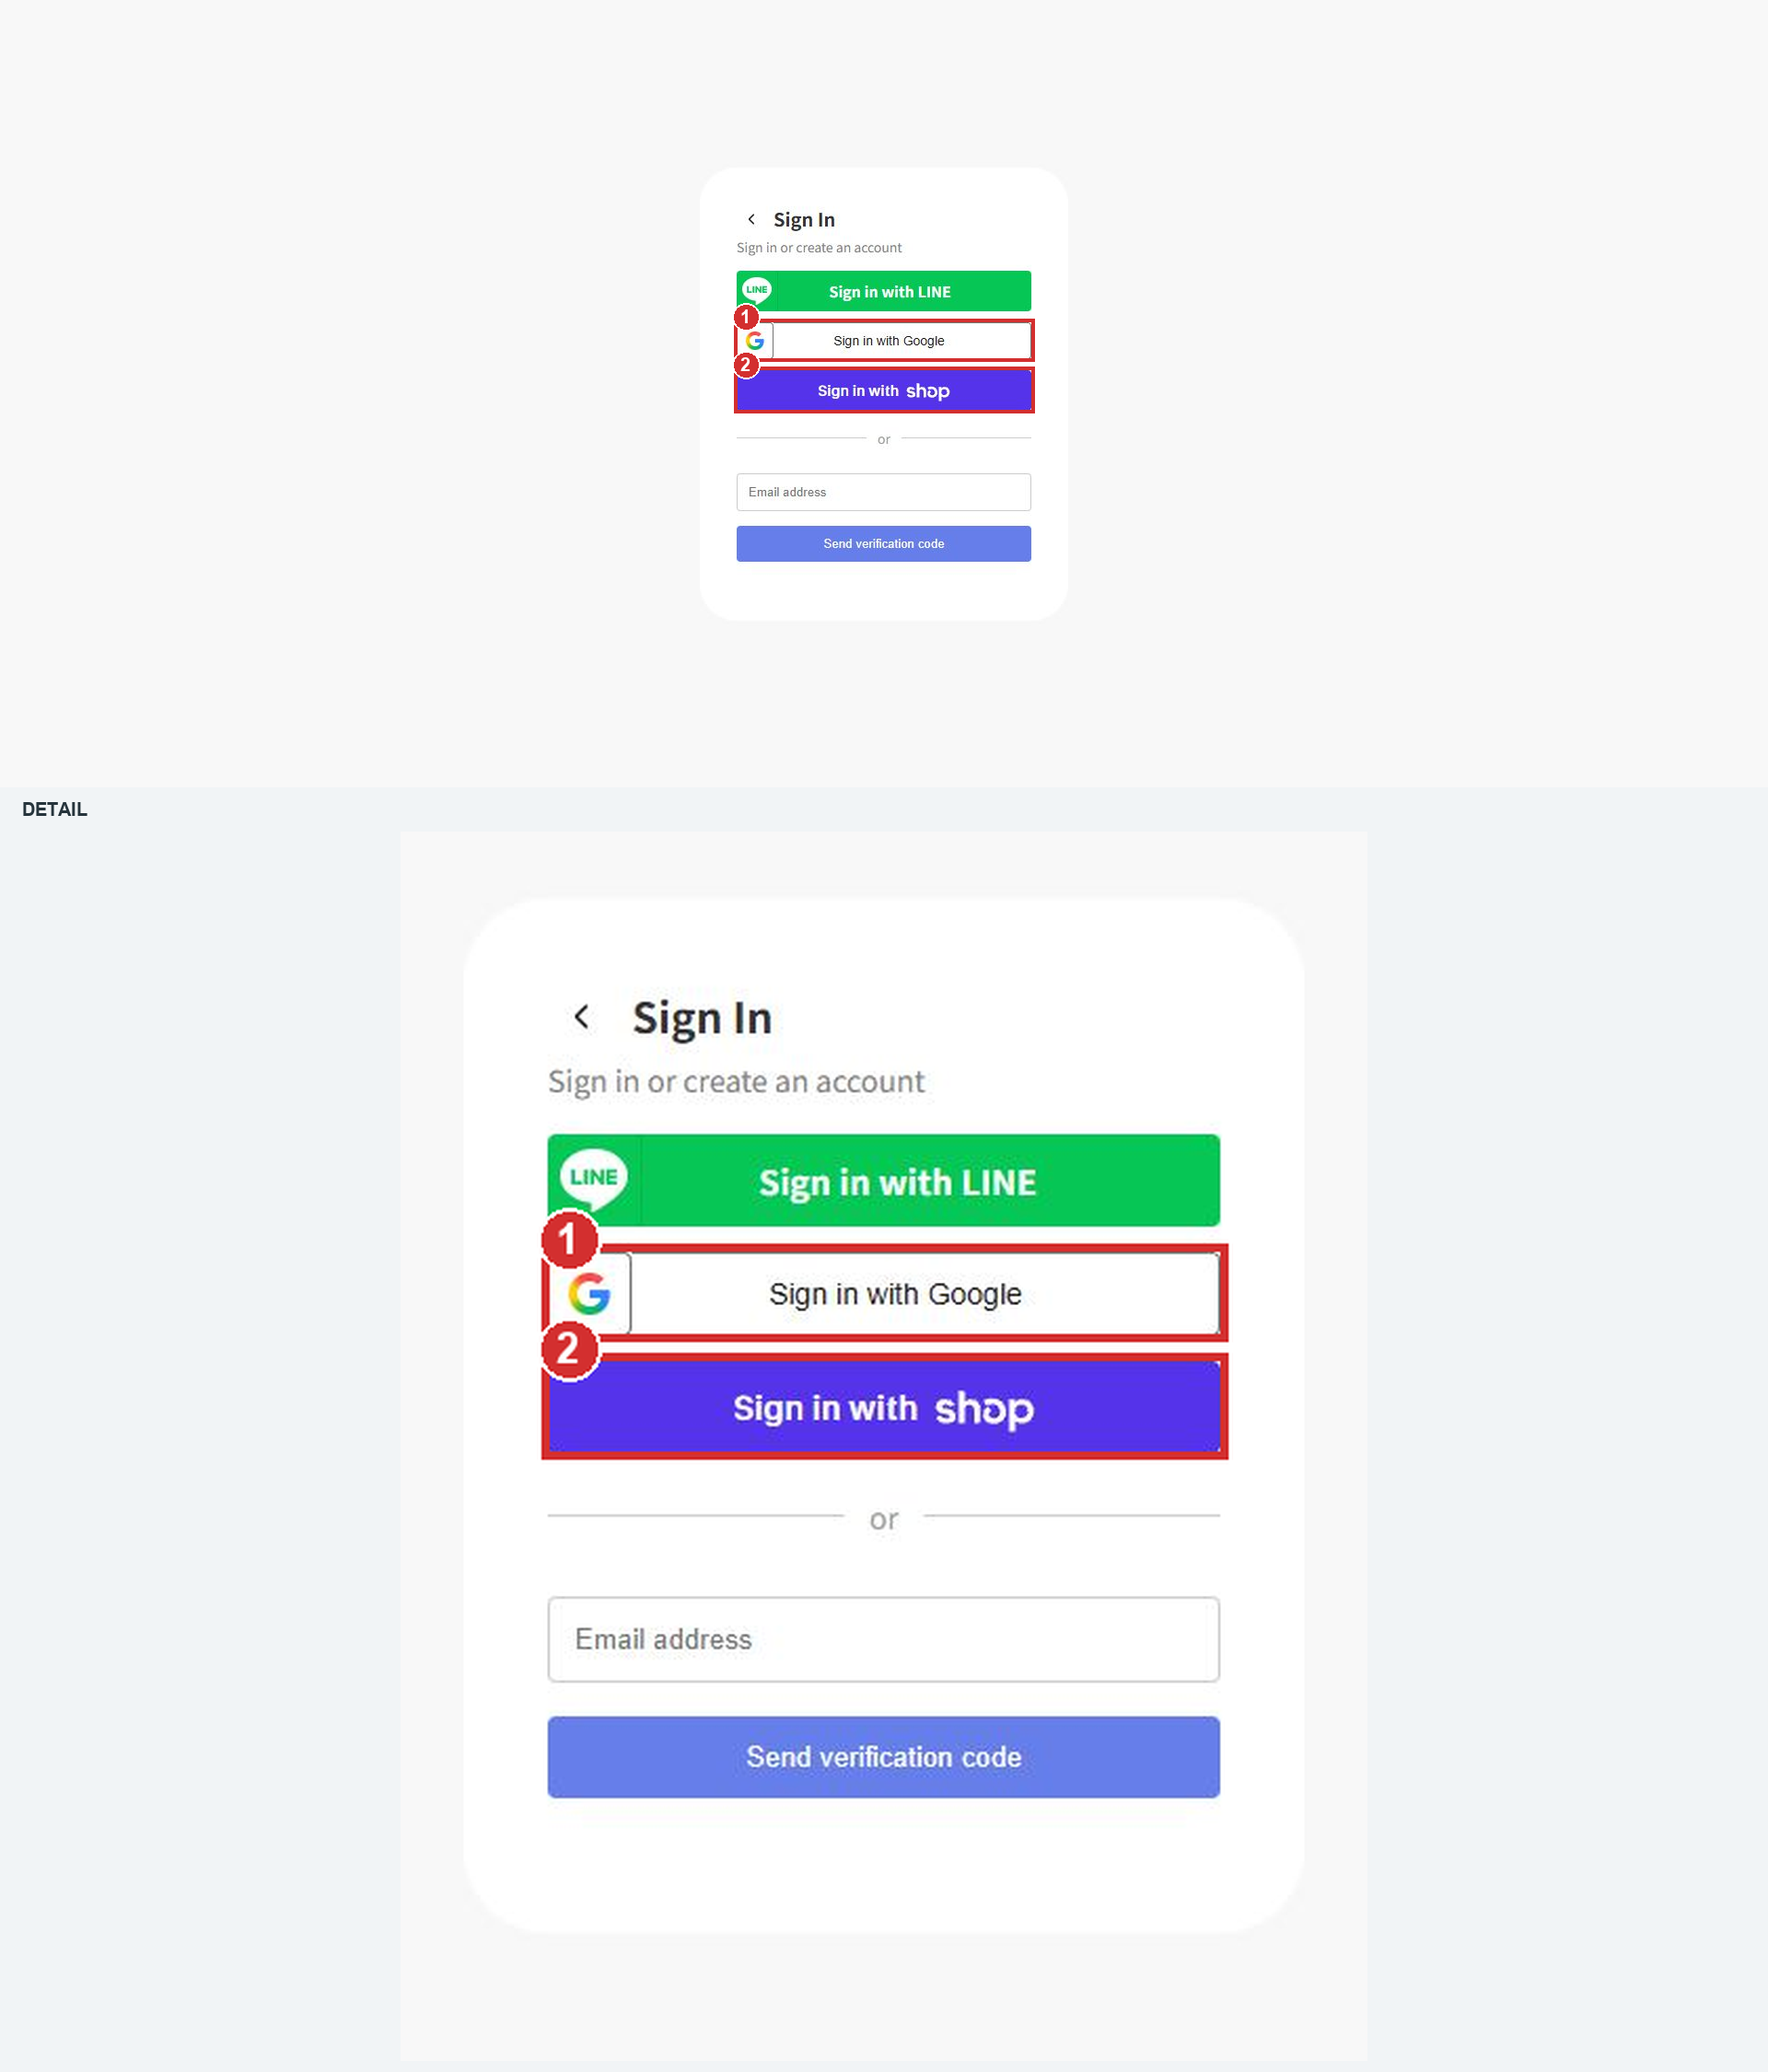
6. Choose a sign-in method
Location: Your store’s sign-in page
While signed out, open your store’s sign-in page and select ① Sign in with Google or ② Sign in with Shop. The provider’s authentication screen depends on the account and device. After authentication, you return to StoreCRM.
Check: The first sign-in leads to account-link confirmation. Once linked, a normal sign-in typically opens the same member account without re-entering the email or an additional StoreCRM email code.
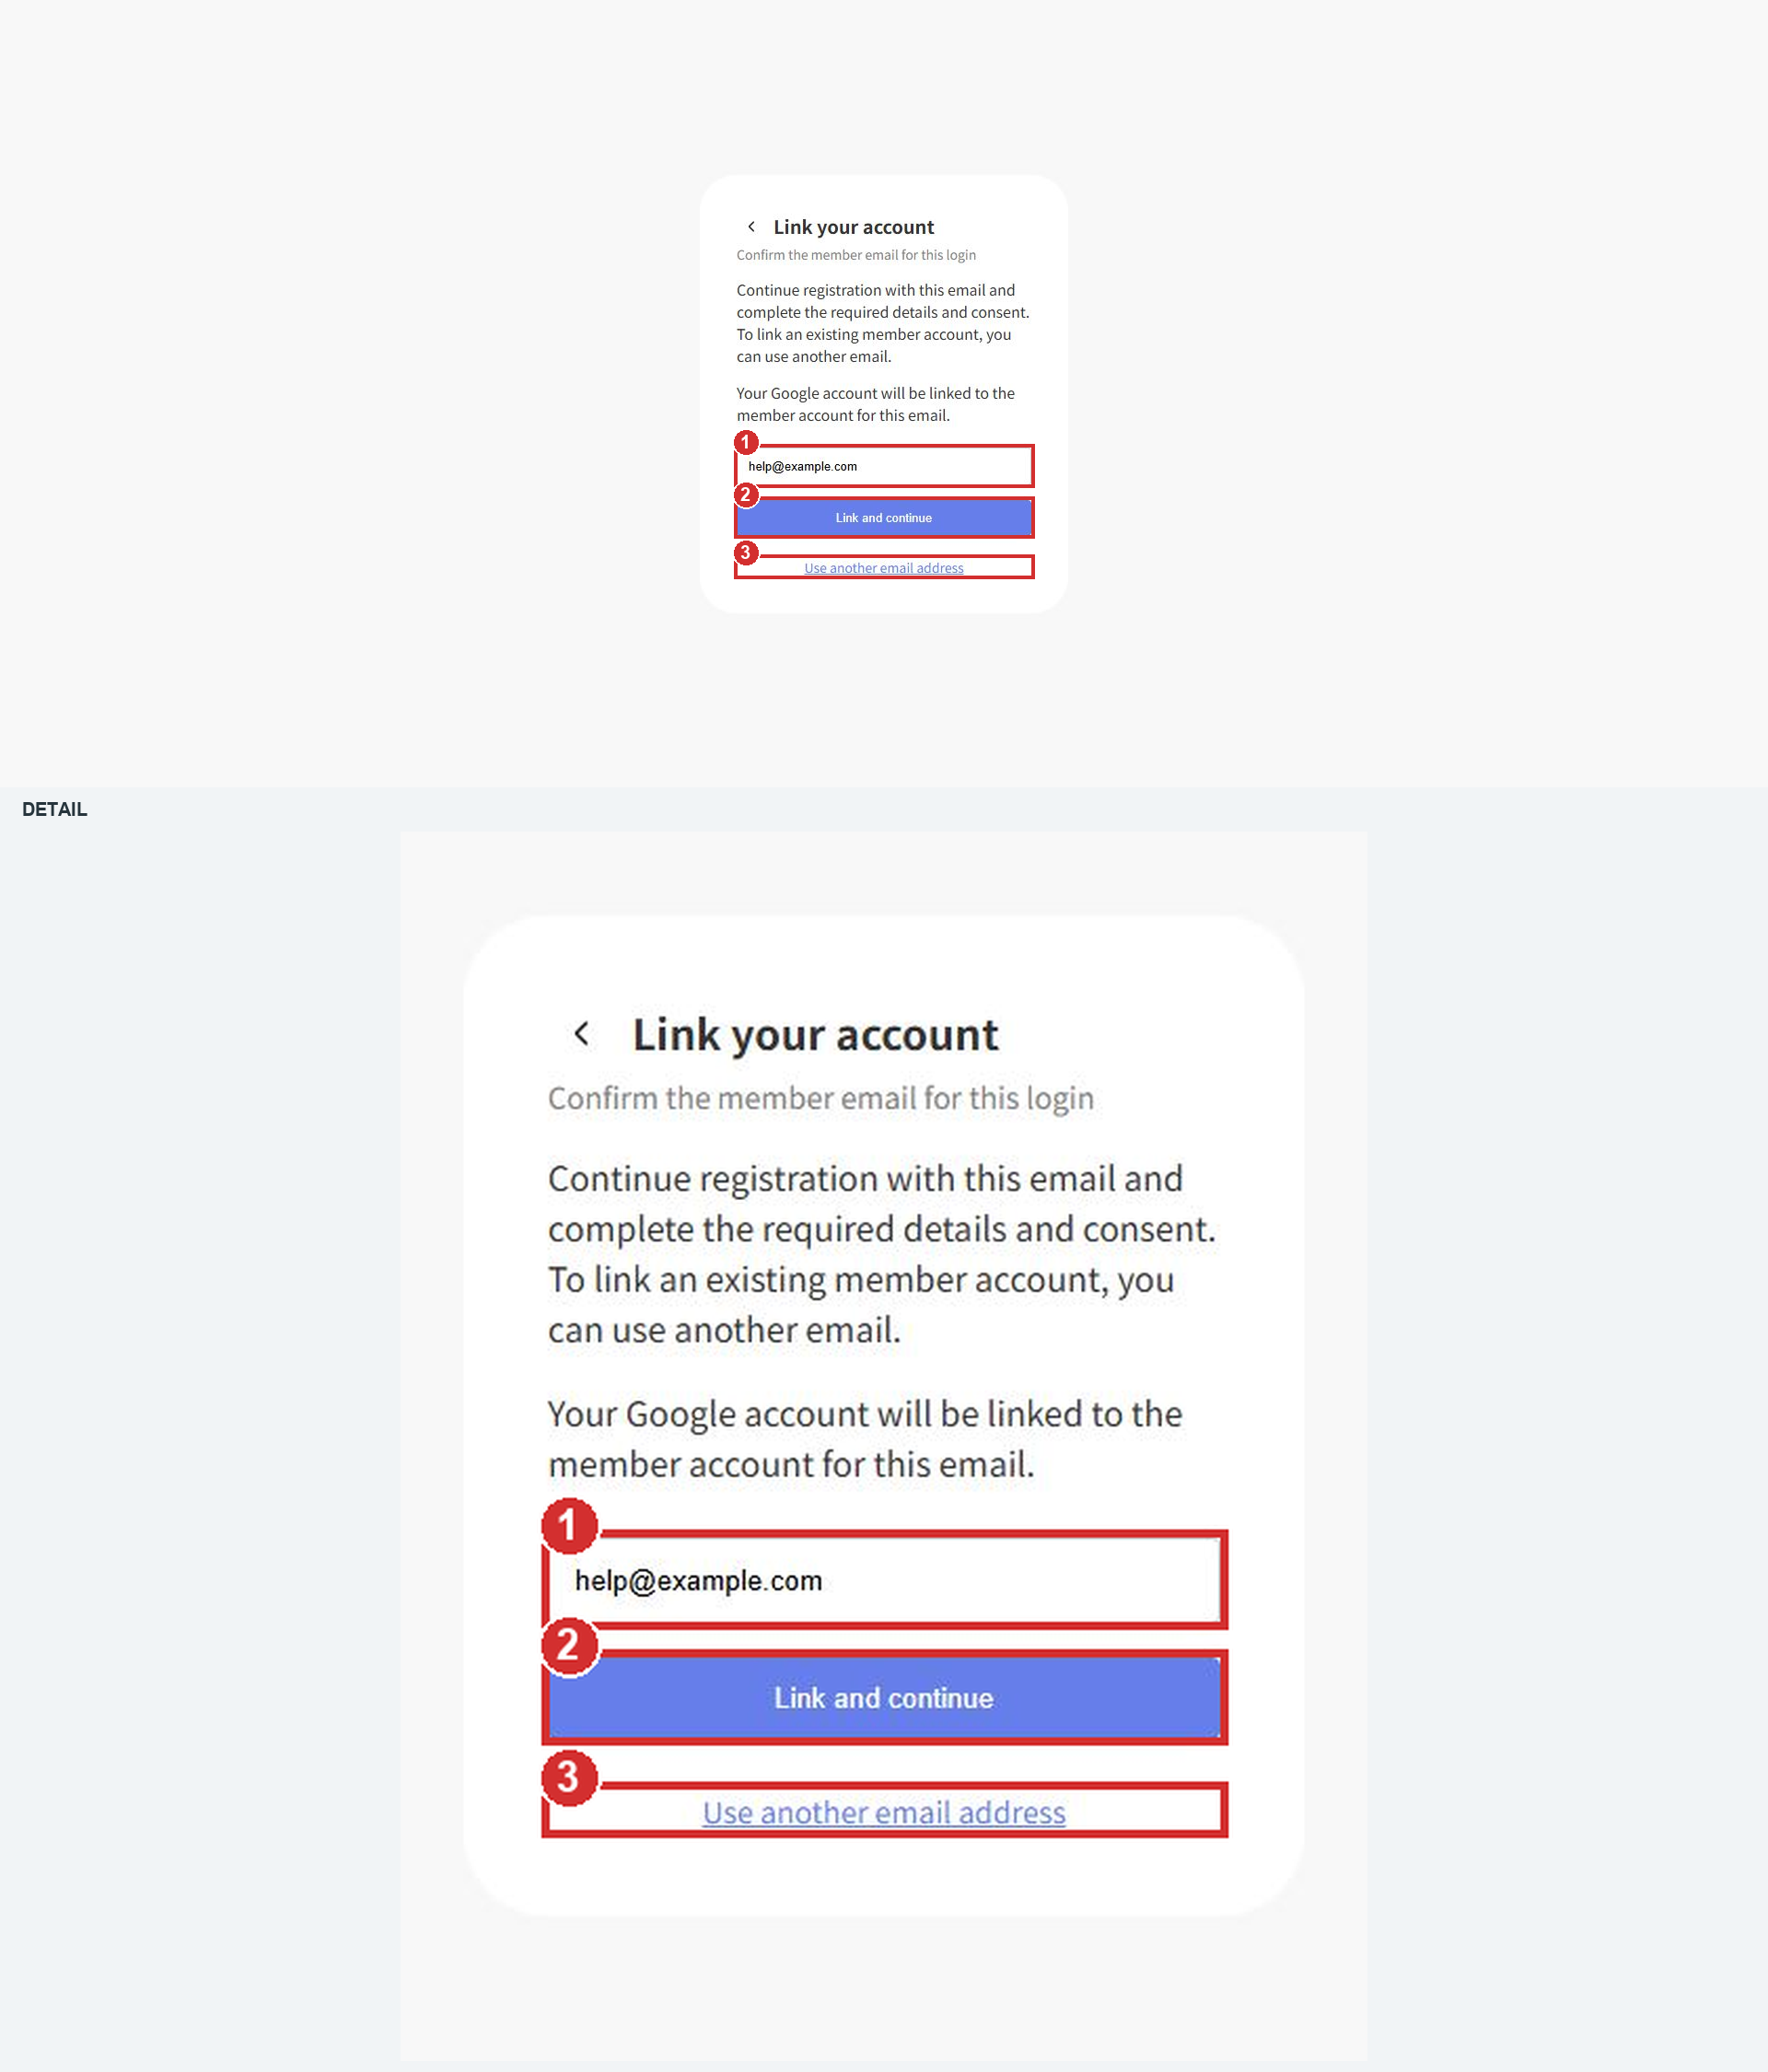
7. When registering a new member
Location: Link your account — new member
Check ① the displayed email and select ② Link and continue. This example uses a verified Google email. If required registration fields or consent are displayed, complete them as instructed. See the customer-registration information guide for configuring those fields.
Check: An additional email code may be skipped for a trusted, verified email. Required registration details and consent still apply.
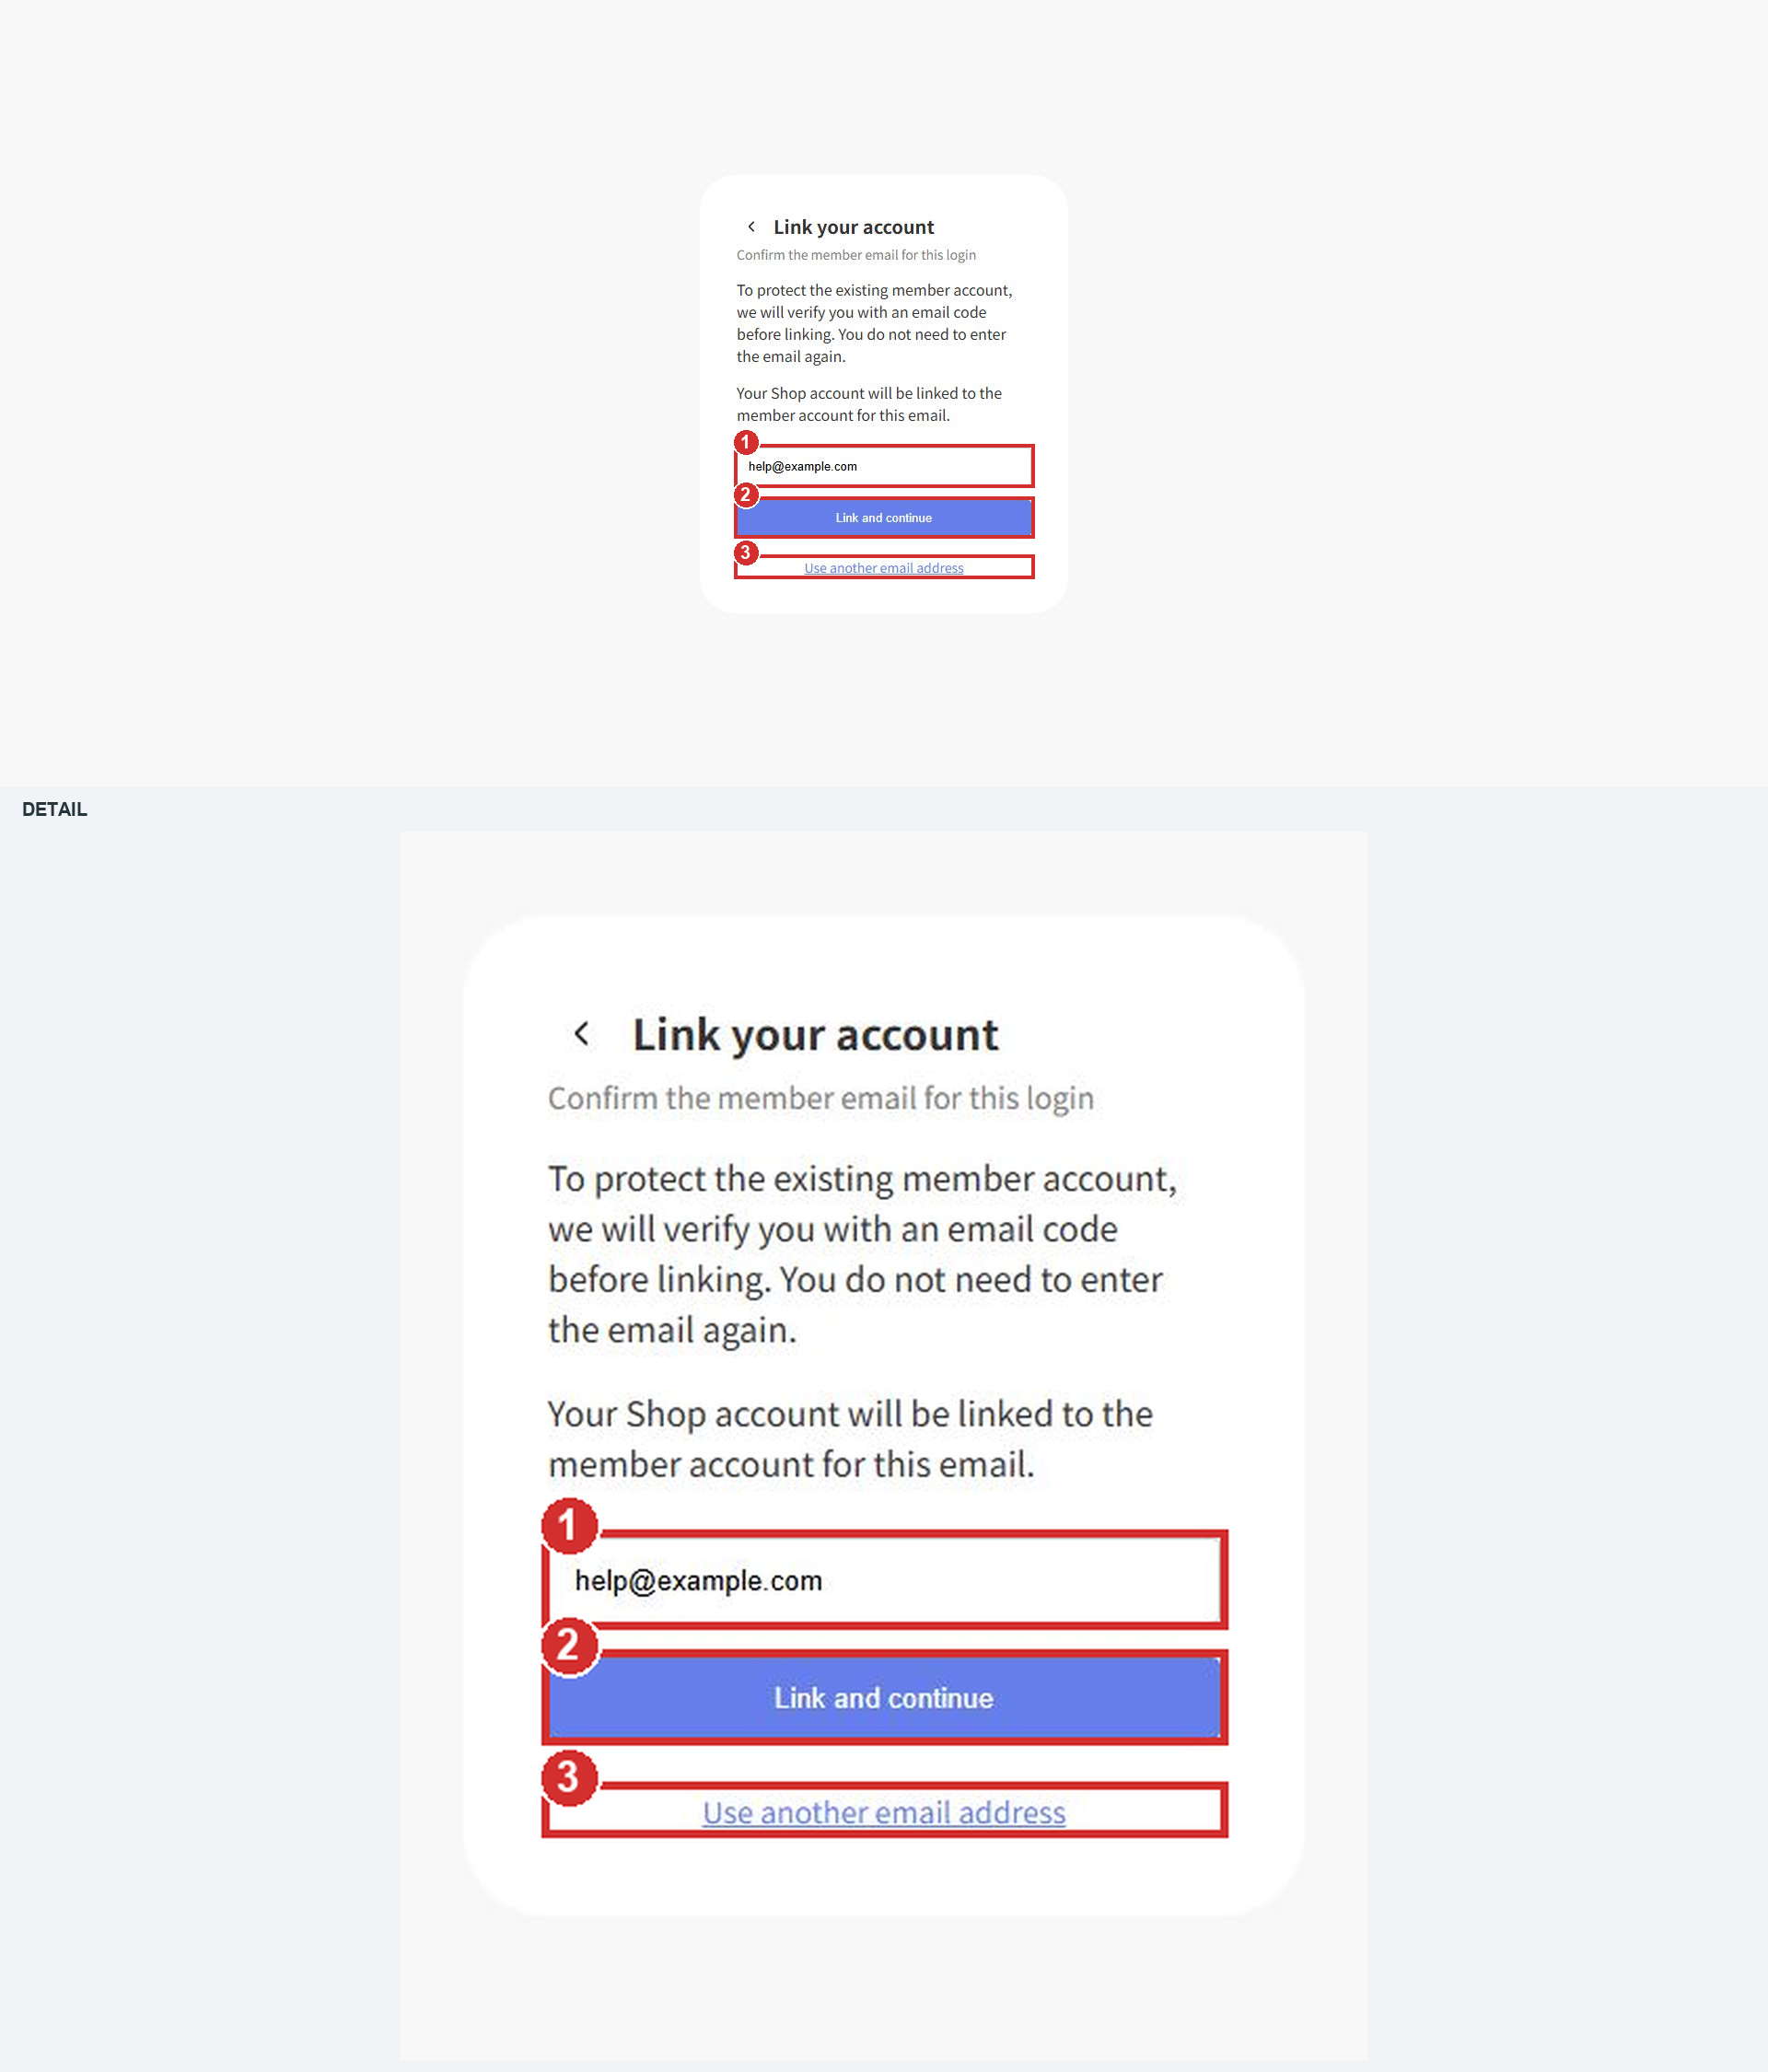
8. When linking an existing member for the first time
Location: Link your account — existing member
Confirm ① the member email and select ② Link and continue. Matching email addresses alone do not automatically link the accounts.
Check: A verification code is sent to the member email. The same principle applies to Google.
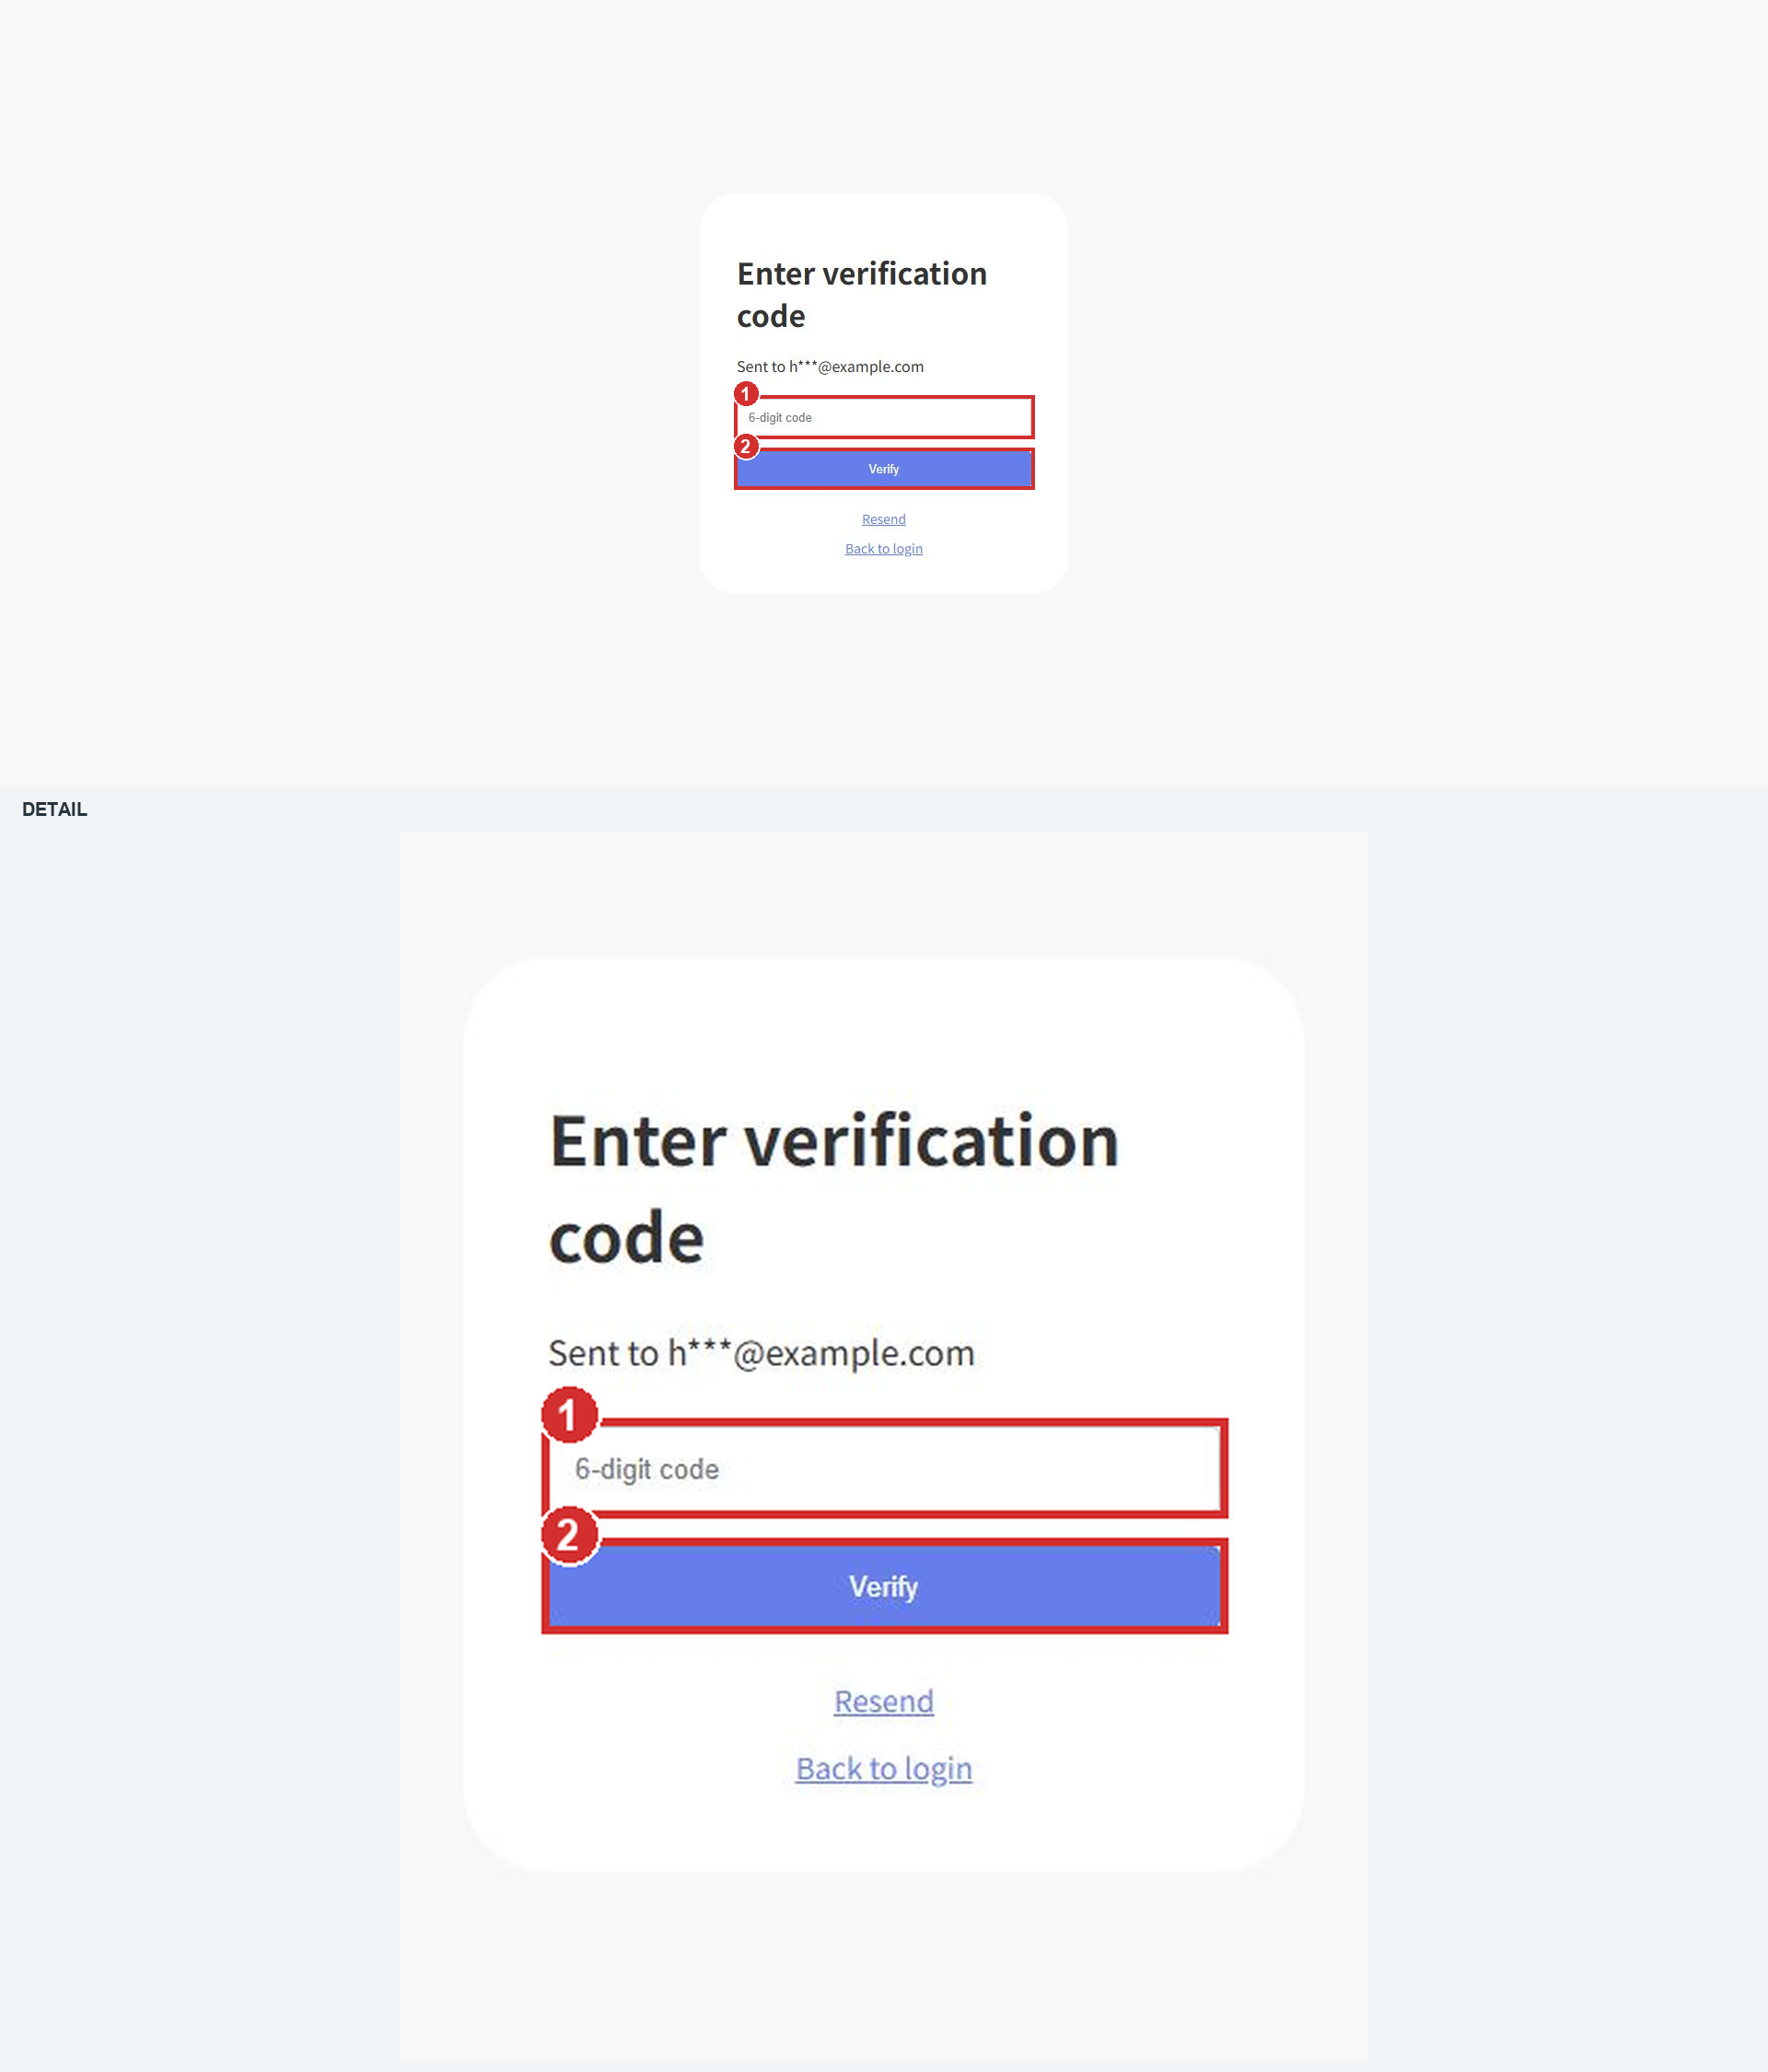
9. Verify your identity with an email code
Location: Enter verification code page
Enter ① the six-digit code from the email sent for this screen, then select ② Verify. If you have multiple emails, use the latest code for the current screen.
Check: Successful verification continues the link and sign-in. If the code does not arrive or has expired, follow the instructions shown on screen.
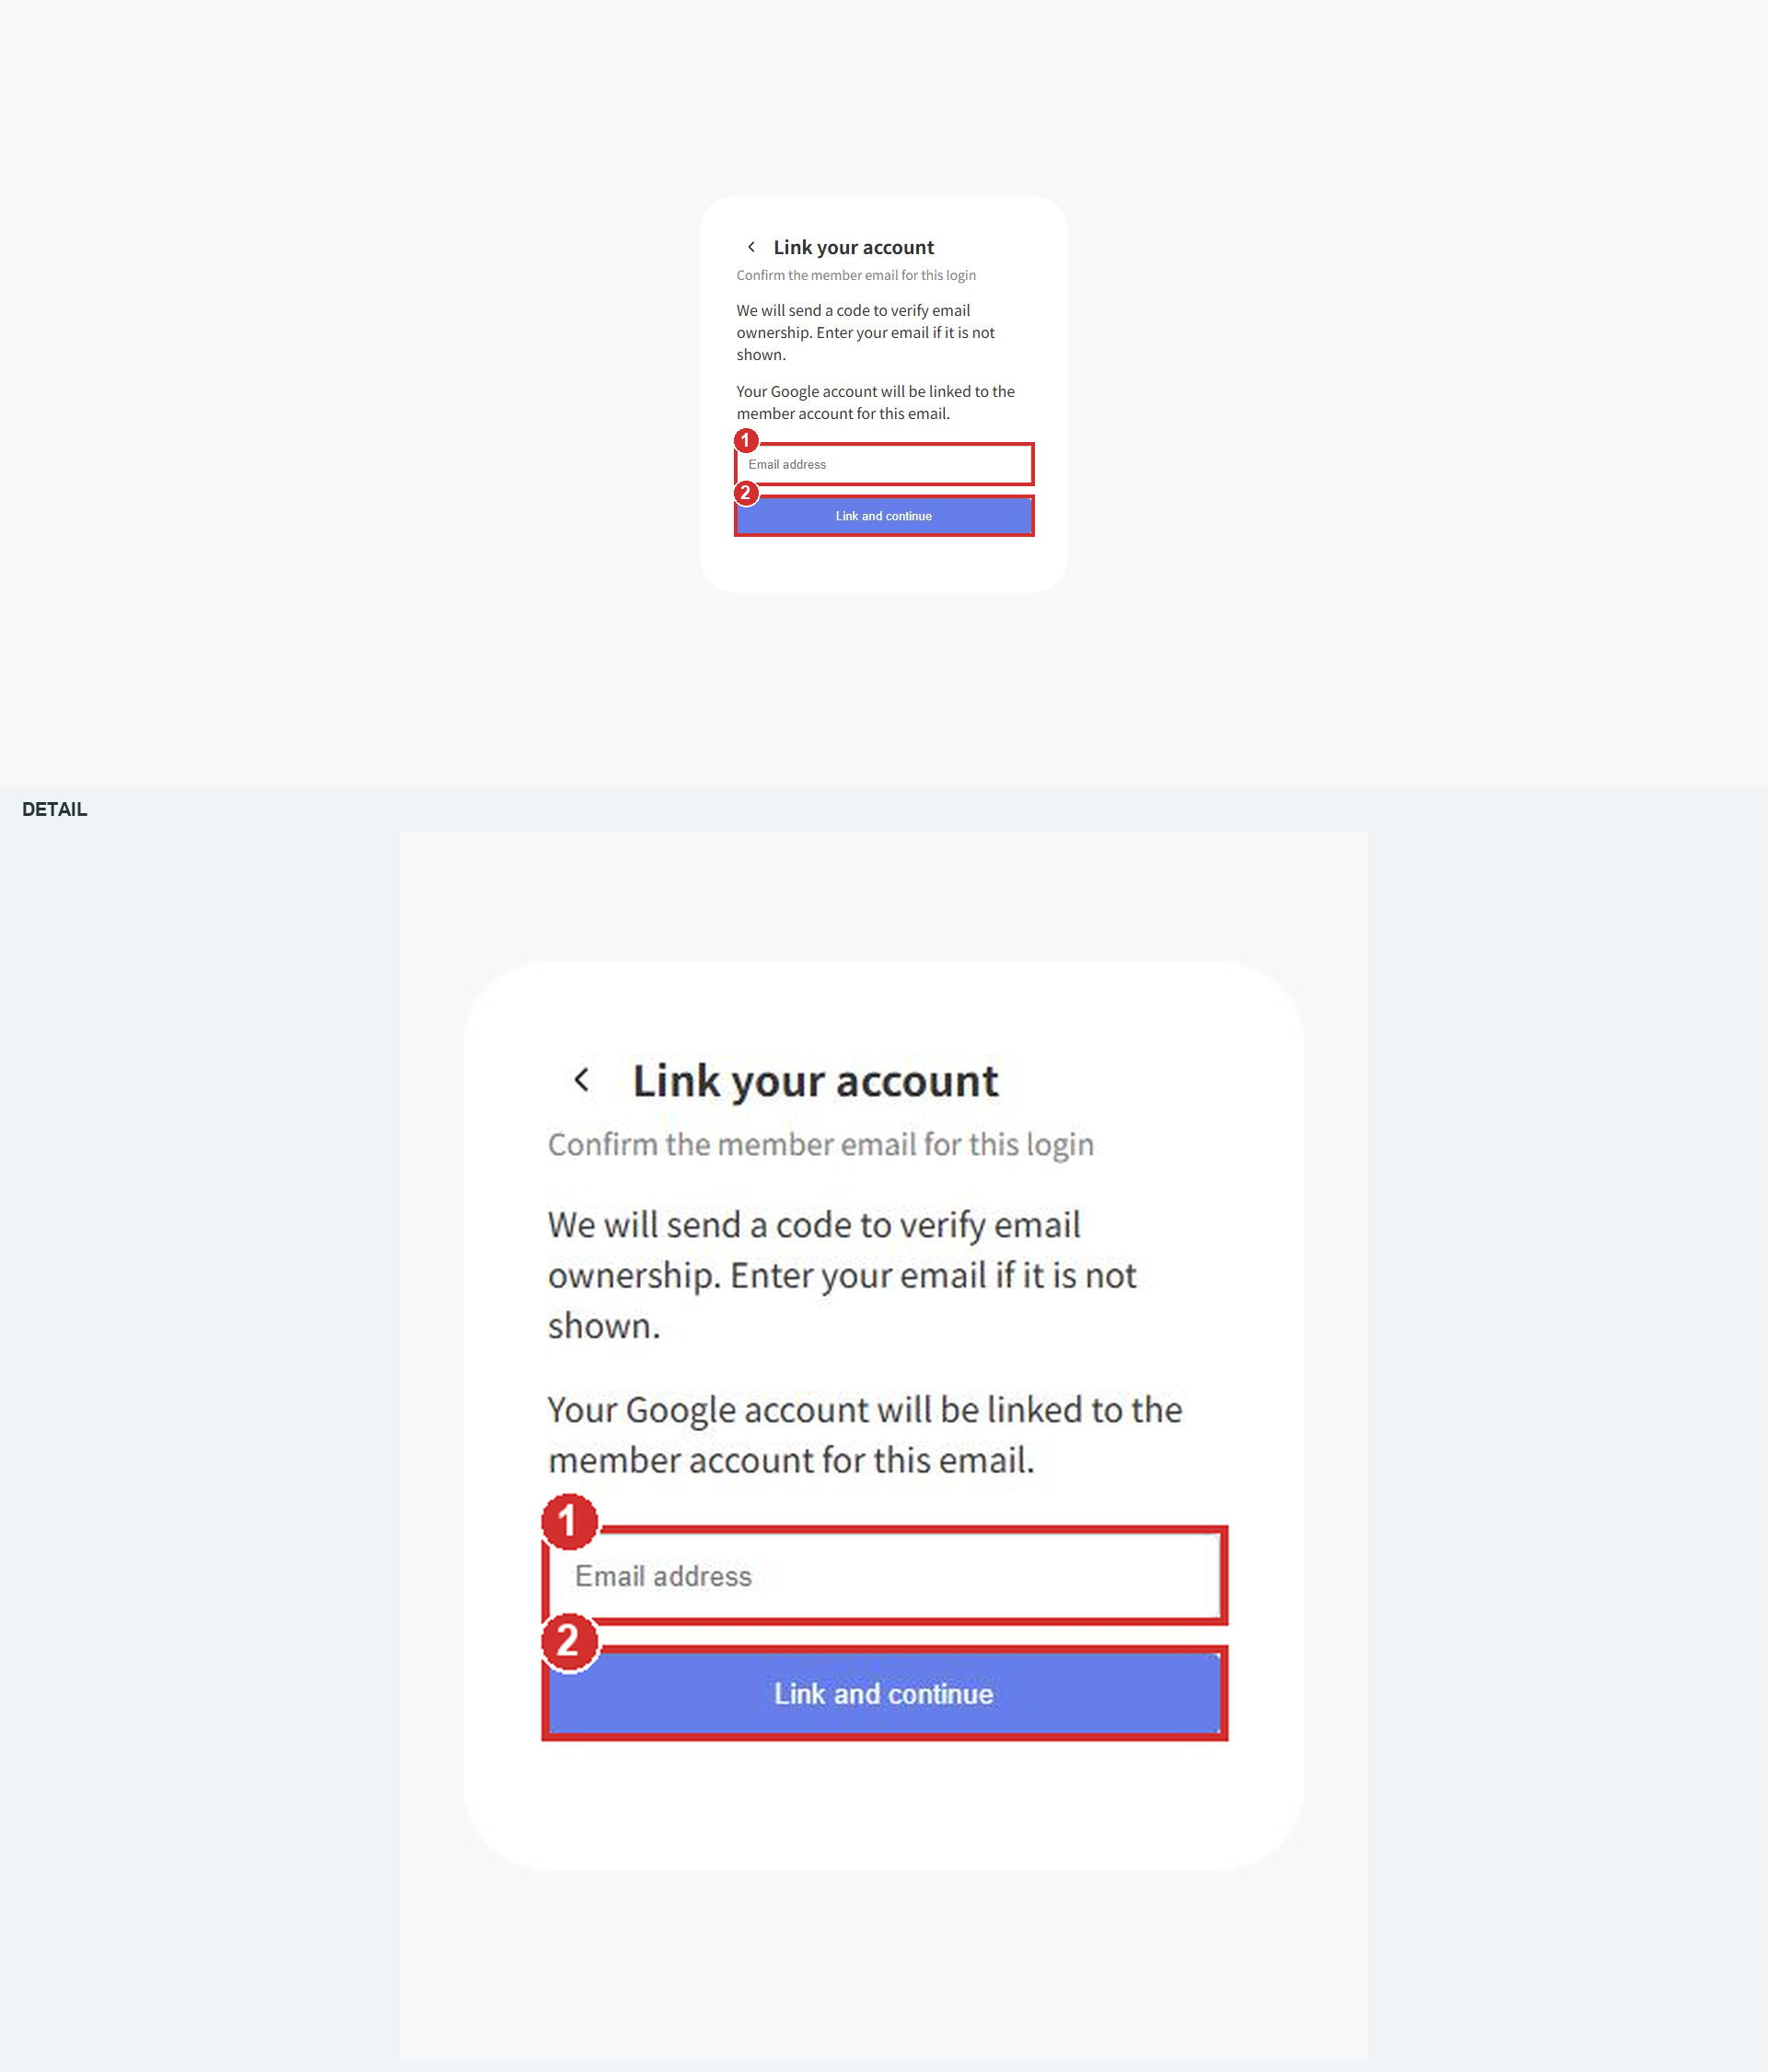
10. When using another member email
Location: After selecting Use another email address
Selecting ③ Use another email address on the preceding confirmation screen opens this form. Enter ① the member email you want to link and select ② Link and continue.
Check: You verify the entered email with a code. This does not change the existing member’s registered email to the Google or Shop email.
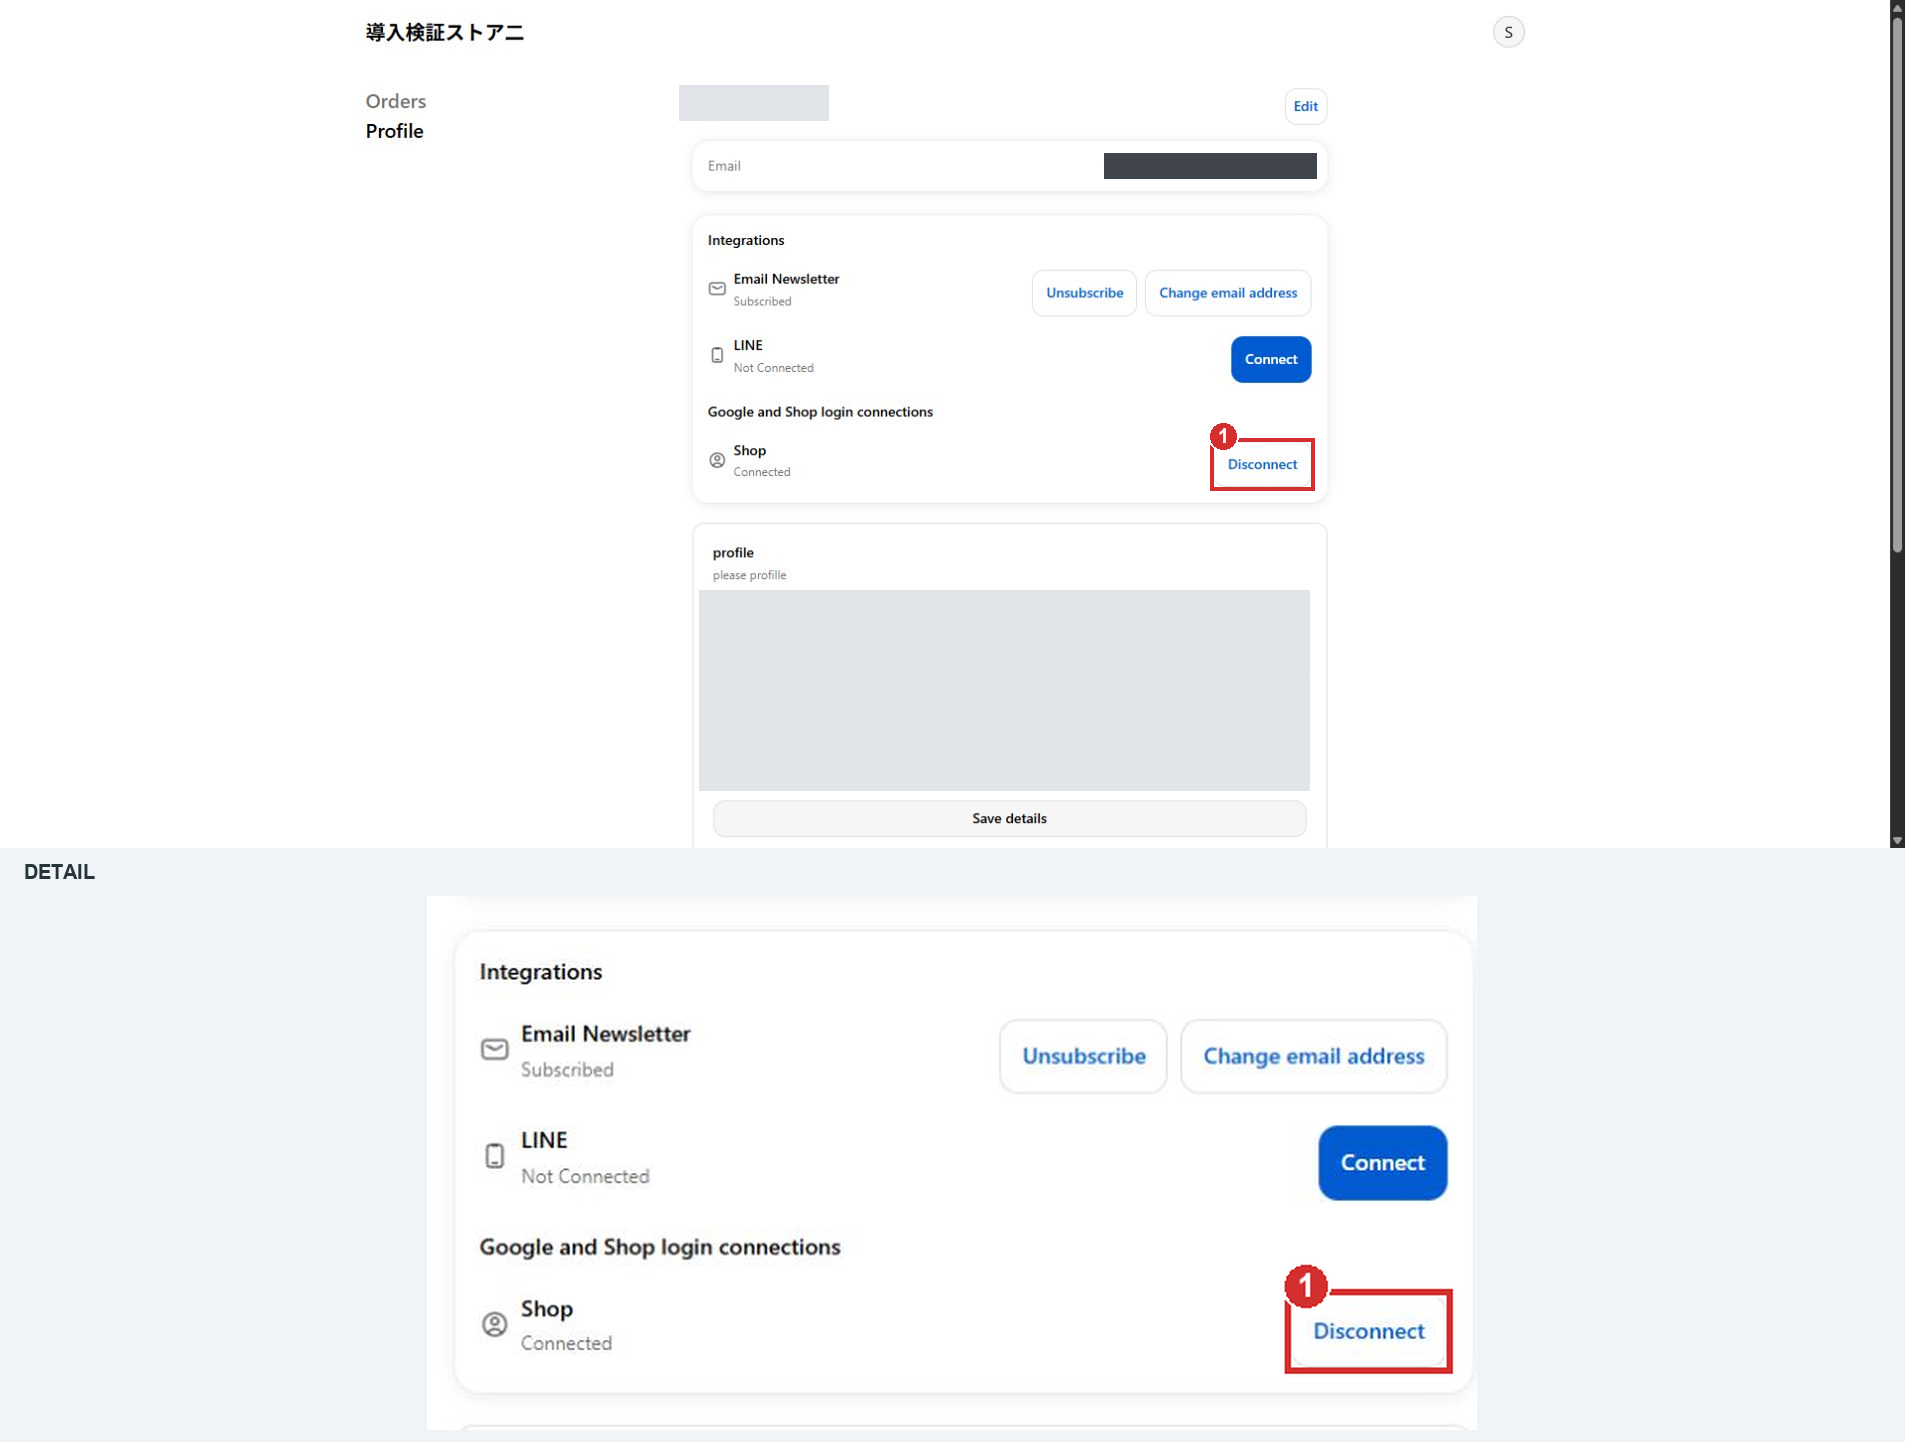
11. Check the connection and start disconnecting
Location: Customer account Profile > Google and Shop login connections
Find the connected Google or Shop account and select ① Disconnect. The StoreCRM profile-settings app block must be installed. The example shows Shop.
Check: A confirmation asks whether you want to disconnect.
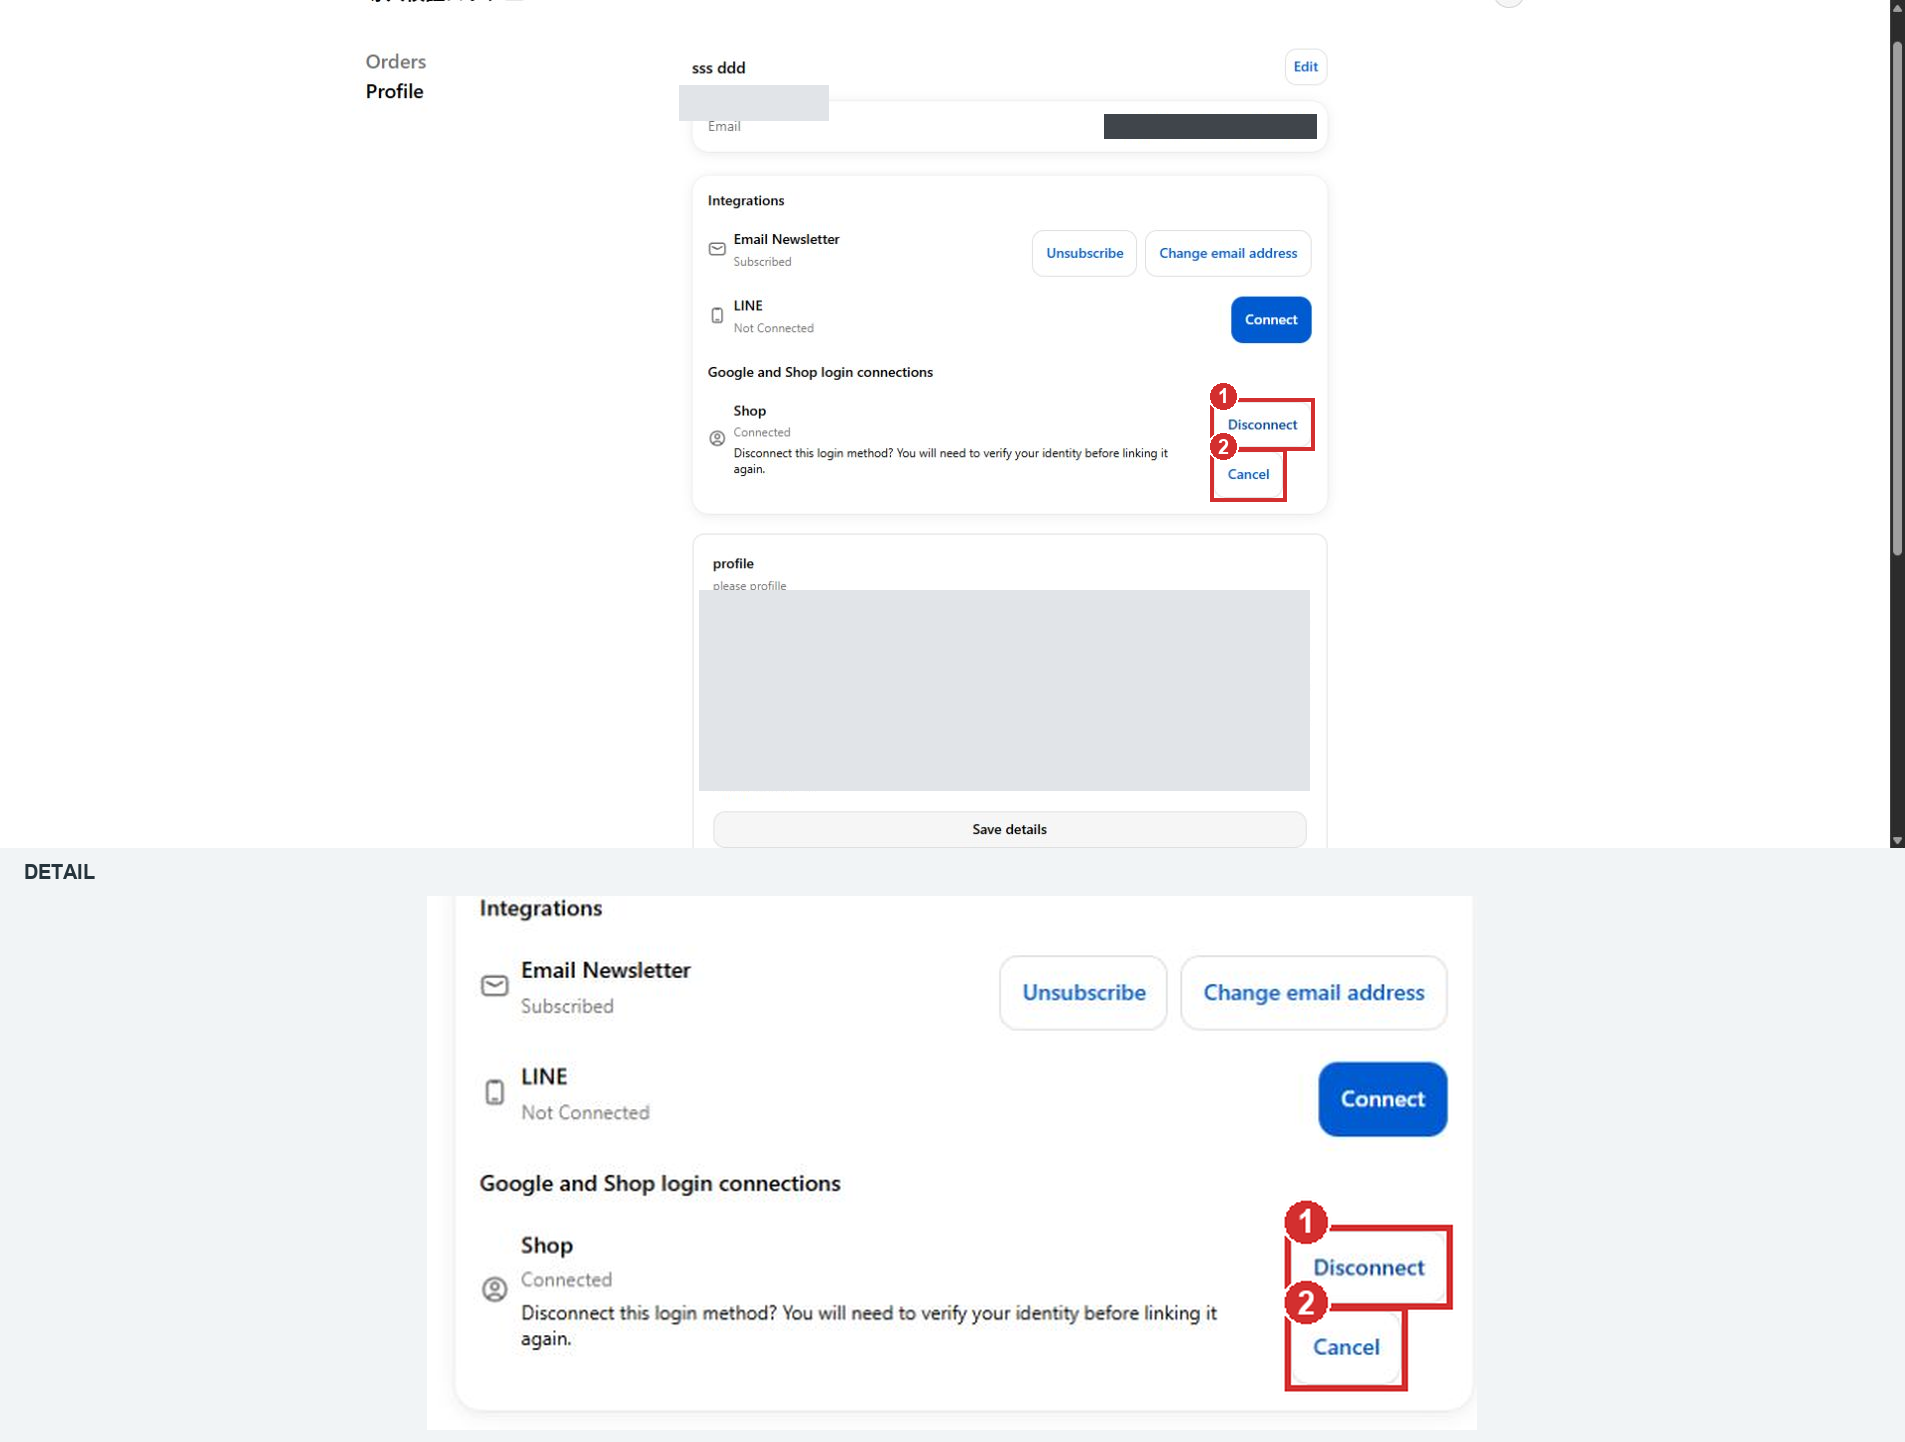
12. Confirm or cancel disconnection
Location: Disconnection confirmation
Select ① Disconnect to remove the connection, or ② Cancel to keep it. Cancel leaves the connection in place.
Check: The login connection is removed only when you confirm.
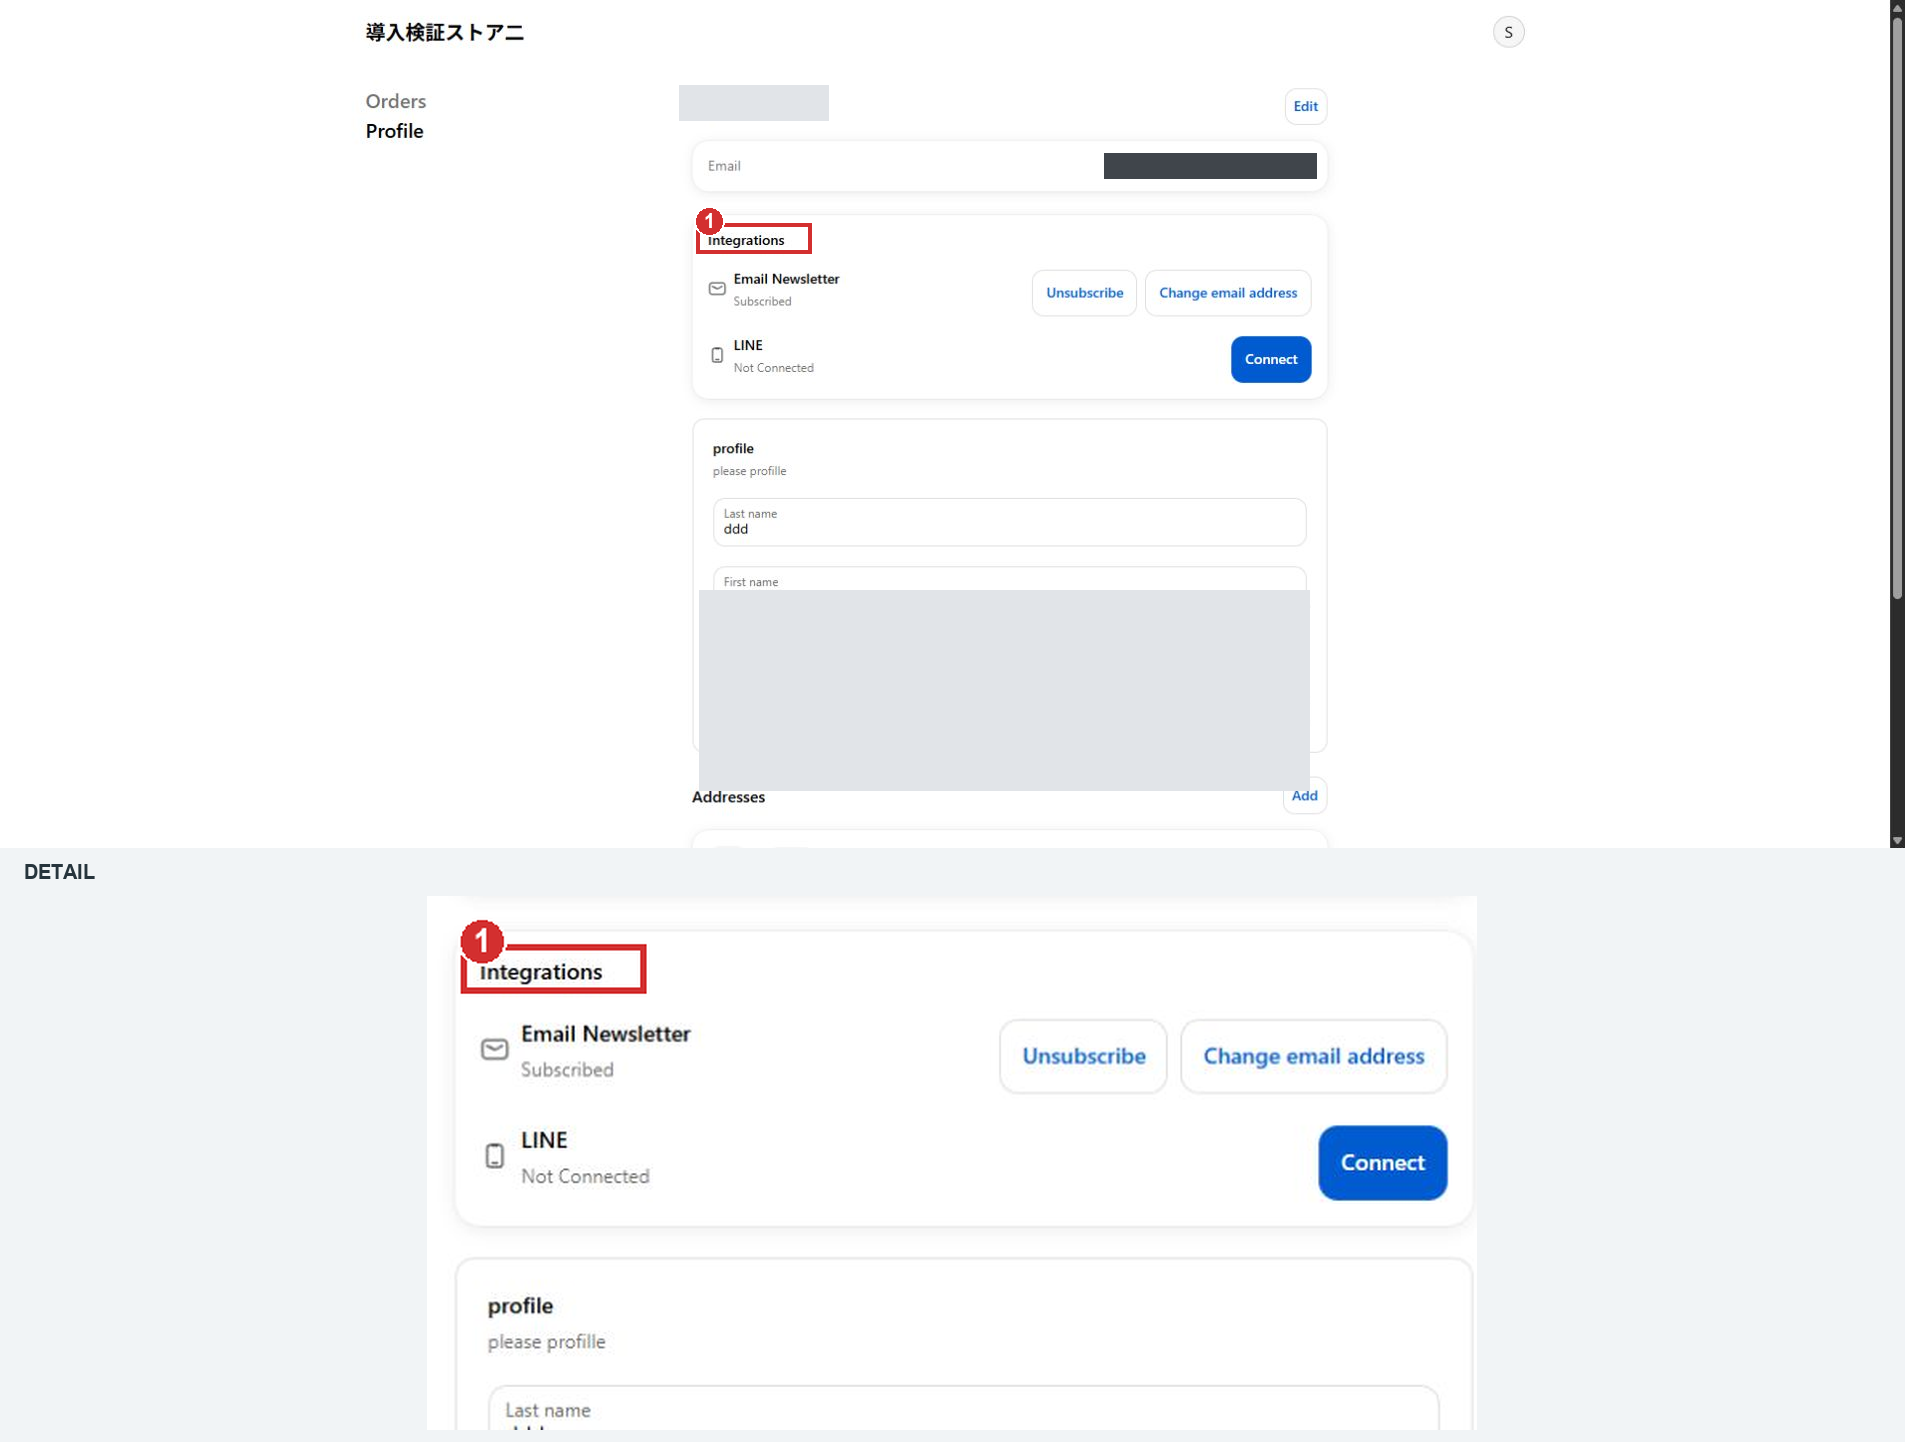
13. Check the result after disconnecting
Location: Profile > Integrations
After the update finishes, check that the disconnected Google or Shop account is no longer listed as connected. The example shows removal of the last Shop connection.
Check: Other connections are not disconnected by this action. Linking Google or Shop again requires identity verification.
- 1. Open Settings
- 2. Open Customer Account Authentication
- 3. Select Google and Shop
- 4. Save your selection
- 5. Reopen the page and check the options
- 6. Choose a sign-in method
- 7. When registering a new member
- 8. When linking an existing member for the first time
- 9. Verify your identity with an email code
- 10. When using another member email
- 11. Check the connection and start disconnecting
- 12. Confirm or cancel disconnection
- 13. Check the result after disconnecting
- If verification emails cannot be sent
If verification emails cannot be sent
If the delivery result cannot be confirmed, do not repeatedly press the same button. Check the inbox and the store’s sending settings. StoreCRM test mode restricts this authentication email. Disabling test mode for testing also allows live scenario and other deliveries; account for that effect before changing it.
 English
 Japanese