

Store Analytics combines sales, customer, email/LINE engagement, and product-browsing data so you can understand your customer mix and choose the next action. When enabled, six analysis views appear under Reports → Store Analytics.
The images on this page show the current Store Analytics screens with the feature enabled. This feature is separate from the legacy Reports list and custom reports.
- Before you start the analysis
- 1. Review overall store performance
- 2. Review customer classification (RFM analysis)
- 3. Review customer lifetime value (LTV) and retention
- 4. Review customer segments
- 5. Review the purchase funnel
- 6. Review product and customer engagement scores
- Create actions from analysis results
- Change aggregation settings
- Check report statuses
Before you start the analysis
- After the initial calculation or a settings change, the status is Calculating. Until it finishes, the report shows values from the previous settings or a preparation message.
- The aggregation period is selected from the last 7 days, 30 days, and 90 days. Your URLs will retain tabs, duration, coverage, and more.
- Switch between Active customers only and All customers. This selector does not apply to LTV and retention or the purchase funnel because those views use their own populations.
1. Review overall store performance
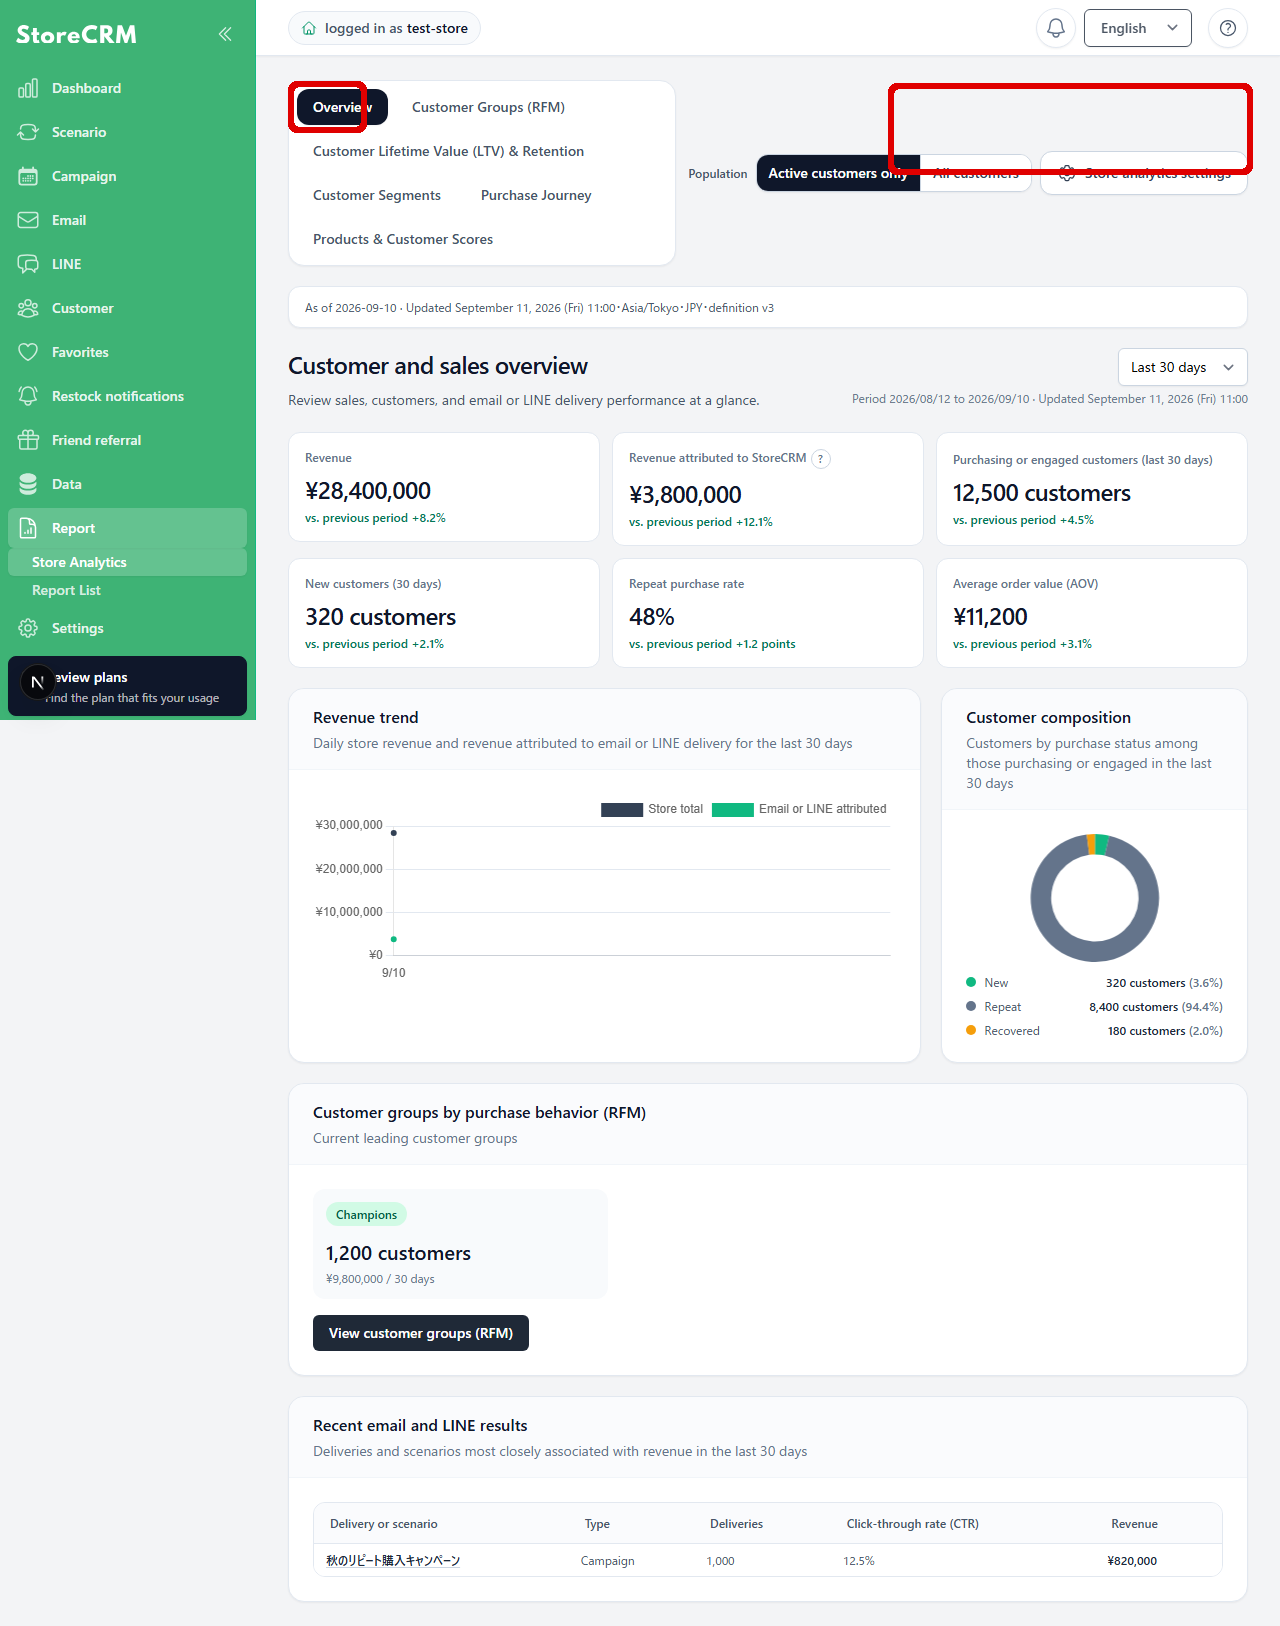
The Overview shows total sales, StoreCRM-attributed sales, purchasing and engaged customers, new customers, repeat-purchase rate, average order value, sales trends, customer composition, and recent messaging results. Select the period and customer scope, then open a detailed view for metrics with notable changes.
2. Review customer classification (RFM analysis)
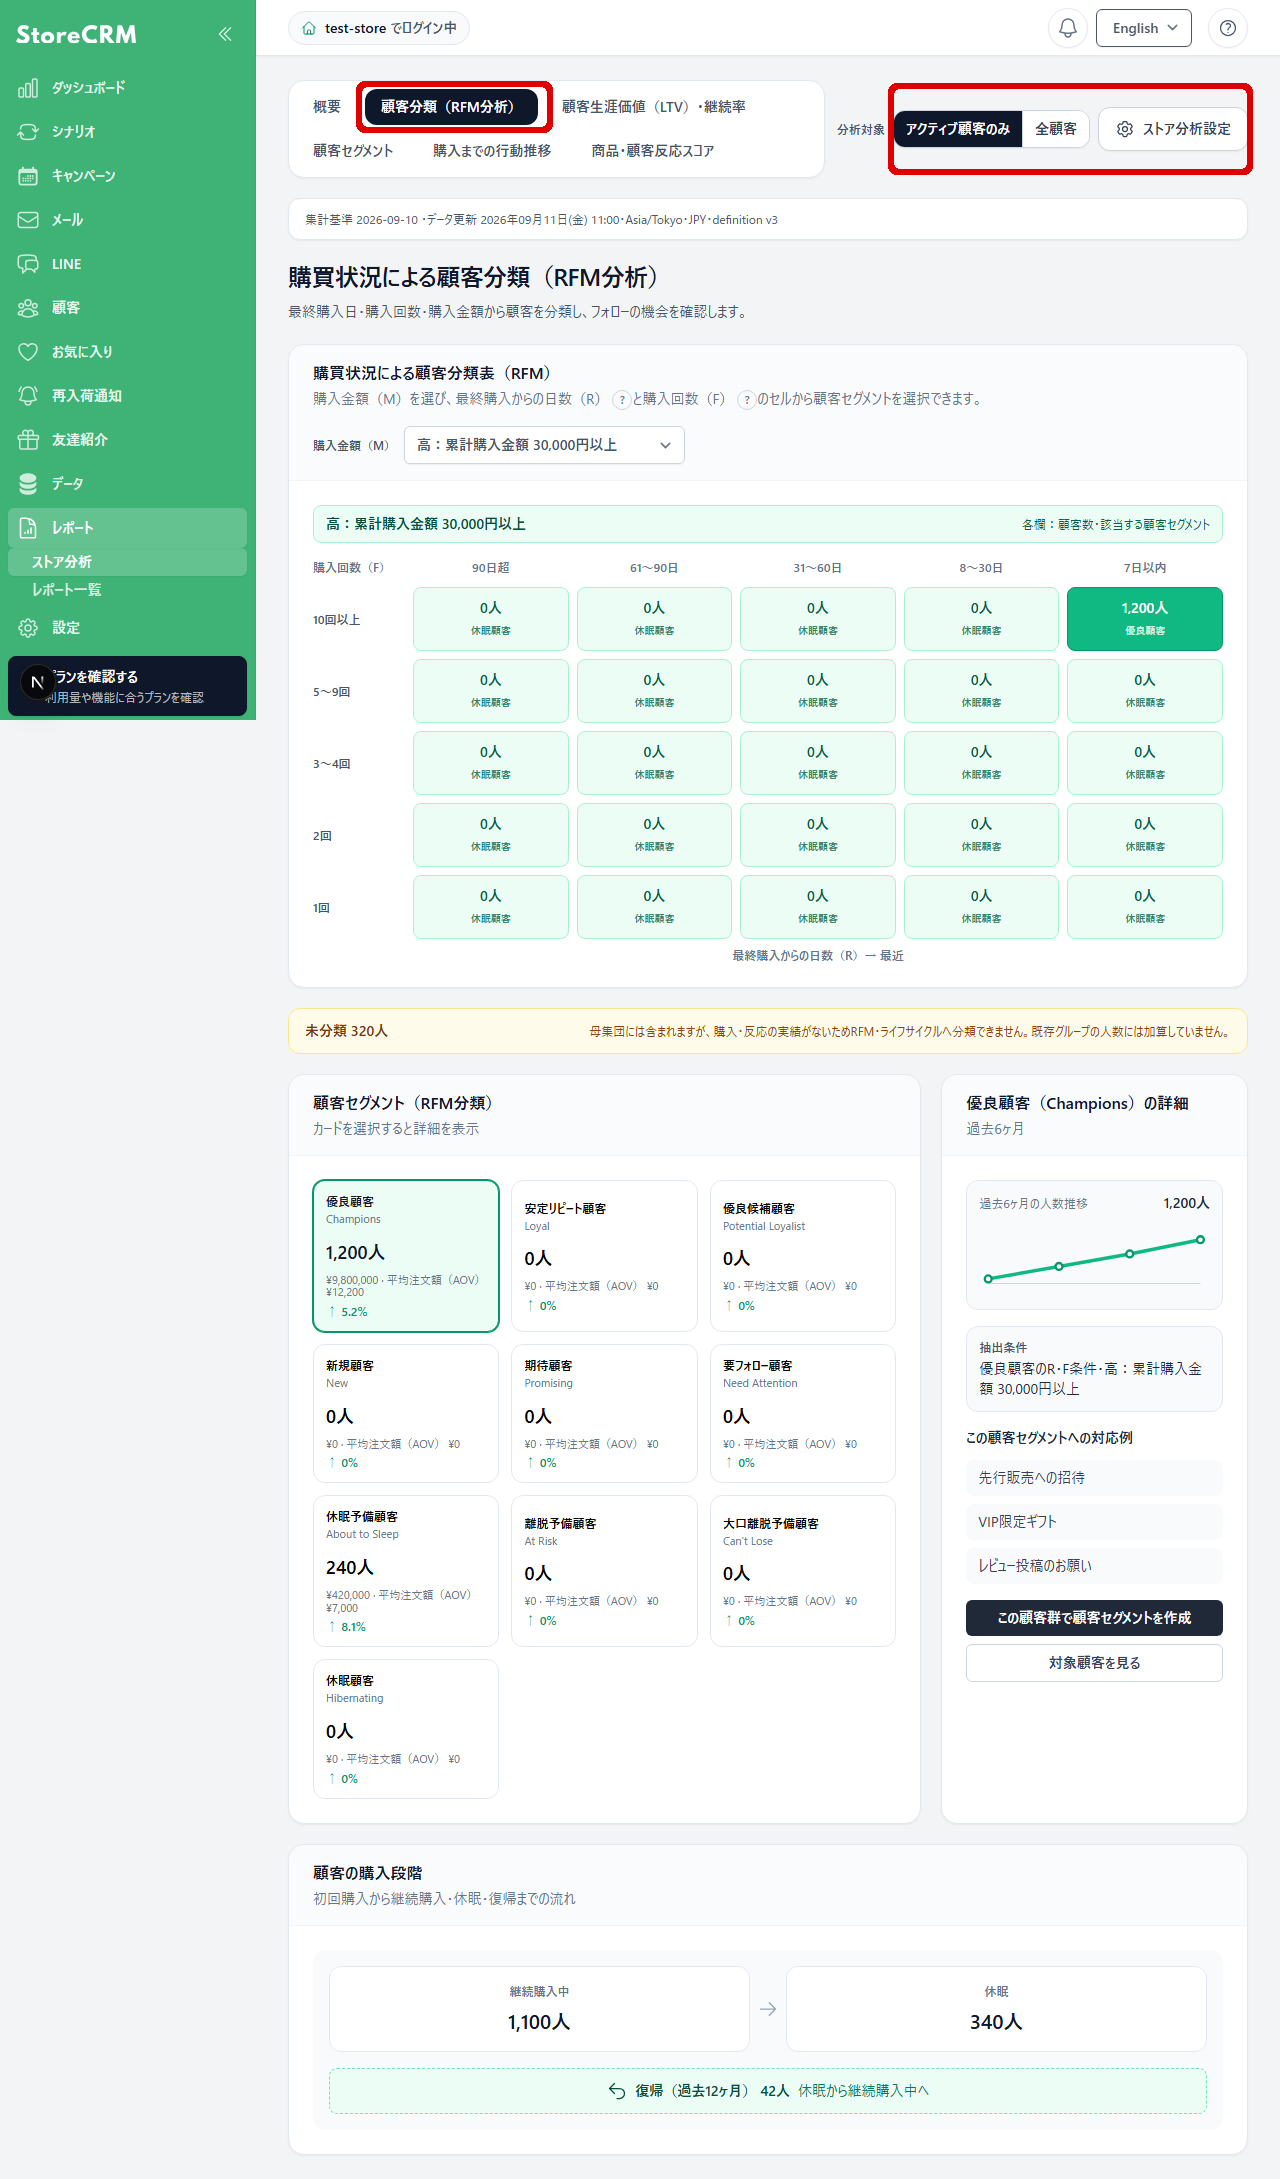
Categorize customers by Recency, Frequency, and Monetary. Select groups such as Top Customers, Nurture Targets, Dormant Reserve, and Dormant to review target customers, create segments, create campaigns, and create automated scenarios. Please check the Uncategorized and do not exclude from the number of people.
3. Review customer lifetime value (LTV) and retention
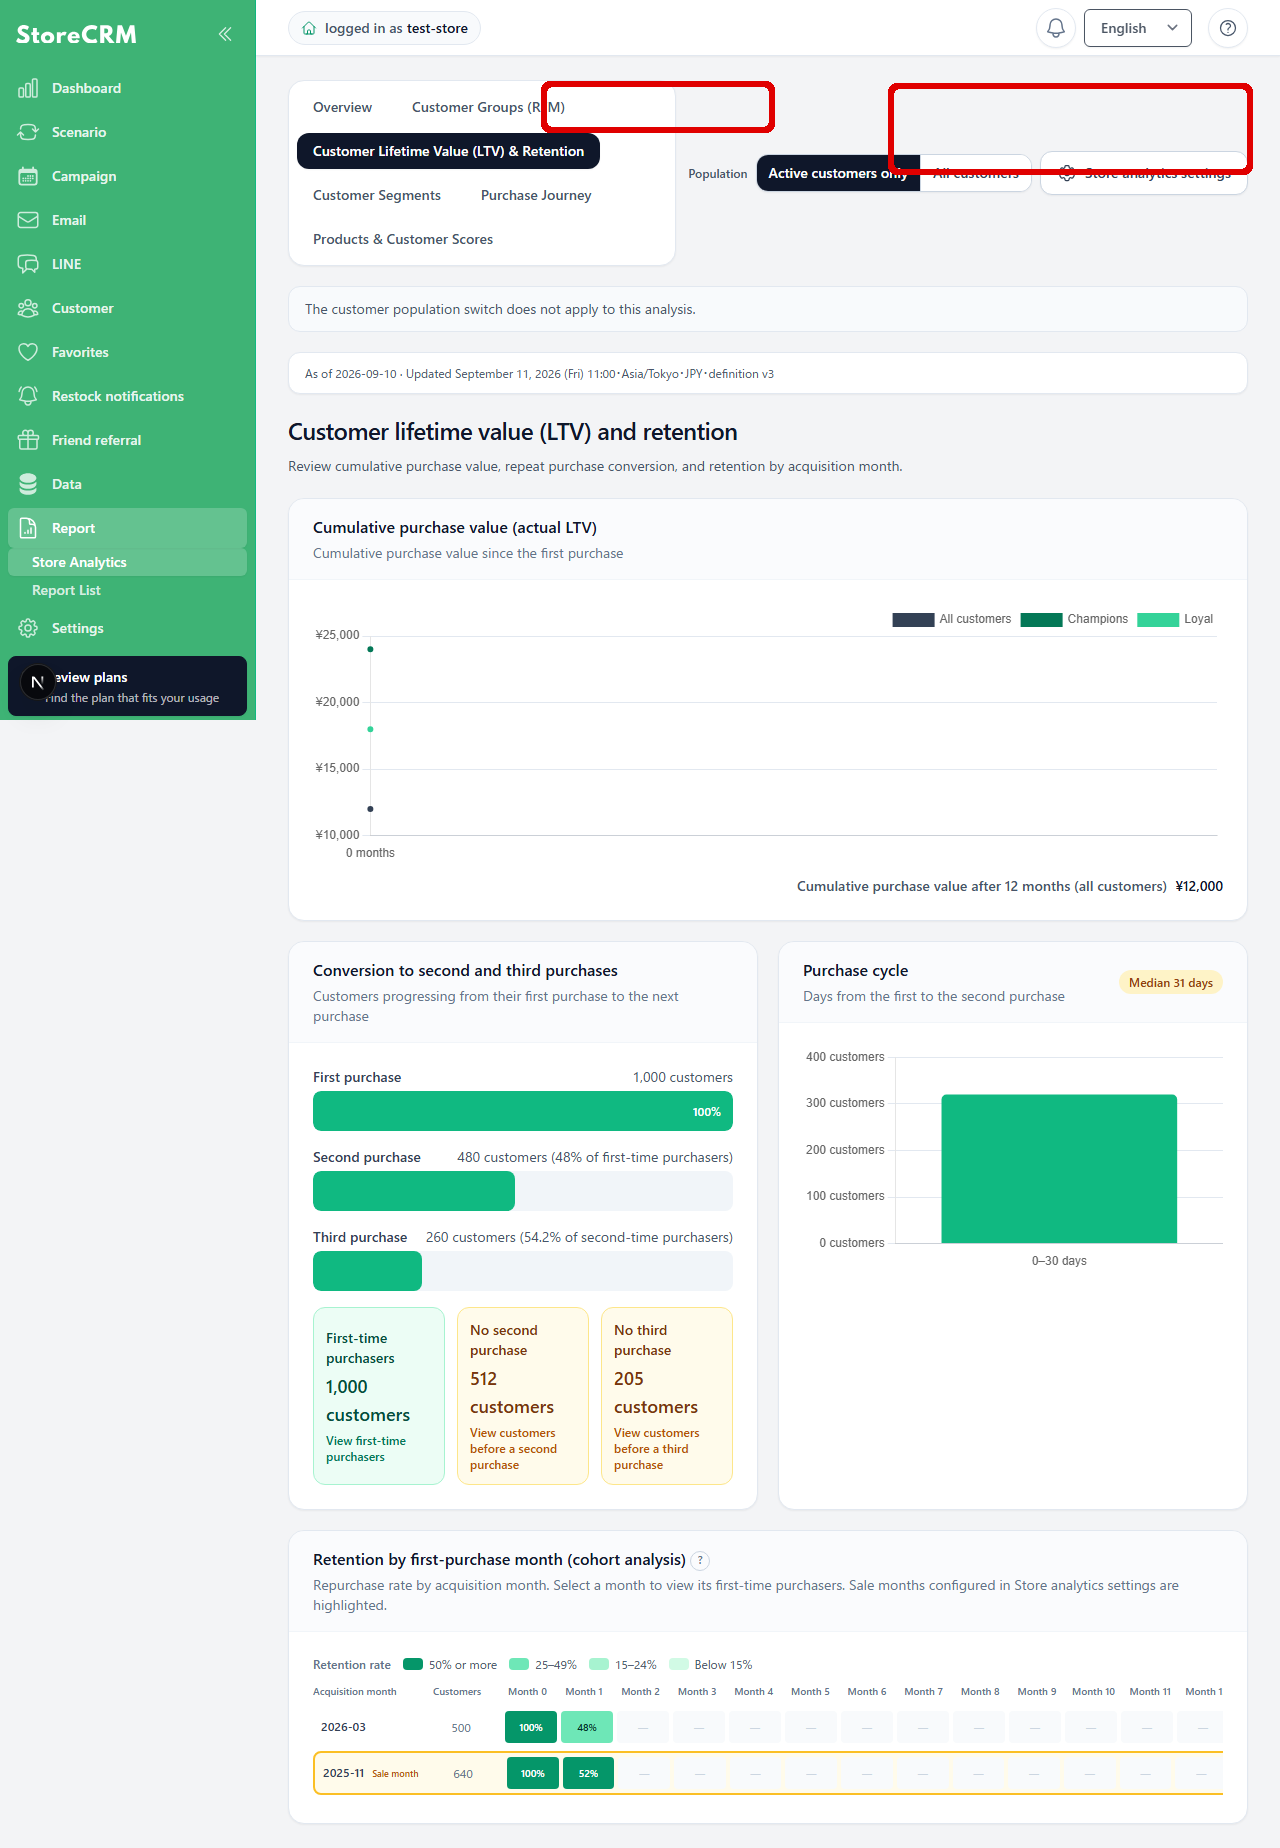
Review LTV, conversion to second and third purchases, and cohorts by first-purchase month. Use retention after the first purchase and the time to a second purchase to decide when to follow up. This view is calculated from order history, so the customer-scope selector at the top does not apply.
4. Review customer segments
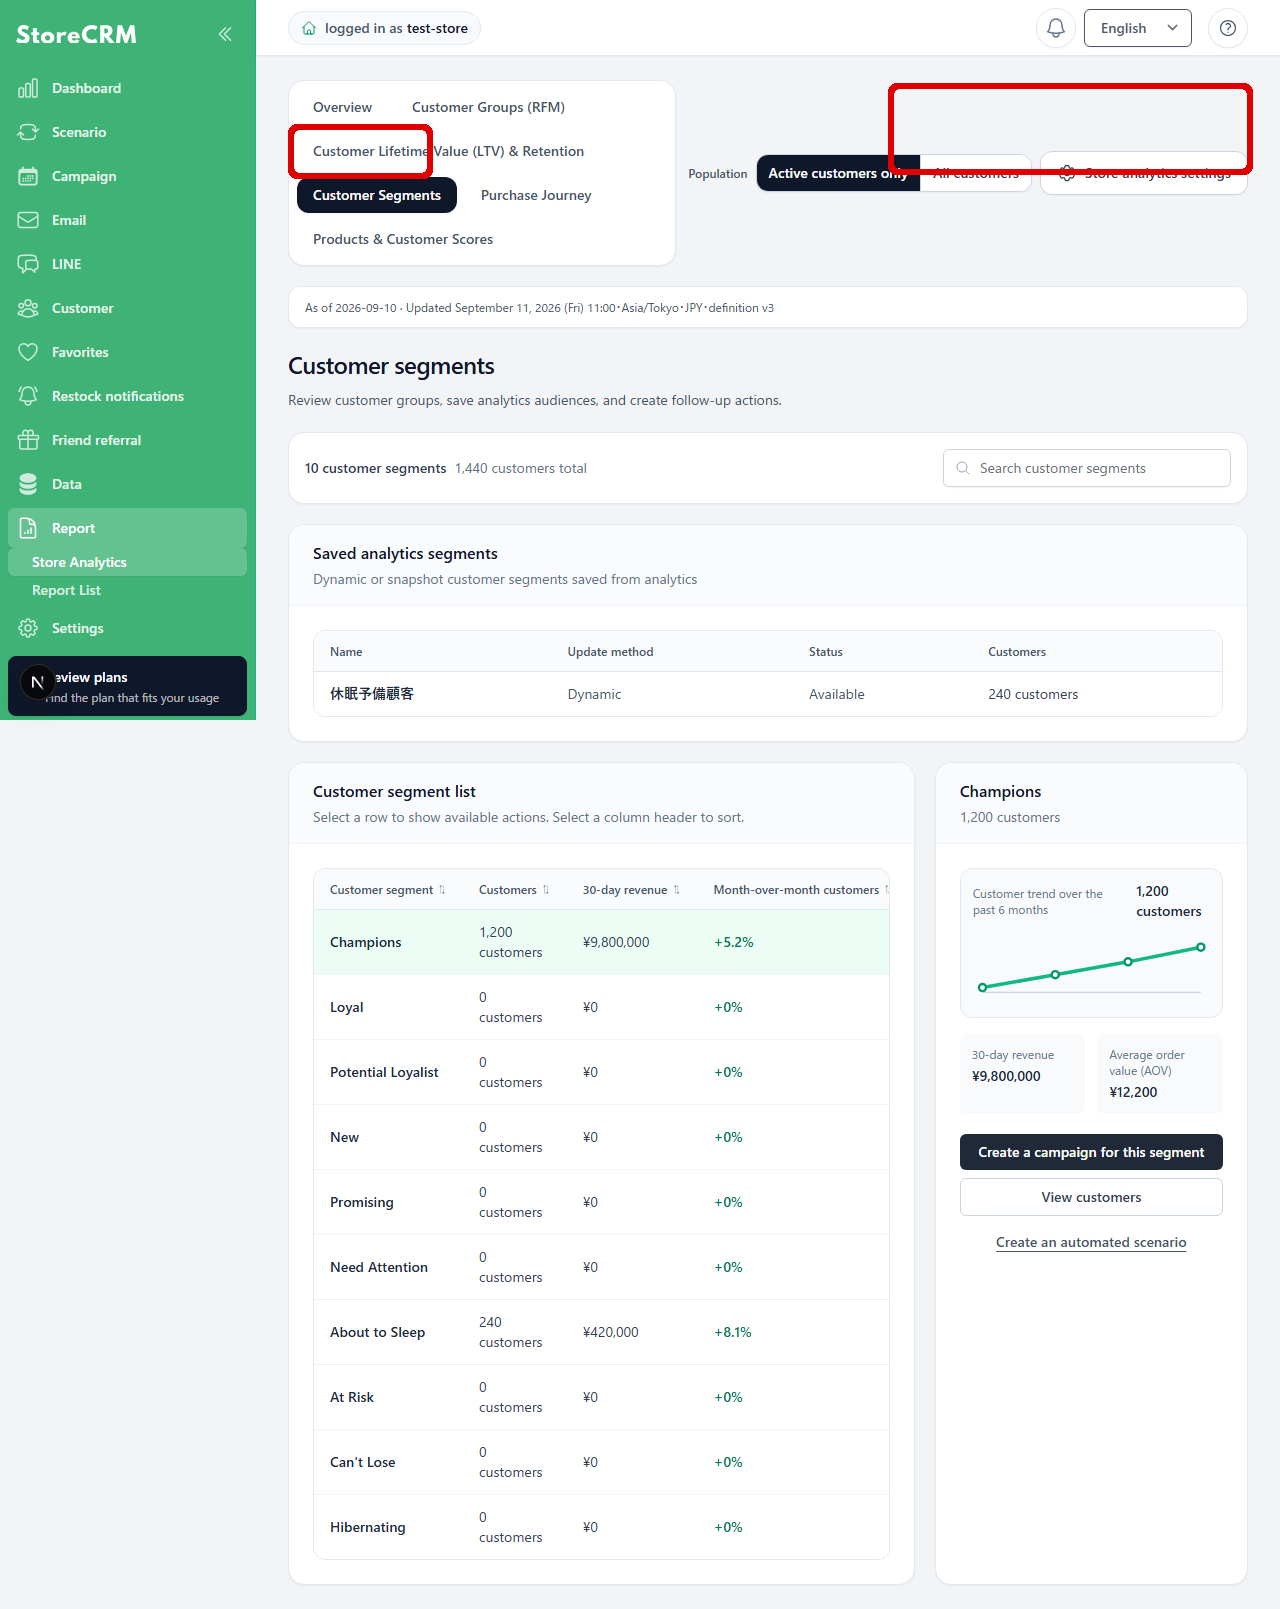
Review customer groups based on lifecycle, purchase status, and email or LINE engagement. Open a group to review its customers, then save it as a point-in-time snapshot or an automatically updated segment. Use the result in an email, LINE message, campaign, or automation.
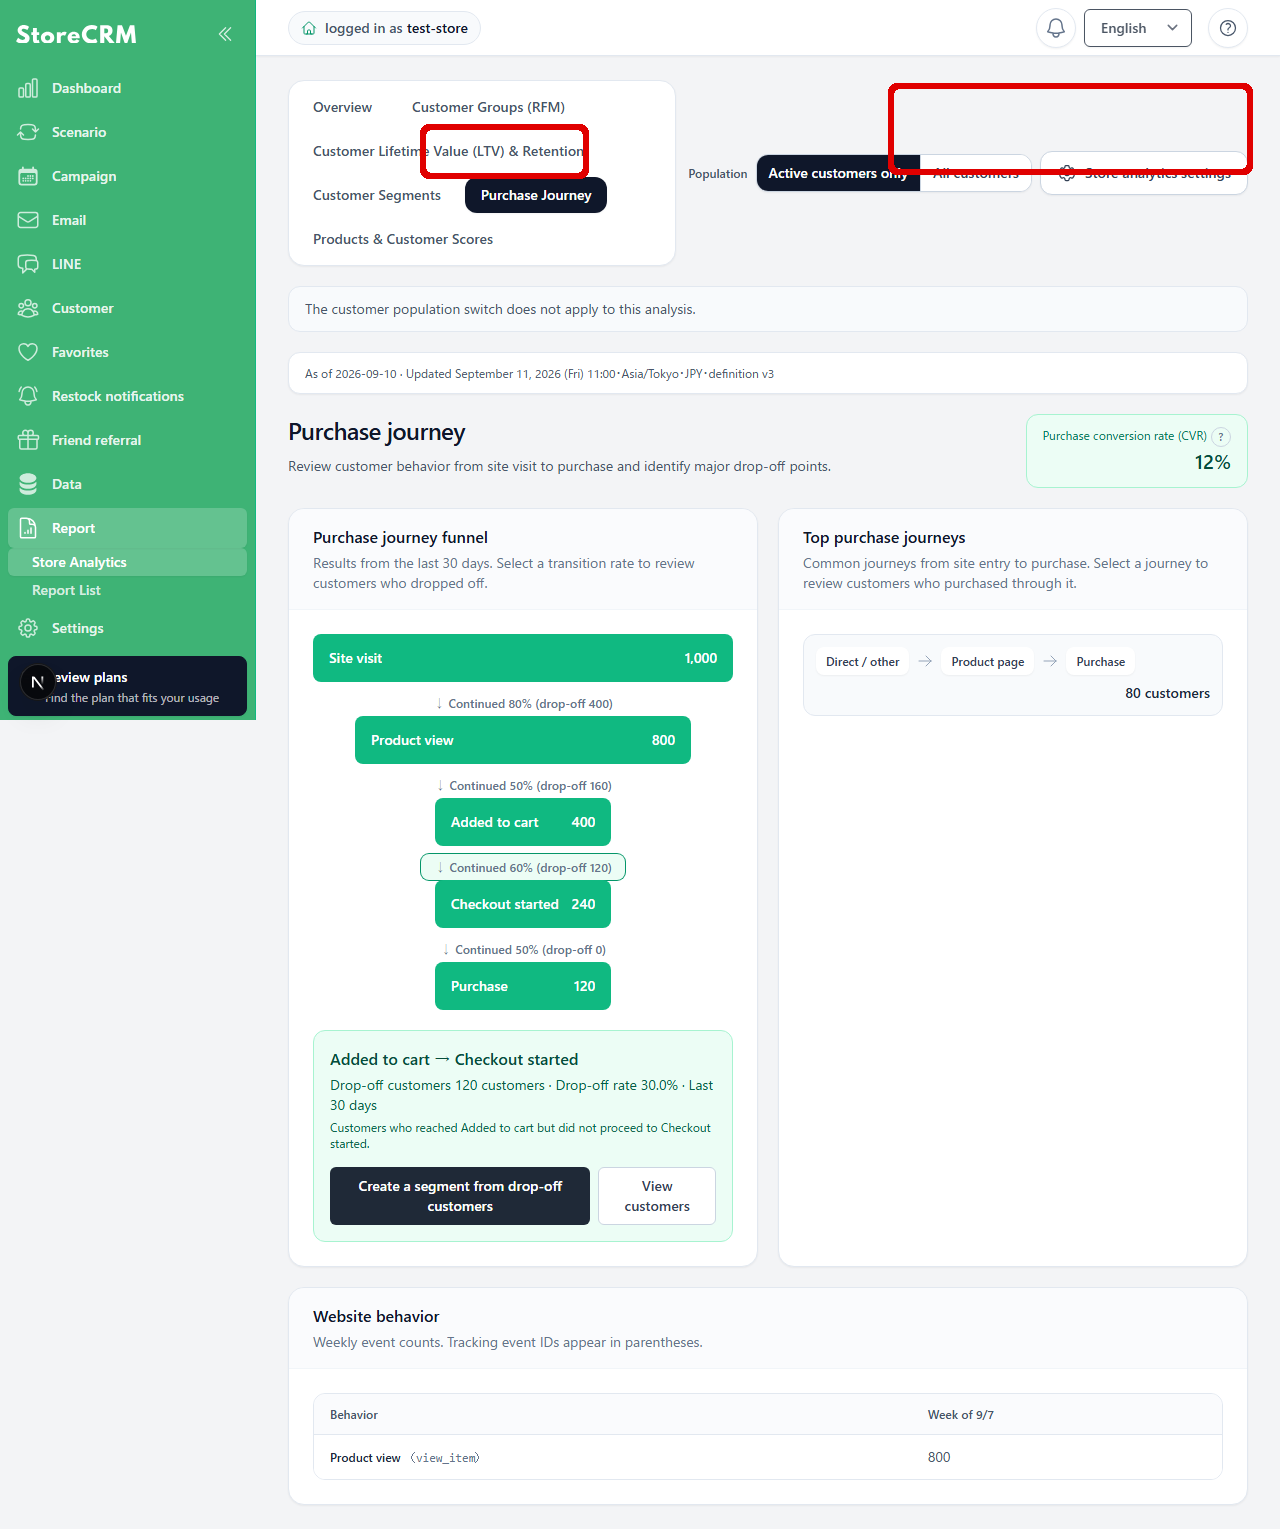
5. Review the purchase funnel
Review customer counts and conversion rates for product views, carts, checkouts, and purchases. Select a stage with a large drop-off to review affected customers or create a follow-up action. This view is based on behavioral events, so the customer-scope selector at the top does not apply.
6. Review product and customer engagement scores
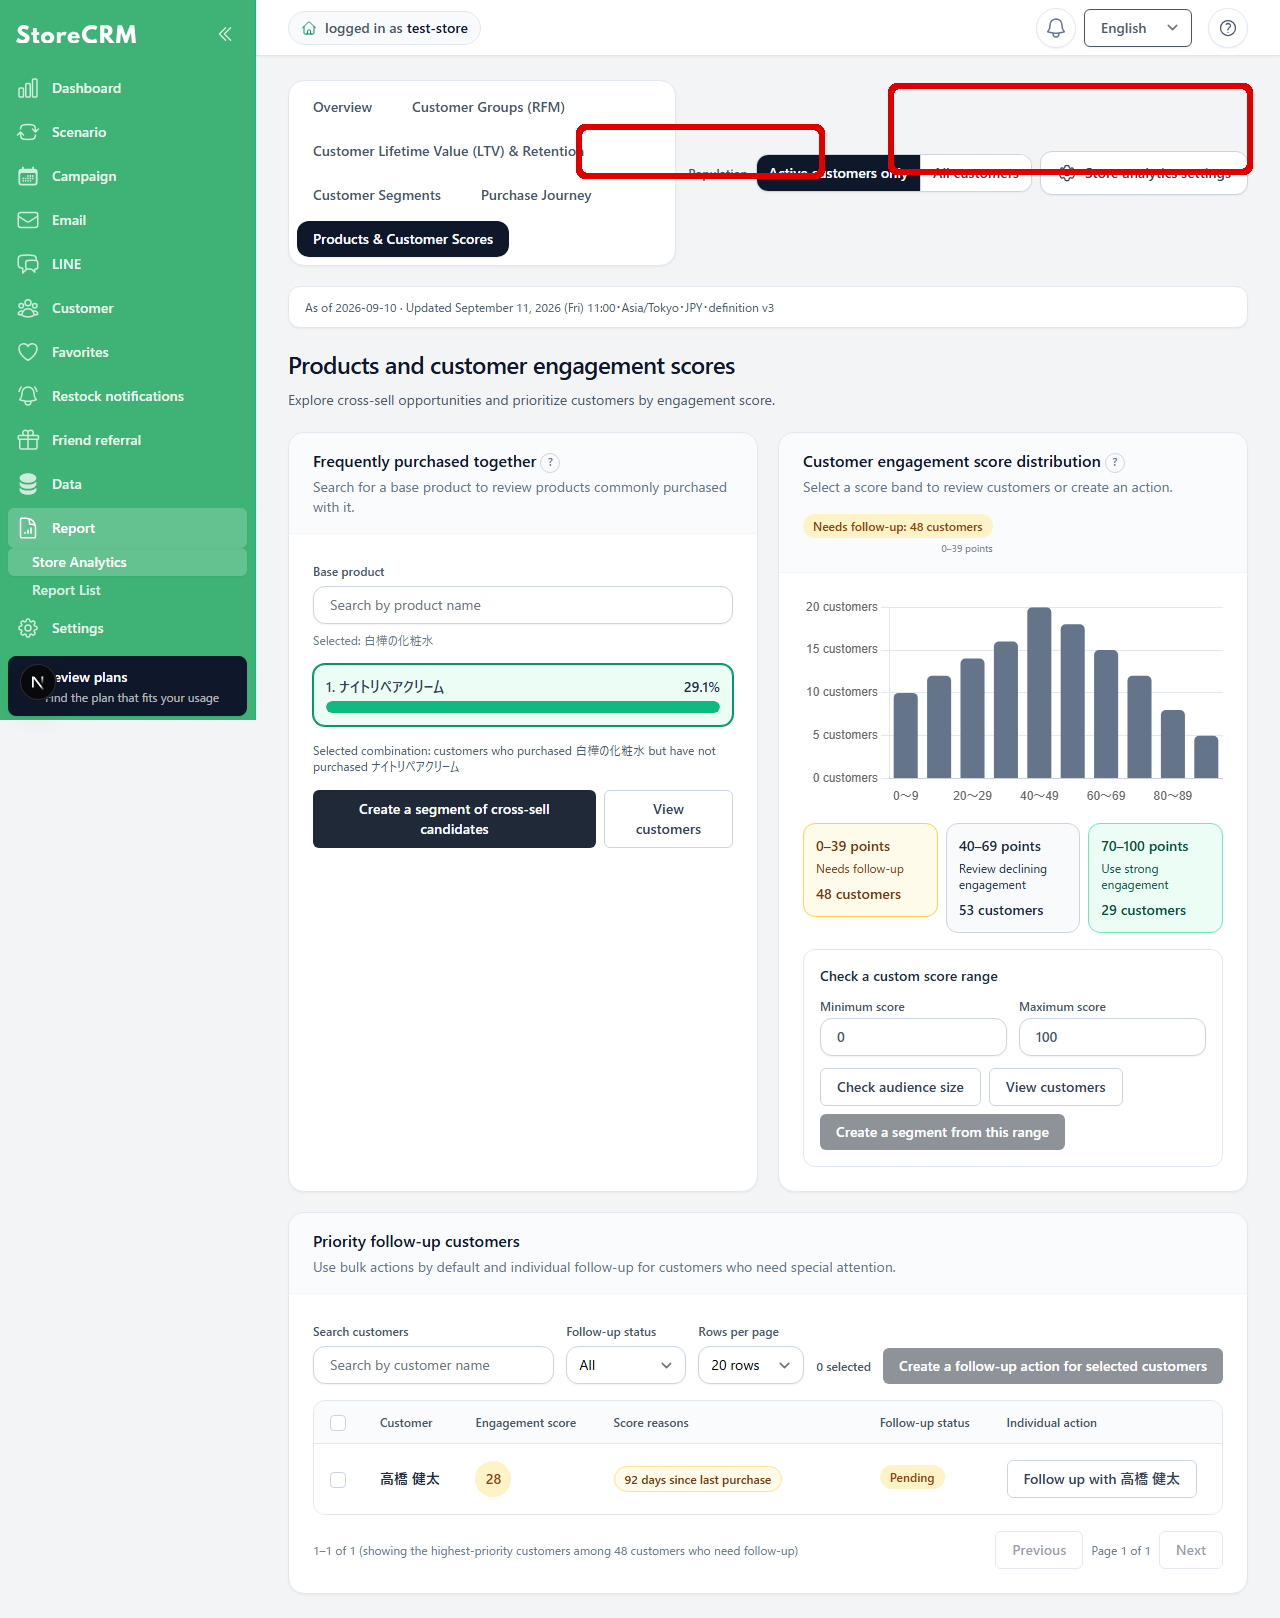
Search for a product and review related products, engagement by product, and customer engagement score ranges. Preview the number of customers in a selected score range, then use high-priority customers in a segment or follow-up action.
Create actions from analysis results
- Check the applicable customers and conditions in View Target Customers.
- To keep using the conditions, save them as a snapshot or an automatically updated segment, depending on your needs.
- Carry over to draft in Create Campaign or Create Automatic Scenario.
- On the creation screen, double-check the target conditions, exclusion conditions, distribution channels, and text before saving and activating.
Change aggregation settings
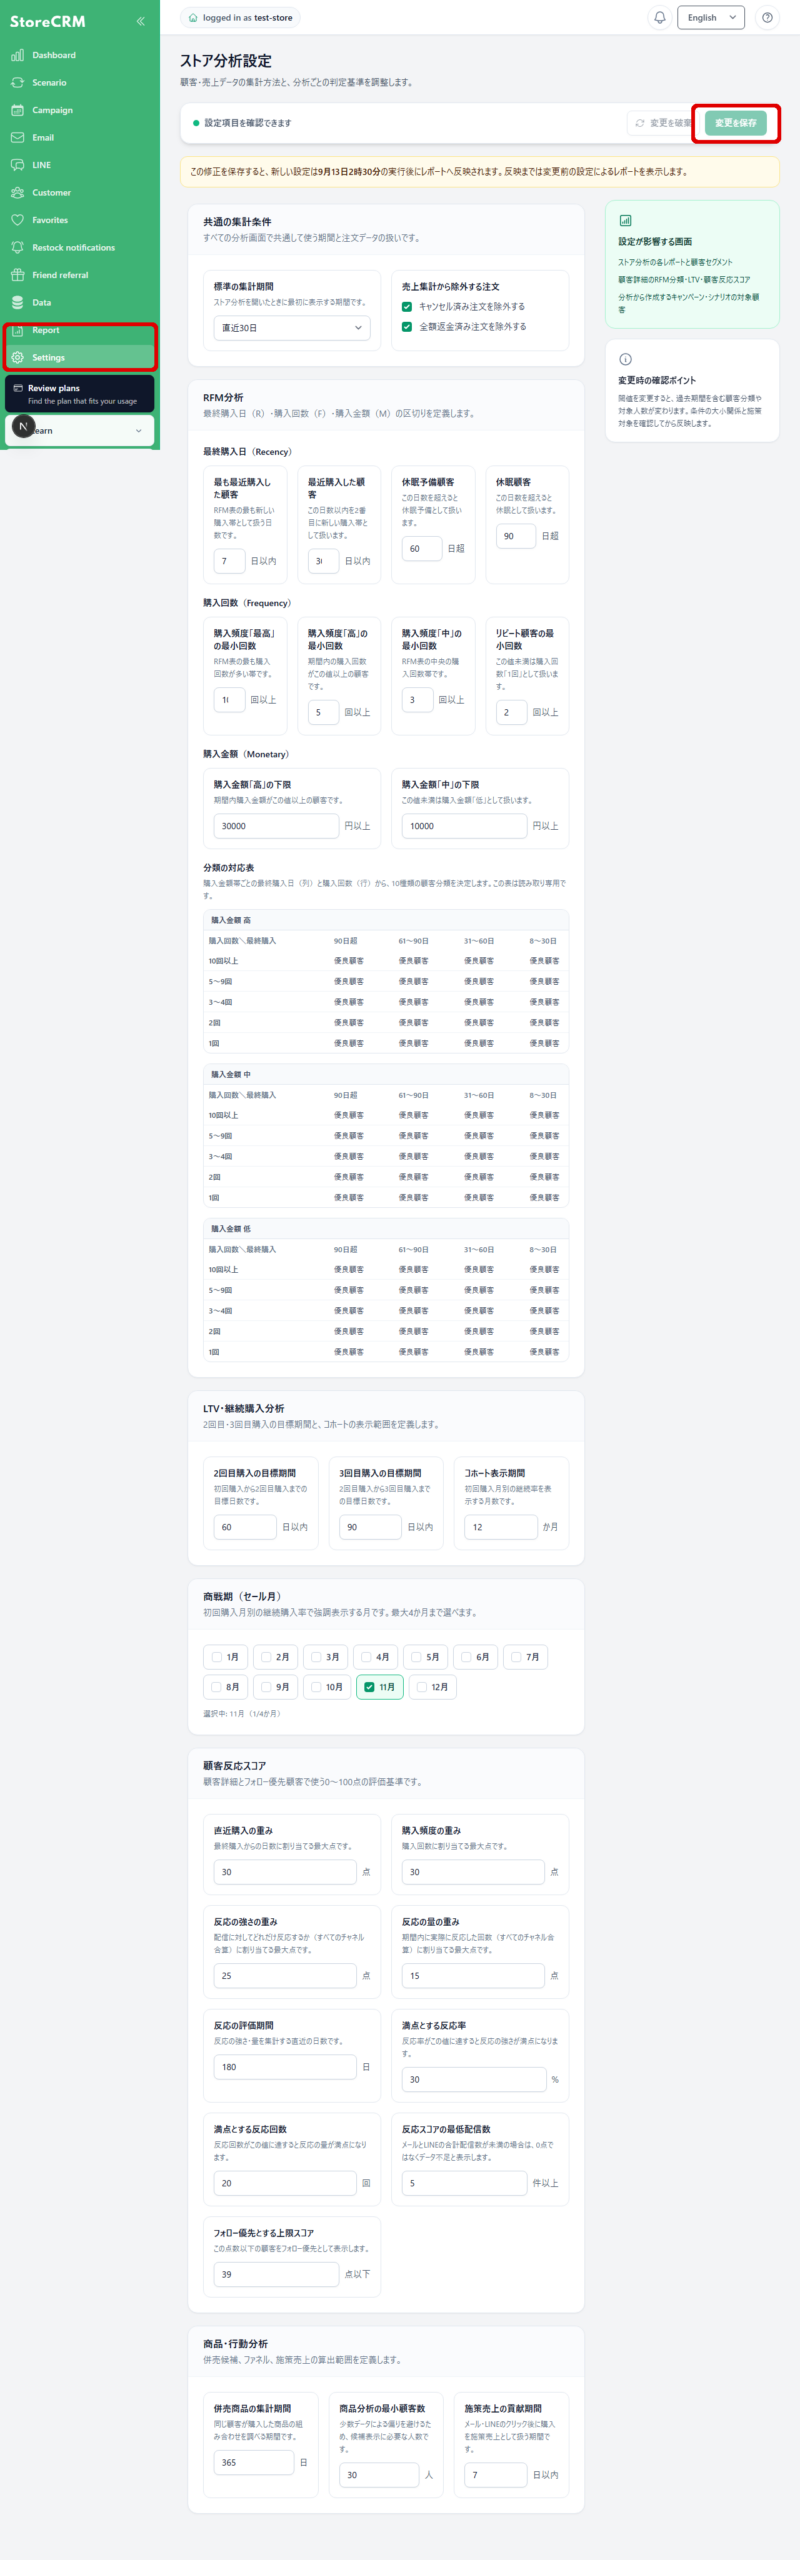
From Store Analytics settings in the upper-right corner, you can adjust the default period, order exclusions, RFM thresholds, LTV and second/third-purchase cohorts, sales seasons, customer engagement scores, and product and behavioral analysis periods. Saving creates a new settings version that takes effect on the next store calendar day. Settings cannot be edited or saved again while recalculation is in progress.
Check report statuses
| Status | What to check |
|---|---|
| Calculating | The initial calculation or a settings update is in progress. Wait for it to finish. |
| Insufficient history/sample | There is not enough order or behavioral history. Change the reporting period or wait for more data to accumulate. |
| Delayed update | Check the data update date and time on the screen. |
| Processing Limit | Try again with a narrower scope or timeframe. |
| Error | If it does not resolve after refreshing, contact us with the date and time displayed and the screen name. |
 English
  Japanese