

- What the LINE connection completed trigger does
- Prerequisites and trigger conditions
- Create a workflow that tags customers after LINE connection
- 1. Start a new Flow workflow
- 2. Open trigger selection for LINE connection completion
- 3. Choose StoreCRM as the trigger app
- 4. Choose the LINE connection completion event
- 5. Check the trigger configuration
- 6. Name the connection completion workflow
- 7. Add a step below the completion trigger
- 8. Choose an action for the next step
- 9. Select Shopify for customer tagging
- 10. Choose the action that adds customer tags
- 11. Enter the customer tag to add
- 12. Verify the customer, tag, and automatic save
- 13. Review the workflow before activation
- Check results after activation
What the LINE connection completed trigger does
When a customer establishes a LINE connection through StoreCRM’s normal connection or LINE login, a Shopify Flow workflow can start subsequent actions. This example adds a LINE-connected tag to the linked Shopify customer.
Prerequisites and trigger conditions
Install StoreCRM and Shopify Flow in the same Shopify store and complete StoreCRM and LINE setup. The customer must be identified as a Shopify customer and establish a LINE connection.
The trigger covers first-time connections and connections established again, such as after removal. Logging in again while the same LINE account remains connected does not start it again. This is not a bulk replay of existing customers’ past connections, and adding the official account as a friend alone is a different event.
Do not treat CSV imports, the CRM PLUS add or restore action, or synchronization of connection data as equivalent to this trigger’s reward processing. Because a new connection can trigger it again, workflows that award points or coupons need duplicate-award controls appropriate to the store’s rules.
The images show inactive drafts in verification store 2. StoreCRM’s trigger name and description include fixed Japanese text even in the English interface.
Create a workflow that tags customers after LINE connection
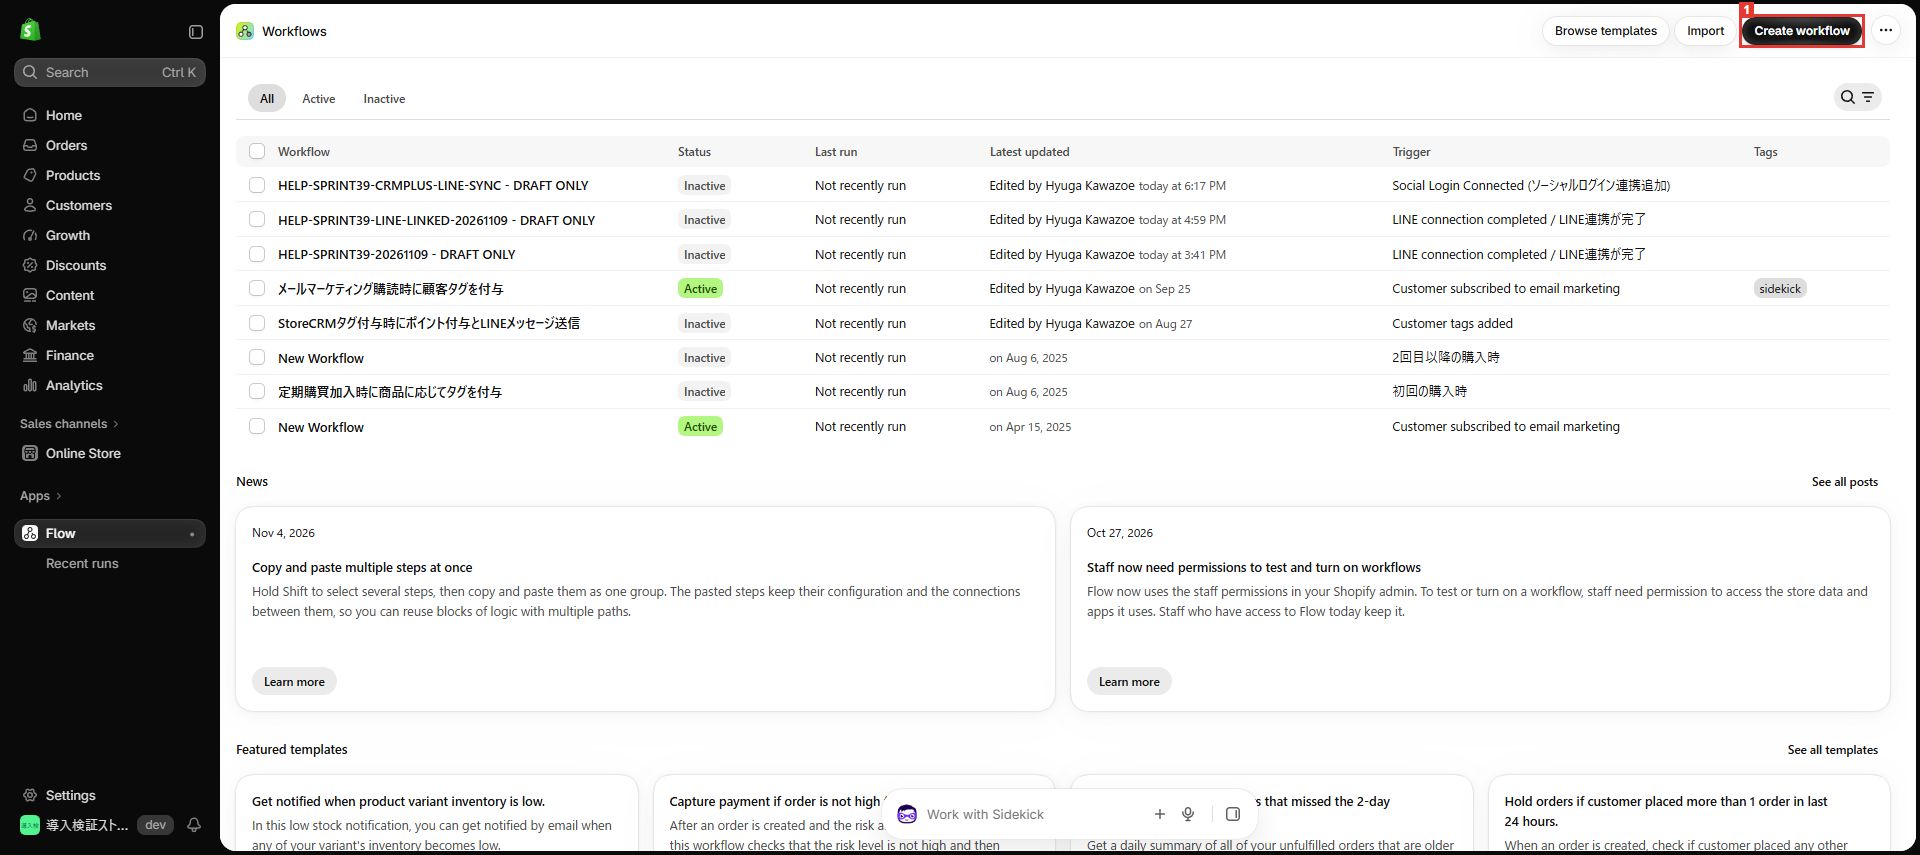
1. Start a new Flow workflow
Location: Shopify admin → Apps → Flow
Select ① Create workflow.
Check: The creation screen opens.
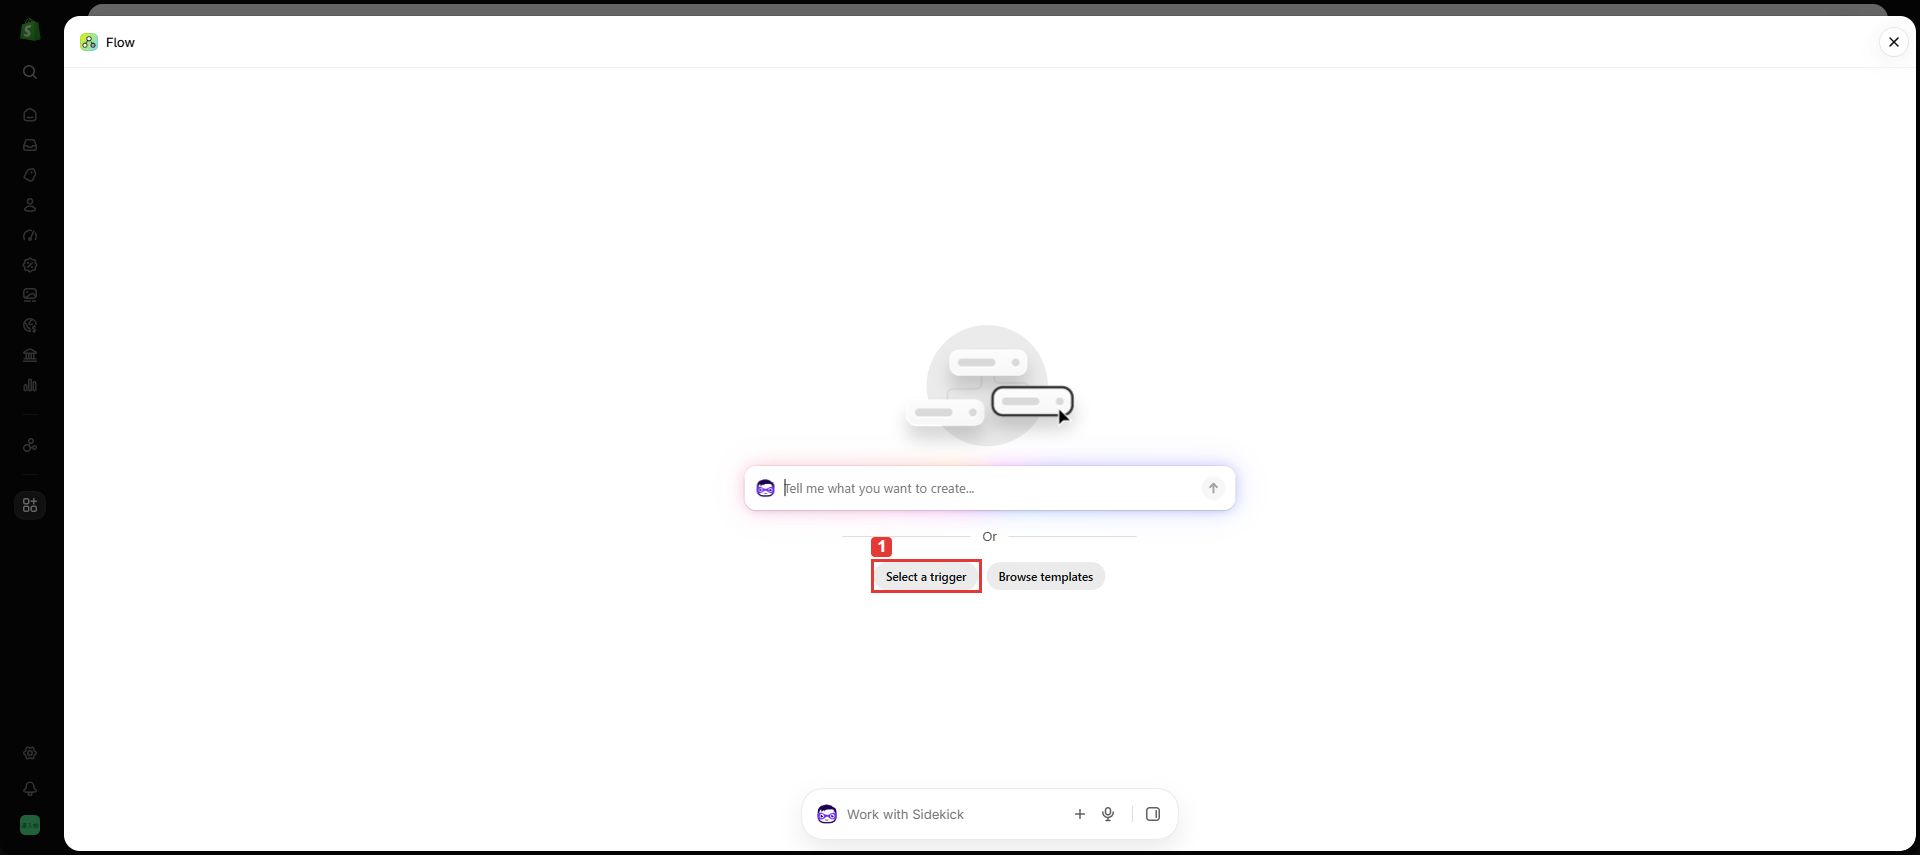
2. Open trigger selection for LINE connection completion
Location: The new workflow creation screen
Select ① Select a trigger.
Check: You can choose an installed app.
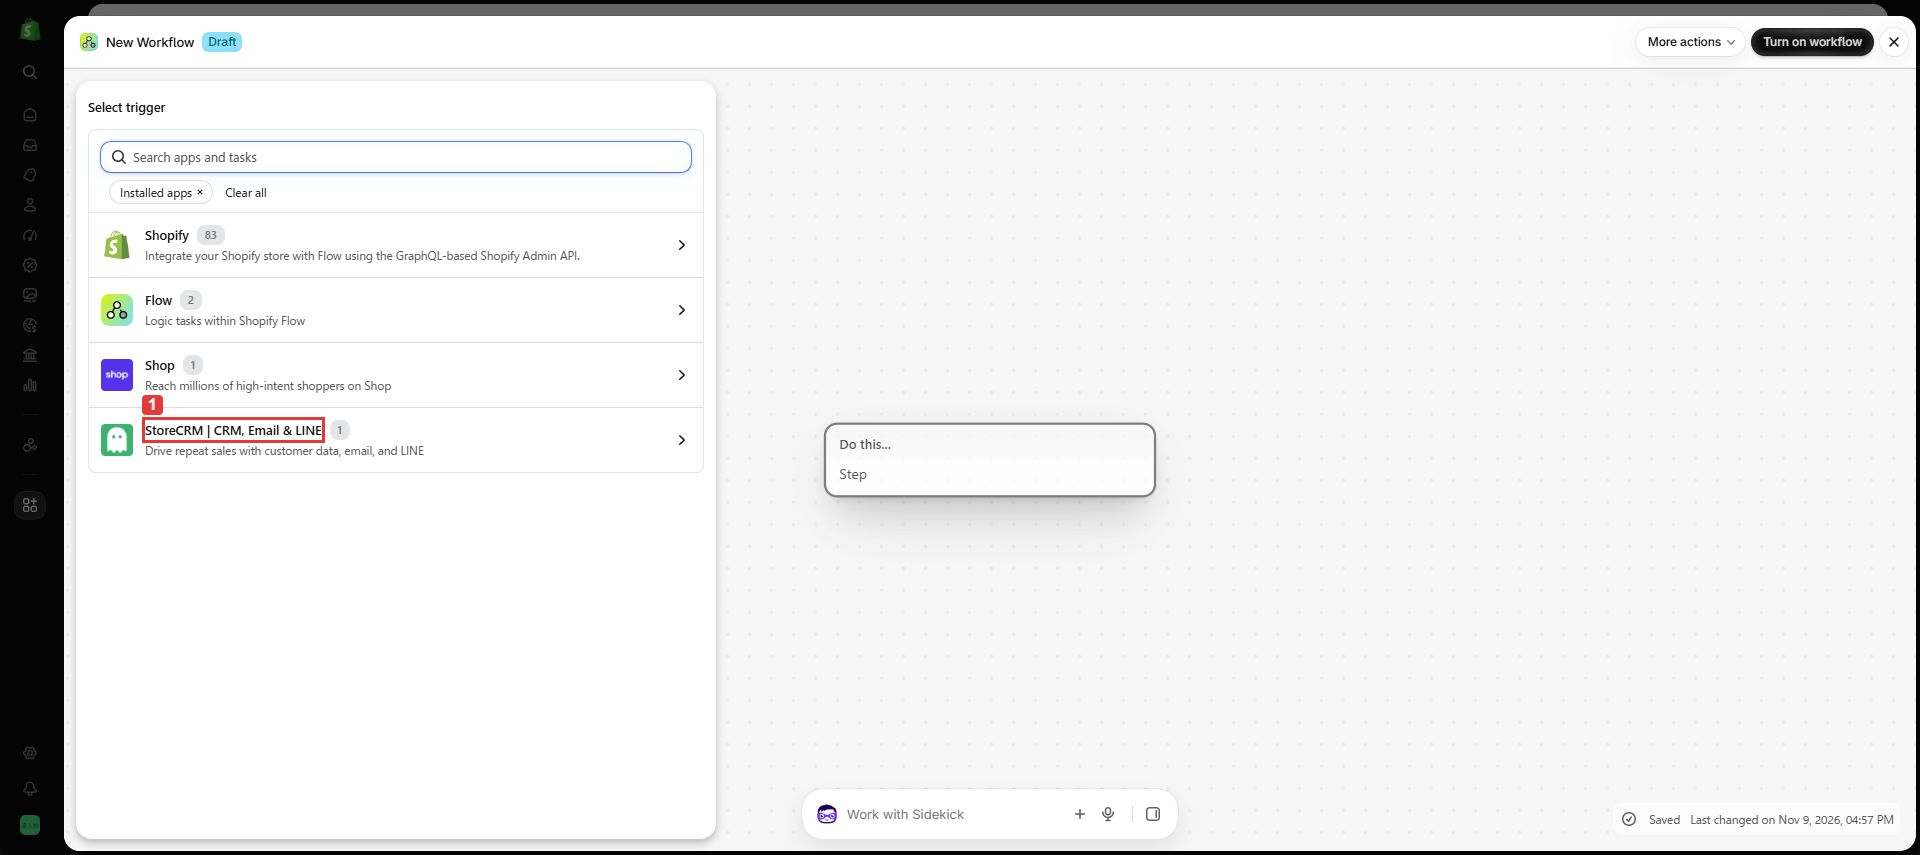
3. Choose StoreCRM as the trigger app
Location: The app list for the LINE connection completion trigger
Select ① StoreCRM | CRM, Email & LINE.
Check: StoreCRM trigger events appear.
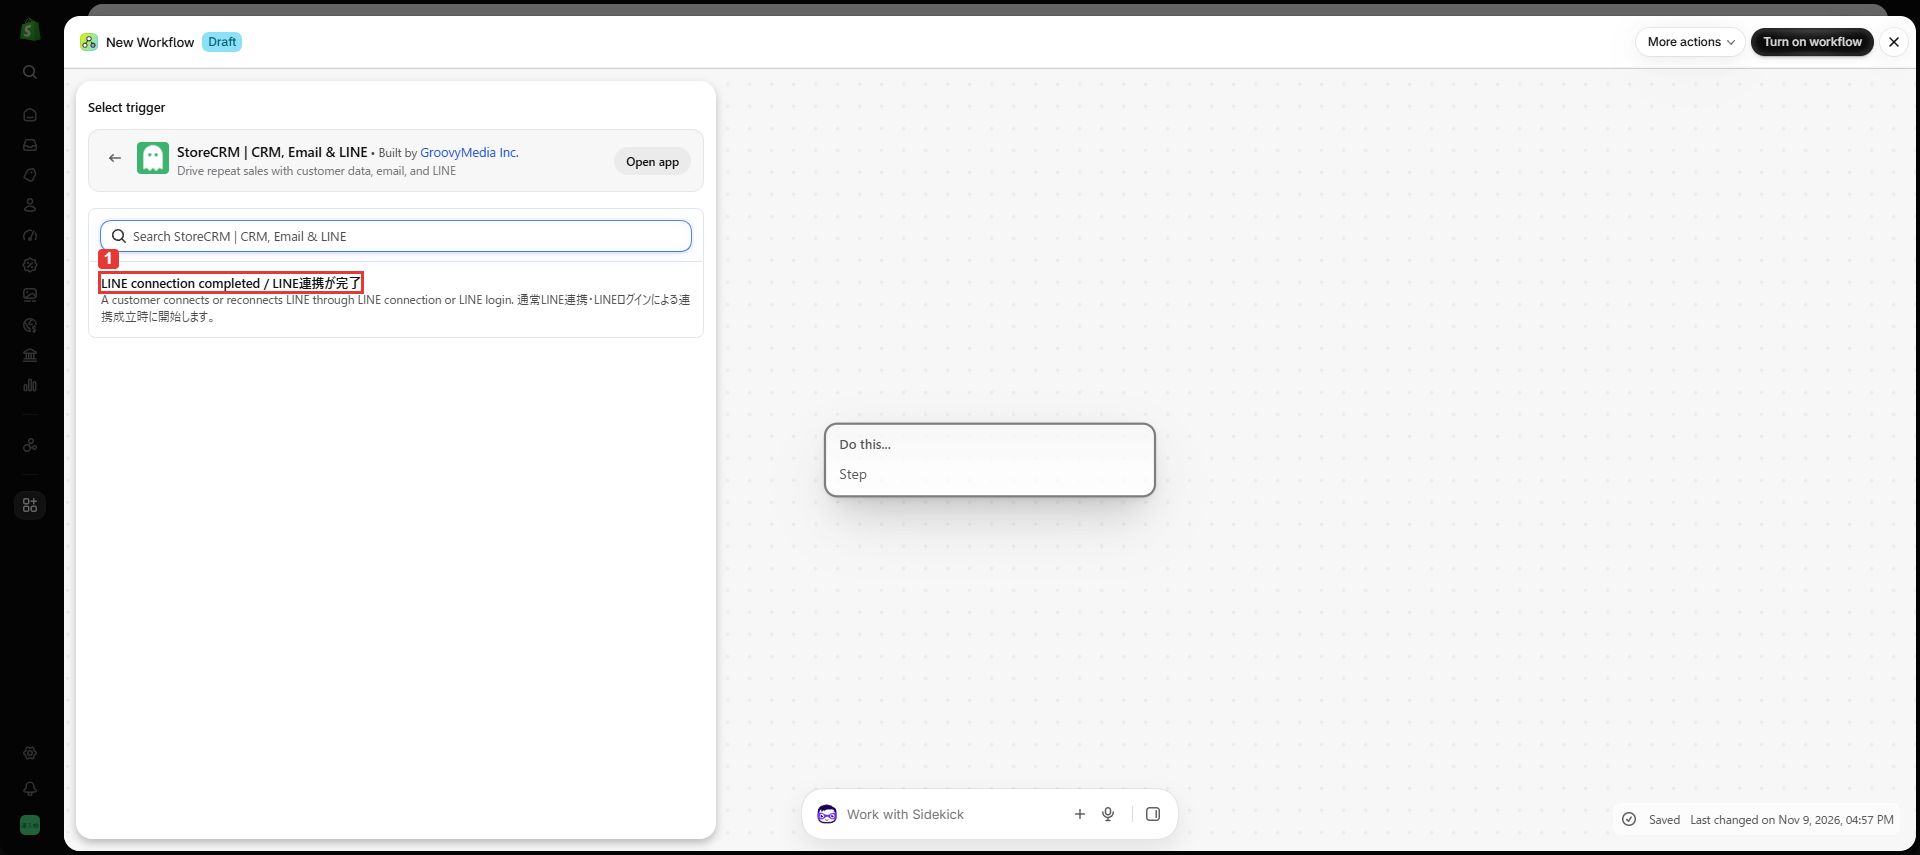
4. Choose the LINE connection completion event
Location: The StoreCRM trigger list
Select ① LINE connection completed / LINE連携が完了.
Check: This event becomes the workflow trigger.
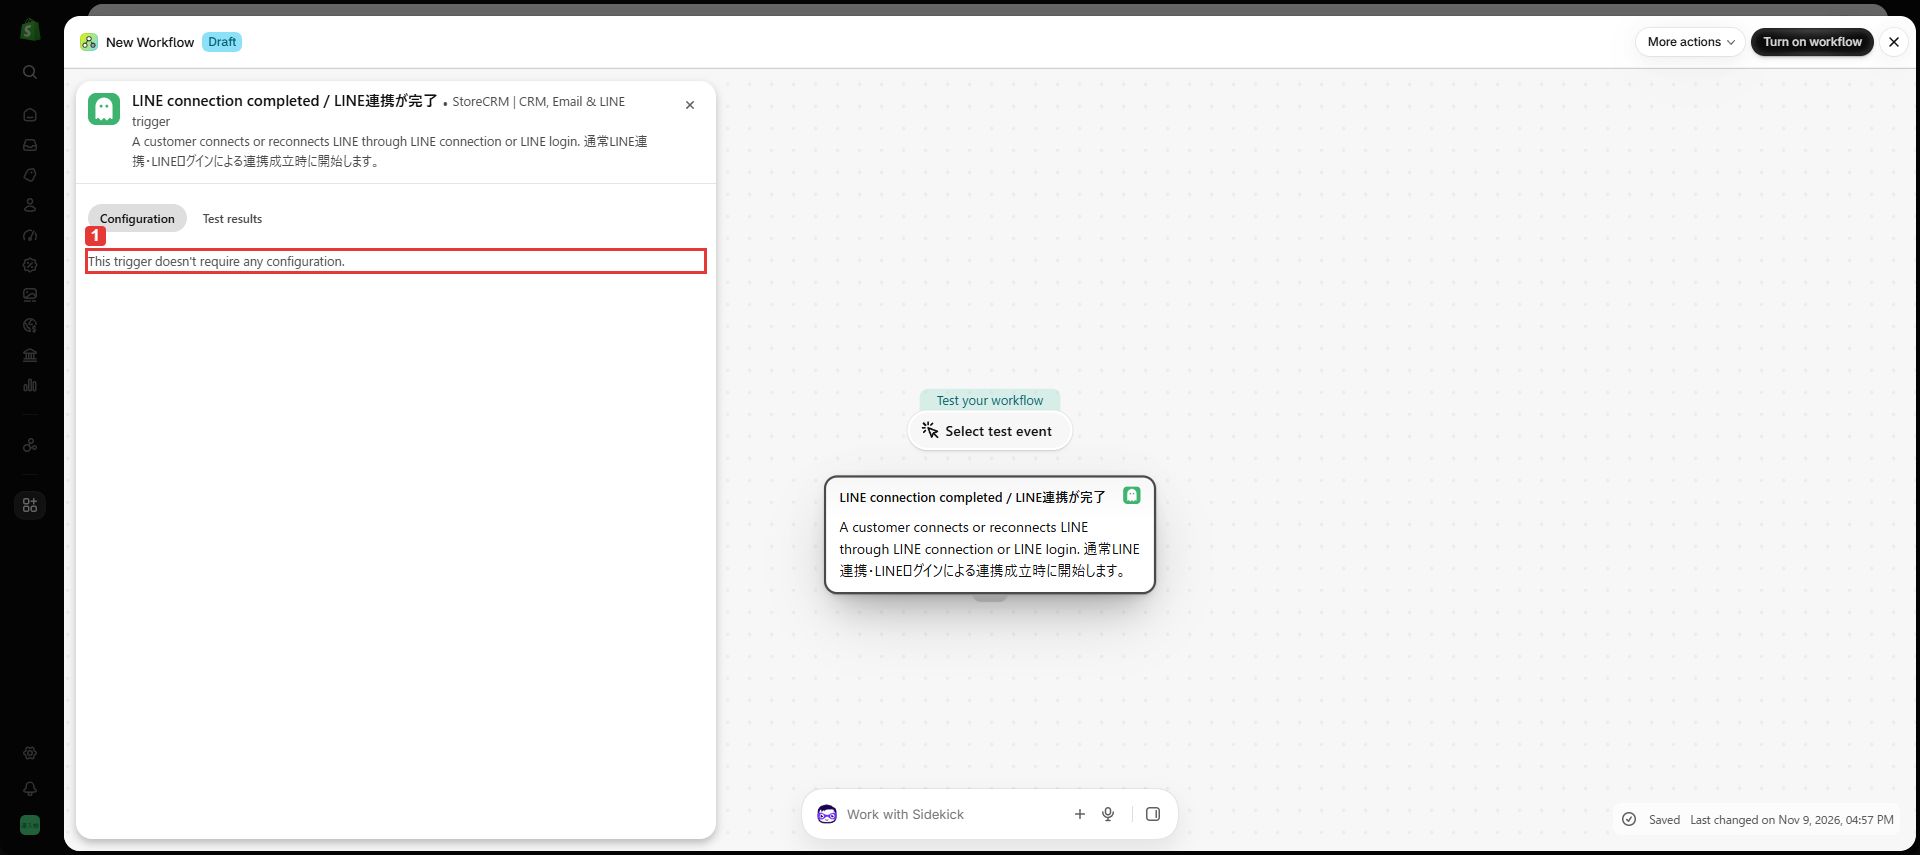
5. Check the trigger configuration
Location: The trigger configuration panel
Check ① This trigger doesn’t require any configuration. You do not enter a LINE ID manually.
Check: The customer is available to subsequent actions.
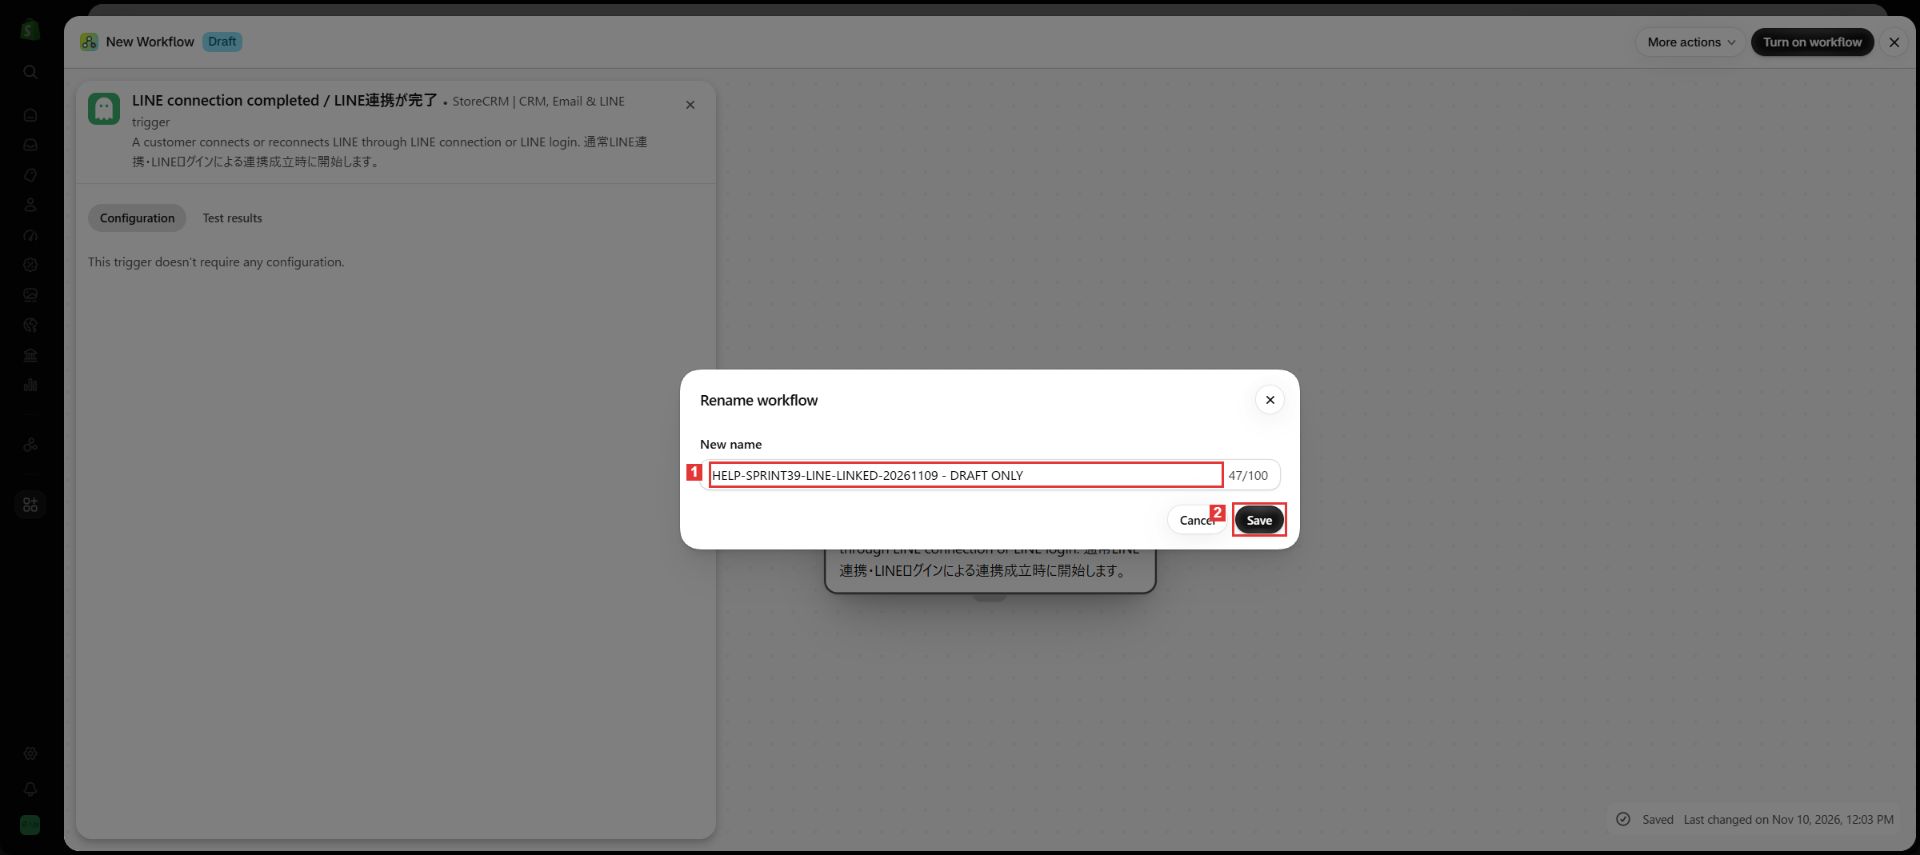
6. Name the connection completion workflow
Location: More actions → Rename at the top
Enter ① an internal name, then select ② Save.
Check: The title updates after saving. DRAFT ONLY is part of the documentation example name.
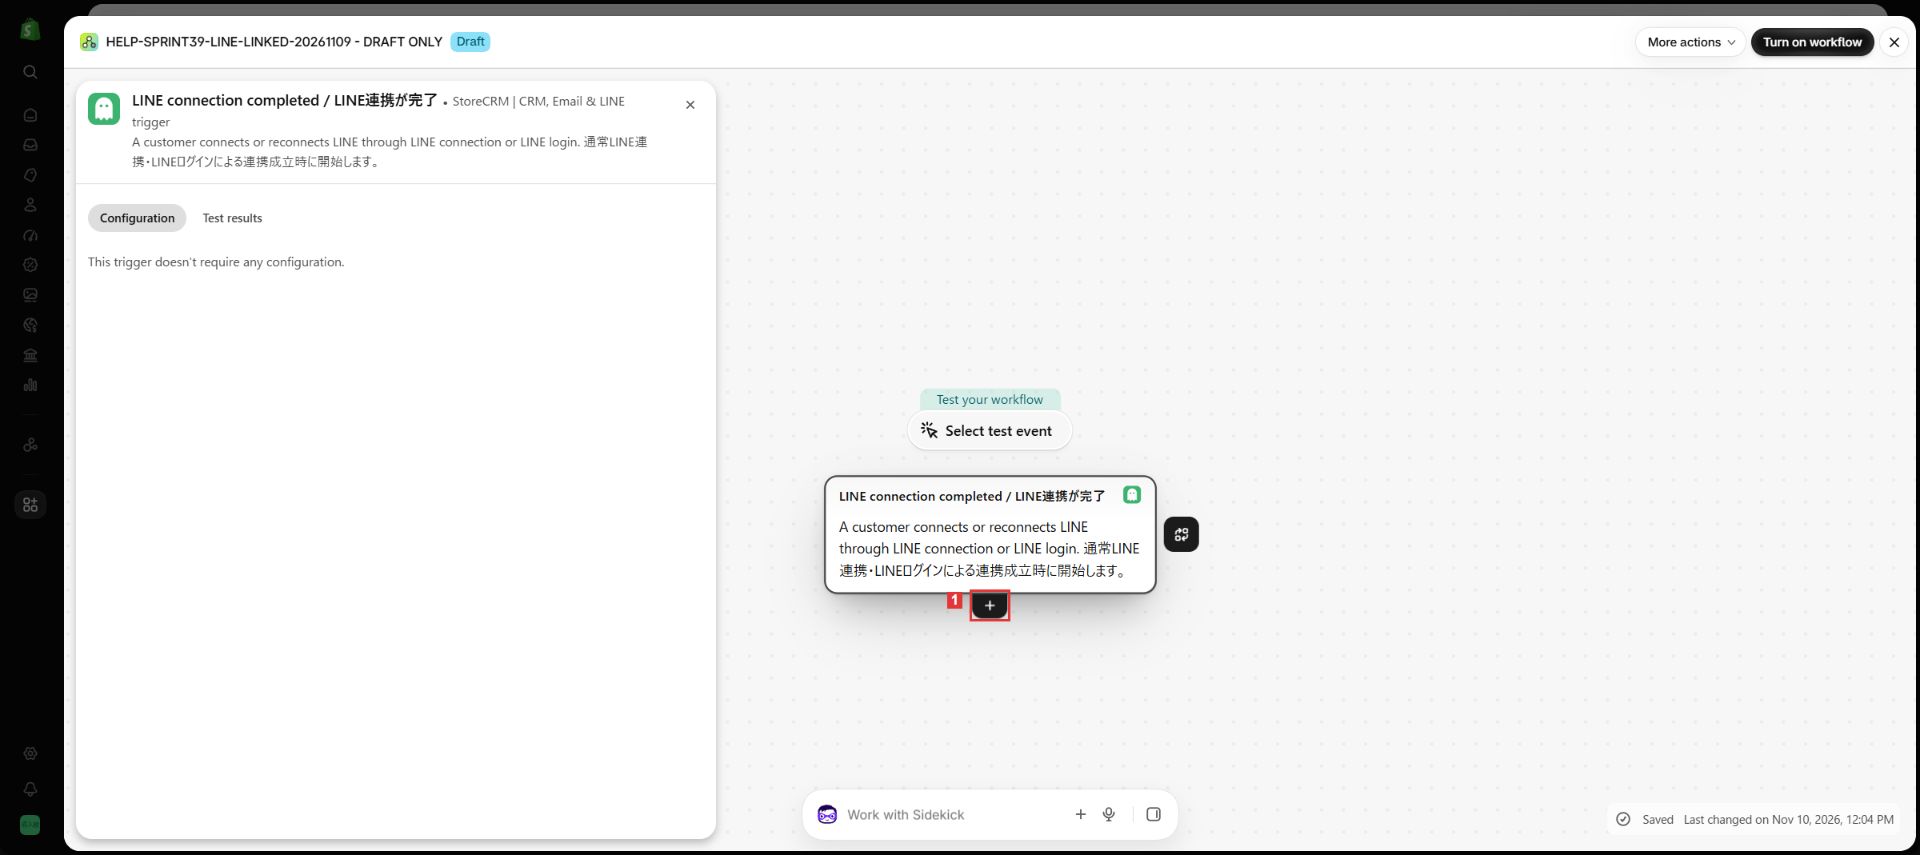
7. Add a step below the completion trigger
Location: Below the trigger on the canvas
Select the trigger and open ① the + below it.
Check: The action and condition menu appears.
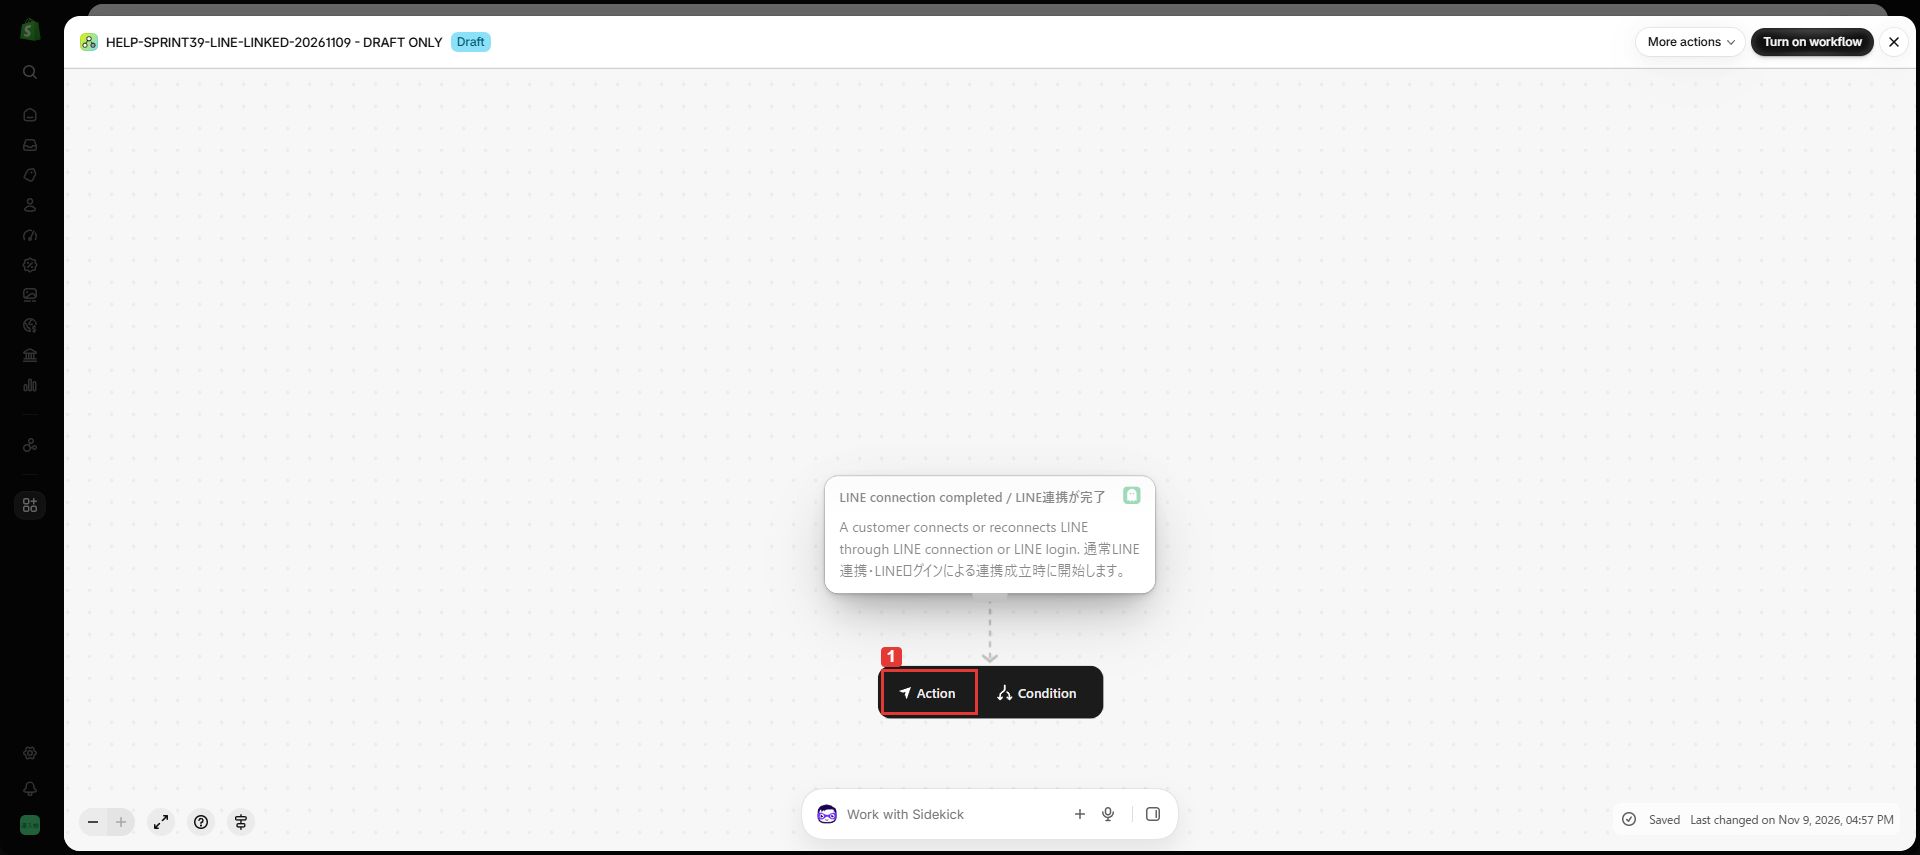
8. Choose an action for the next step
Location: The menu opened from +
Select ① Action.
Check: The action app list opens.
9. Select Shopify for customer tagging
Location: The action app list
Select ① Shopify.
Check: Shopify actions appear.
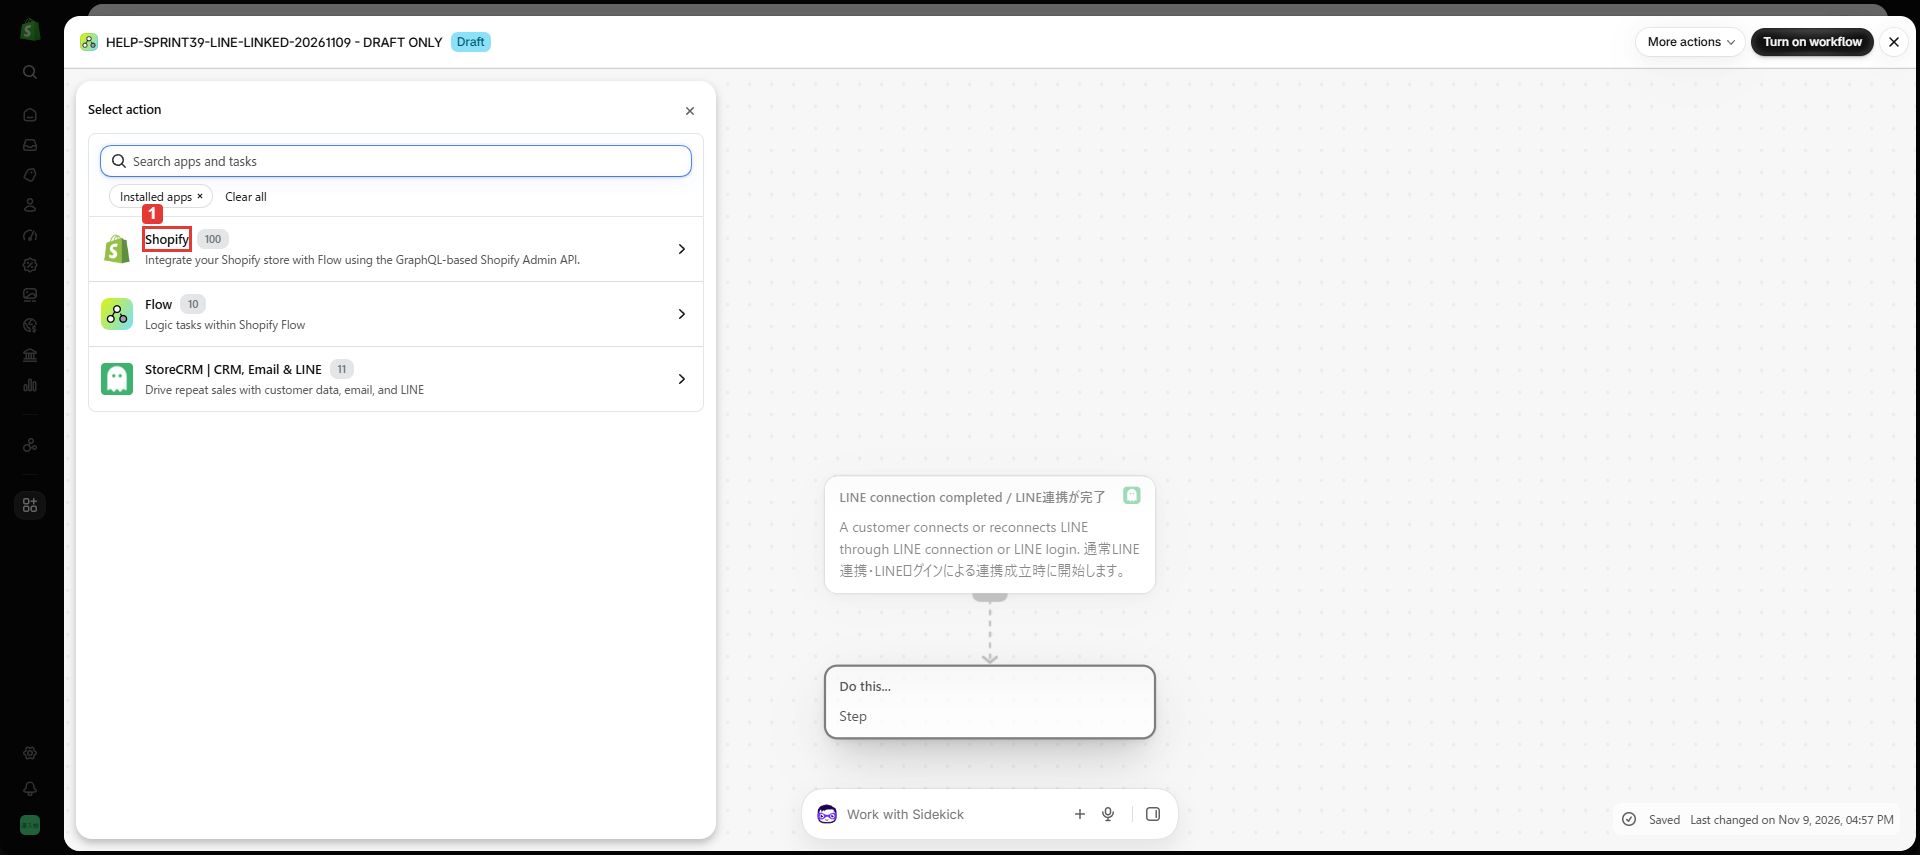
10. Choose the action that adds customer tags
Location: The Shopify action list
Choose Add customer tags. If needed, search for that action name.
Check: The customer and Tags configuration opens.
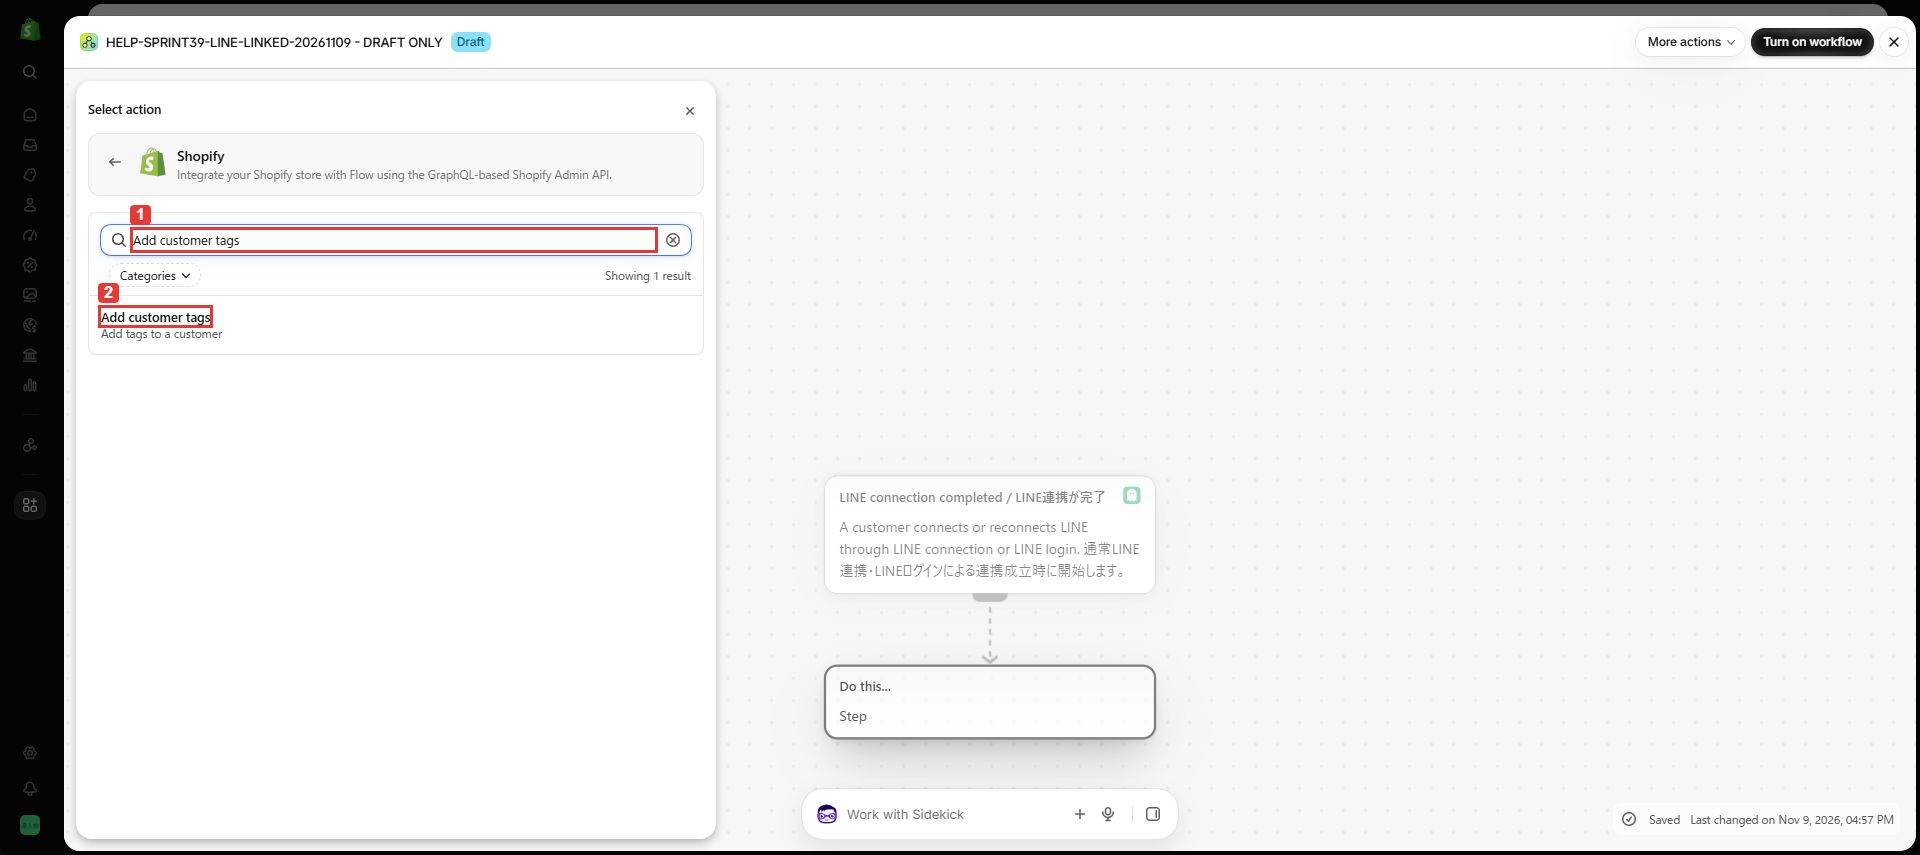
11. Enter the customer tag to add
Location: Tags under Add customer tags
Enter LINE-connected in ① Tags and select the suggestion. Check ② the tag below the input. You can use a tag suitable for your workflow.
Check: Verify the tag is selected, rather than merely typed in the input.
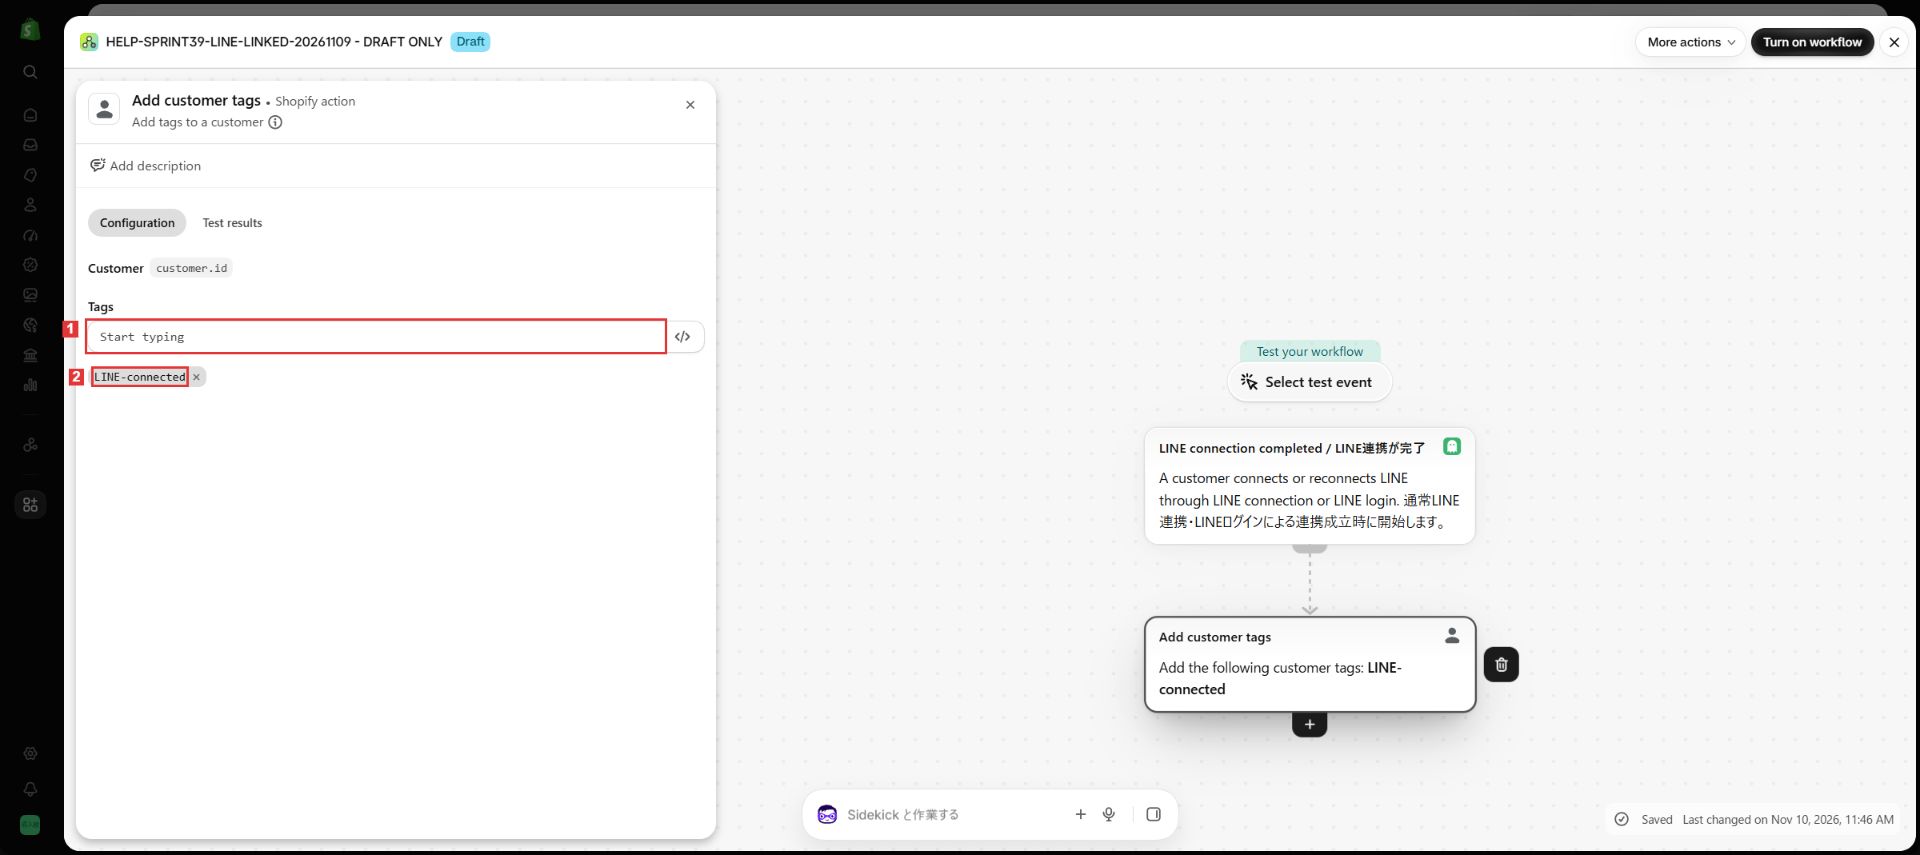
12. Verify the customer, tag, and automatic save
Location: The action configuration and lower-right save status
Verify ① Customer is customer.id, ② the tag is LINE-connected, and ③ the status is Saved.
Check: Do not treat Saving or an error as a completed save. Saving the draft alone does not change customer tags.
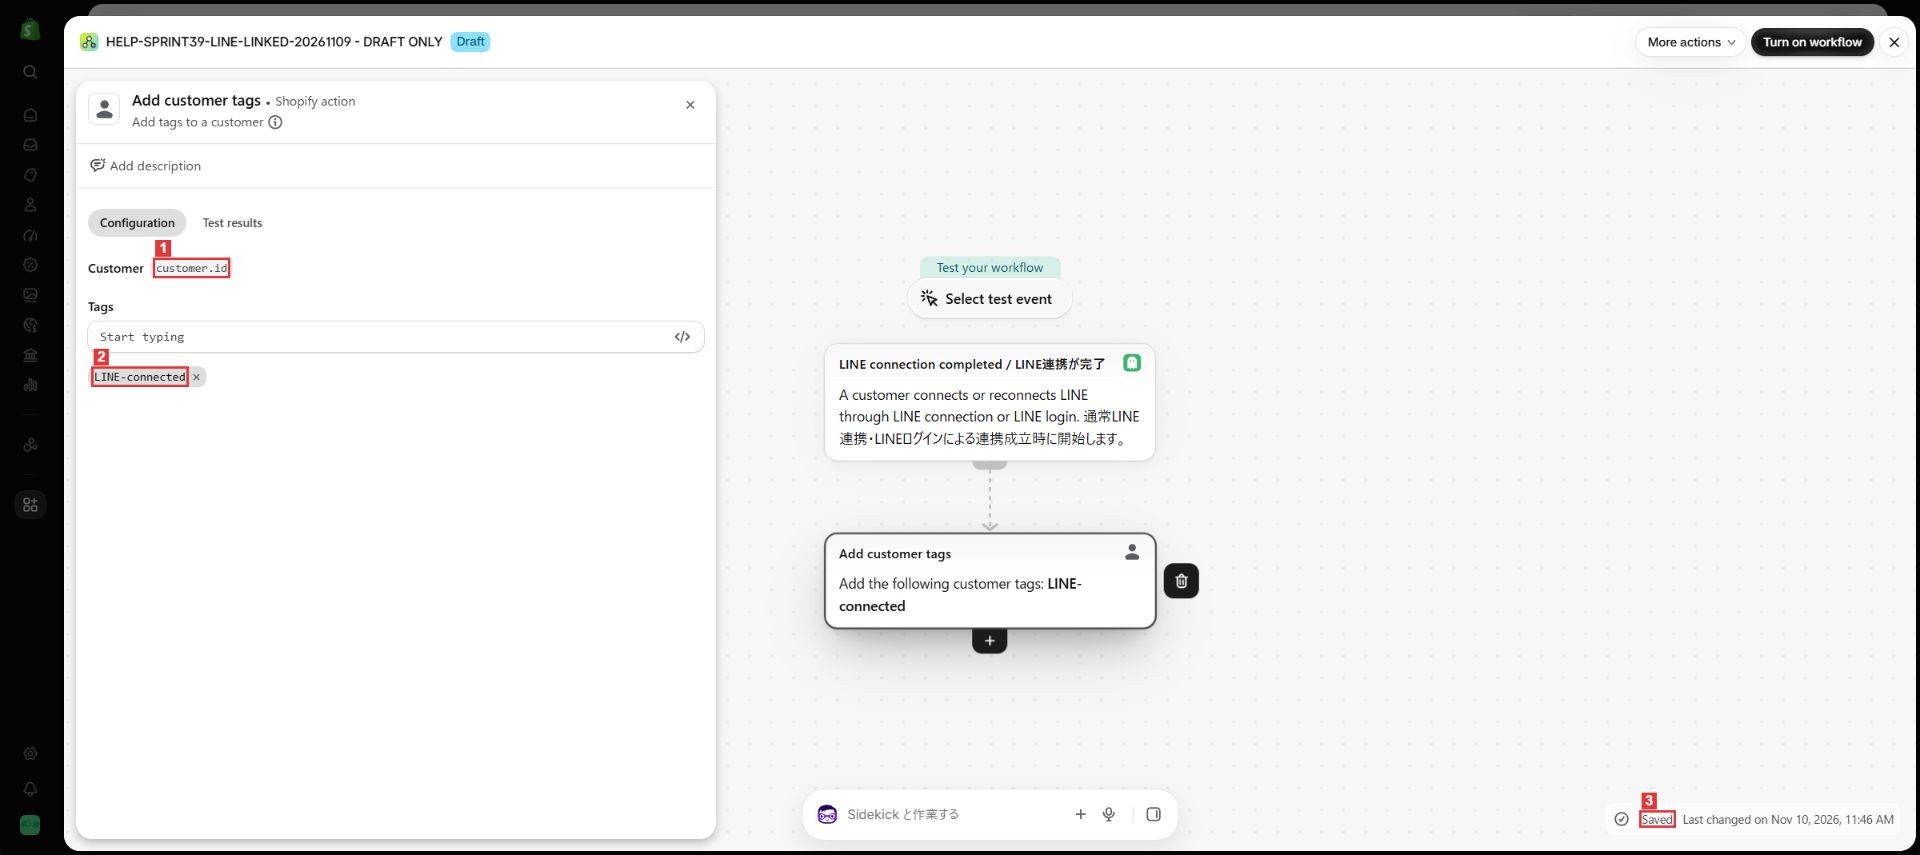
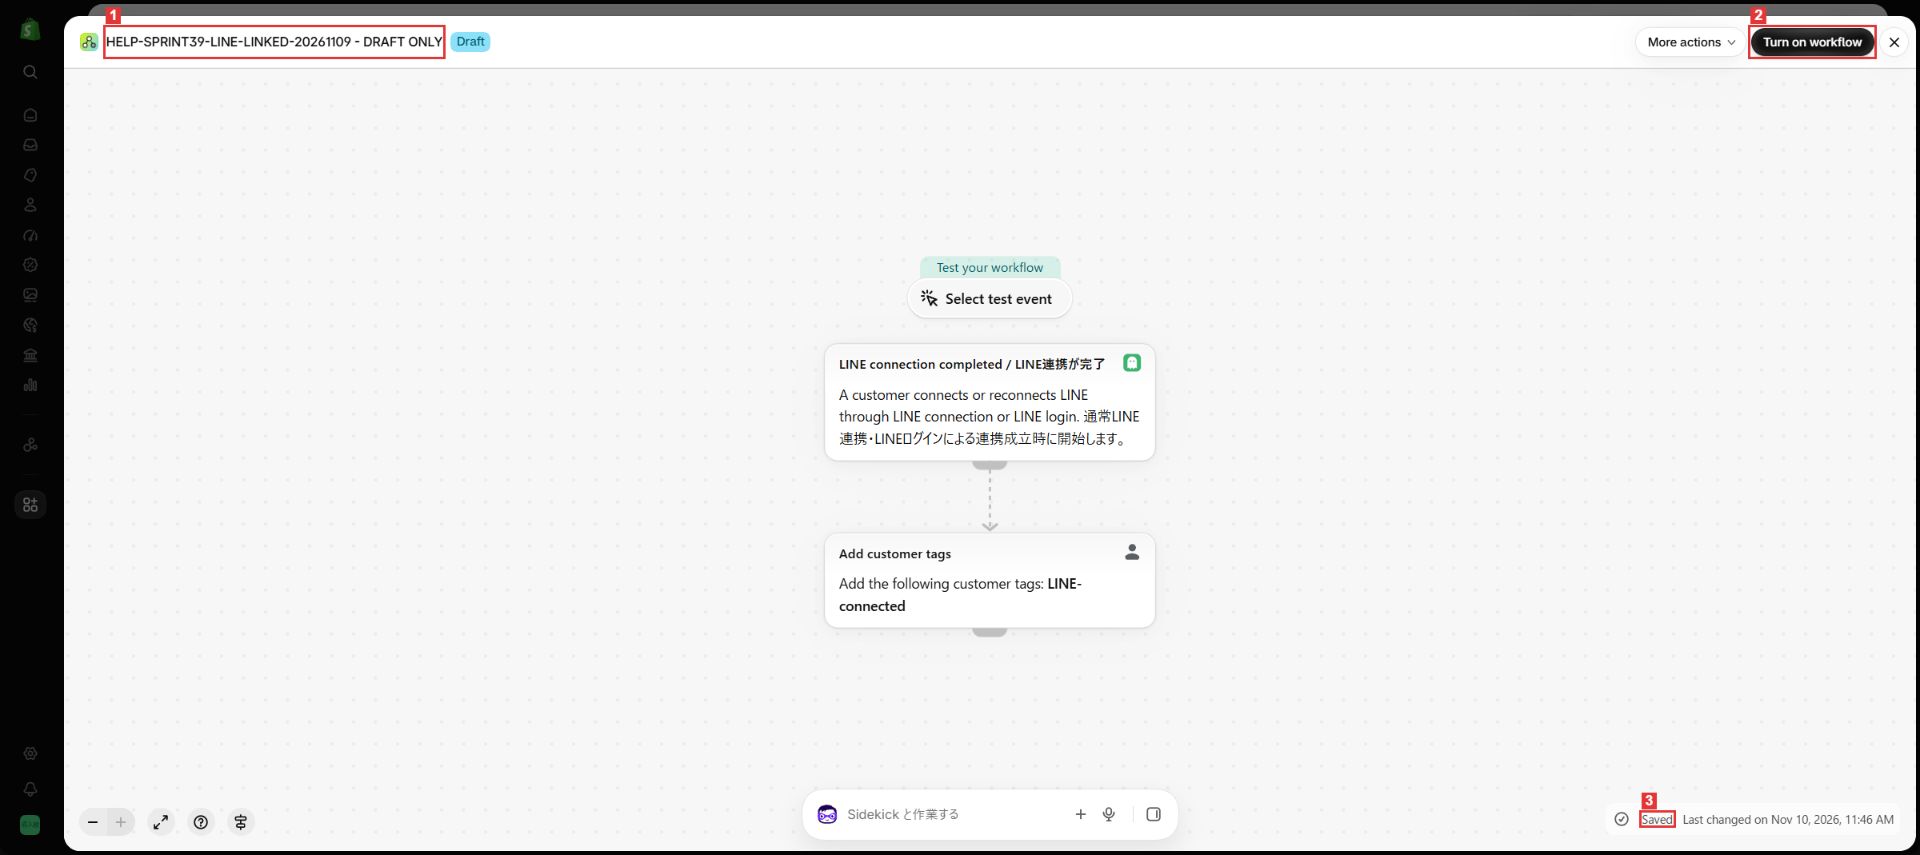
13. Review the workflow before activation
Location: The complete workflow
Review ① the title, completion trigger, tagging action, and ③ Saved. When you intend to apply it, review its effects and use ② Turn on workflow.
Check: The screenshots show an inactive draft. Workflow activation and customer actions were not performed for the documentation.
Check results after activation
After starting operation, review the workflow’s run history in Shopify Flow for the customer and action outcomes. For this example, also check the tag in the Shopify customer details. Acceptance of a trigger notification and completion of its actions are separate results.
If the outcome is uncertain, compare Flow runs with point, coupon, or other award history before rerunning reward actions. Provide the connection time and customer when contacting support.
Information available to subsequent actions
The trigger supplies Customer (Shopify customer), Event ID (connection event identifier), Linked At (connection time in Japan Standard Time), and Connection Route (line_connect or line_login). Event ID can identify processing of the same event; a once-per-customer lifetime reward needs an additional customer-level rule across separate reconnections.
For connection setup, see LINE initial setup. For the separate CRM PLUS event synchronization setup, follow Add or restore LINE connections from CRM PLUS.
 English
 Japanese