

- What the CRM PLUS integration does
- Before you start
- Create the connection workflow
- 1. Create a workflow
- 2. Open trigger selection
- 3. Select CRM PLUS on LINE
- 4. Select the connection event
- 5. Name and save the workflow
- 6. Add a condition
- 7. Add a condition variable
- 8. Select provider
- 9. Restrict the condition to LINE
- 10. Add an action to the True branch
- 11. Select StoreCRM
- 12. Select the add or restore action
- 13. Check the customer and Provider input
- 14. Insert the event’s provider
- 15. Verify the fields and automatic save
- 16. Review the saved workflow
- Results, waiting, and errors
What the CRM PLUS integration does
When a customer adds a LINE connection through CRM PLUS on LINE, Shopify Flow can add or restore the corresponding connection in StoreCRM. This setup passes CRM PLUS connection events to StoreCRM and is separate from the normal StoreCRM linking procedure.
Before you start
Install Shopify Flow, StoreCRM, and CRM PLUS on LINE in the same store, and complete each app’s setup and LINE configuration. The customer must be synchronized to StoreCRM, and CRM PLUS must store a valid LINE ID in the Shopify customer’s socialplus.line metafield. You do not enter a LINE ID directly in the action fields.
The screenshots show inactive drafts in a verification store. DRAFT ONLY is part of the example name. Even in the English interface, CRM PLUS trigger labels and descriptions and StoreCRM action labels and descriptions include fixed Japanese text.
Create the connection workflow
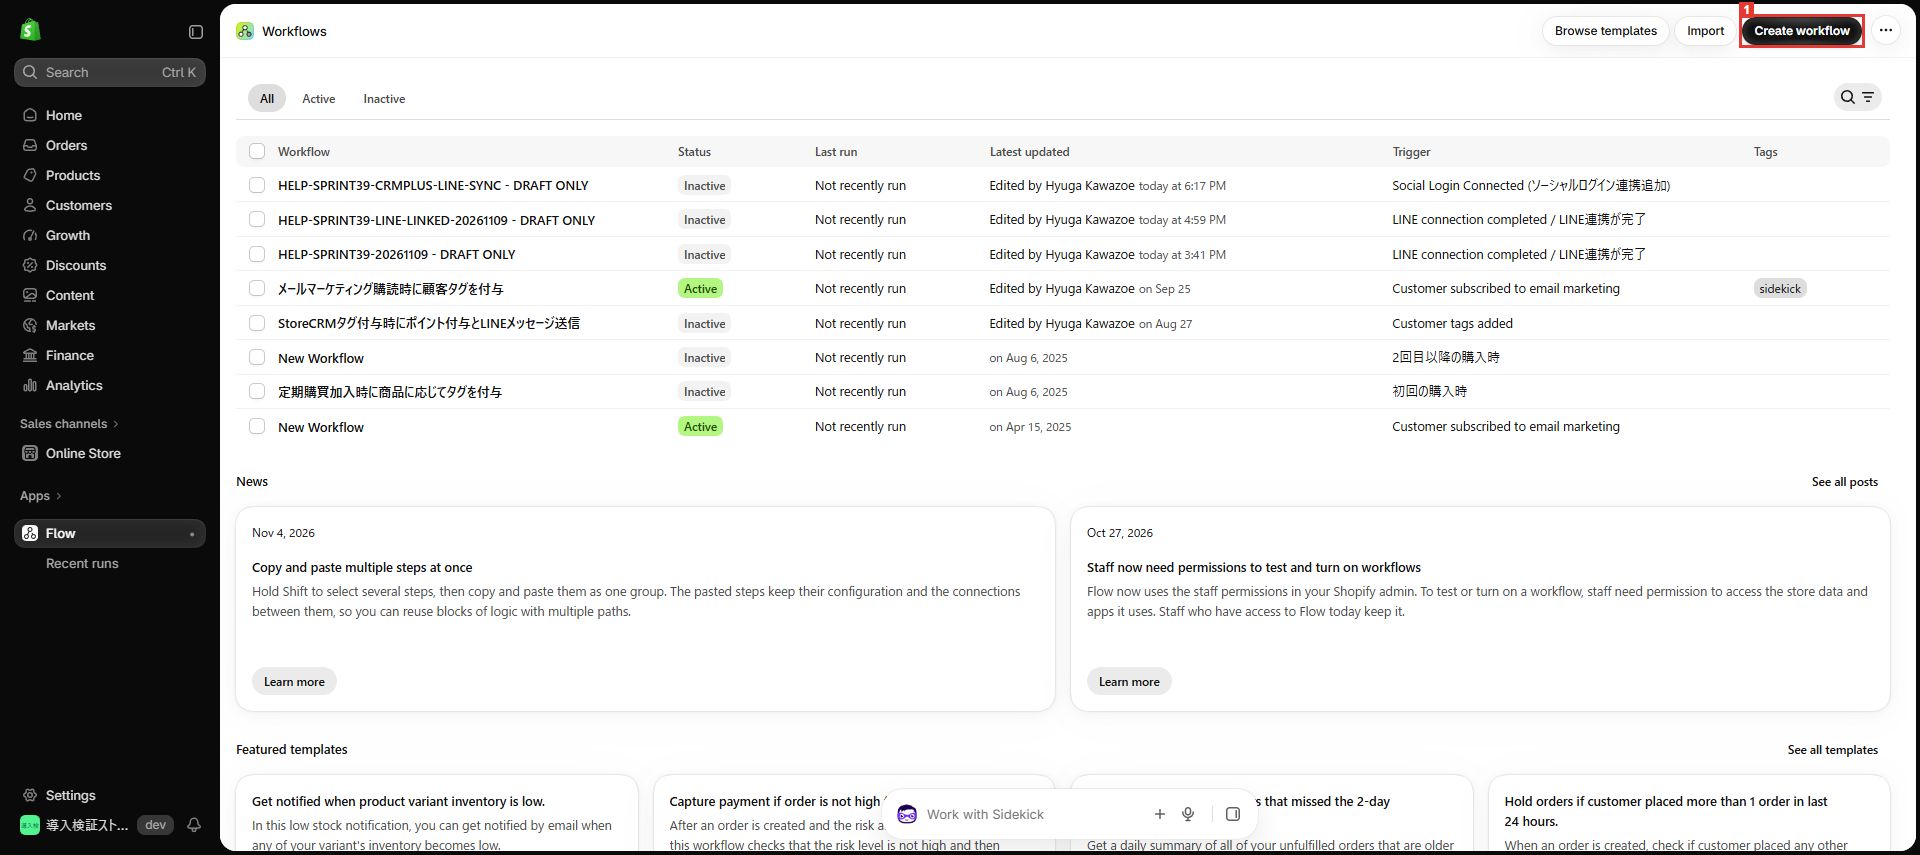
1. Create a workflow
Location: Shopify admin → Apps → Flow workflow list
Select ① Create workflow.
Check: The new workflow screen opens.
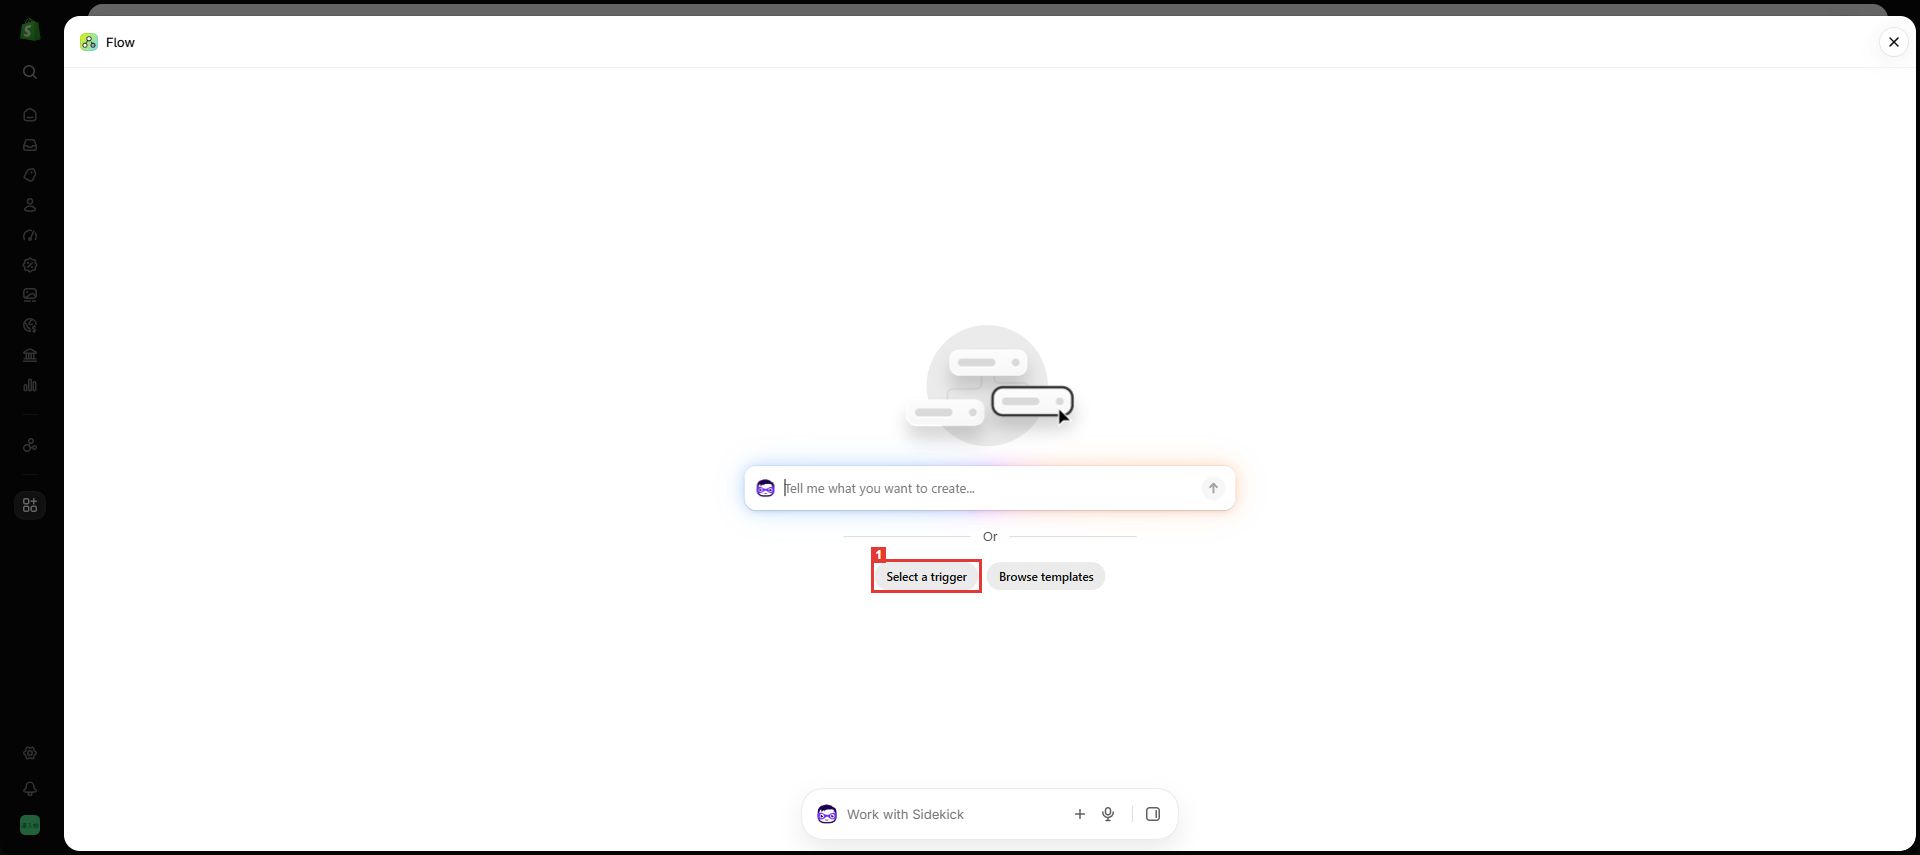
2. Open trigger selection
Location: The new workflow screen
Select ① Select a trigger.
Check: The trigger list for installed apps opens.
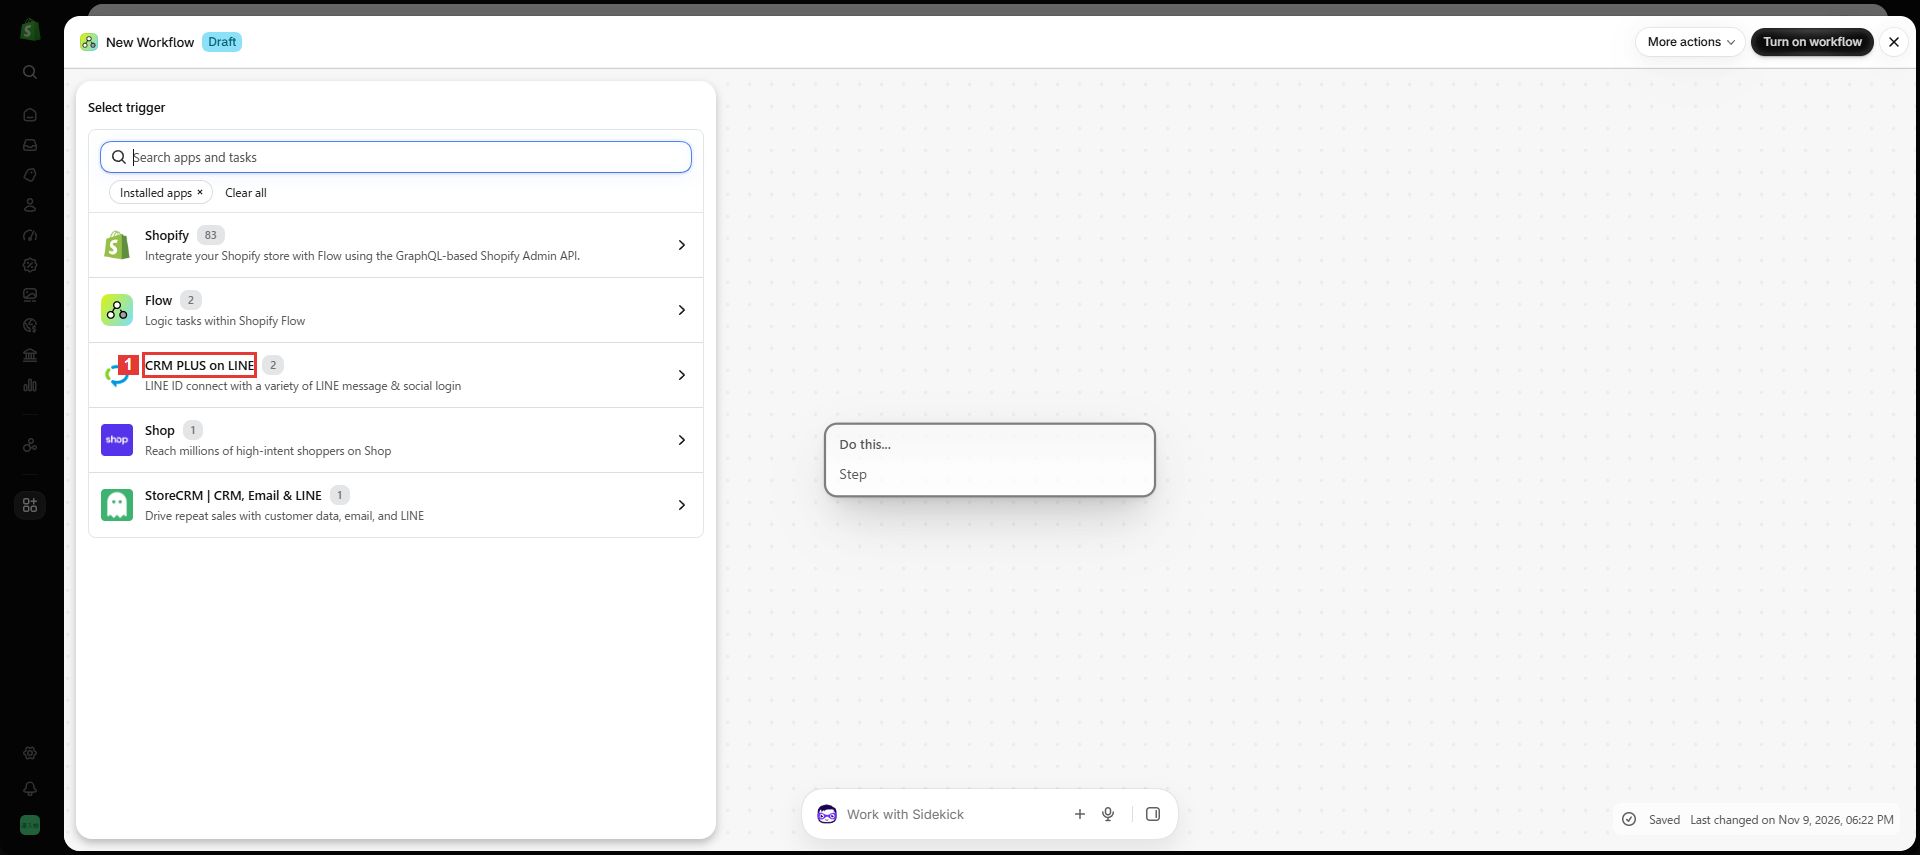
3. Select CRM PLUS on LINE
Location: The trigger list
Select ① CRM PLUS on LINE.
Check: CRM PLUS triggers appear.
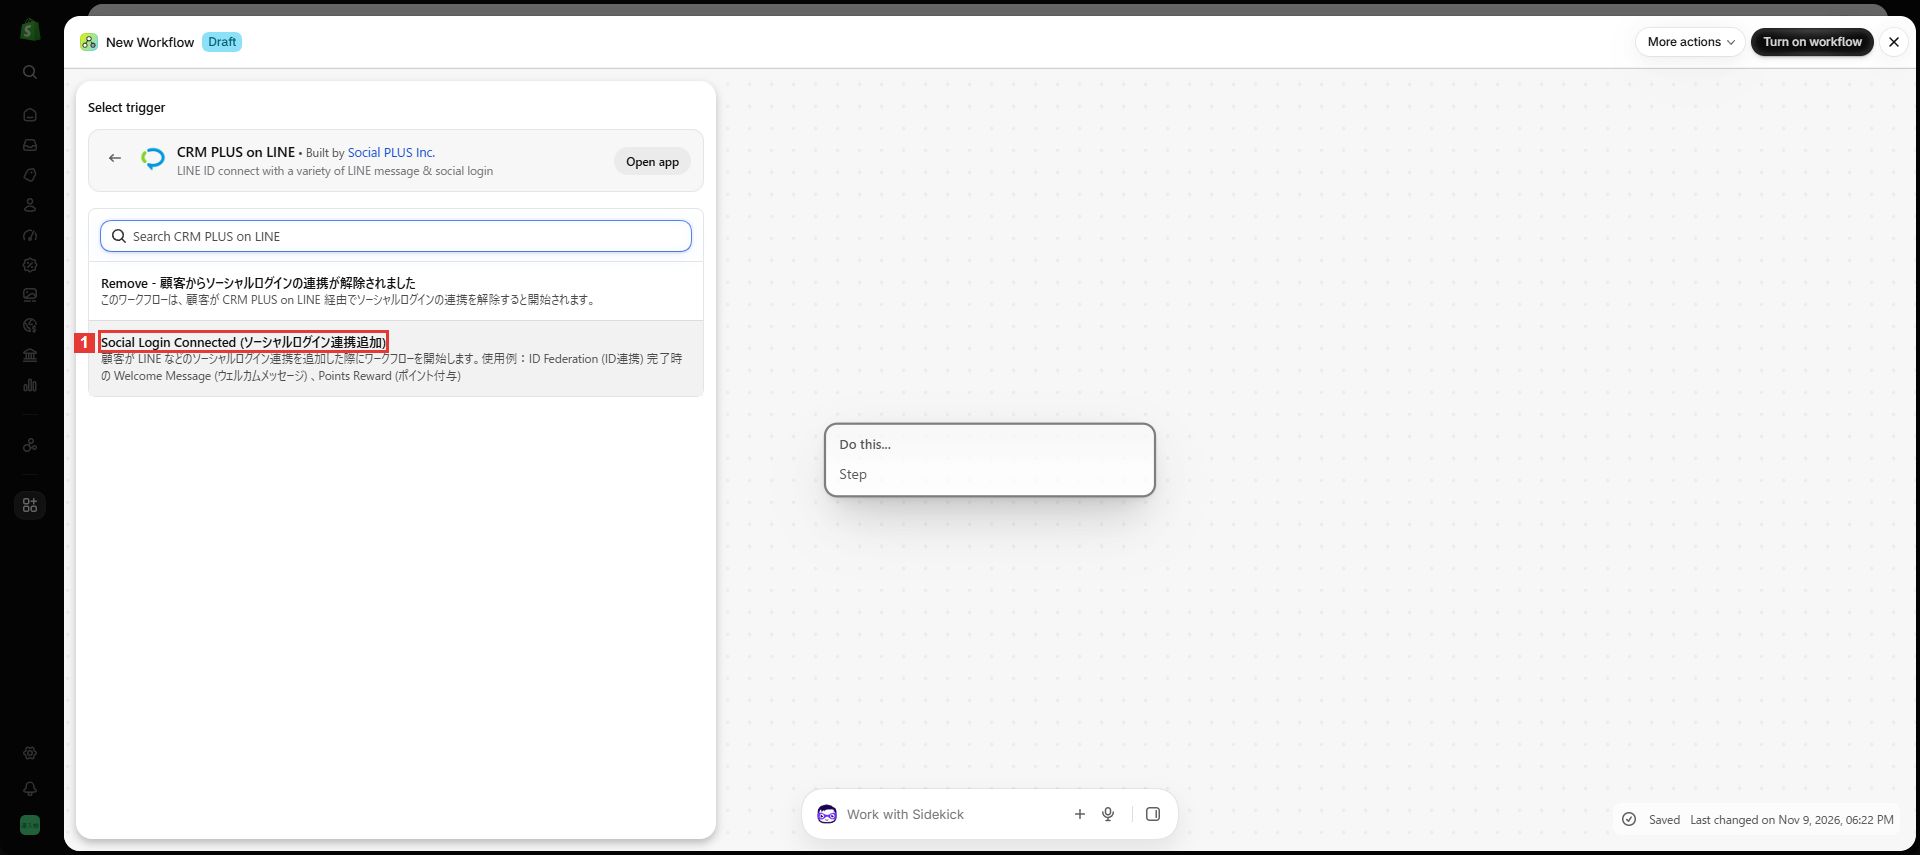
4. Select the connection event
Location: The CRM PLUS trigger list
Select ① Social Login Connected (ソーシャルログイン連携追加). This is separate from the removal event.
Check: This event becomes the workflow trigger.
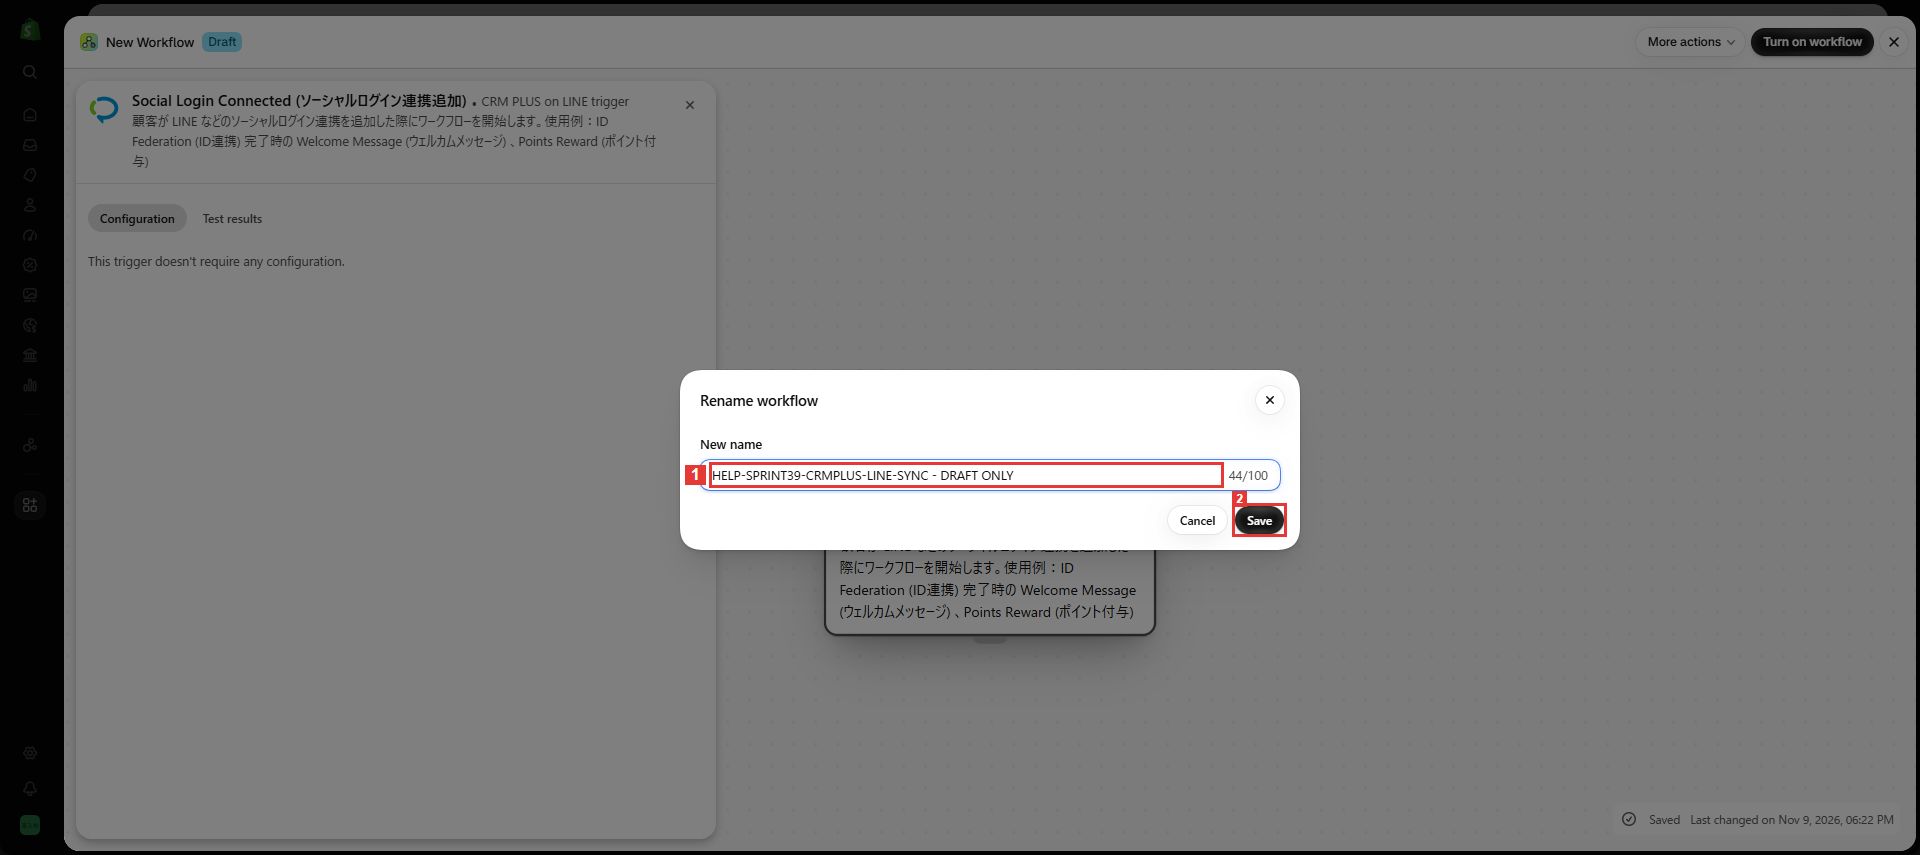
5. Name and save the workflow
Location: More actions → Rename at the top
Enter ① the new name, then select ② Save. Replace the example name with one suitable for your workflow.
Check: The workflow title updates after saving.
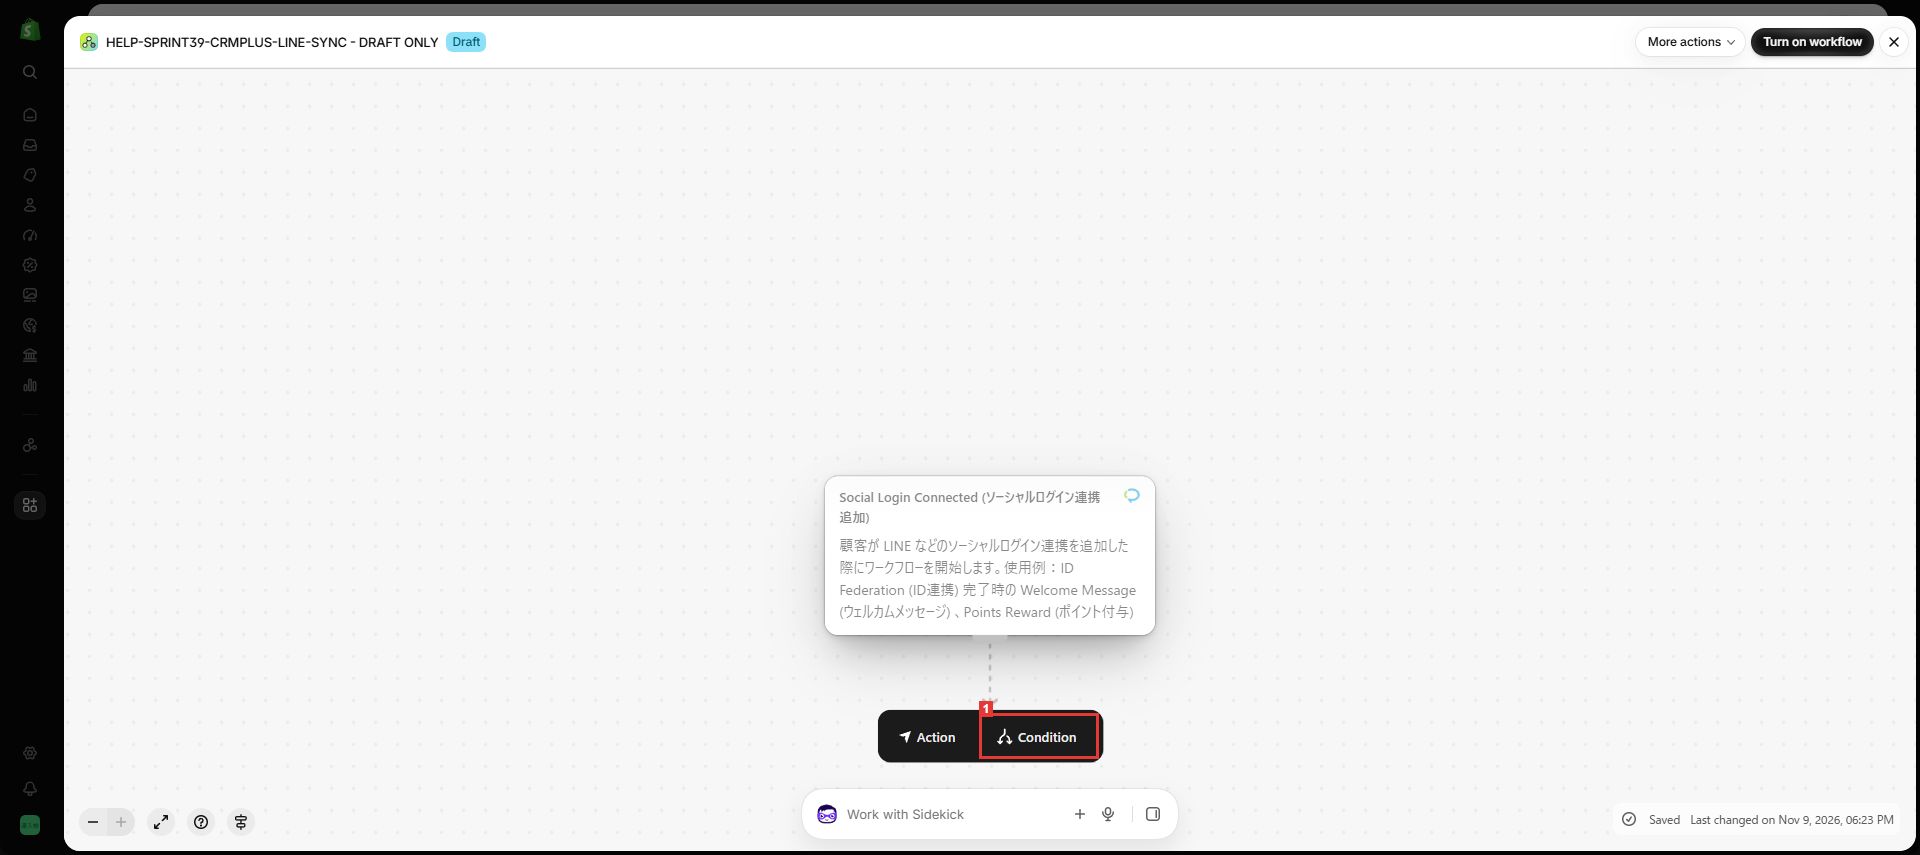
6. Add a condition
Location: The + below the trigger
Open + and select ① Condition.
Check: The condition configuration panel opens.
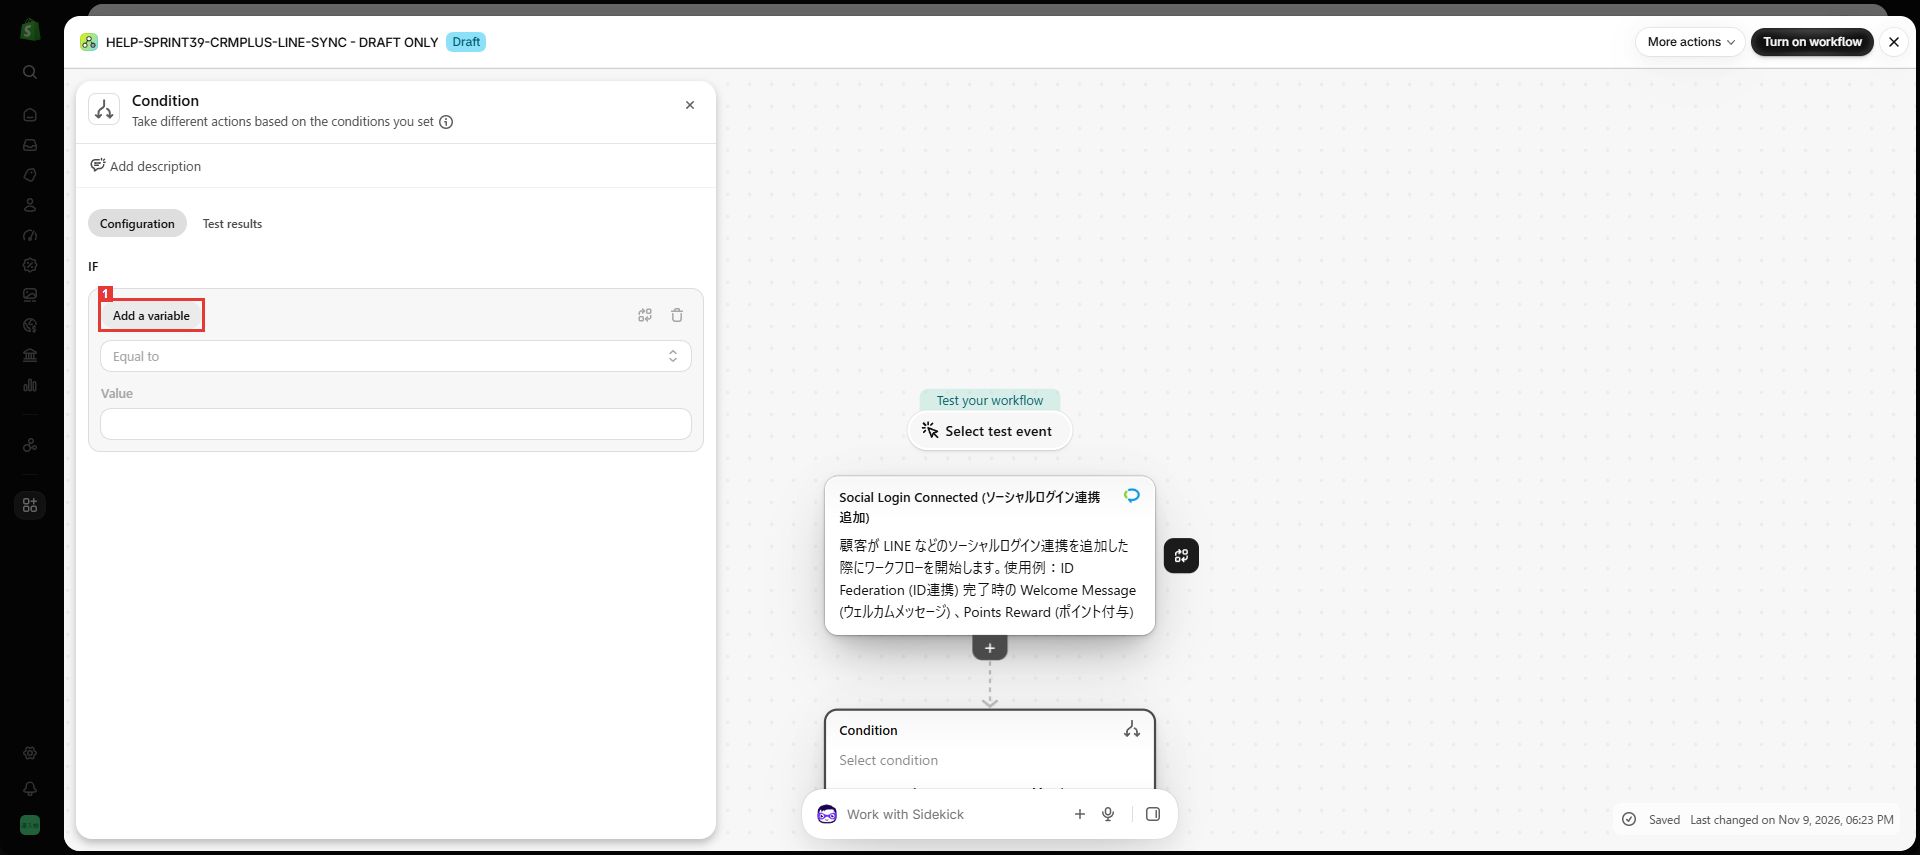
7. Add a condition variable
Location: The condition’s IF section
Select ① Add a variable.
Check: The variables supplied by the trigger appear.
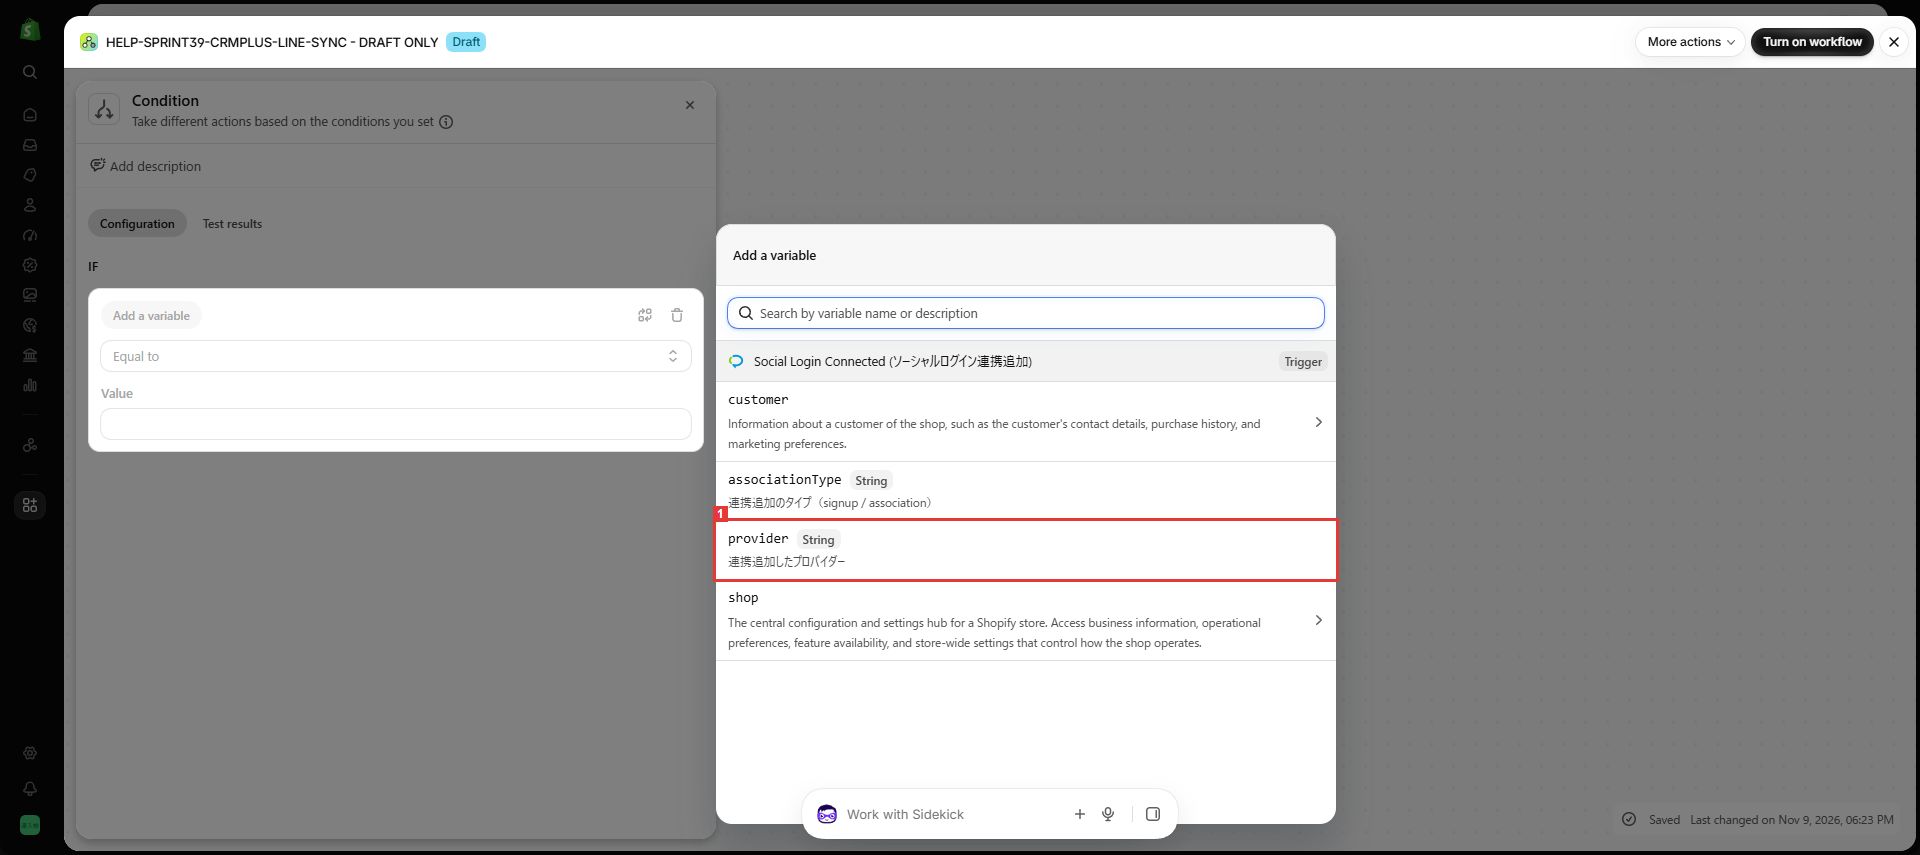
8. Select provider
Location: The variable list
Select ① provider.
Check: Provider becomes the condition variable.
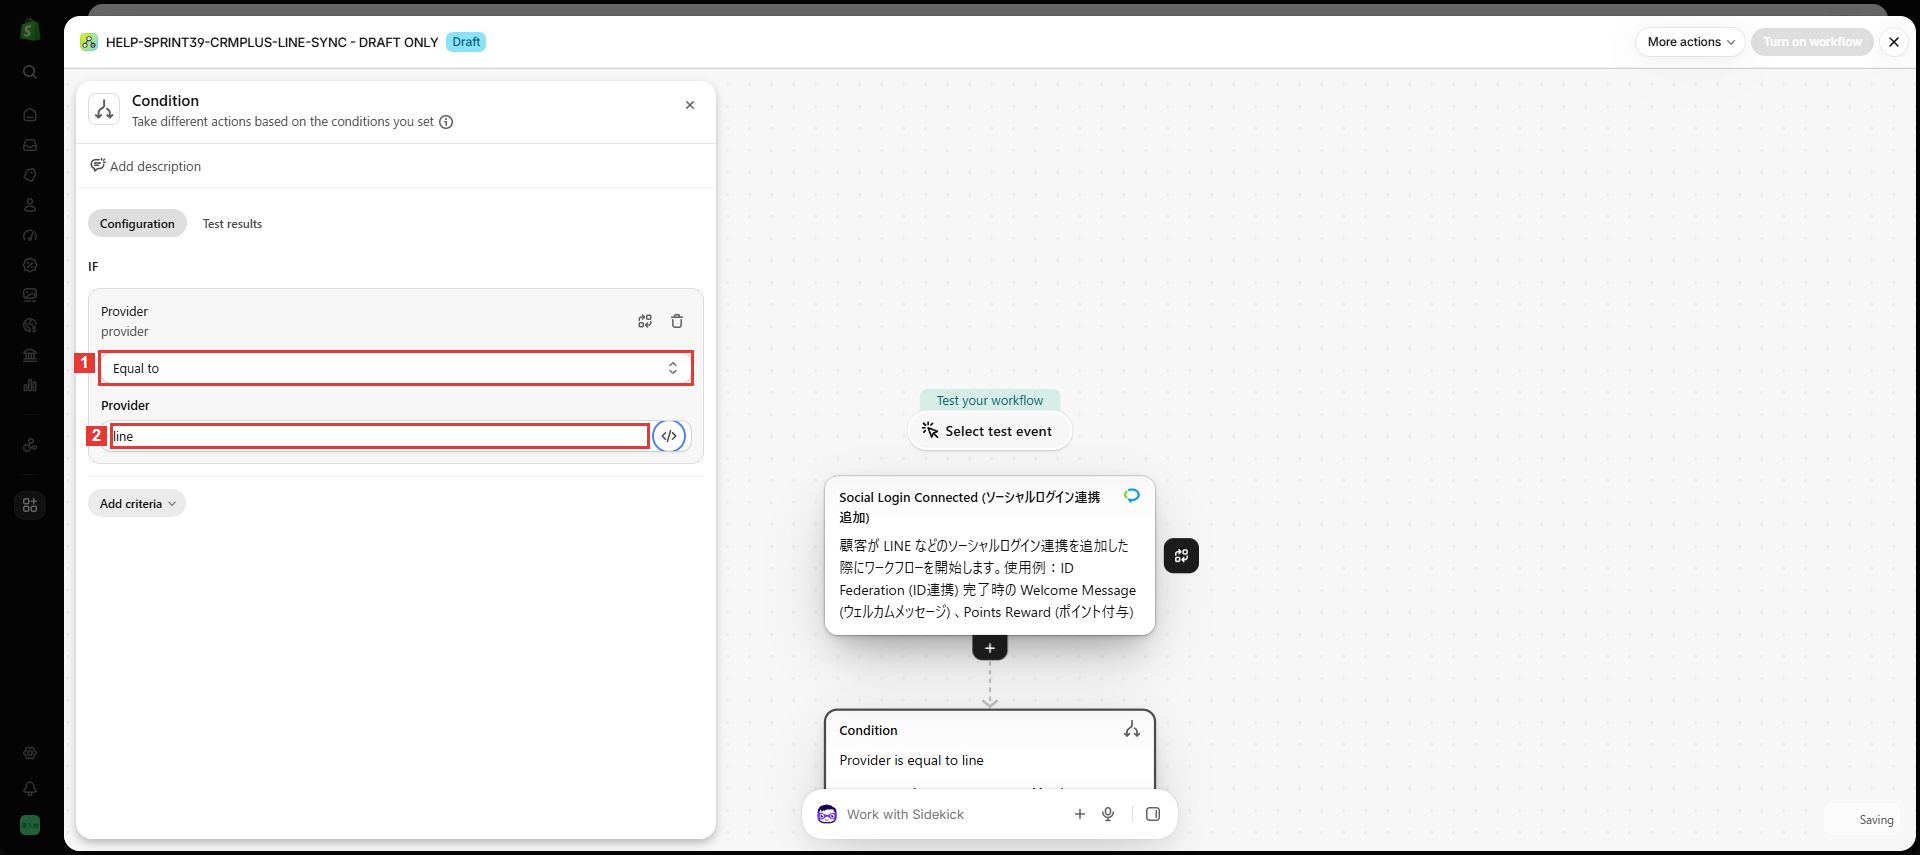
9. Restrict the condition to LINE
Location: The Provider condition
Set ① Comparison to Equal to and enter ② line in lowercase.
Check: The condition reads Provider is equal to line. Configuration is saved automatically.
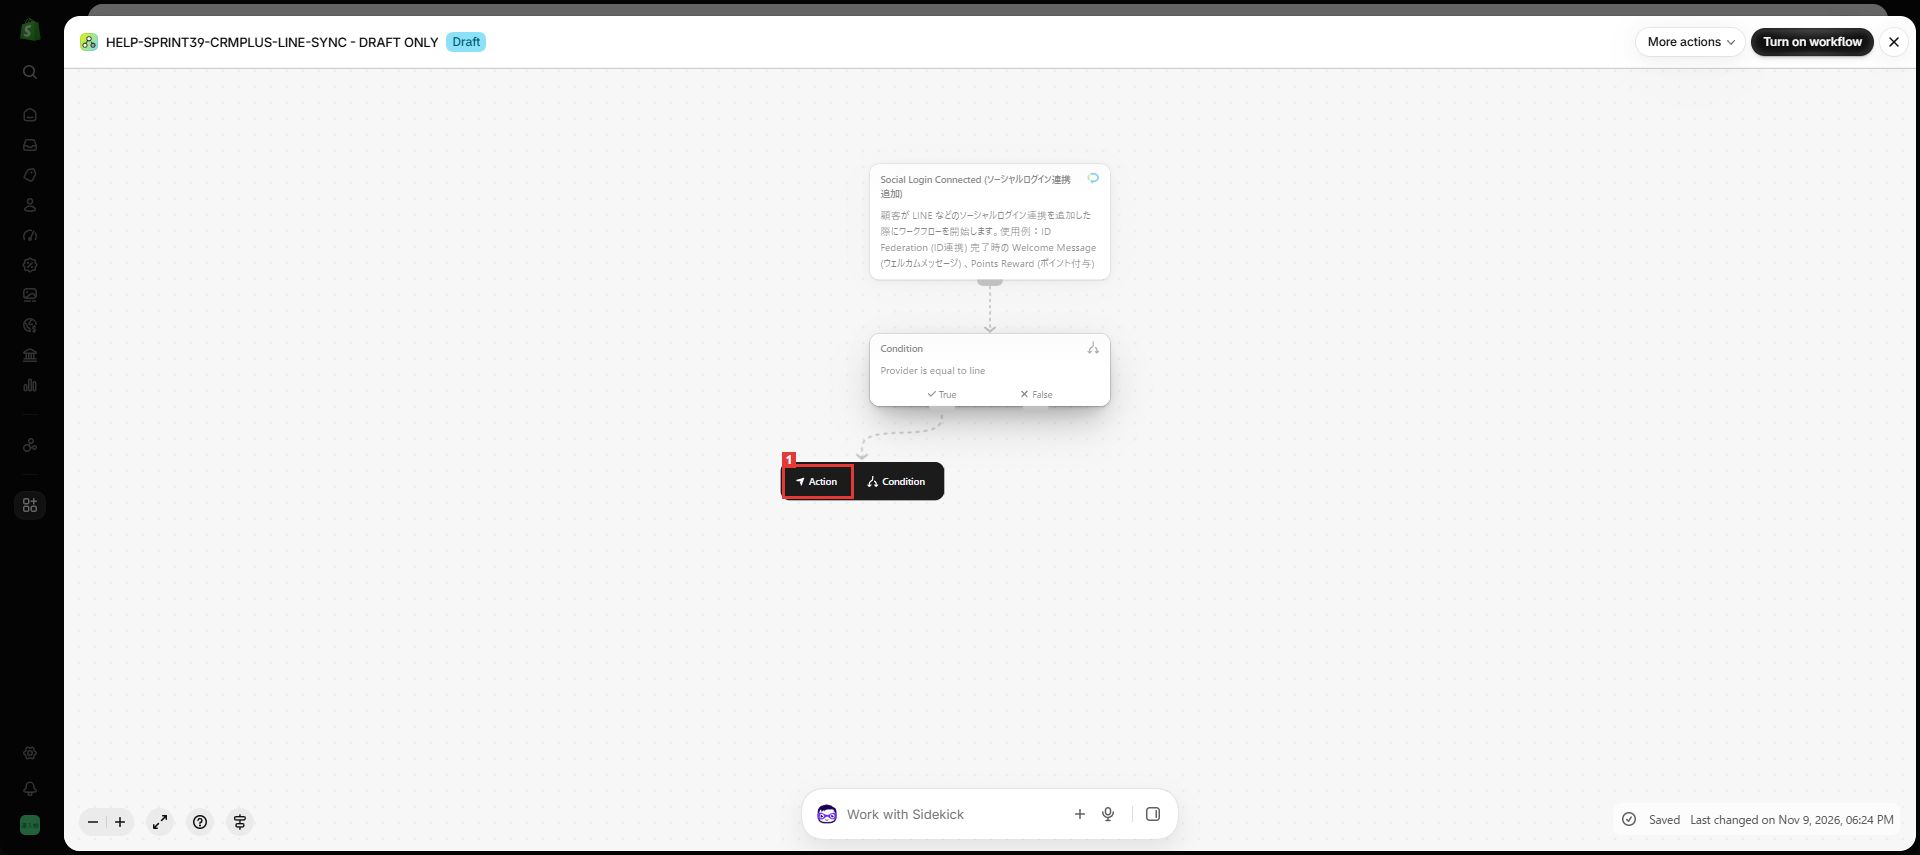
10. Add an action to the True branch
Location: The + below the condition’s True branch
Open + under True and select ① Action. Leave the False branch without this action.
Check: The action picker for the LINE branch opens.
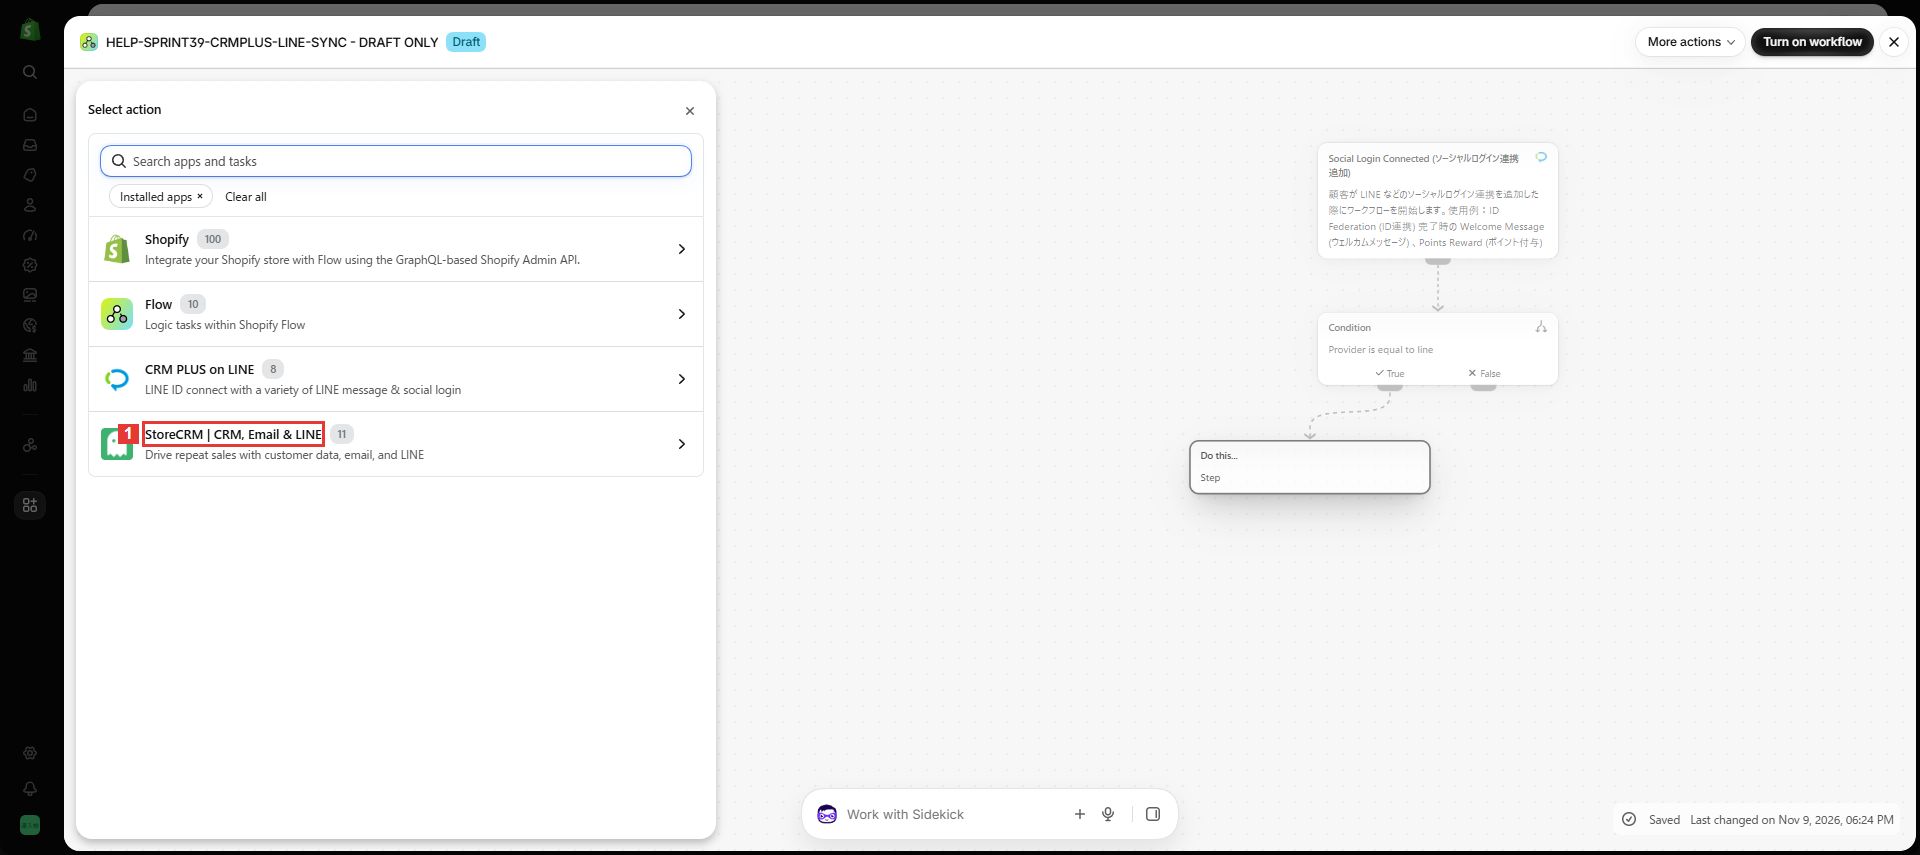
11. Select StoreCRM
Location: The action app list
Select ① StoreCRM | CRM, Email & LINE.
Check: The StoreCRM actions appear.
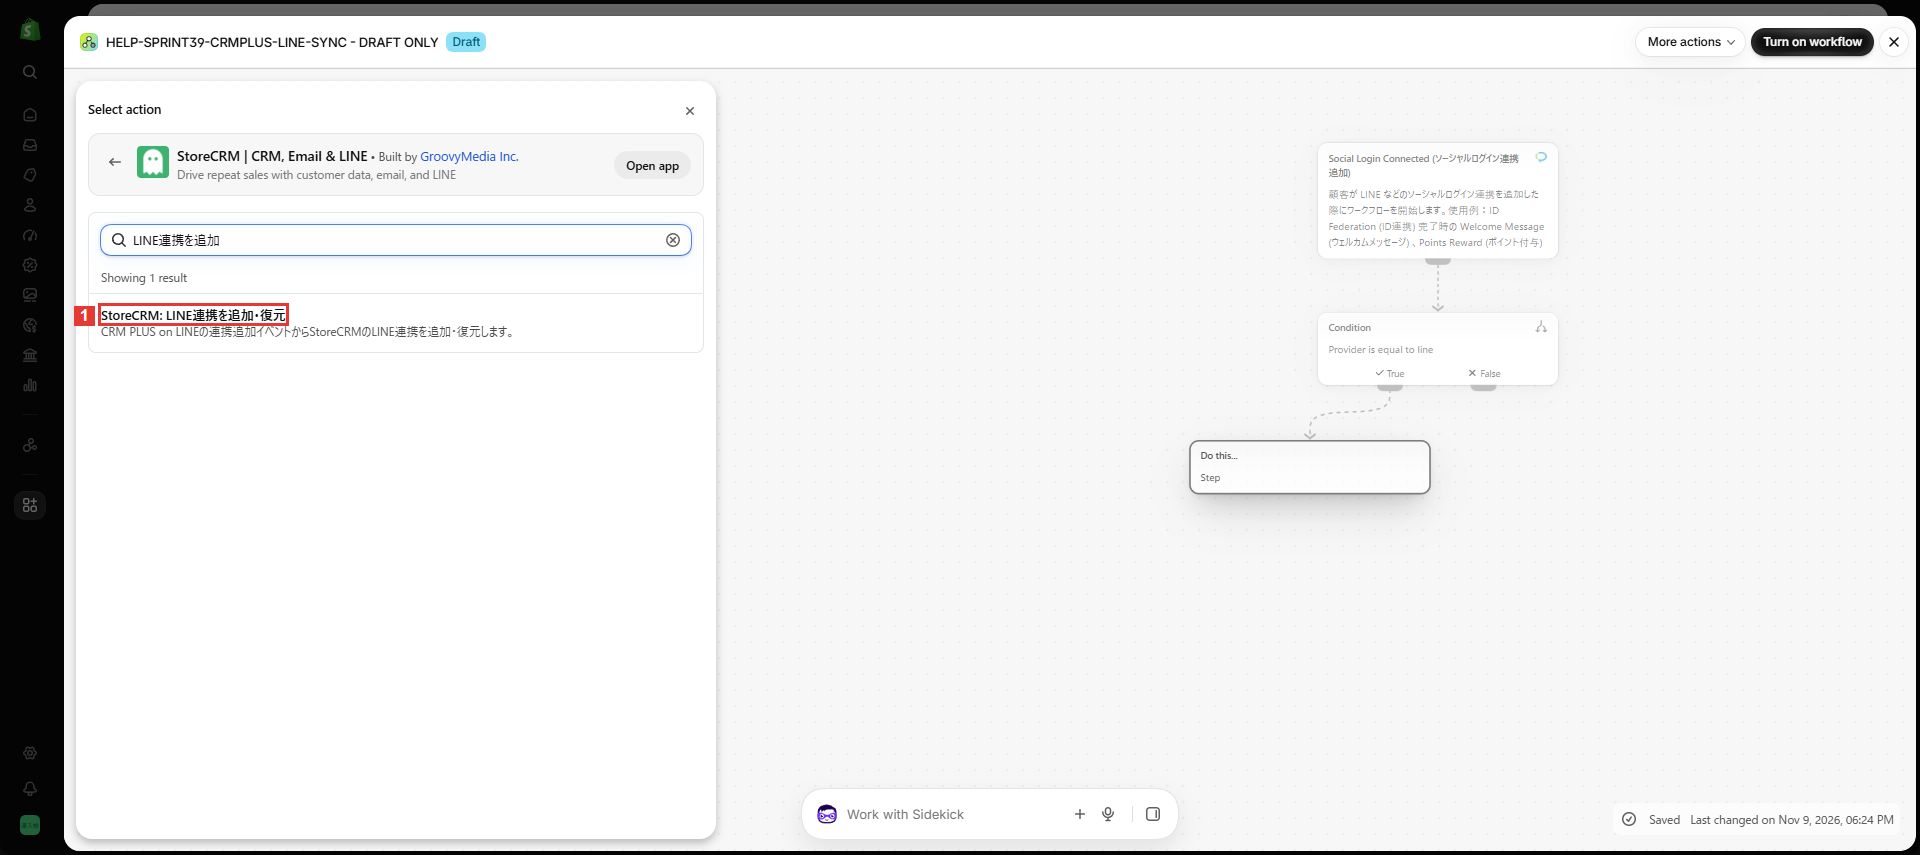
12. Select the add or restore action
Location: The StoreCRM action list
If needed, search for LINE連携を追加, then select ① StoreCRM: LINE連携を追加・復元.
Check: The Customer and Provider configuration appears.
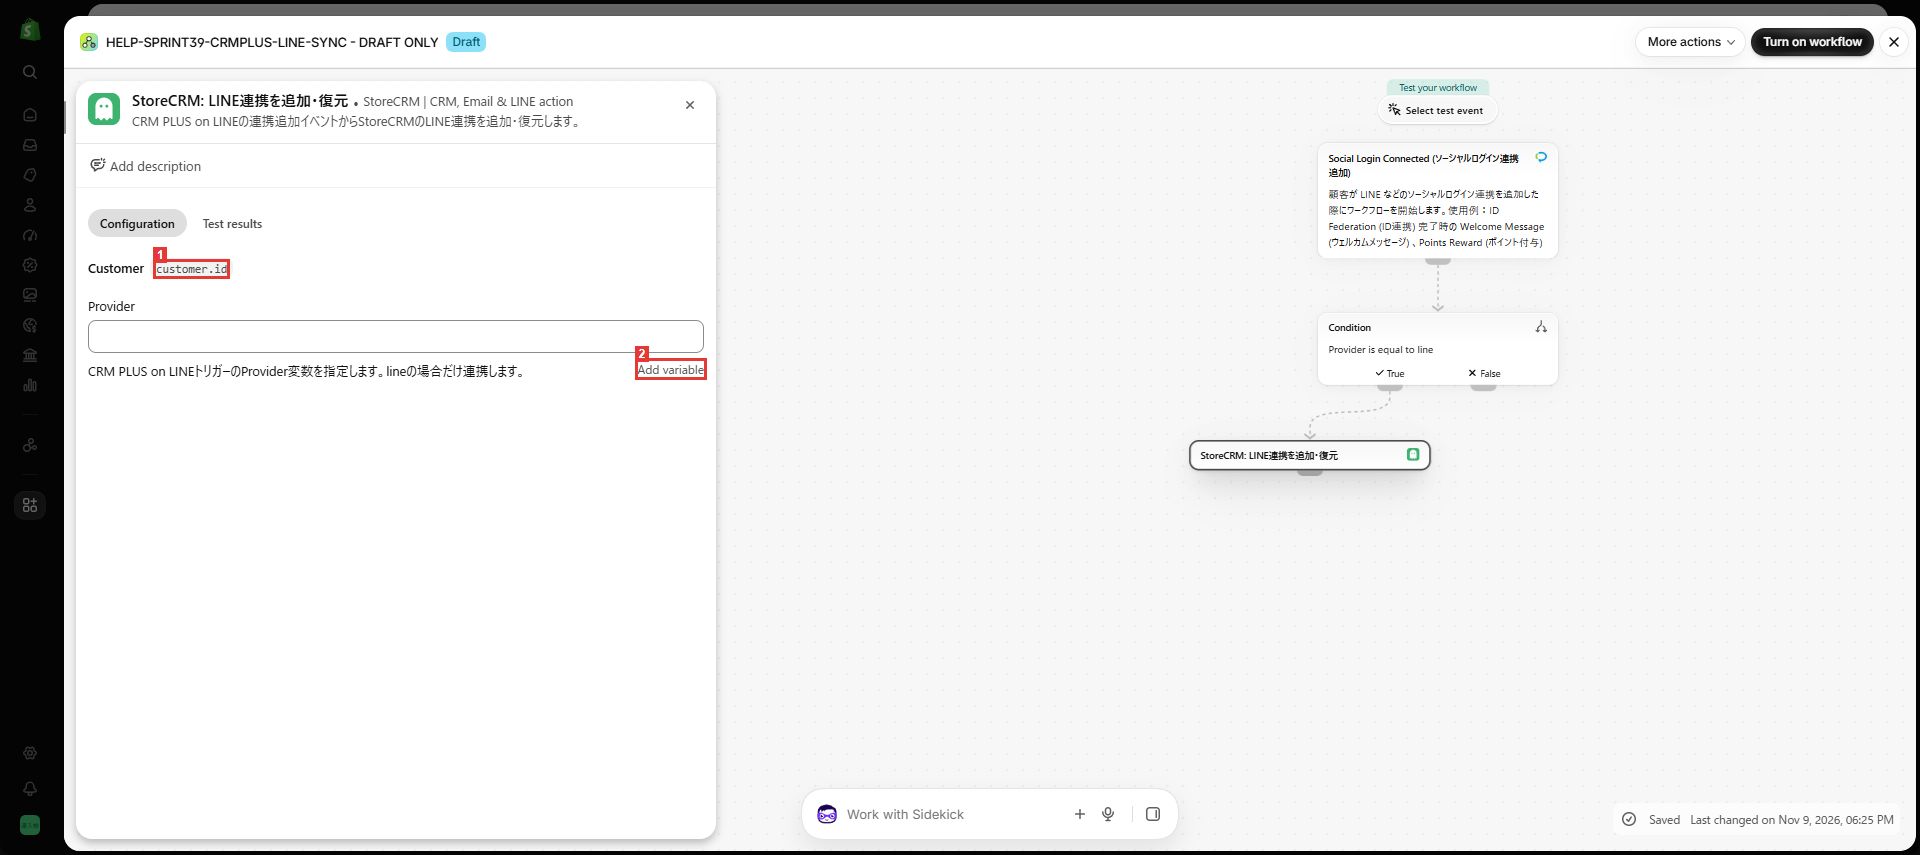
13. Check the customer and Provider input
Location: The add or restore action configuration
Verify ① Customer uses the trigger’s customer.id, then select ② Add variable for Provider.
Check: The trigger’s variables appear. Pass the event variable to Provider rather than entering a constant line value.
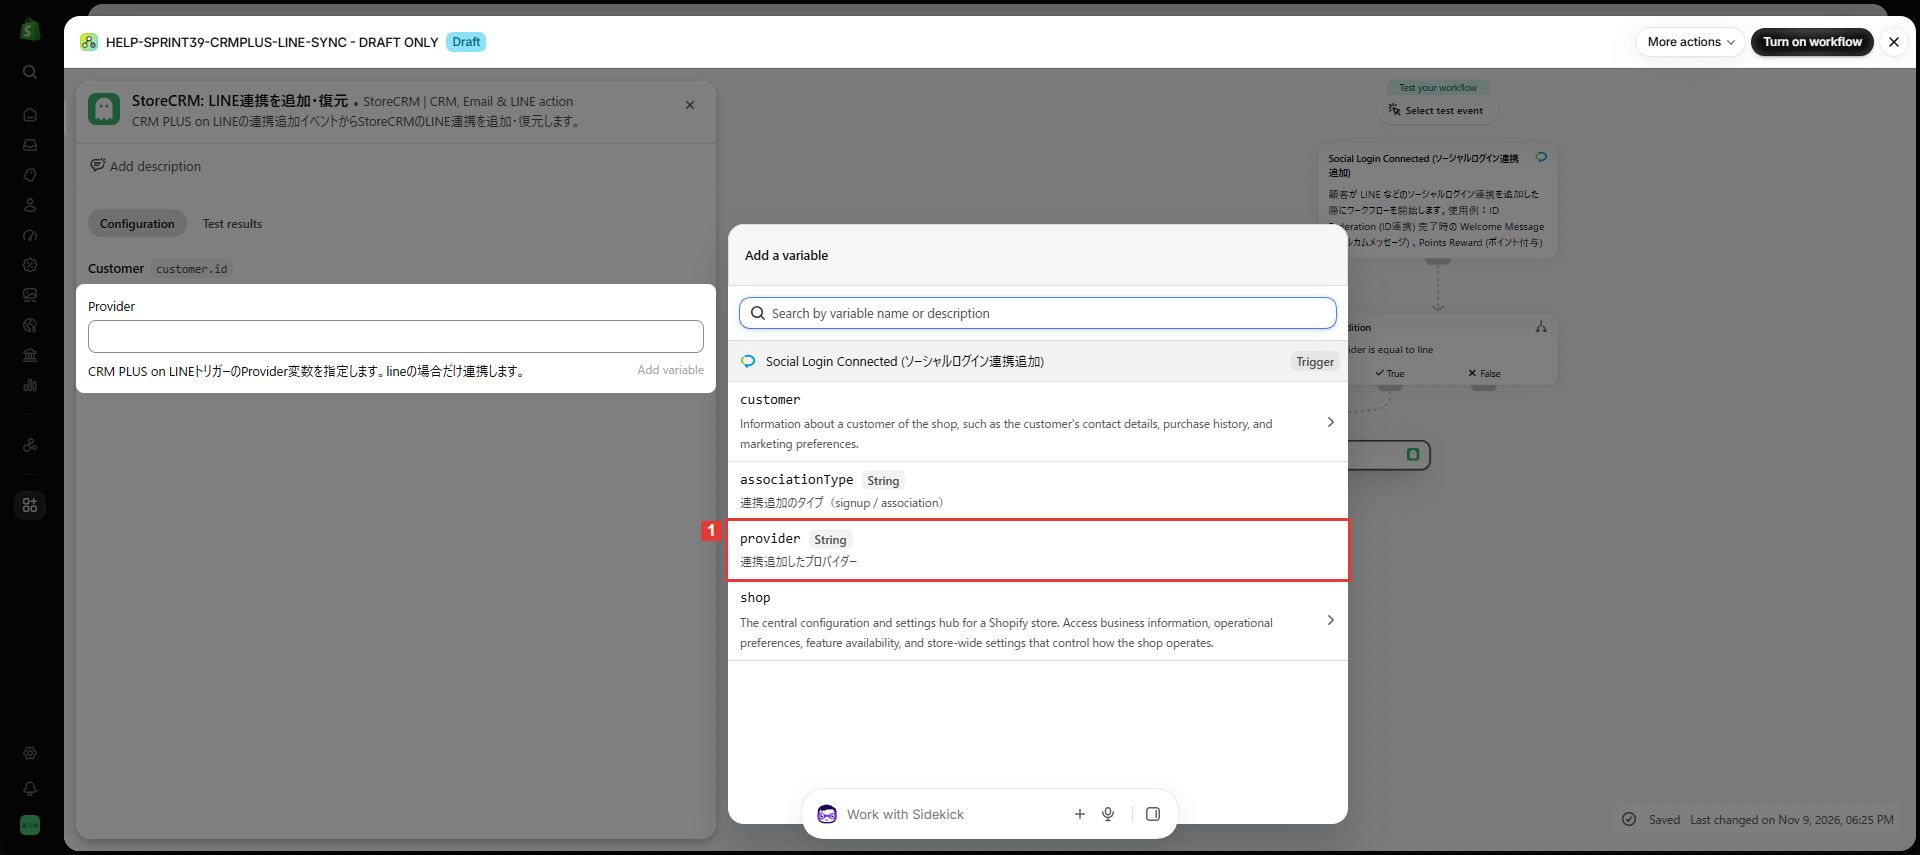
14. Insert the event’s provider
Location: The variable picker opened from Provider
Select ① provider.
Check: The Provider field receives {{provider}}.
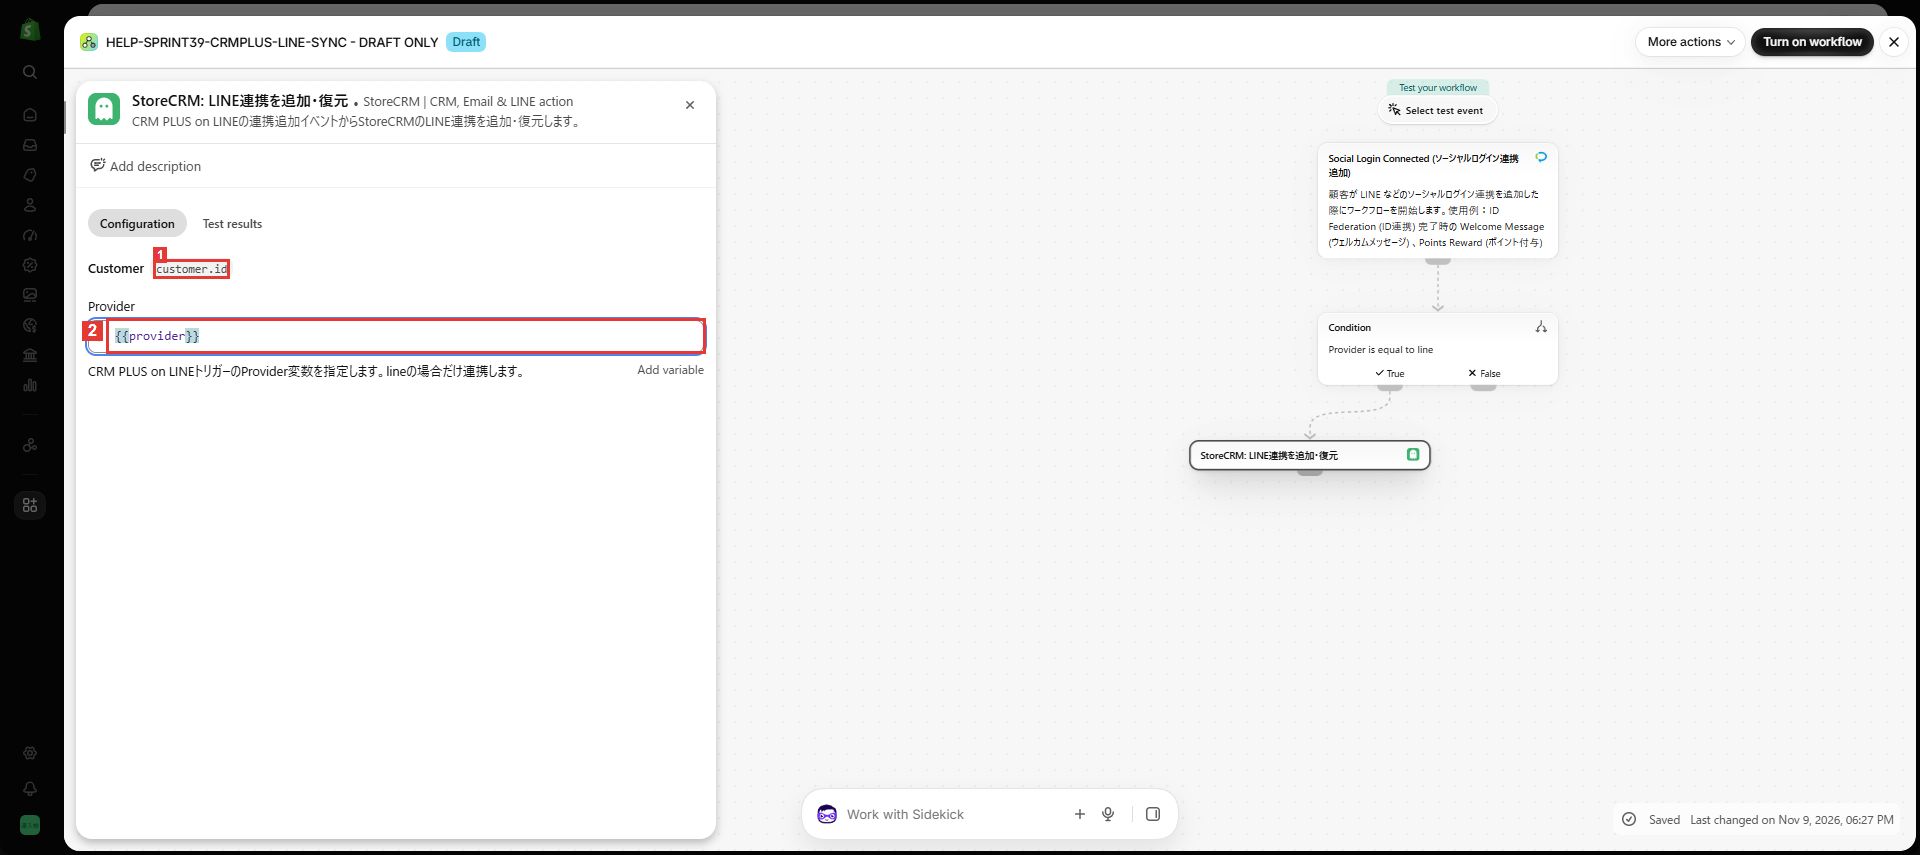
15. Verify the fields and automatic save
Location: The add or restore action configuration
Verify ① customer.id and ② {{provider}}. Check that the lower-right status becomes Saved.
Check: Do not treat Saving or an error as a completed save.
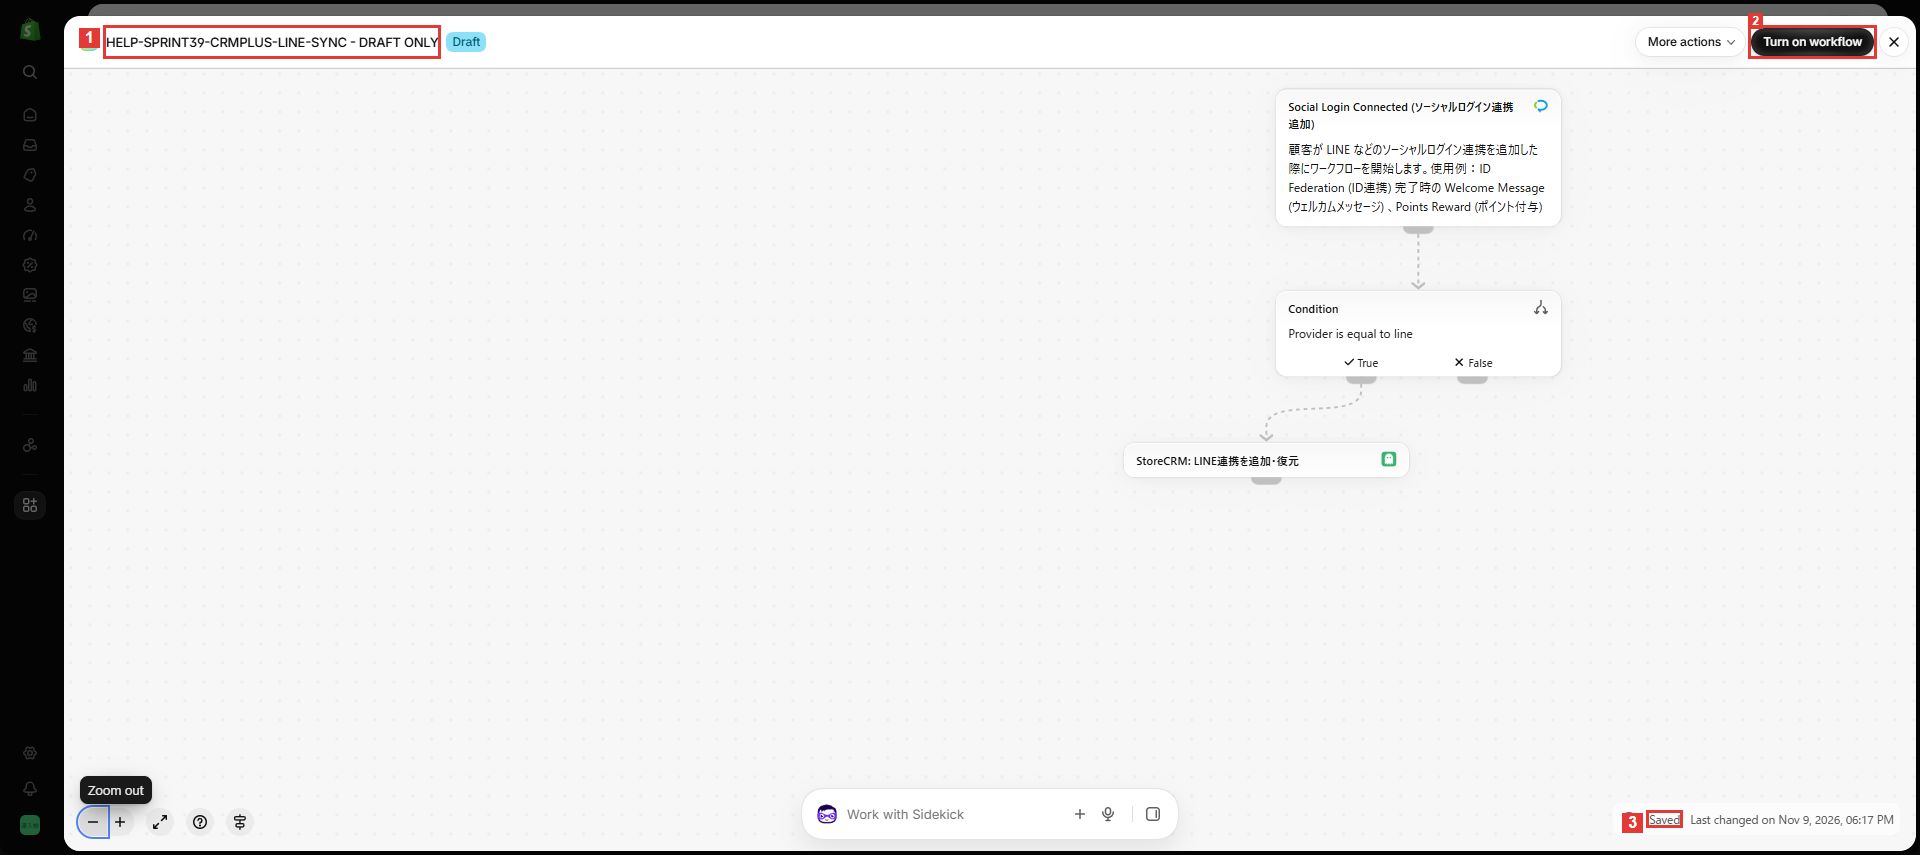
16. Review the saved workflow
Location: The workflow canvas
Review ① the name, the CRM PLUS trigger, the Provider=line condition, the add or restore action under True, and ③ Saved. When you are ready to apply the workflow, review its effect and use ② Turn on workflow to enable it.
Check: The image shows an inactive draft. Saving alone does not run the action. Connection events occurring after activation are processed.
Results, waiting, and errors
The action reads the LINE ID written to Shopify by CRM PLUS, updates the StoreCRM connection, and reflects the result in Shopify in stages. Customer synchronization or metafield delays can cause retries; acceptance or waiting is not completion. This action does not automatically create a missing customer.
If a Flow run fails, the Customer and Provider input, customer synchronization, and CRM PLUS connection state are relevant checks. Other providers are ignored. A later removal or connection change takes precedence over an older request. This workflow is not an automatic backfill of past events or a bulk migration feature.
Do not assume that adding or restoring a connection through this action starts a separate reward workflow using StoreCRM’s LINE connection completed trigger. For removal, see Disconnect LINE with Shopify Flow.
To start subsequent actions from StoreCRM’s normal LINE connection or LINE login, see Start Shopify Flow after LINE connection completion. Its starting event and purpose differ from this CRM PLUS synchronization procedure.
 English
 Japanese