

Use these steps to send a saved LINE message to a recipient you can check yourself. This content test is separate from test mode for an entire campaign.
- Before you start
- 1. Open the test-send dialog
- 2. Select a saved test recipient
- 3. Open recipient setup if needed
- 4. Refresh recipients after setup
- 5. Enter a recipient directly when needed
- 6. Review the sample data
- 7. Check the market and locale
- 8. Complete the pre-send verification
- 9. Review the recipient and sample data, then send
- 10. Check the acceptance message
- 11. Understand an unknown result
- If the test cannot be sent
Before you start
The recipient must be a customer of this store, linked to the same LINE official account, and able to receive messages. Entering an email address alone does not link a LINE account. The saved message content is used for the test.
1. Open the test-send dialog
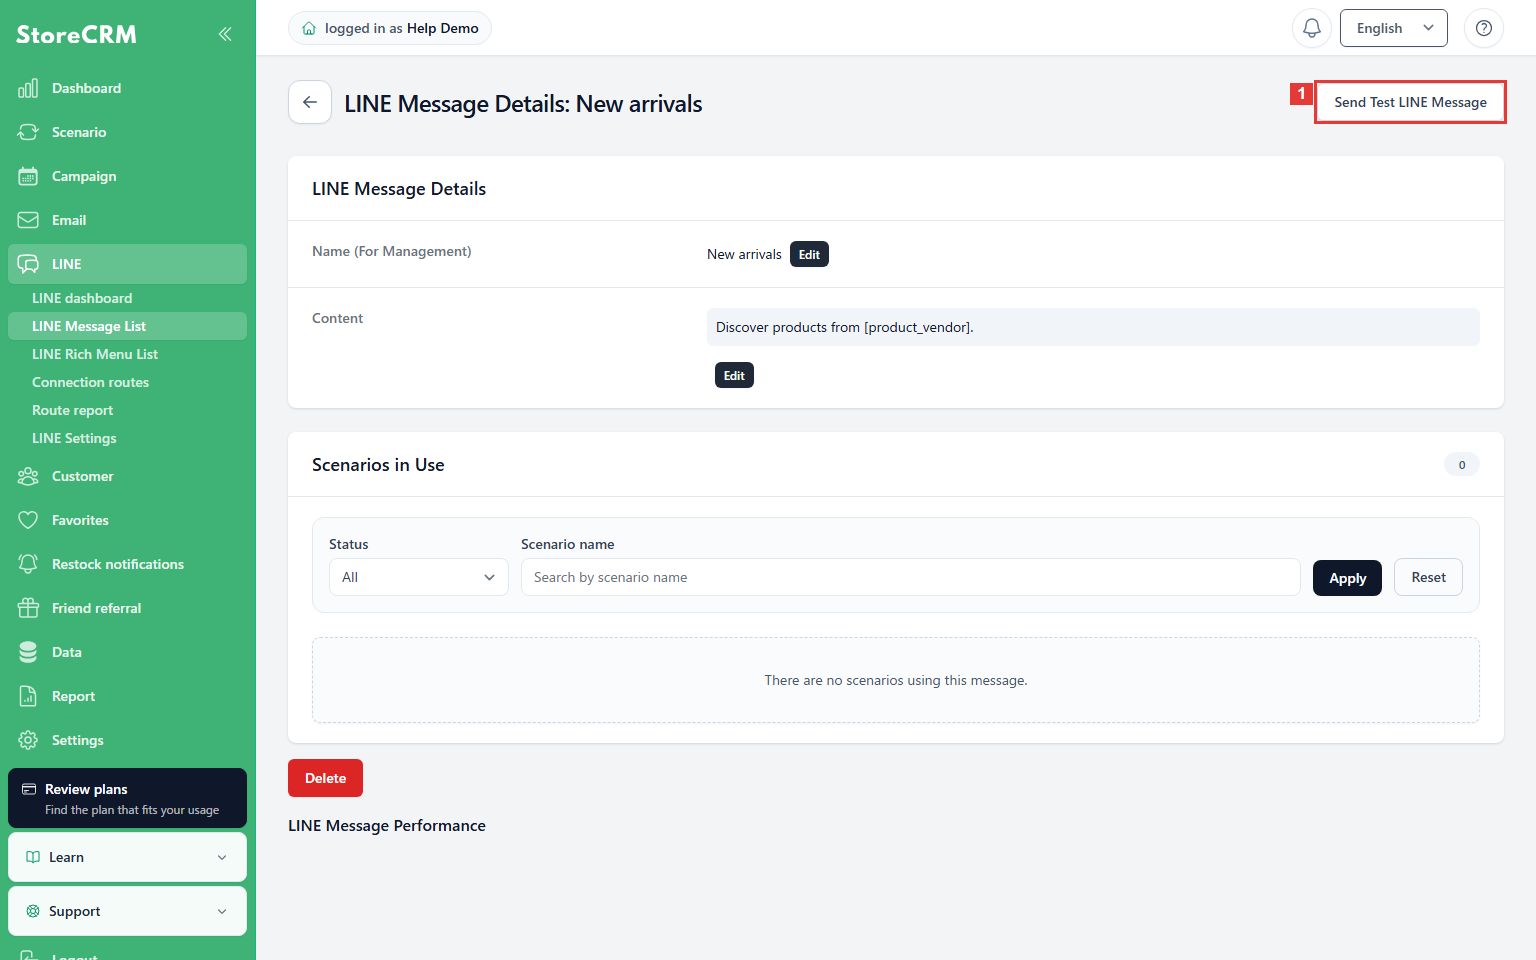
Location: LINE → LINE Message List → message details
Click ① Send Test LINE Message.
Check: The recipient and test-data guidance appear.
2. Select a saved test recipient
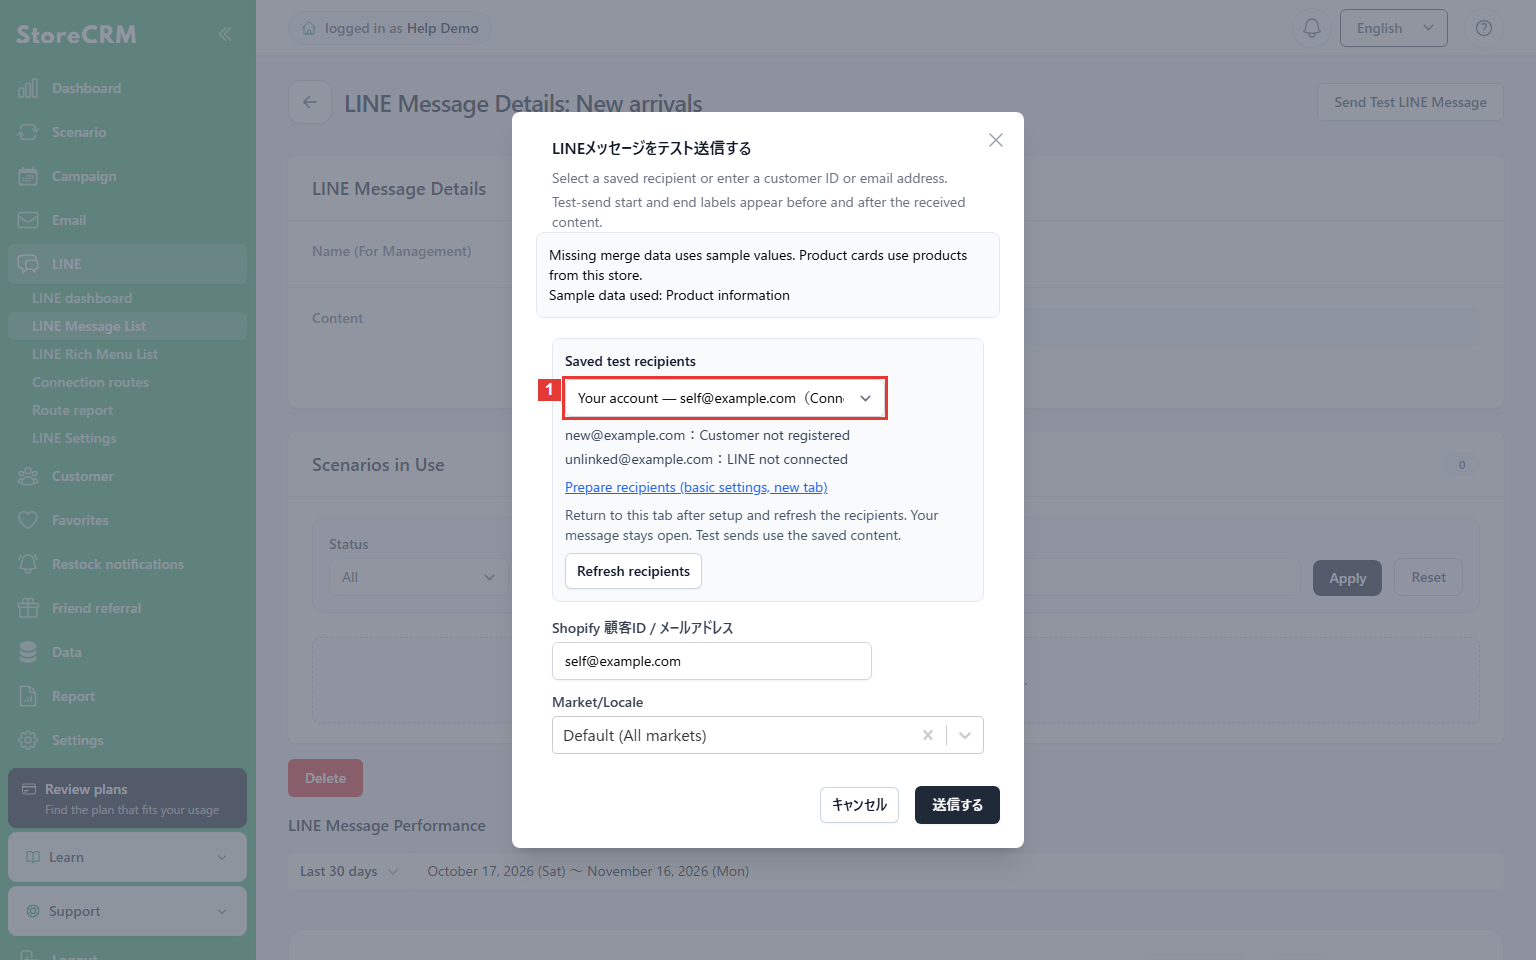
Location: Test-send dialog
Select your own linked recipient from ① the saved recipient list.
Check: Recipients without a customer, without a LINE link, or requiring a reachability check are listed as needing preparation.
3. Open recipient setup if needed
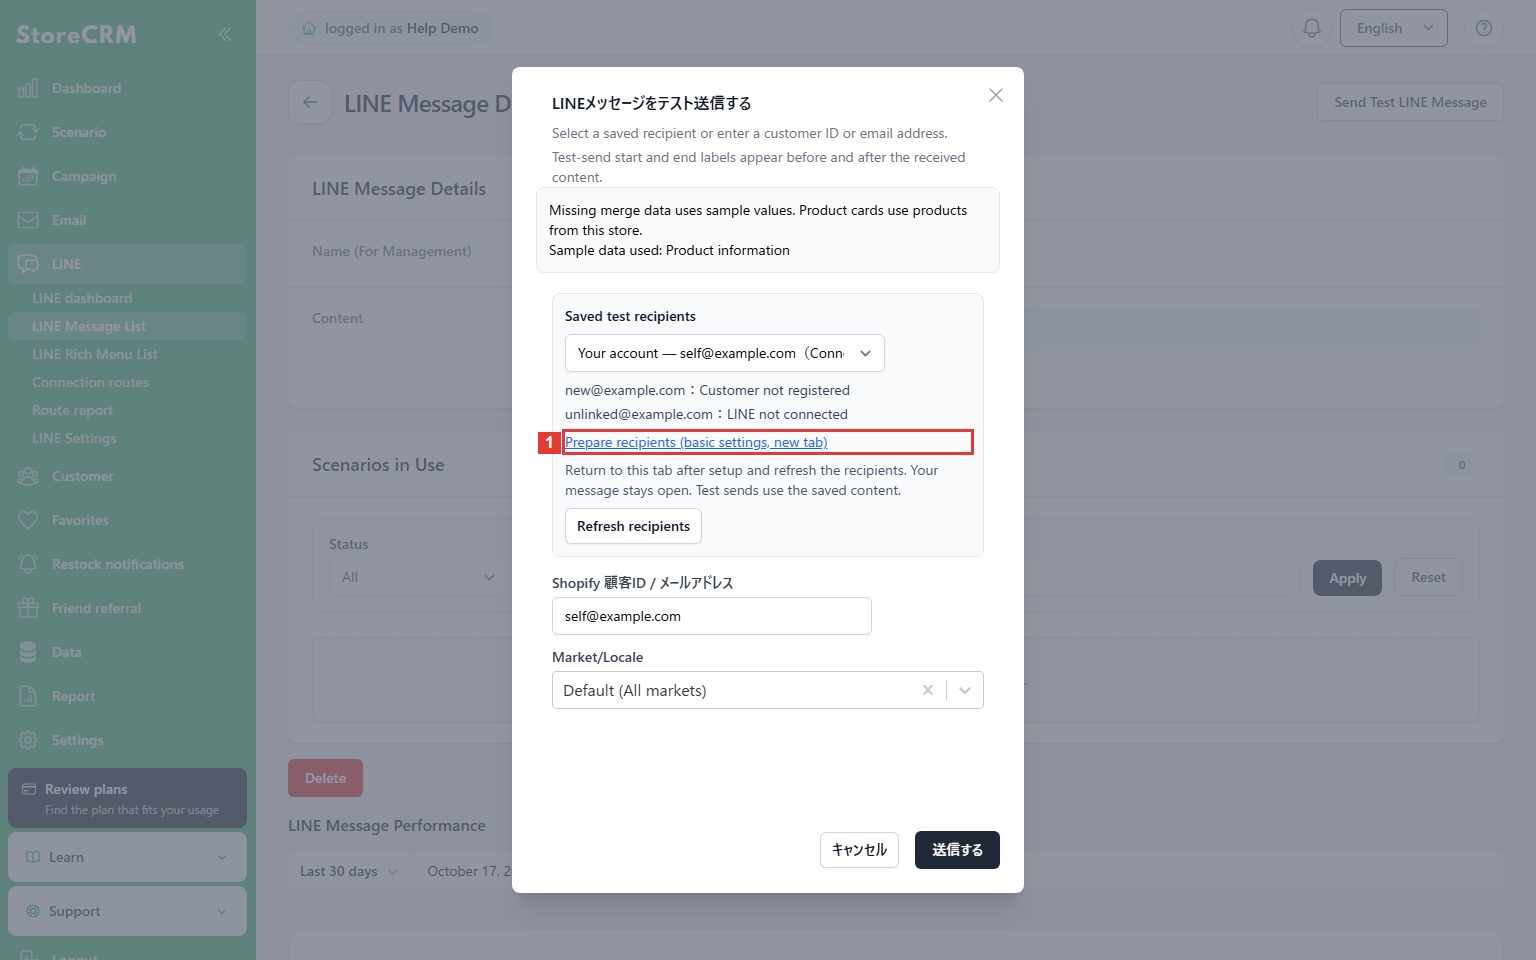
Location: Recipient section of the dialog
If setup is needed, open ① the recipient setup link in a new tab. Follow the basic-settings instructions linked below.
Check: The original message and test-send tab are retained.
4. Refresh recipients after setup
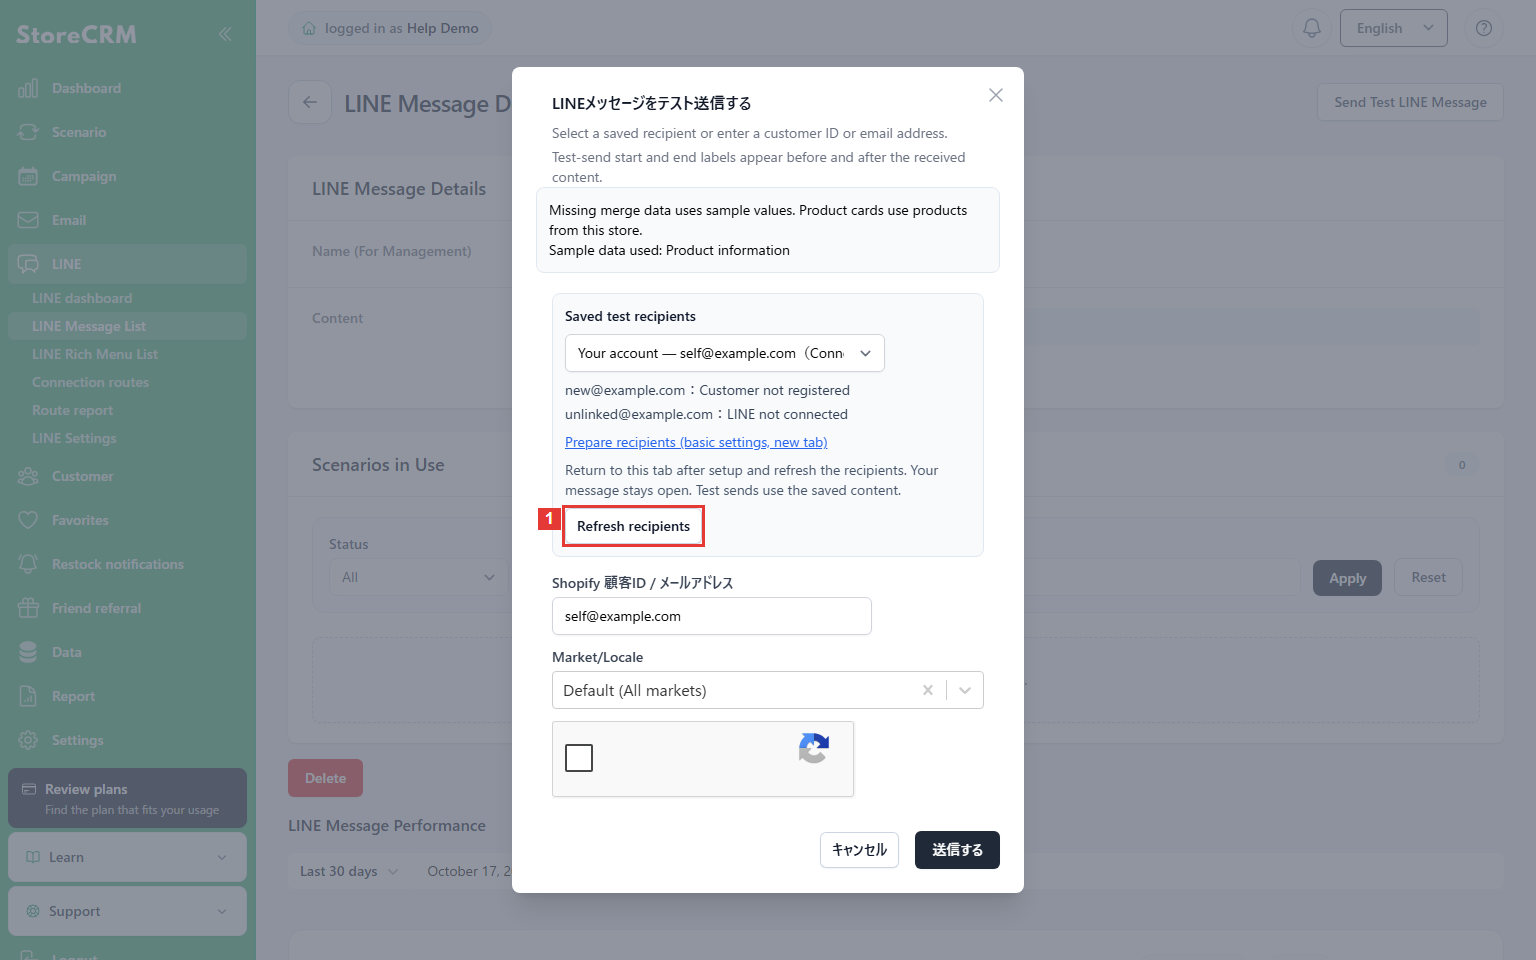
Location: The original test-send tab
Return to the original tab, click ① Refresh recipients, and select a sendable recipient.
Check: Refreshing alone does not send a message.
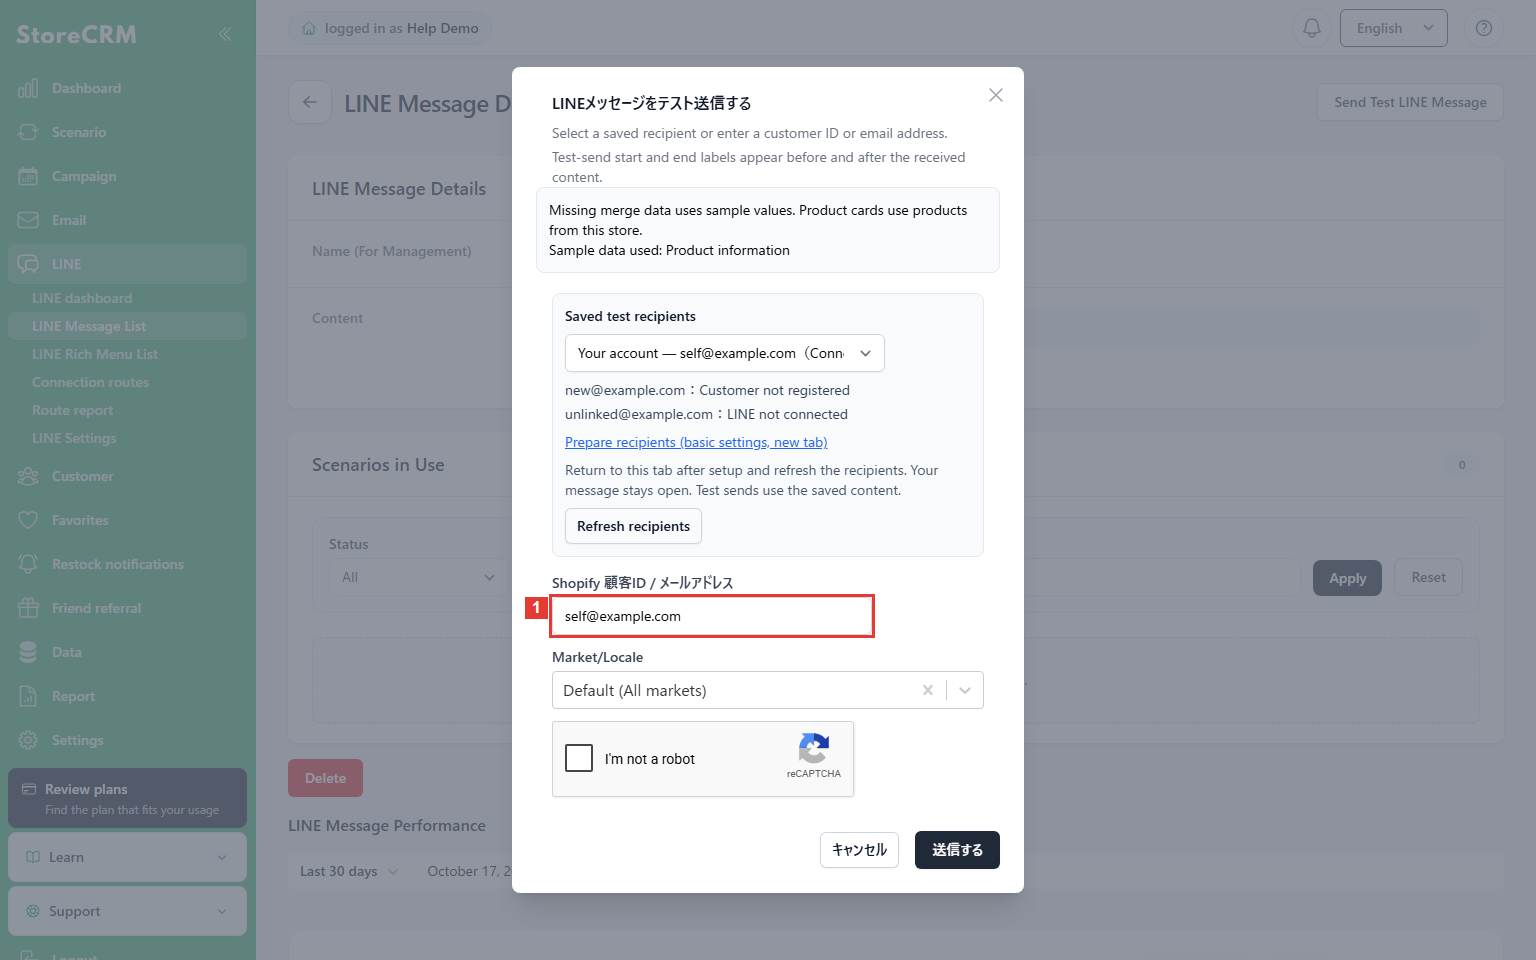
5. Enter a recipient directly when needed
Location: Shopify customer ID / email field
For manual entry, use ① to enter a store customer email, a numeric Shopify customer ID, or a Customer GID. Examples: [email protected], 1234567890, gid://shopify/Customer/1234567890.
Check: This field does not accept an order ID or a LINE user ID.
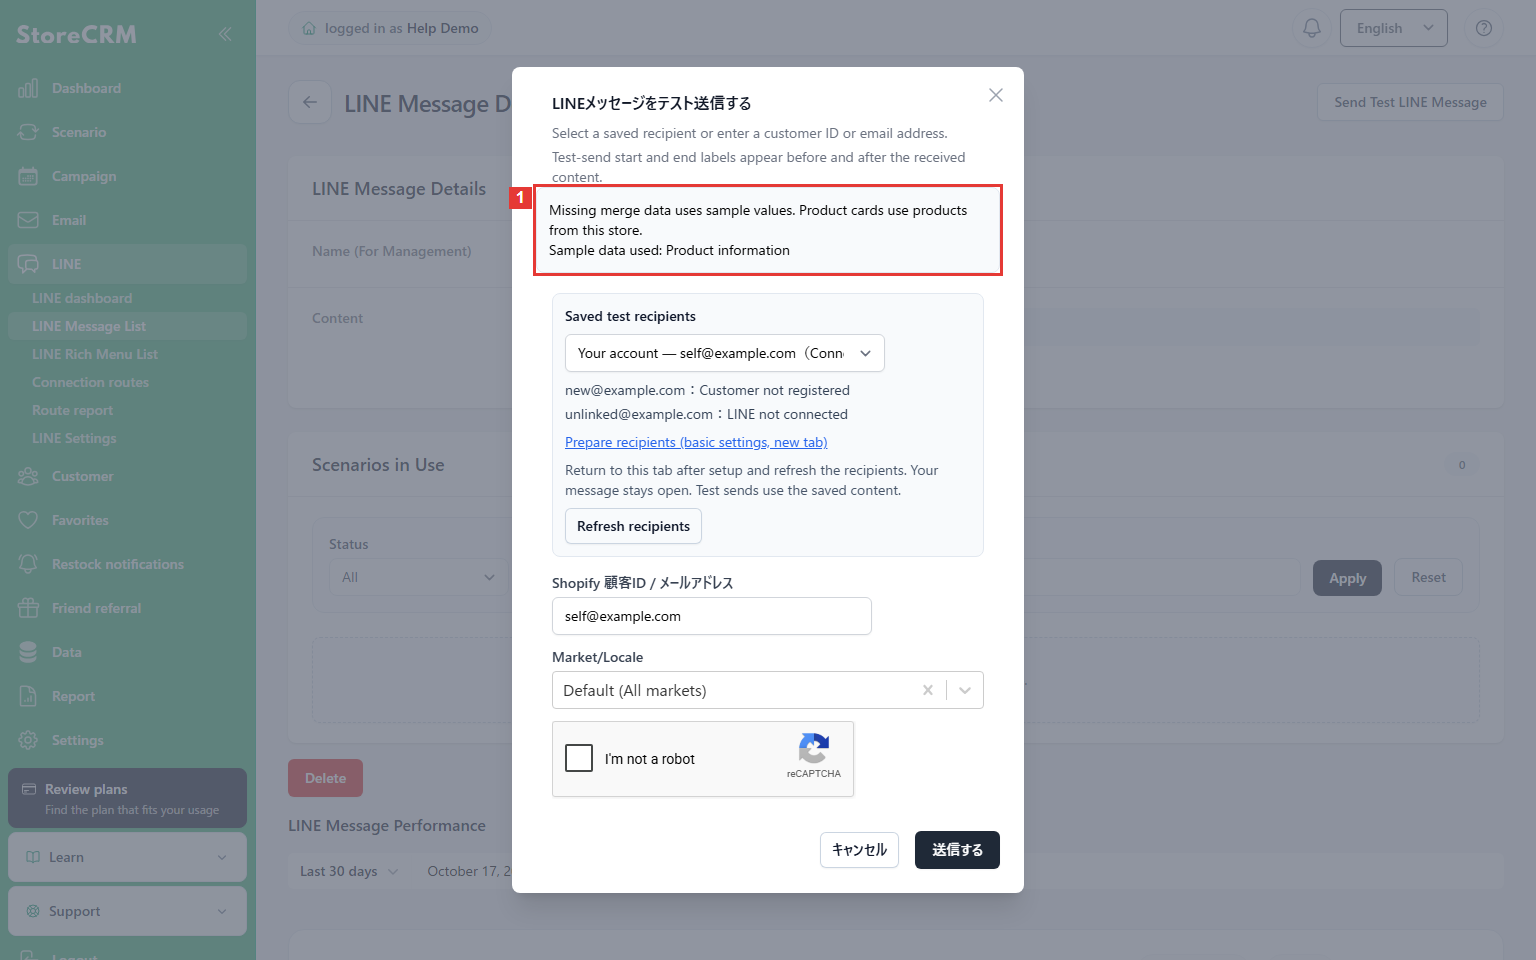
6. Review the sample data
Location: Test-data notice near the top of the dialog
Read ① the fields using sample data.
Check: Missing merge data may use samples. Product cards use available products from this store. Samples do not create the real events used for normal delivery.
Prepare test recipients in basic settings.
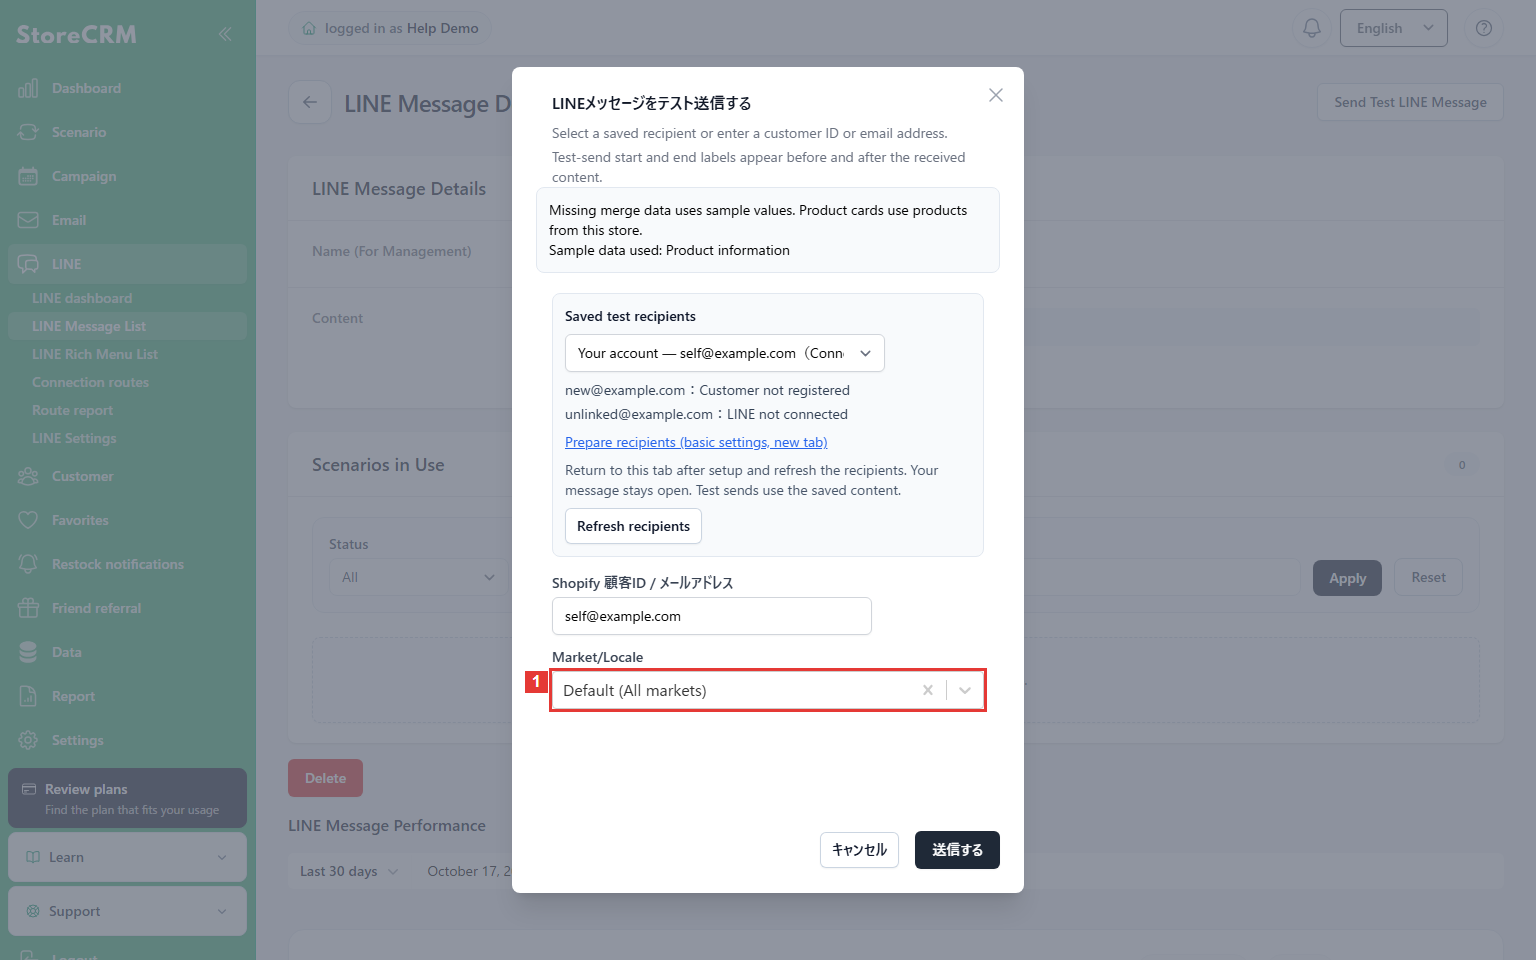
7. Check the market and locale
Location: Test-send dialog
Check ① the market and locale. To check another language, select the applicable published locale.
Check: The default follows the store configuration. Wait for test-data preparation after changing the recipient.
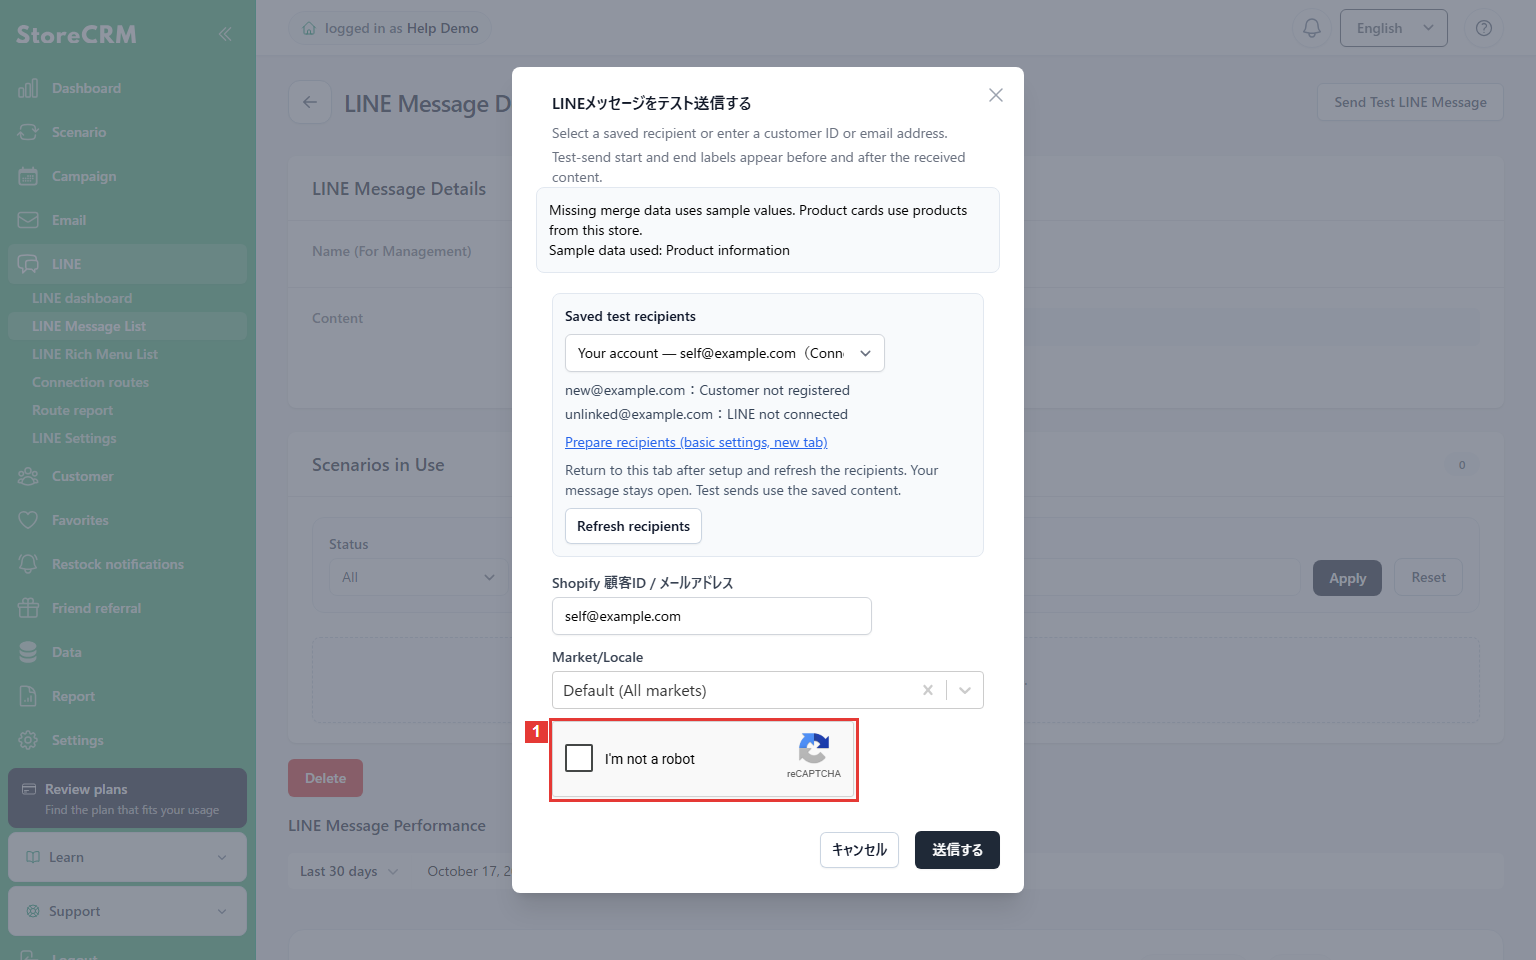
8. Complete the pre-send verification
Location: Below the recipient fields
Complete ① the reCAPTCHA verification as instructed on screen.
Check: Verification alone does not send a message.
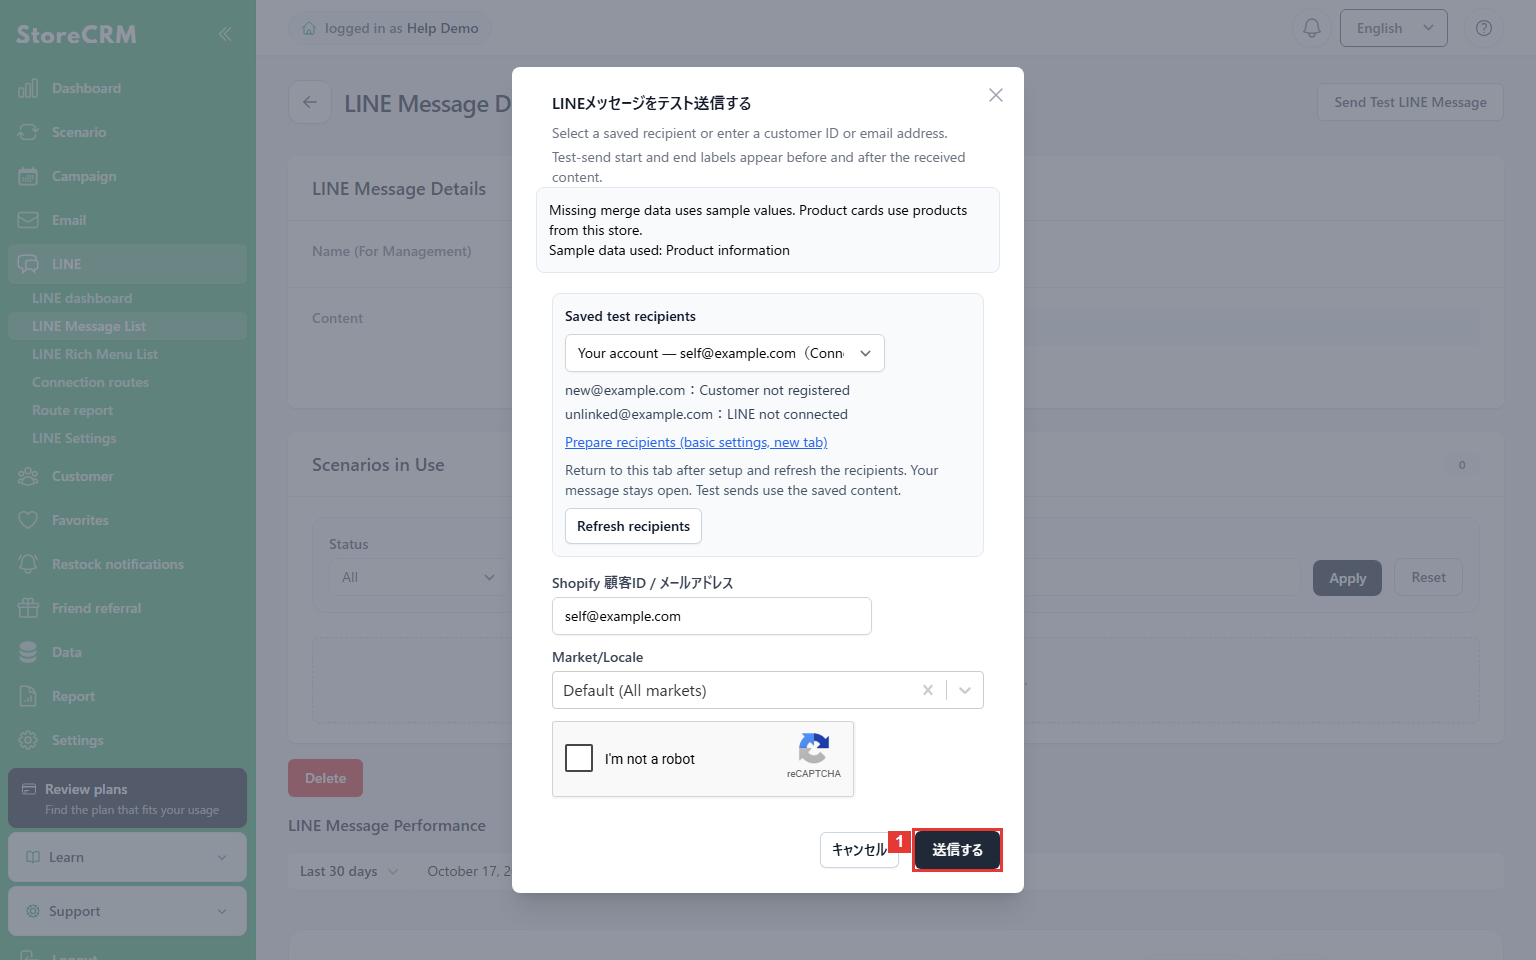
9. Review the recipient and sample data, then send
Location: Bottom of the dialog
Review the recipient, locale, and saved content, then click ①[送信する] (Send). The button currently uses this Japanese label in the English interface.
Check: Do not submit the same send again while it is processing.
10. Check the acceptance message
Location: Screen after submission
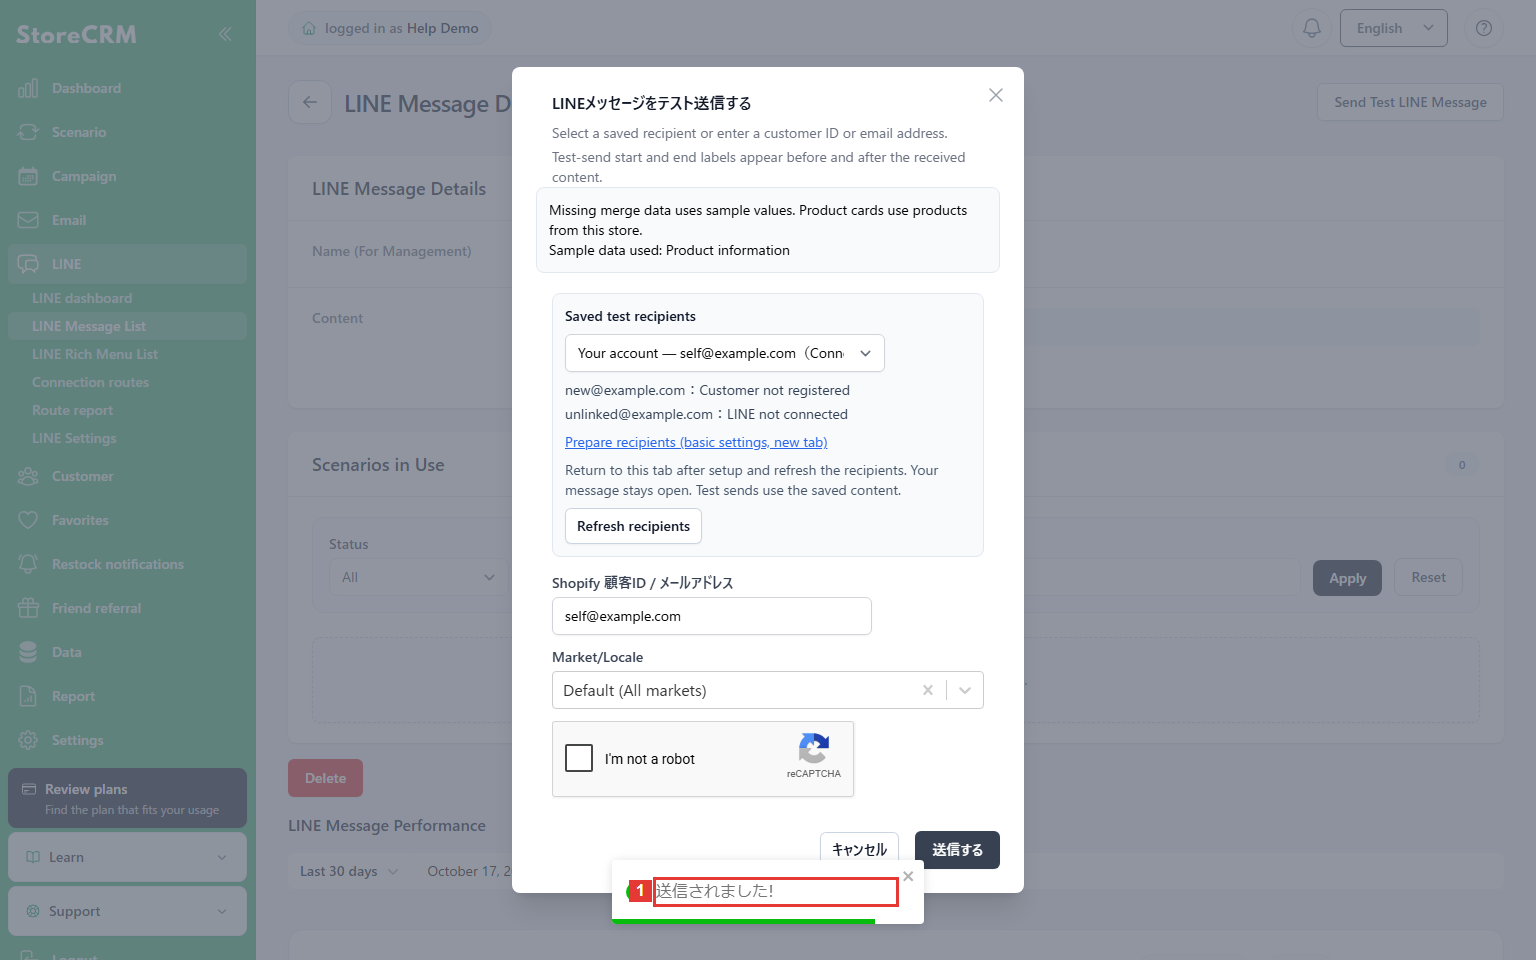
Check ① the acceptance notification. The current UI may show the fixed Japanese text “送信されました!” (sent).
Check: This illustrates acceptance, not guaranteed arrival in the recipient’s LINE inbox.
11. Understand an unknown result
Location: Result notice in the test-send dialog
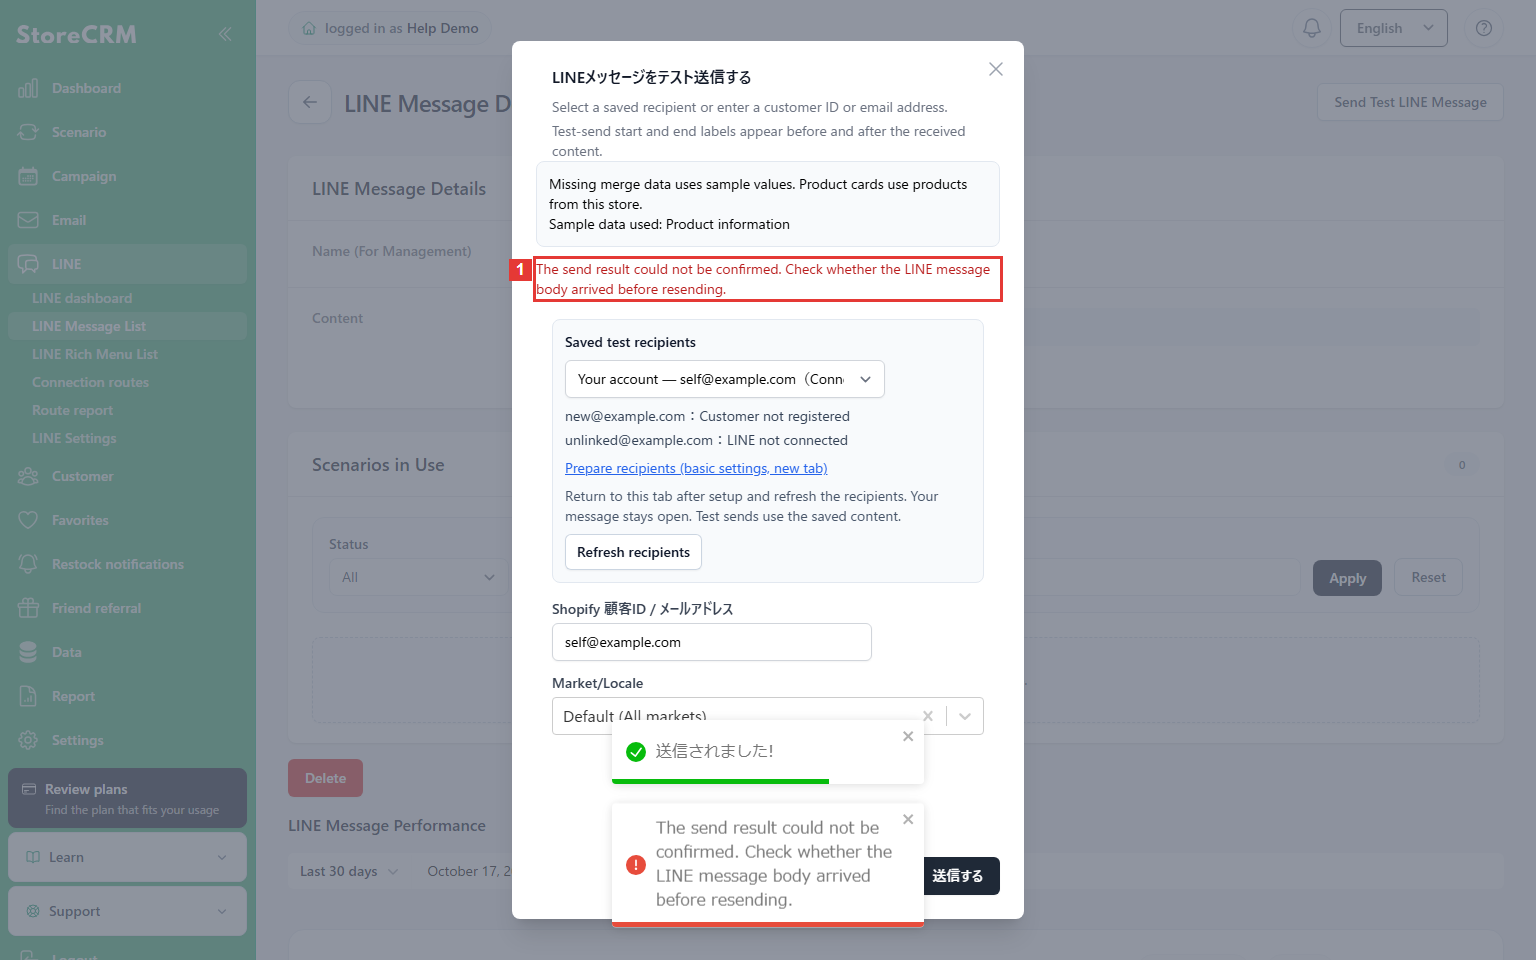
If ① reports an unknown result, do not immediately resend the same content.
Check: The test start/end markers and the body are separate messages. The body may already have arrived; reconcile the recipient’s LINE with the original result.
If the test cannot be sent
Prepare the recipient if the customer is missing or not linked to LINE. If a product message has no usable products, prepare products and check again. For invalid URLs, empty content, or unresolved merge fields, correct and save the indicated content.
If the result is unknown, do not assume the body was not delivered and immediately resend it. A failed end marker is different from an unsent body. Check the recipient’s LINE and the original result, then contact support if needed.
 English
 Japanese