

LINE acquisition routes record where customers started linking their LINE account, such as a profile, product page, or campaign. You can compare the linking rate and automation start rate for each route. In addition to tracking existing routes, you can create custom routes for your own buttons.
- Before you begin
- Create a message to send after LINE linking
- Create an automation for the LINE acquisition route
- Configure an existing LINE linking route
- Create a custom acquisition route
- Set a custom route on your own button
- Select the run frequency
- Review the LINE dashboard and acquisition route report
- If results or automations do not appear
Before you begin
- Complete the connections between StoreCRM, Shopify, and your LINE Official Account.
- Customers must be logged in to their Shopify account to link their LINE account.
- To send a message after linking, first create a LINE message and a dedicated automation.
Create a message to send after LINE linking
- In StoreCRM, open [LINE] → [LINE messages].
- Create and save the message to send after linking is complete.
Create an automation for the LINE acquisition route
- Open [Automations] → [Add automation].
- Select "Send a message after LINE linking is complete."
- Confirm that the start condition is [LINE linking completed].
- Under [Delivery content], select the LINE message you created, then save the automation.
- Enable the automation from the automation list. Only enabled dedicated automations appear as options for acquisition routes.
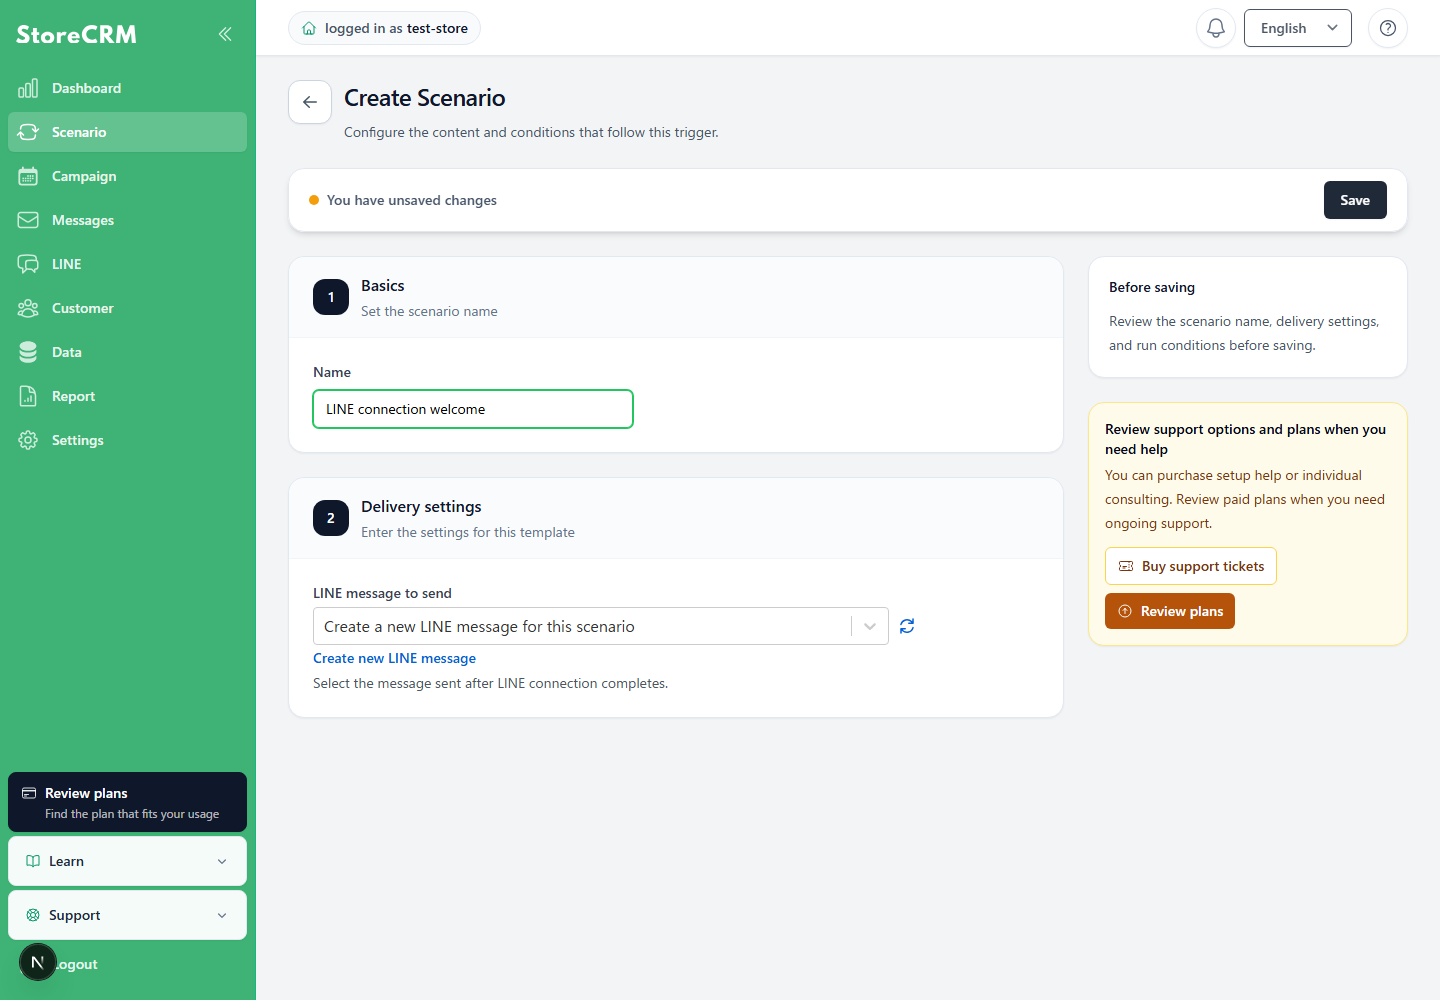
Note:Regular LINE delivery automations cannot be selected. Create the automation from the "Send a message after LINE linking is complete" template and confirm that its start condition is [LINE linking completed].
Configure an existing LINE linking route
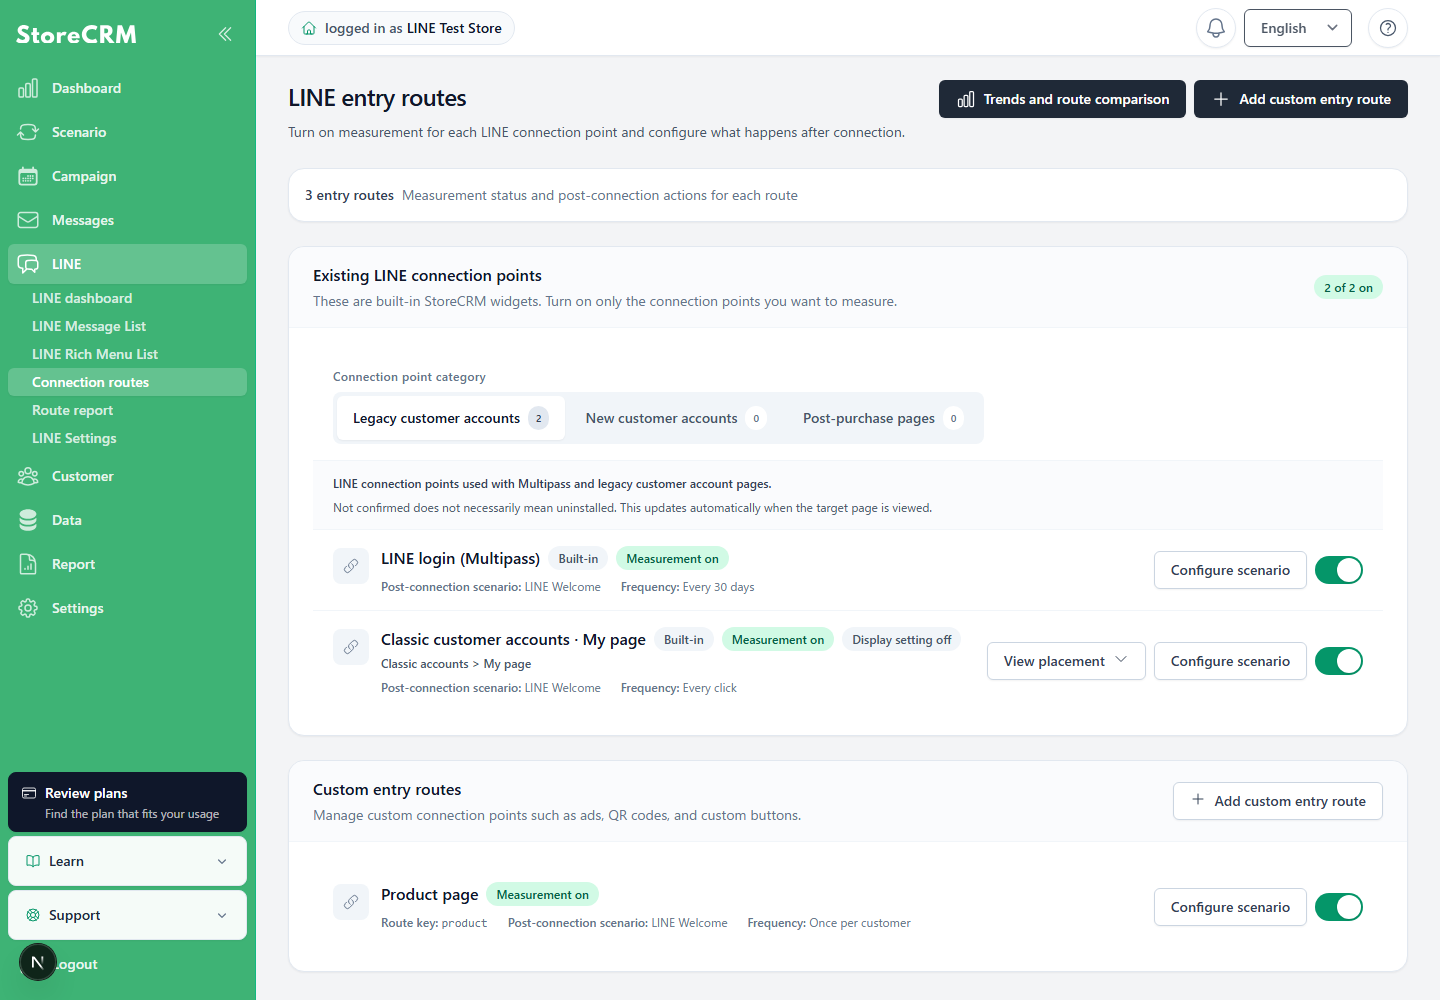
- Open [LINE] → [Acquisition routes].
- Open [Install / check] for the route you want to use, such as the profile, order list, or thank-you page.
- Place the block by following the installation guide or selecting [Install in Shopify], then confirm that it appears on your store.
- To send a message after linking, choose an enabled dedicated automation from [Set automation]. If you only want to track the route, leave the automation unspecified.
- Turn on the toggle to start tracking.
Entry routes by LINE login method
For LINE connections started from an existing login path, the route is recorded as LINE login (Multipass) or LINE login (OIDC) according to the login method used. When a returning login is already connected, StoreCRM does not start the LINE-connection-completed scenario again.
Create a custom acquisition route
LINE連携ページを作成し、連携特典クーポンを自動発行する(サンプルコード・操作ごとの画像付き)
- Under [LINE] → [Acquisition routes], click [Add custom acquisition route].
- Enter an internal route name and route key. The route key can contain lowercase ASCII letters, numbers, underscores (_), and hyphens (-).
- To track the route only, select [LINE linking and acquisition tracking only]. To send a message after linking, select an enabled dedicated automation.
- Set the run frequency, then click [Create acquisition route].
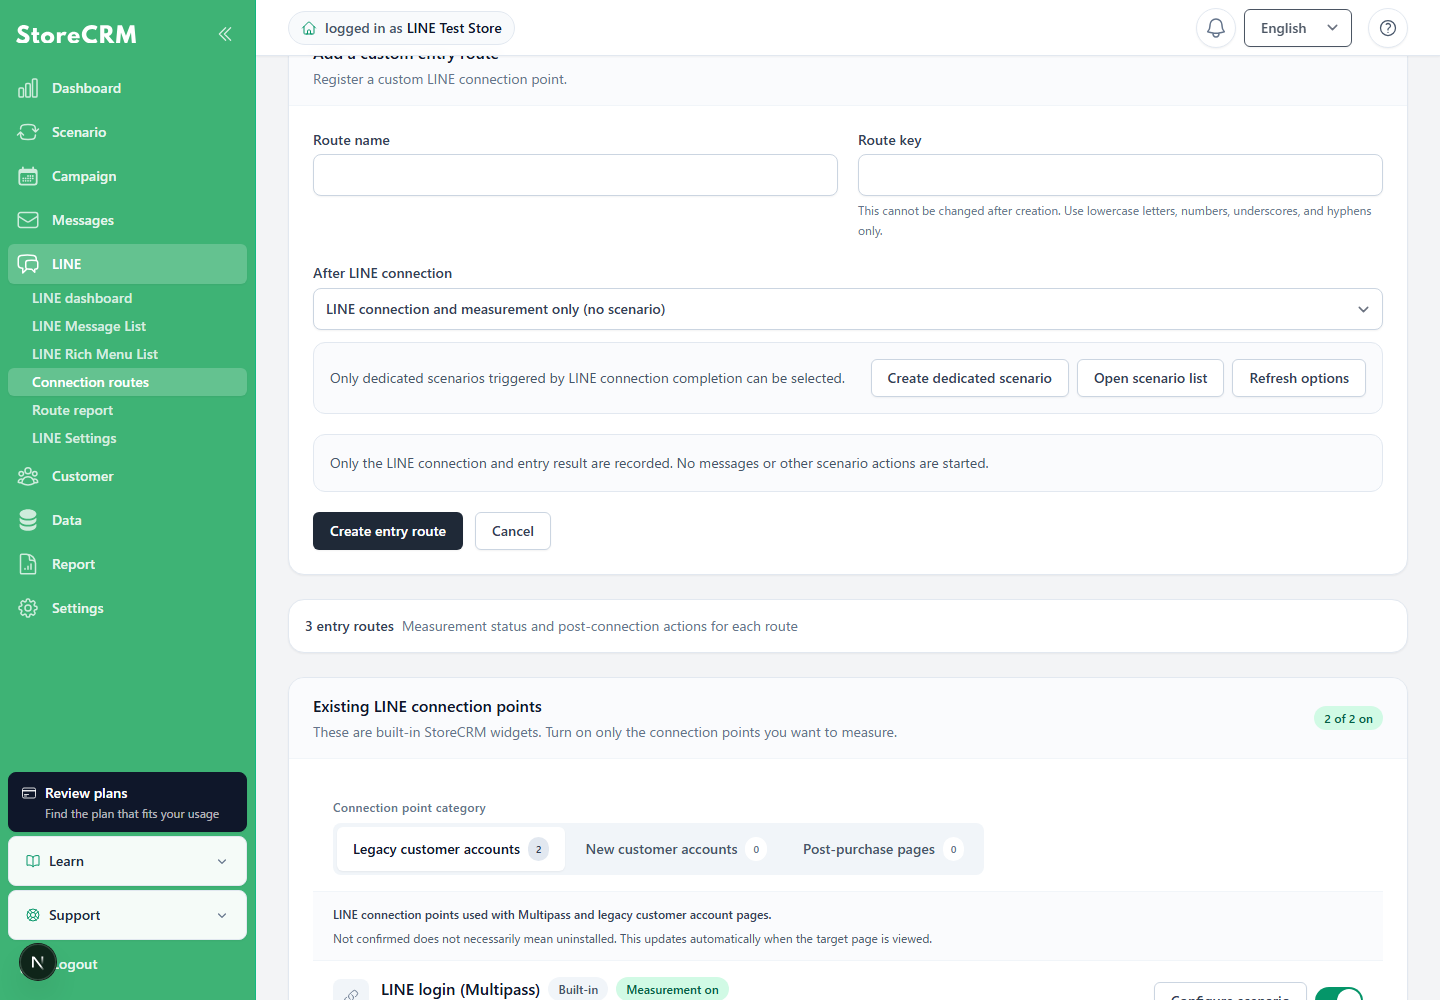
Note:The route key cannot be changed after creation. Use a name that identifies its placement, and make sure it exactly matches the value used in your code.
Set a custom route on your own button
To start LINE linking from a button in your theme or on a custom page, run the following JavaScript when the button is clicked. First create a custom route in the admin, then replacerouteKeywith that route key.
window.storecrm.doLineSubscribe({
  routeKey: 'product_page'
});
The following is an implementation example that includes a button.
<button type="button" id="storecrm-line-product">Connect with LINE</button>
<script>
document.getElementById('storecrm-line-product').addEventListener('click', function () {
  if (!window.storecrm || typeof window.storecrm.doLineSubscribe !== 'function') {
    console.error('Failed to load the StoreCRM LINE connection feature.');
    return;
  }
  window.storecrm.doLineSubscribe({ routeKey: 'product_page' });
});
</script>routeKeyIf you omit it, only the standard LINE linking flow starts and the action is not tracked as a custom route. After installation, click the button as a test customer logged in to Shopify and confirm both LINE linking and the report results.
Select the run frequency
- Once per customer:Starts the automation only the first time for each customer.
- Every specified number of days:The automation can start again after the specified number of days (1–3650) has passed since the previous run.
- Every click:Starts every time the route is clicked. Before using this option, make sure your operation will not result in duplicate messages.
If an automation does not start because of the frequency limit, the skipped result is still recorded in the acquisition history.
Review the LINE dashboard and acquisition route report
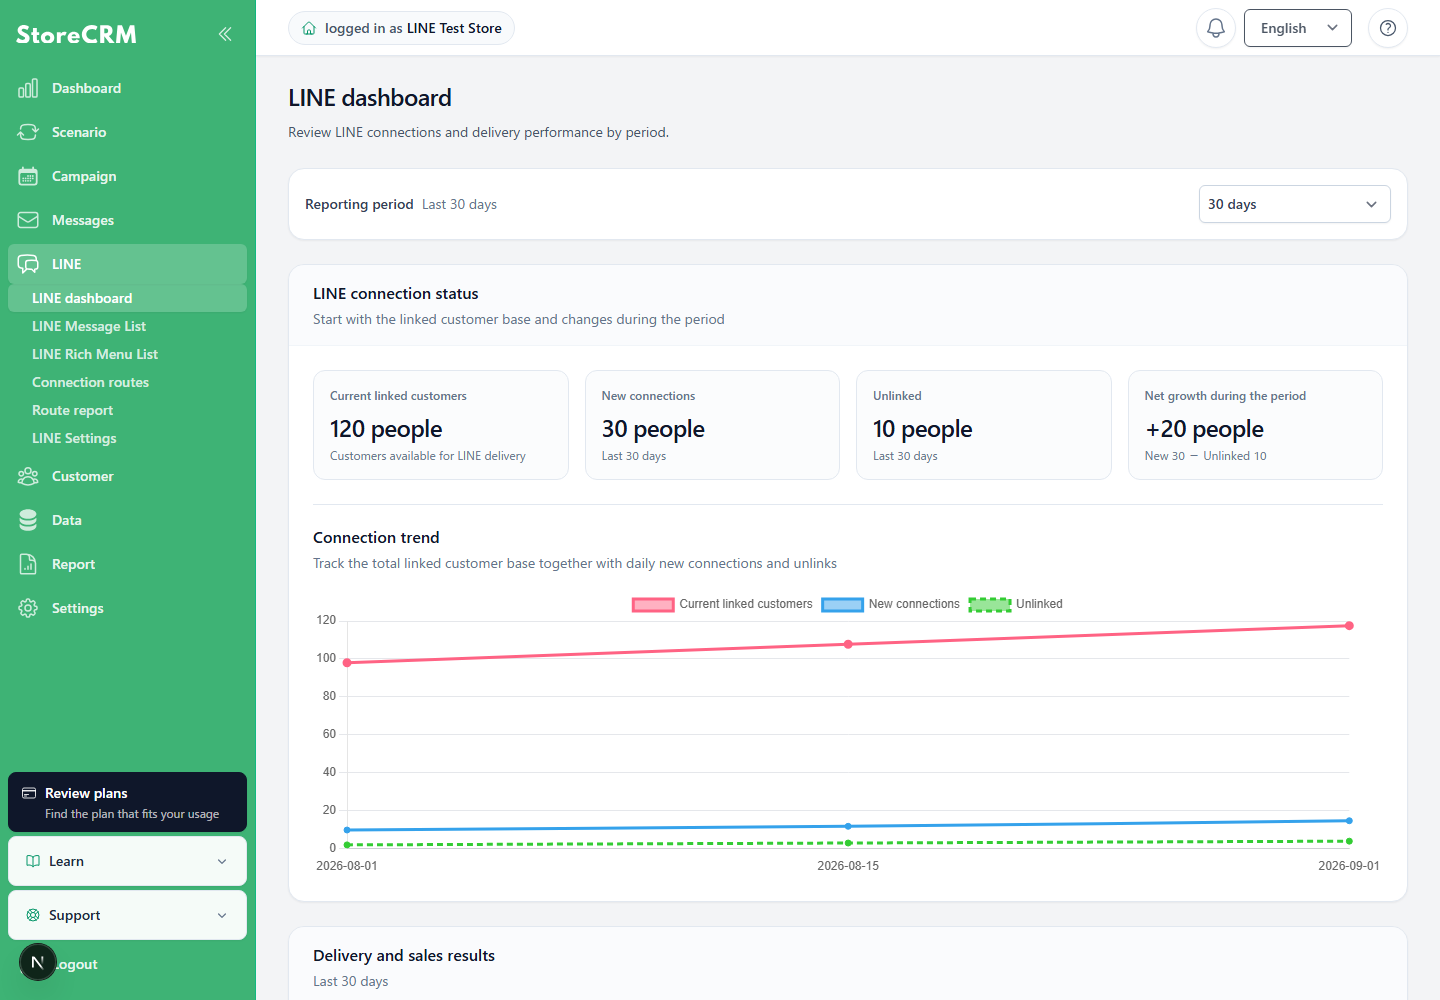
Under [LINE] → [LINE dashboard], you can review currently linked customers, new links, unlinks, net growth during the selected period, and daily trends.
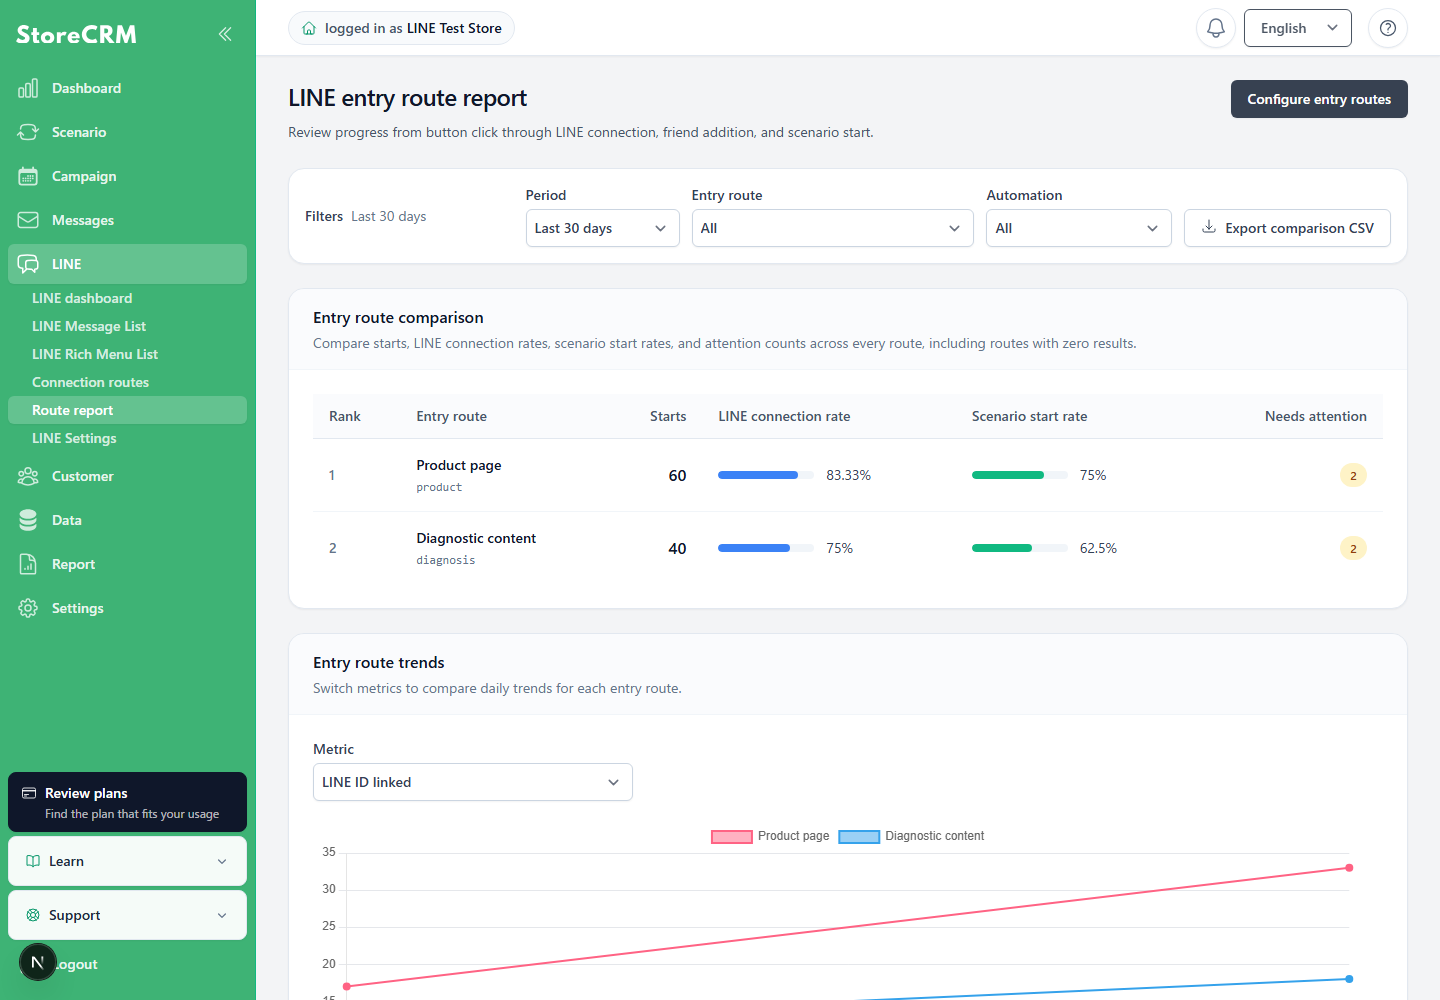
Under [LINE] → [Acquisition route report], you can filter by period, acquisition route, and automation, then compare linking starts, LINE linking rates, automation start rates, and items that require review.
Review processing results and customer-level history
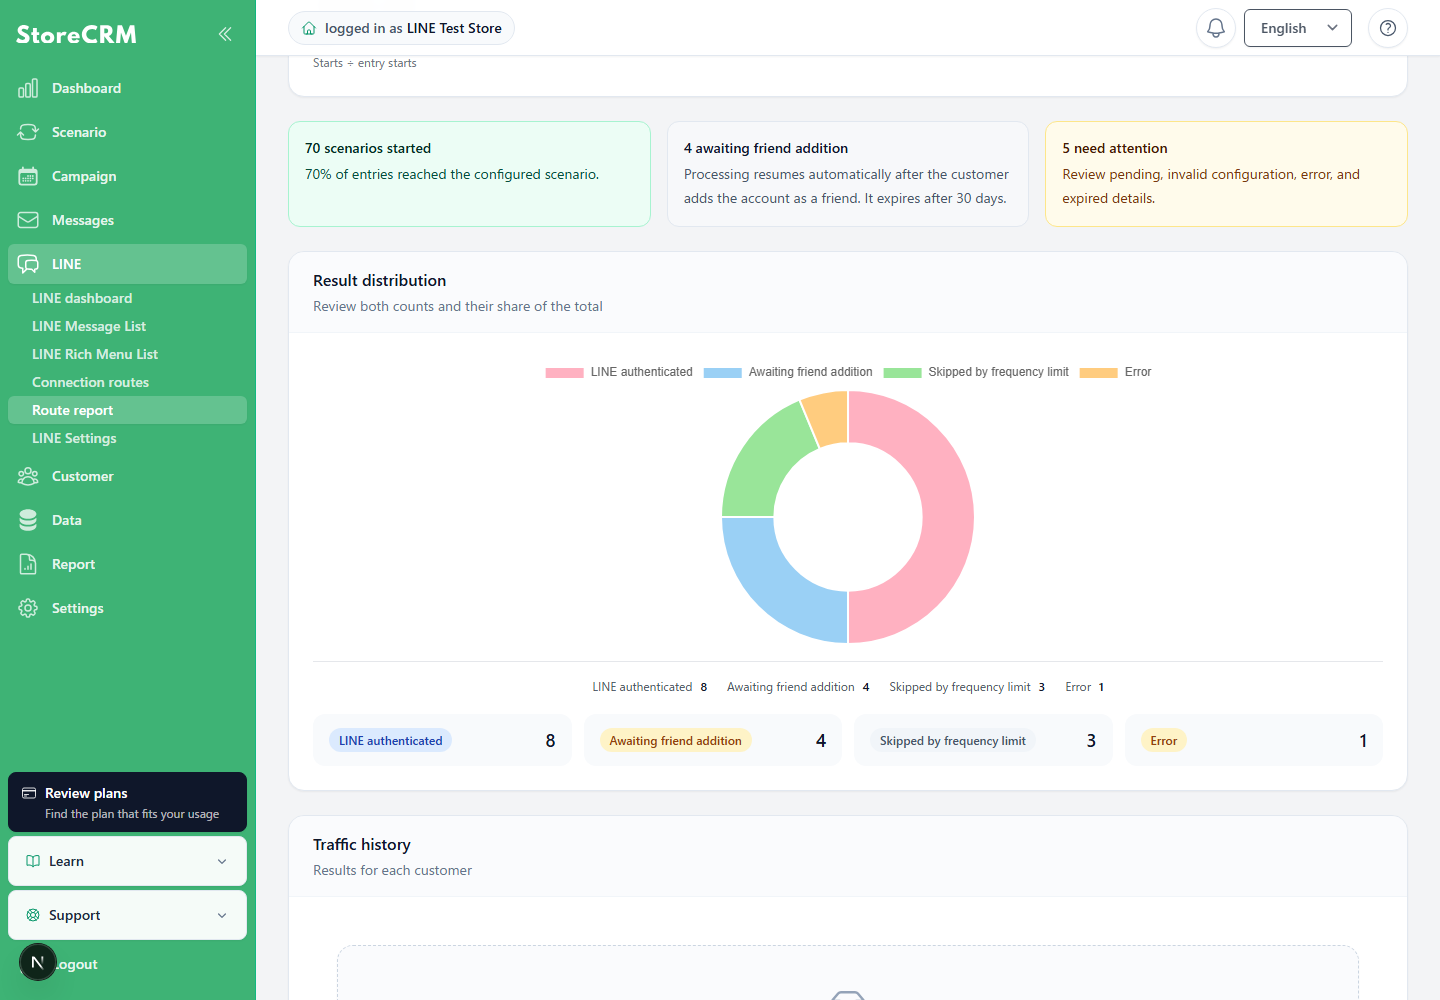
You can review the proportions of results such as waiting for a friend addition, skips caused by frequency limits, and errors, as well as the processing result for each customer. Export comparison data and history as CSV files, then download generated files from [Data] → [Downloads].
If results or automations do not appear
- Confirm that the target route appears on the storefront and route tracking is turned on.
- For a custom route, confirm that the value in your code
routeKeyexactly matches the key of the route you created. - Confirm that the customer is logged in to their Shopify account.
- Confirm that the automation was created from the dedicated template and is enabled.
- Check the customer-level processing results to see whether the automation was skipped because of the run frequency.
- Clear the report filters for period, route, and automation, then check again.
 English
  Japanese