This page provides an overview of the integration functionality between the Shopify application easyPoints and StoreCRM and how to set it up.
How to cooperate
- Using easyPoints' CSV export data, StoreCRM's import function imports each customer's point data.
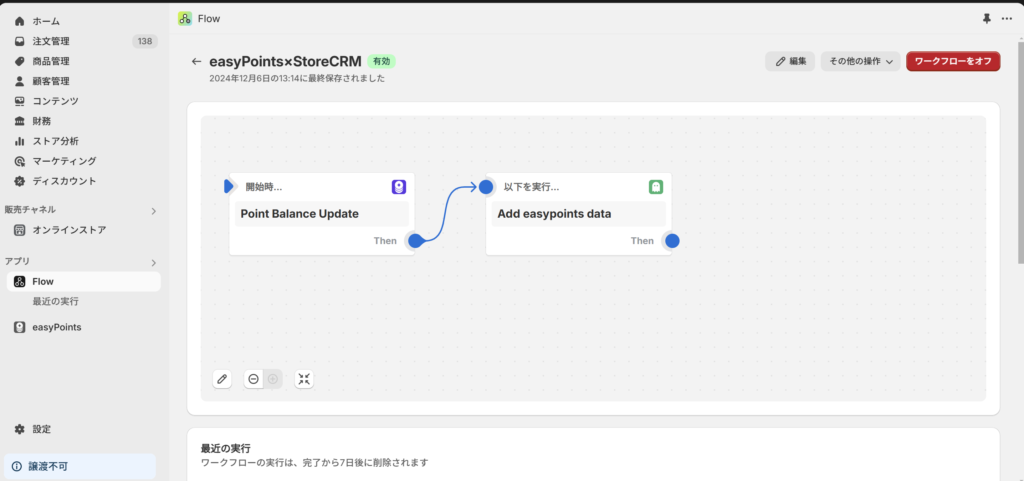
- Based on the "Point Balance Update" trigger of Shopify Flow provided by easyPoints, each data at the time of point fluctuation is imported into StoreCRM by the "Add easyPoints data" action of StoreCRM.
- Based on the "Tier Update" trigger in Shopify Flow provided by easyPoints, data from each rank change is imported into StoreCRM using the "Add customer metrics data" action in StoreCRM.
What can be done through collaboration
- Mail magazine and LINE policies based on events such as when points are earned or spent
- Mail magazine and line policies based on events such as when ranks increase or decrease
- Reminder e-mail and line delivery ● days before point expiration date
- Segmentation based on user possession points and expiration date
- Mail magazine and LINE distribution policies for the created segments
Initial setup for collaboration
Import easyPoints point information into StoreCRM
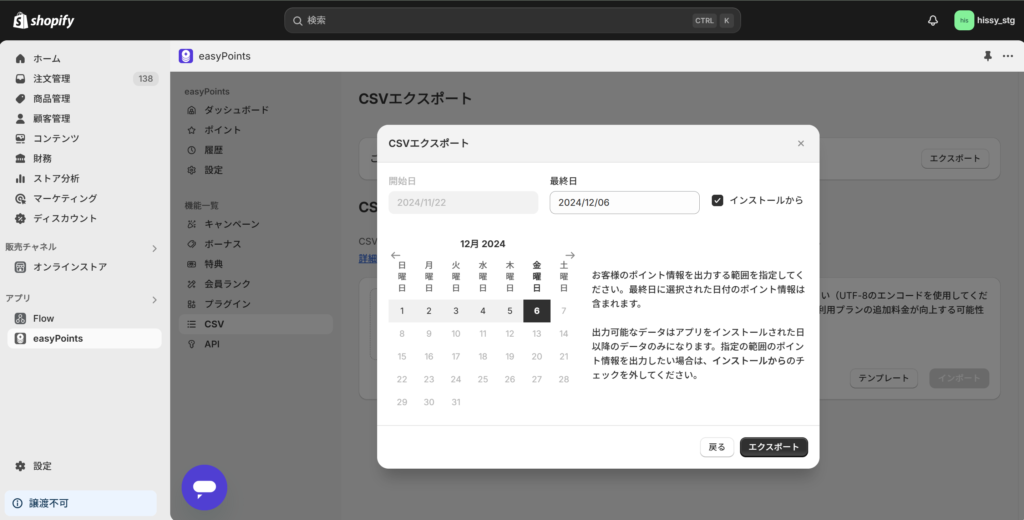
(1) Export CSV data for the entire period using easyPoints' CSV export function.

(2) Import the downloaded CSV data into StoreCRM at [Data] > [Data Import] on the StoreCRM application screen.
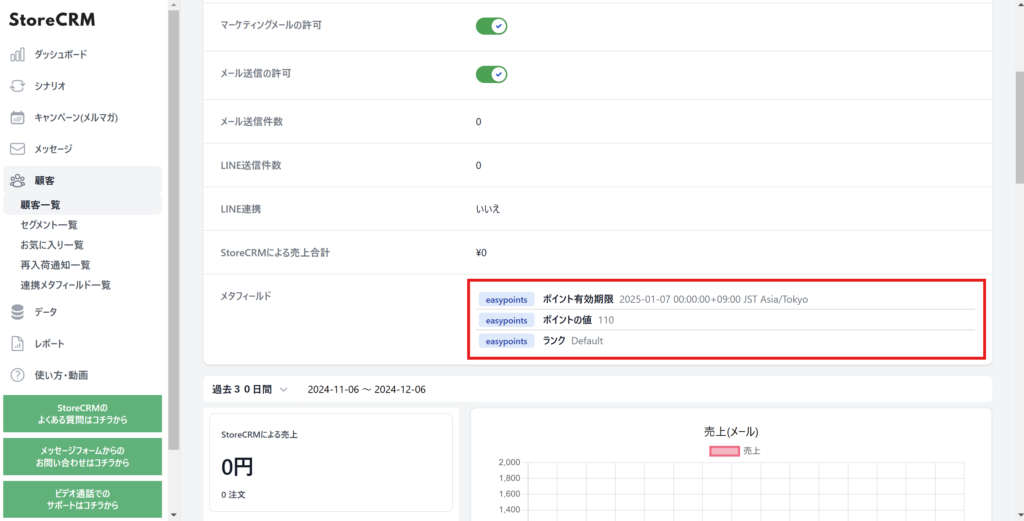
The initial import is complete when the point information is registered in the metafield data of the customer information.
Set up a linkage process in Shopify Flow when points change.
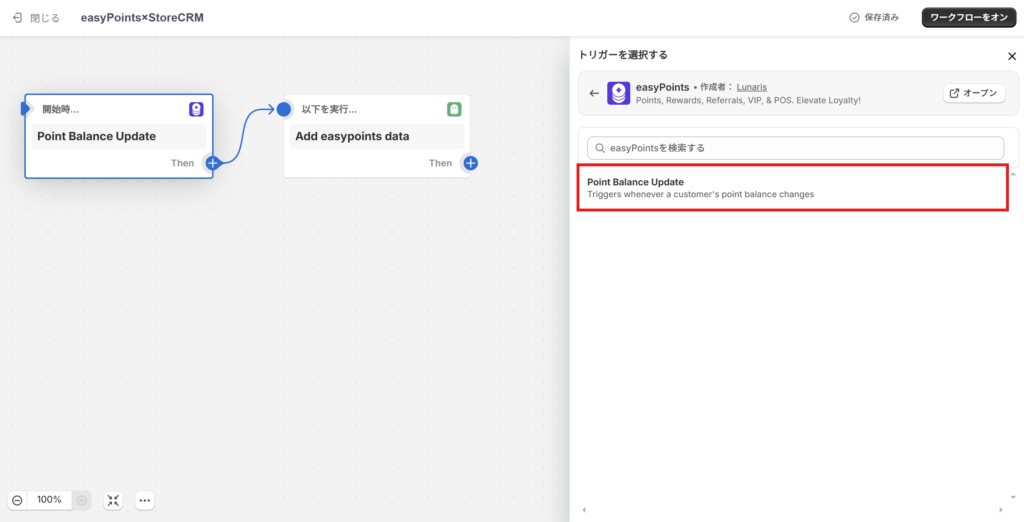
Create a new Flow in Shopify Flow. Select the "Point Balance Update" trigger.
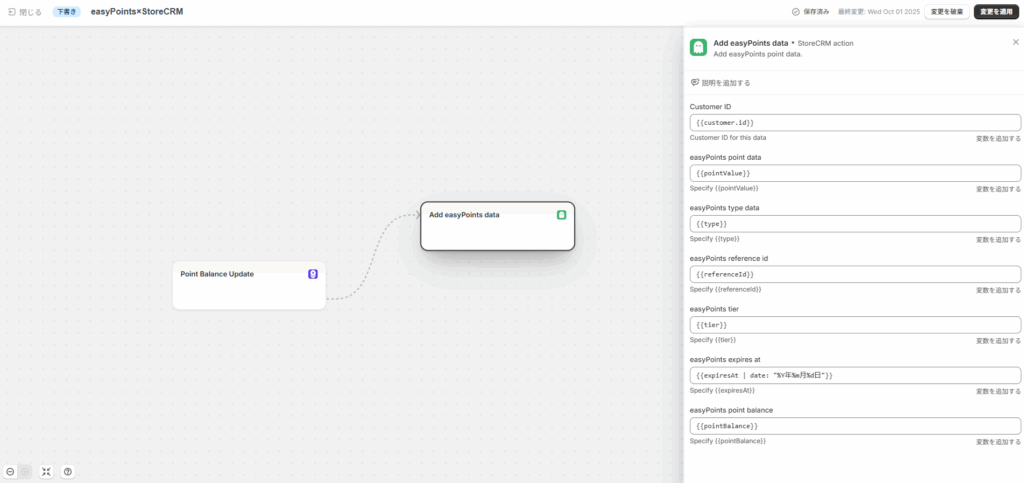
(2) As an action, the StoreCRM action "Add easyPoints dataSelect the "Action" and set variables for each item as shown in the image.
*Refer to the string after Specify at the bottom of the item for each data variable in easyPoints.
※{{expiresAt}}はそのまま入力すると、時刻やタイムゾーンまで表示されるため、
{{expiresAt | date: "%Y年%m月%d日"}}といった形で整形します。
(iii) Turn on the workflow. This allows the latest data to be imported into StoreCRM when points fluctuate.
Set up linkage processing in Shopify Flow when rank changes.
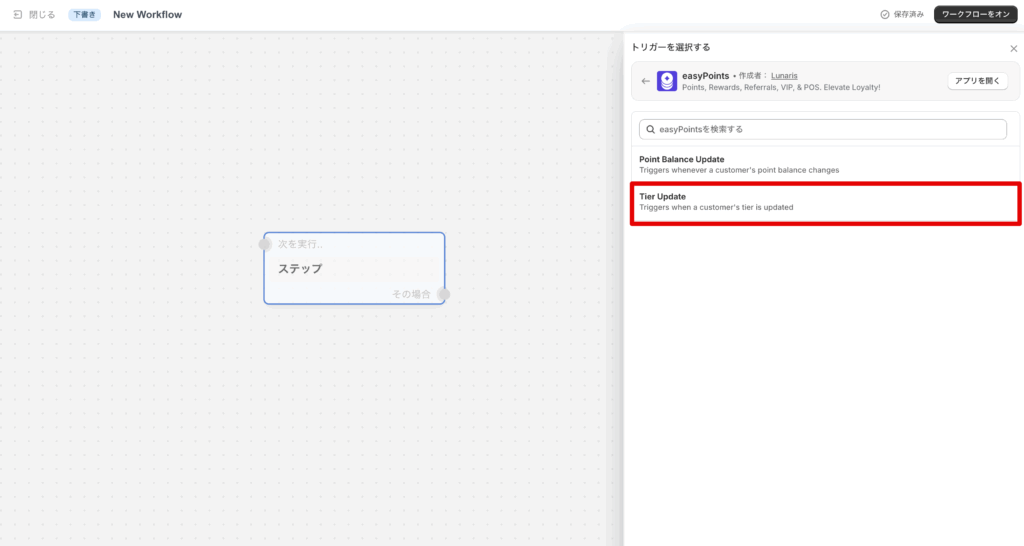
Create a new Flow in Shopify Flow. Select the "Tier Update" trigger.
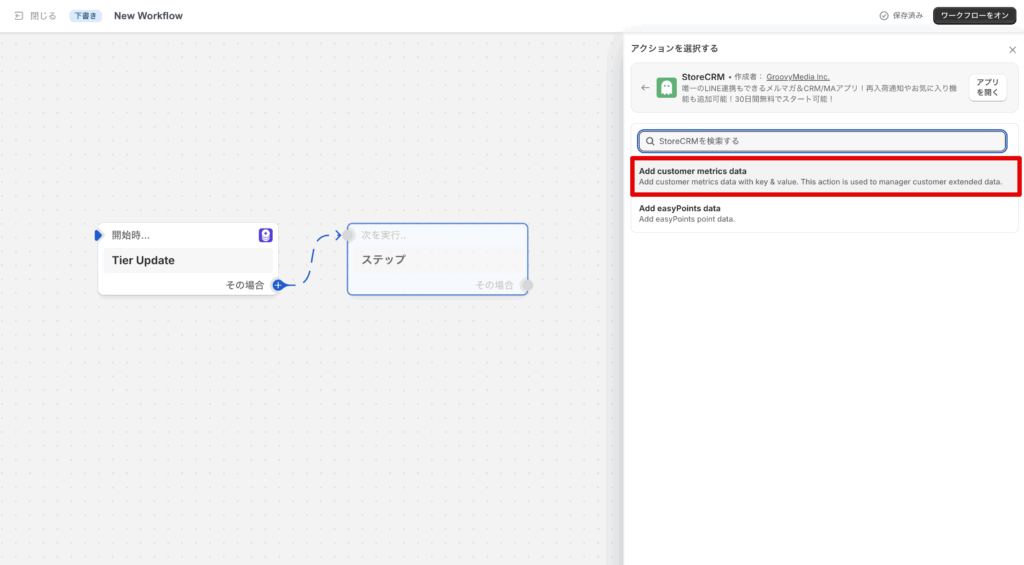
(2) As an action, the StoreCRM action "Add customer metrics dataSelect the "Action.
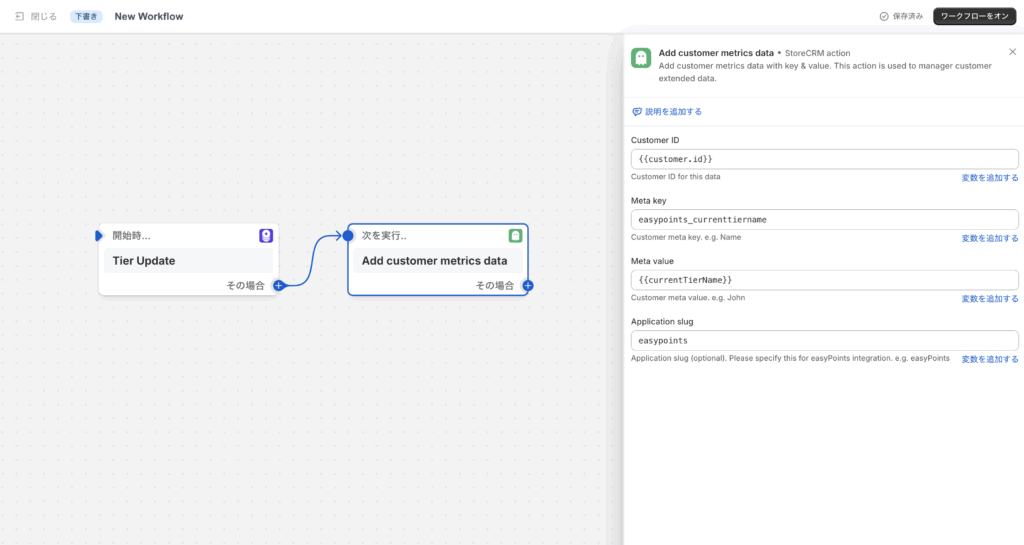
(iii) "Add customer metrics dataThe various values will be entered in the "Action" section of the "Action". The values to be specified are as follows
Customer ID: {{customer.id}}
Meta key: any value (in this case, enter easypoints_currenttiername to proceed)
Meta value: {{currentTierName}}
Application slug: arbitrary value (in this case, enter easypoints to proceed)
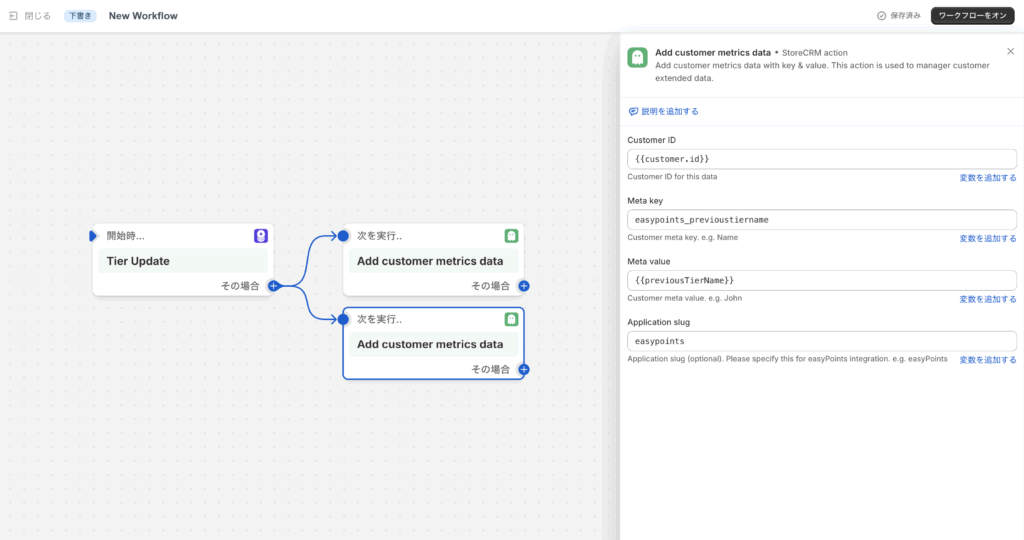
(4) "Add customer metrics dataWe will add another action for the "+" action and enter the various values. The values to be specified are as follows
Customer ID: {{customer.id}}
Meta key: any value (in this case, enter easypoints_previoustiername to proceed)
Meta value: {{previousTierName}}
Application slug: arbitrary value (in this case, enter easypoints to proceed)
Turn on the workflow when you have completed the entry.
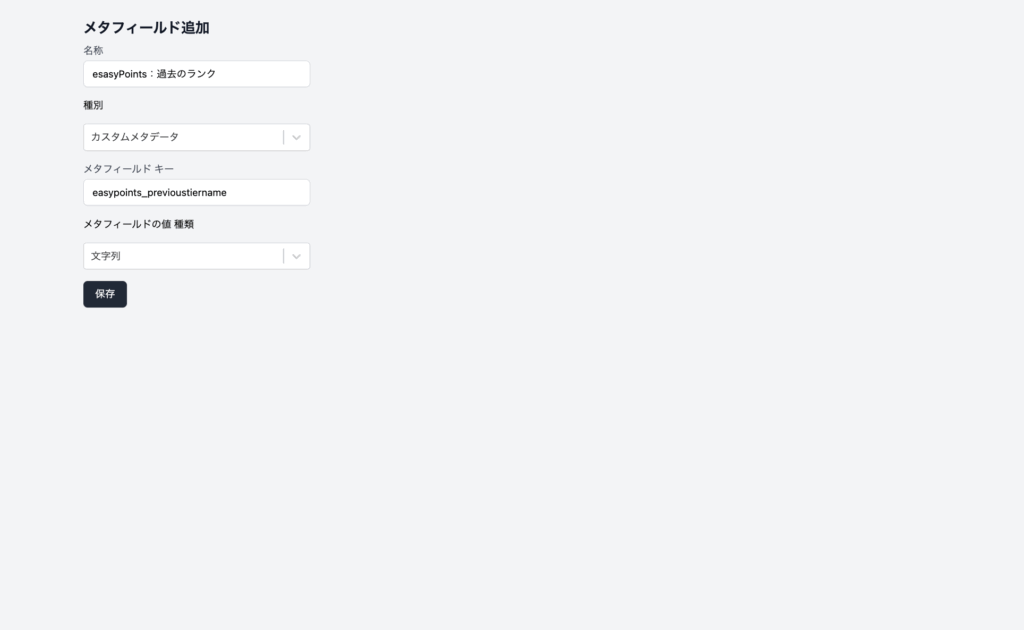
5) To retain the point values received by StoreCRM, go to the StoreCRM screen and add a new meta field from [Customer] > [Meta Field List]. In the Add Meta Field screen, enter and save the information as shown below.
Name: any string
Type: Custom metadata
Meta field Key: Value of Meta key specified in (3)
Meta field value Type: string
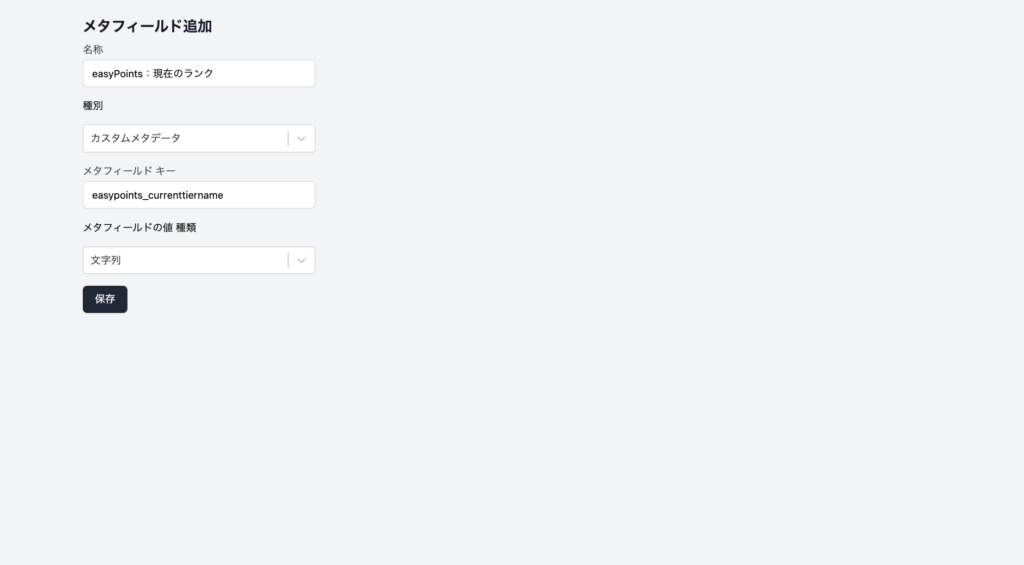
(6) In order for StoreCRM to retain the value of the current point, go to the StoreCRM screen and add a new meta field from [Customer] > [Meta Field List]. In the Add Meta Field screen, enter and save the information as shown below.
Name: any string
Type: Custom metadata
Meta field Key: Value of Meta key specified in (4)
Meta field value Type: numeric
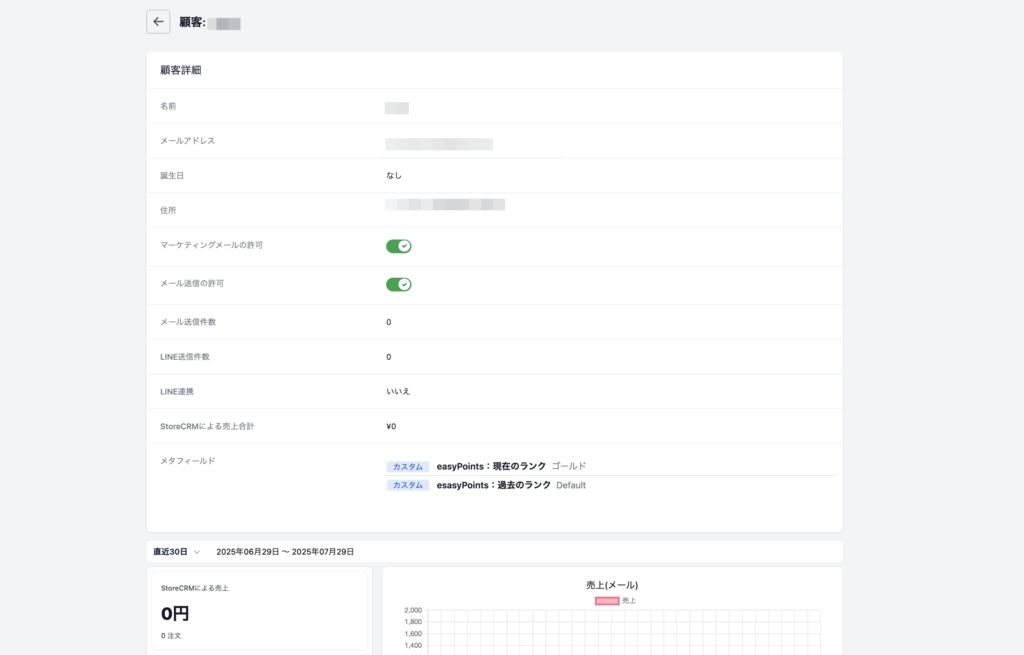
(vii) After the configured Flow is activated, check the customer detail screen in StoreCRM. If the rank information of easyPoints is correctly described for the specified meta-field, the linkage has succeeded.
easyPoints
StoreCRM
Related Pages