

Automation tests let you check branches and execution paths using entered customer attributes or past events before enabling an automation. When needed, you can also send email or LINE messages to configured test recipients and issue coupons in Shopify.
What you can check with an automation test
- Branches based on customer attributes, orders, checkouts, products, and variants
- The nodes and branches actually followed in the automation
- Customer-specific recommendations in email and LINE messages
- Email and LINE delivery results for test recipients
- Coupon issuance results in Shopify
An automation test can use unsaved edits. Entered test data and results are not saved, and wait nodes proceed to the next step without waiting for the actual duration.
Before you begin
- Configure the start condition, branches, email messages, and LINE messages for the automation you want to test.
- Before sending an actual test email or LINE message, configure thetest mode recipients.
- A LINE test send requires a customer whose email address matches the configured address, whose LINE account is linked, and who can receive messages.
- To test coupon issuance, the automation must contain a coupon issuance node or coupon settings.
Open an automation test
- In the StoreCRM admin, open the target automation under [Automations].
- On the edit or details screen, click [Test this automation].
- Proceed through [Select target] → [Review execution] → [Review results].
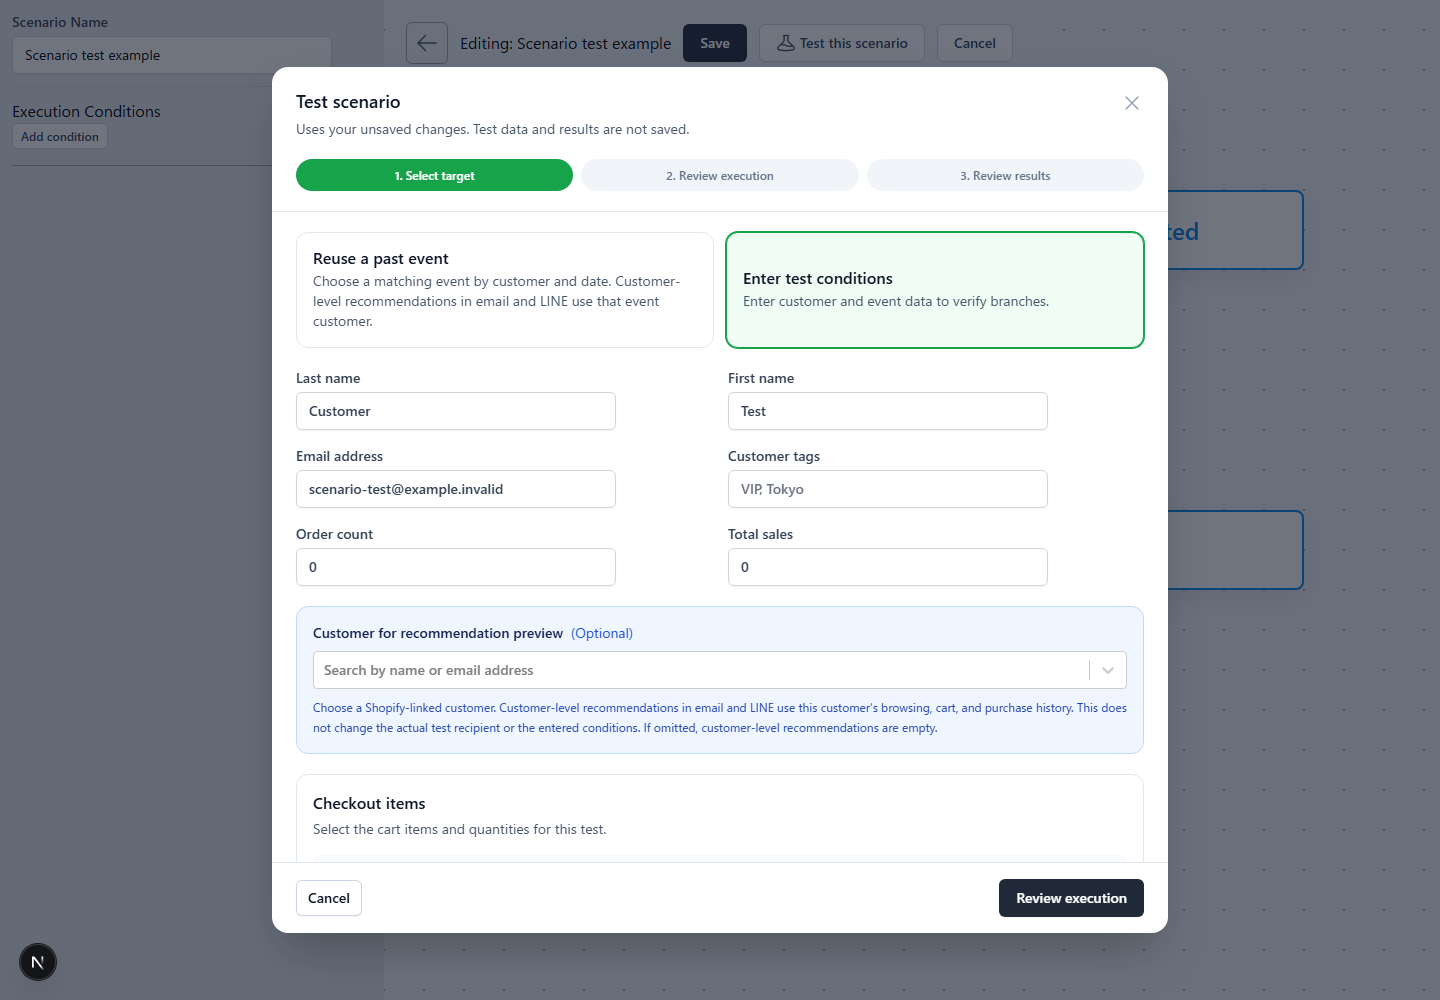
Method 1: Enter test conditions
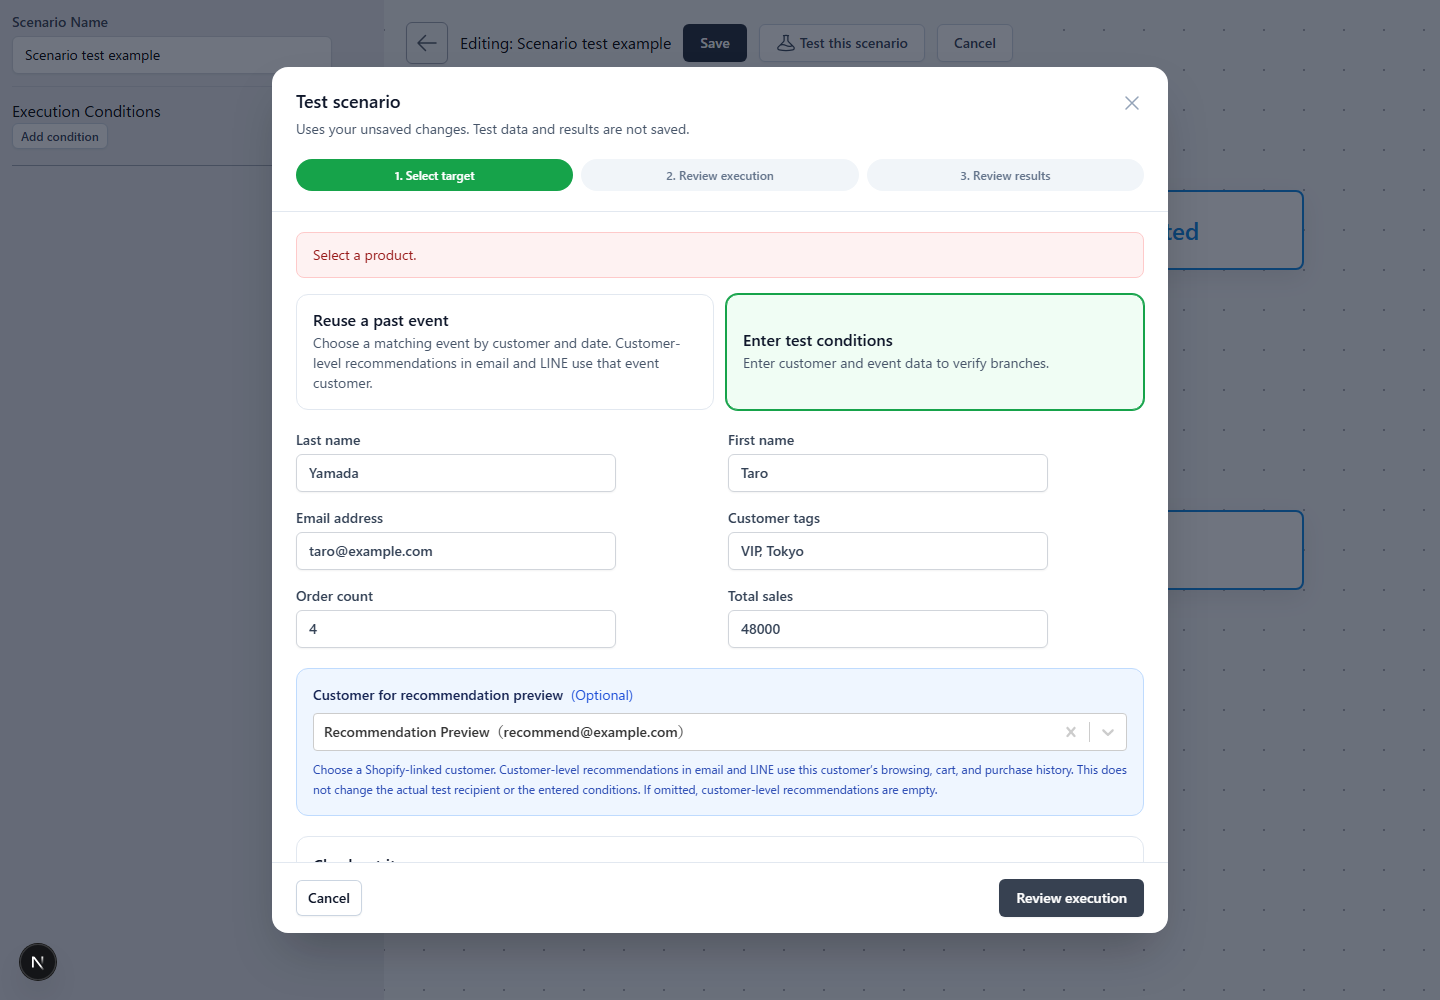
[Enter test conditions] lets you create the conditions you want to check without using an actual event. Enter values such as last name, first name, email address, customer tags, order count, and total amount spent.
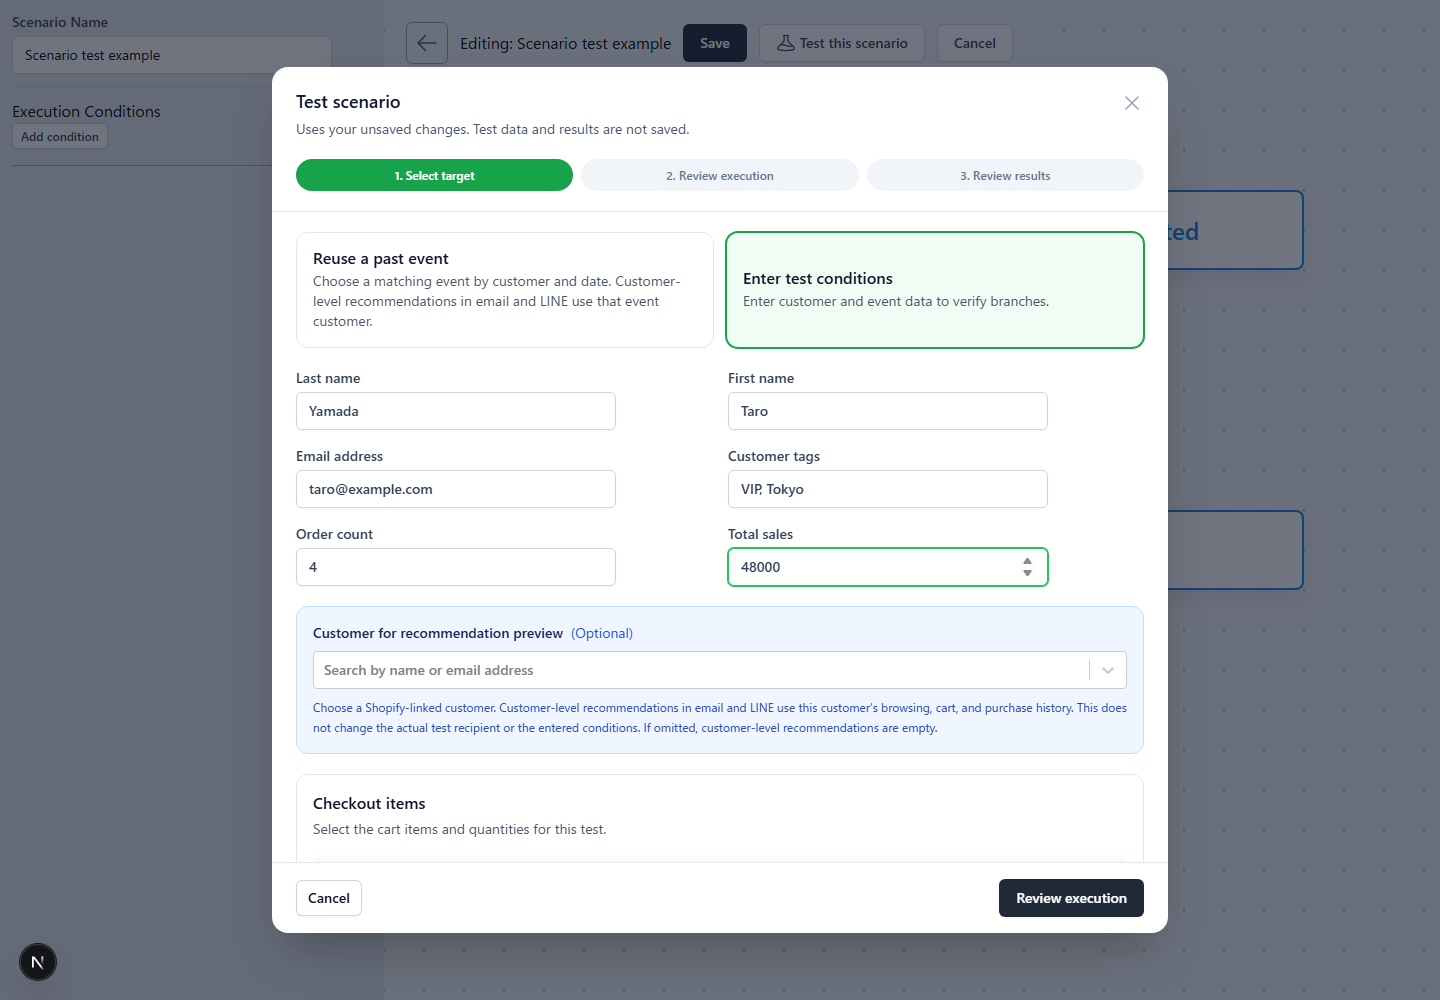
Separate multiple customer tags with commas. Enter zero or a positive number for order count and total amount spent. The customer entered here is a virtual test customer and is not saved as a customer in StoreCRM or Shopify.
Check customer-specific recommendations
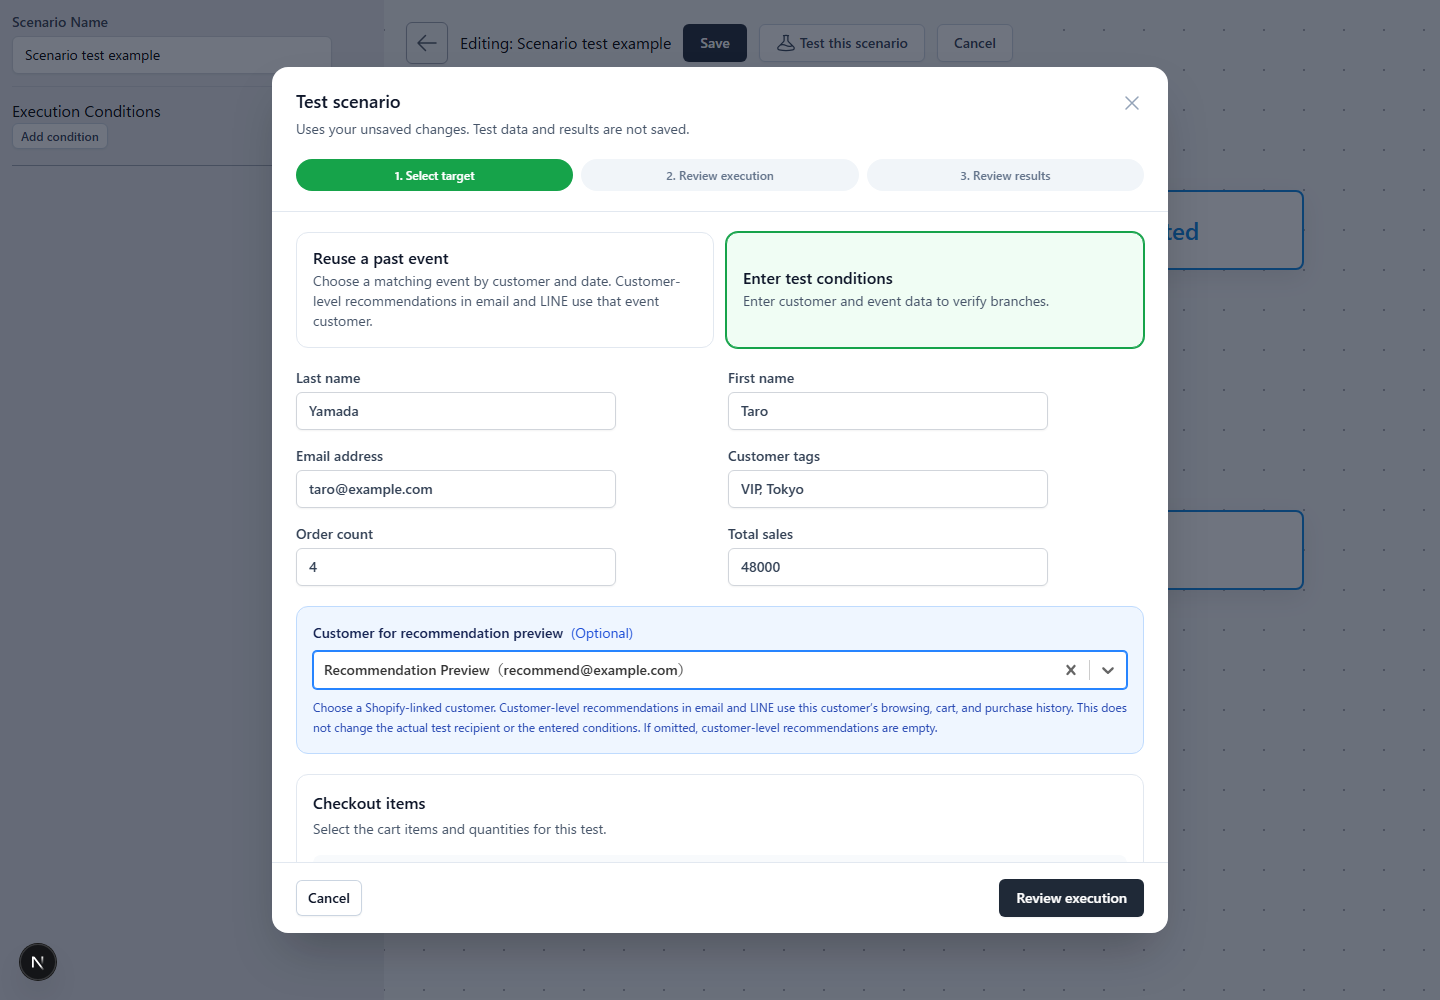
To check customer-specific recommendations in email or LINE messages, select a customer linked to Shopify under [Customer for recommendation preview]. That customer's browsing, cart, and purchase history is used only to calculate recommendations.
The selected customer does not become the actual recipient, and the entered customer attributes and test conditions are not changed. If no customer is selected, customer-specific recommendations are empty.
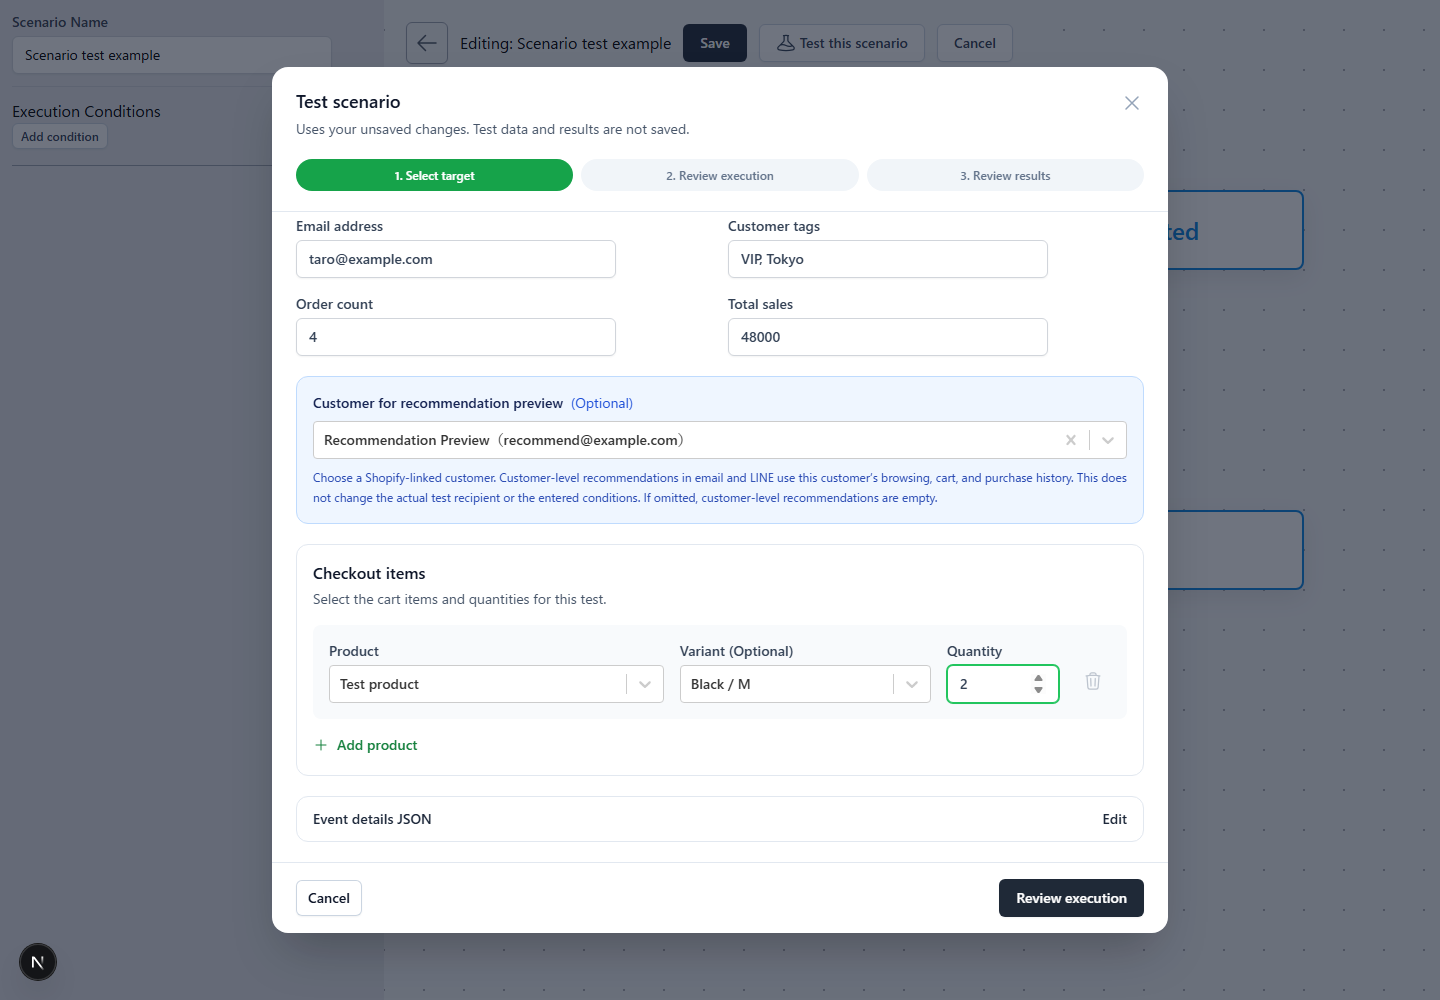
Enter checkout products
For an automation triggered by checkout creation or abandonment, select a product, an optional variant, and a quantity. To test multiple products, click [Add product].
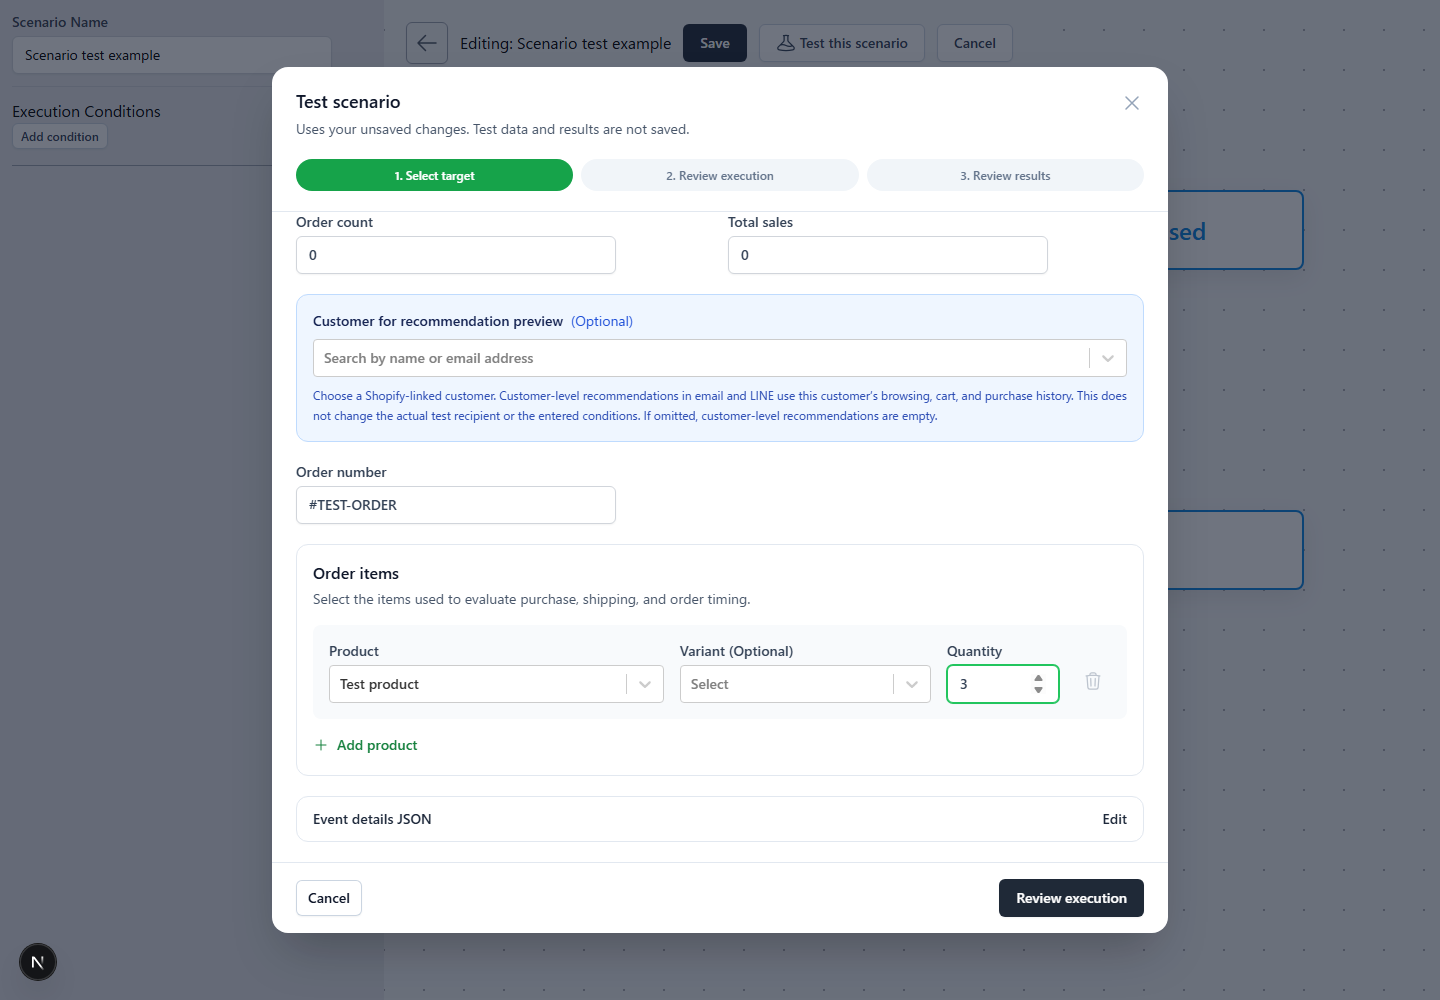
Enter order products
For an automation triggered by a purchase, fulfillment, or elapsed time after an order, enter an order number, at least one product, an optional variant, and a quantity. A test order amount is calculated automatically from the entered product prices and quantities.
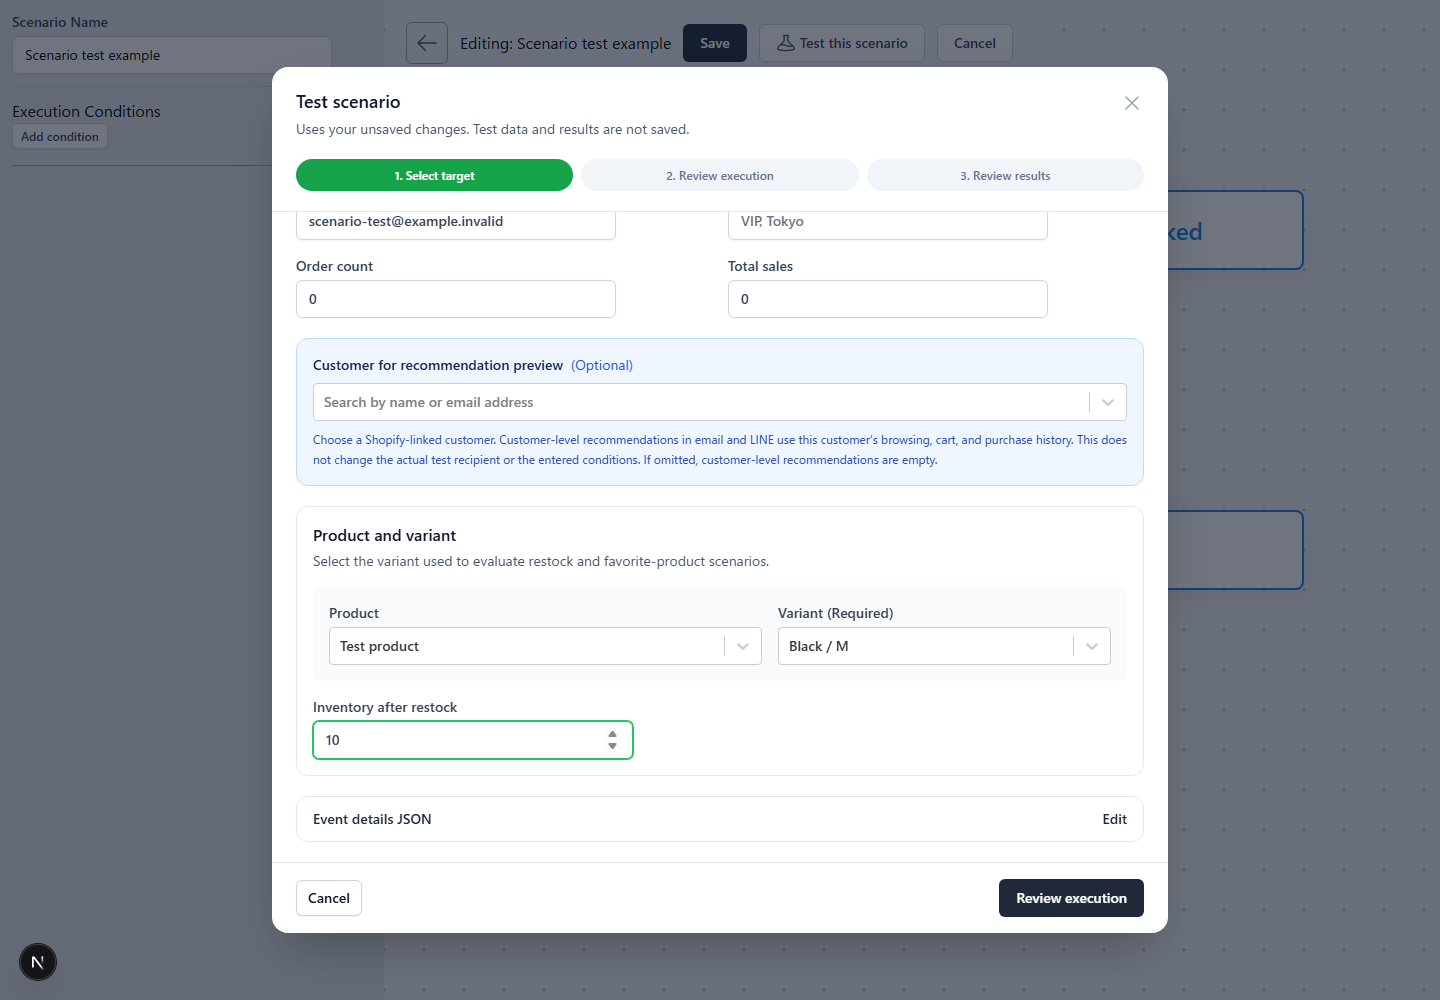
Enter back-in-stock or favorite products
For an automation triggered by a back-in-stock or favorite product event, select a product and a required variant. For a back-in-stock automation, also enter the post-restock inventory quantity used to evaluate conditions.
Edit event details JSON
You do not need to edit this for a standard test. Keep the default value {} and continue.Customer information, products, variants, quantities, order numbers, order amounts, inventory quantities, and similar data are generated automatically from values entered on the screen.
Use JSON only when you need to add event-specific values that do not have fields on the screen to condition evaluation. Enter only the event'sdatasection.slug, ,model_slug, customer information, or other outer fields managed by the test screen.
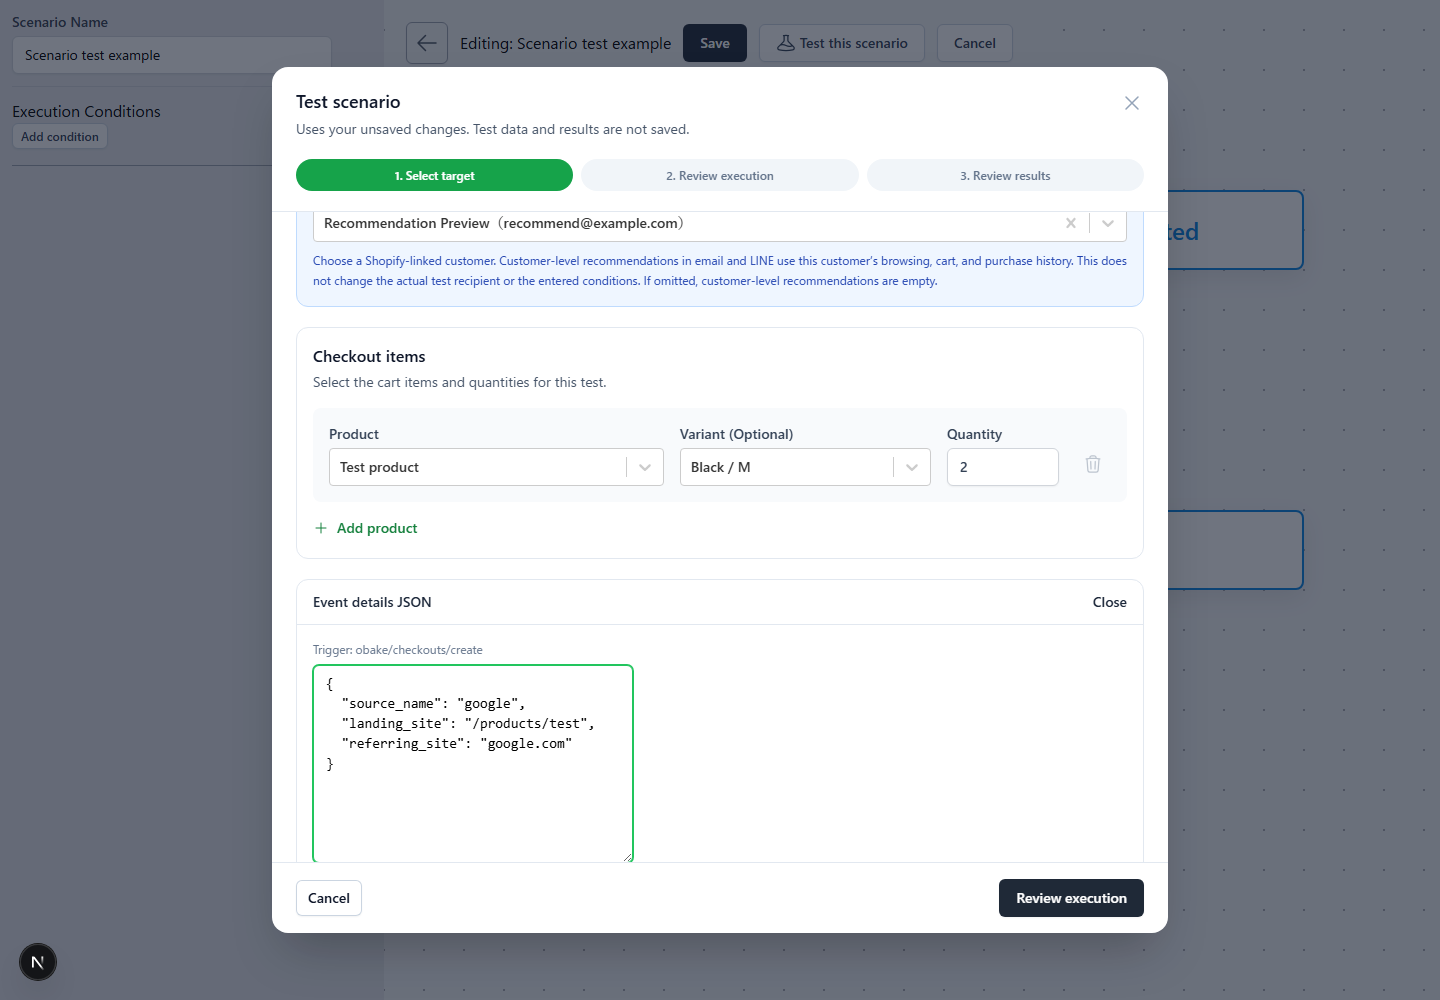
Example of specifying a checkout source
This example shows how to enter source-related event values for a checkout creation or abandonment automation.
{
  "source_name": "web",
  "landing_site": "/products/sample?utm_source=instagram",
  "referring_site": "https://www.instagram.com/"
}
How to choose JSON keys
- Check which event fields are referenced by the automation's start condition and branches.
- If the screen has a corresponding field, use that field.
- Add only fields that have no input field to the JSON, using the same key name and data type as the actual event.
If the same key exists in both the screen input and JSON, values generated from the screen, such as product, quantity, order number, amount, and inventory, take priority. If you do not know the actual event structure or key names, use [Reuse a past event] instead of guessing.
JSON input rules
- Enclose the entire value in ASCII curly braces
{ }. - Enclose keys and strings in ASCII double quotation marks.
- Separate multiple fields with commas. Do not add a comma after the last field.
- Use
120for numbers andtrueorfalsefor Boolean values without quotation marks. - Do not enter only an array, only a string, or
nullby itself. Always enter a JSON object.
Method 2: Reuse a past event
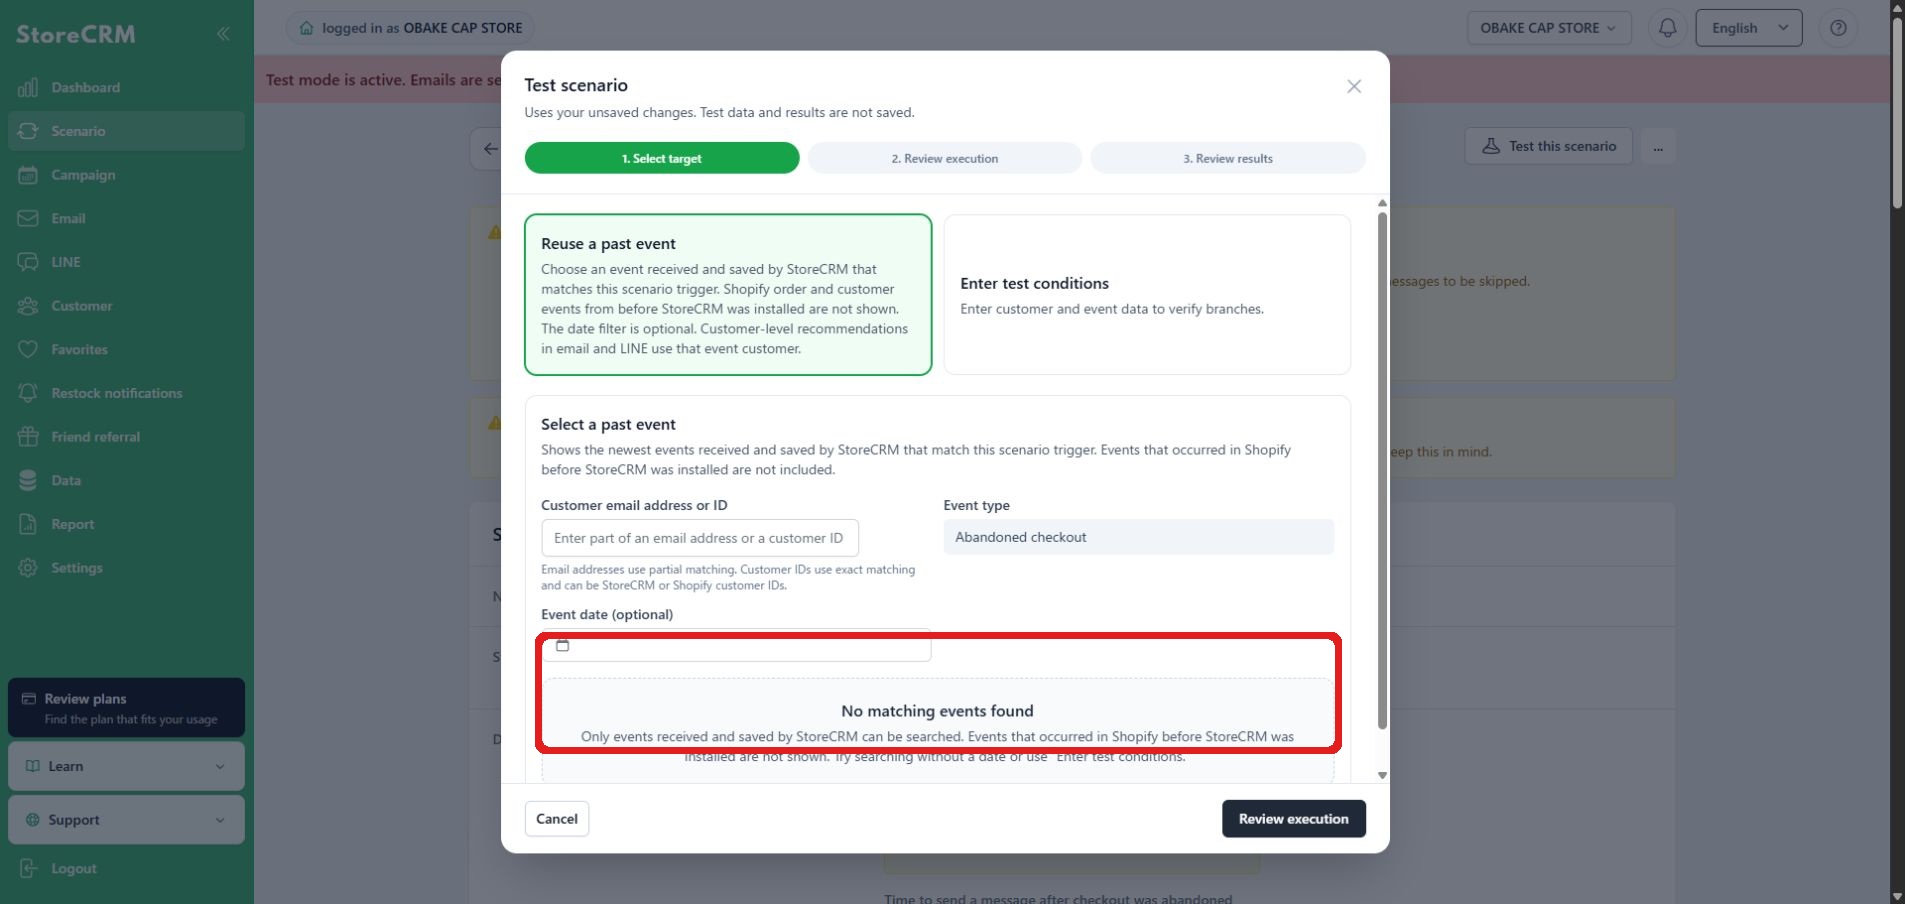
If matching start-condition history exists, select actual data under [Reuse a past event]. Events are shown newest first and can be filtered by customer email address or customer ID and event date.
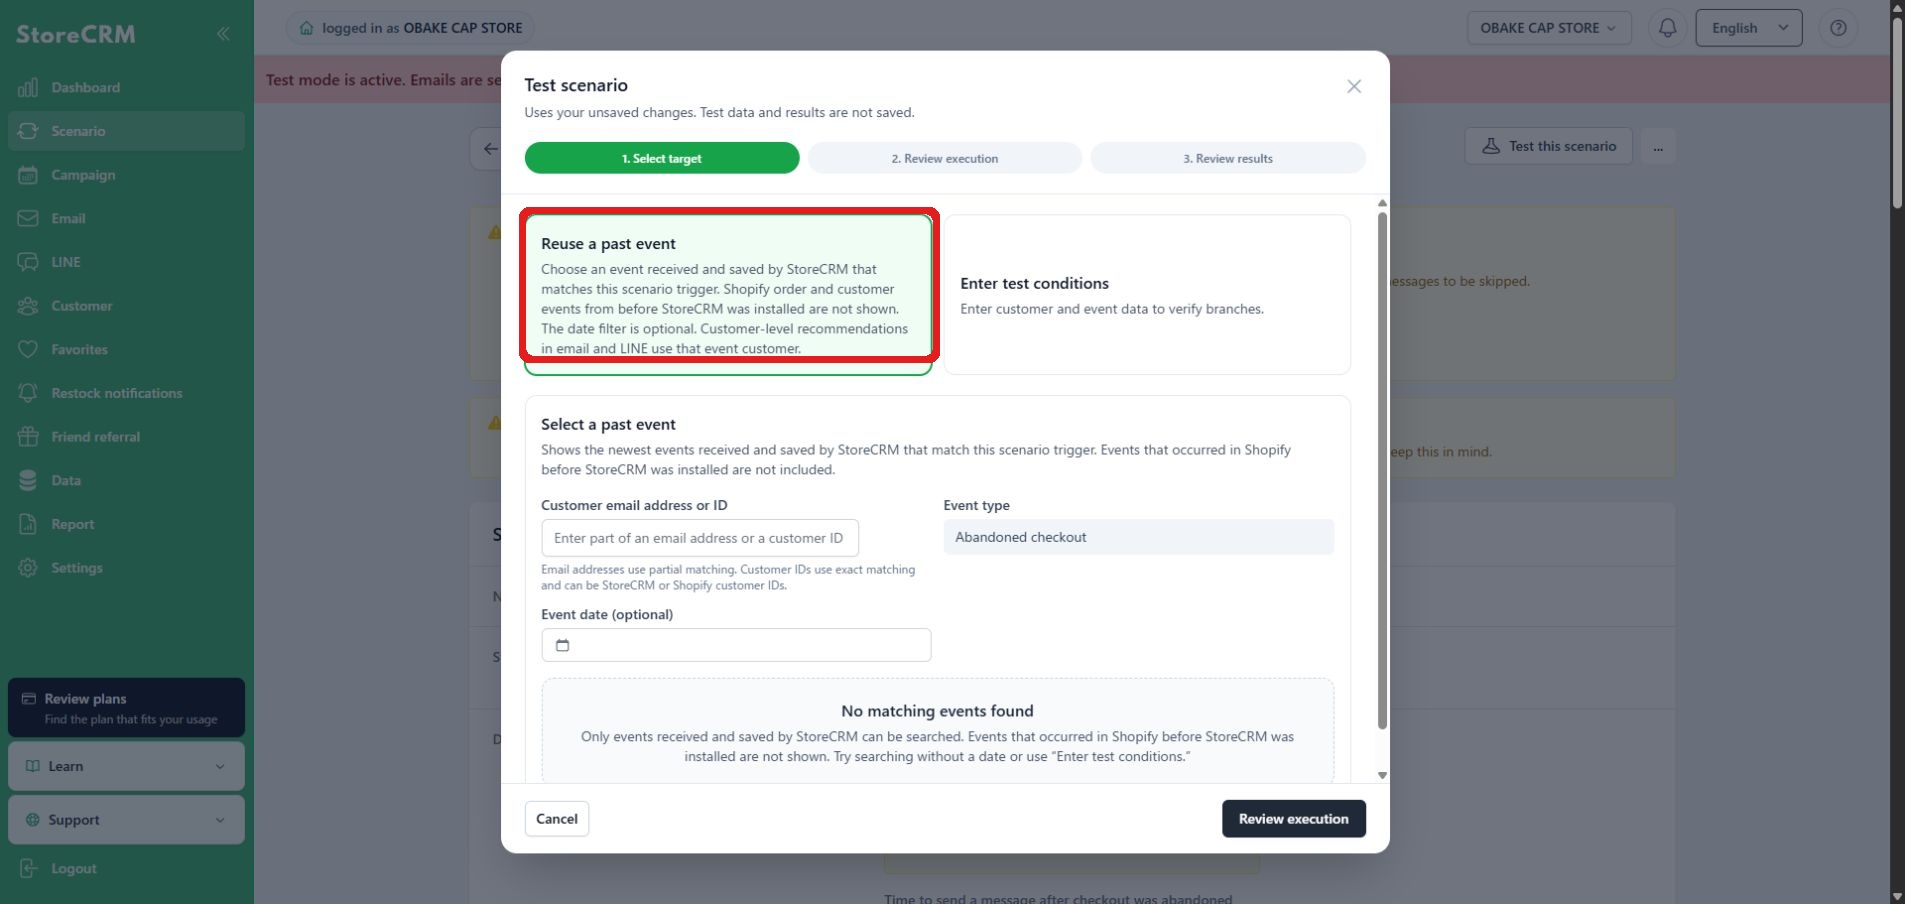
Review the customer, event type, occurrence time, and external ID, then select the event to use. Recommendations are calculated using the selected event's customer, but the event history itself is not changed.
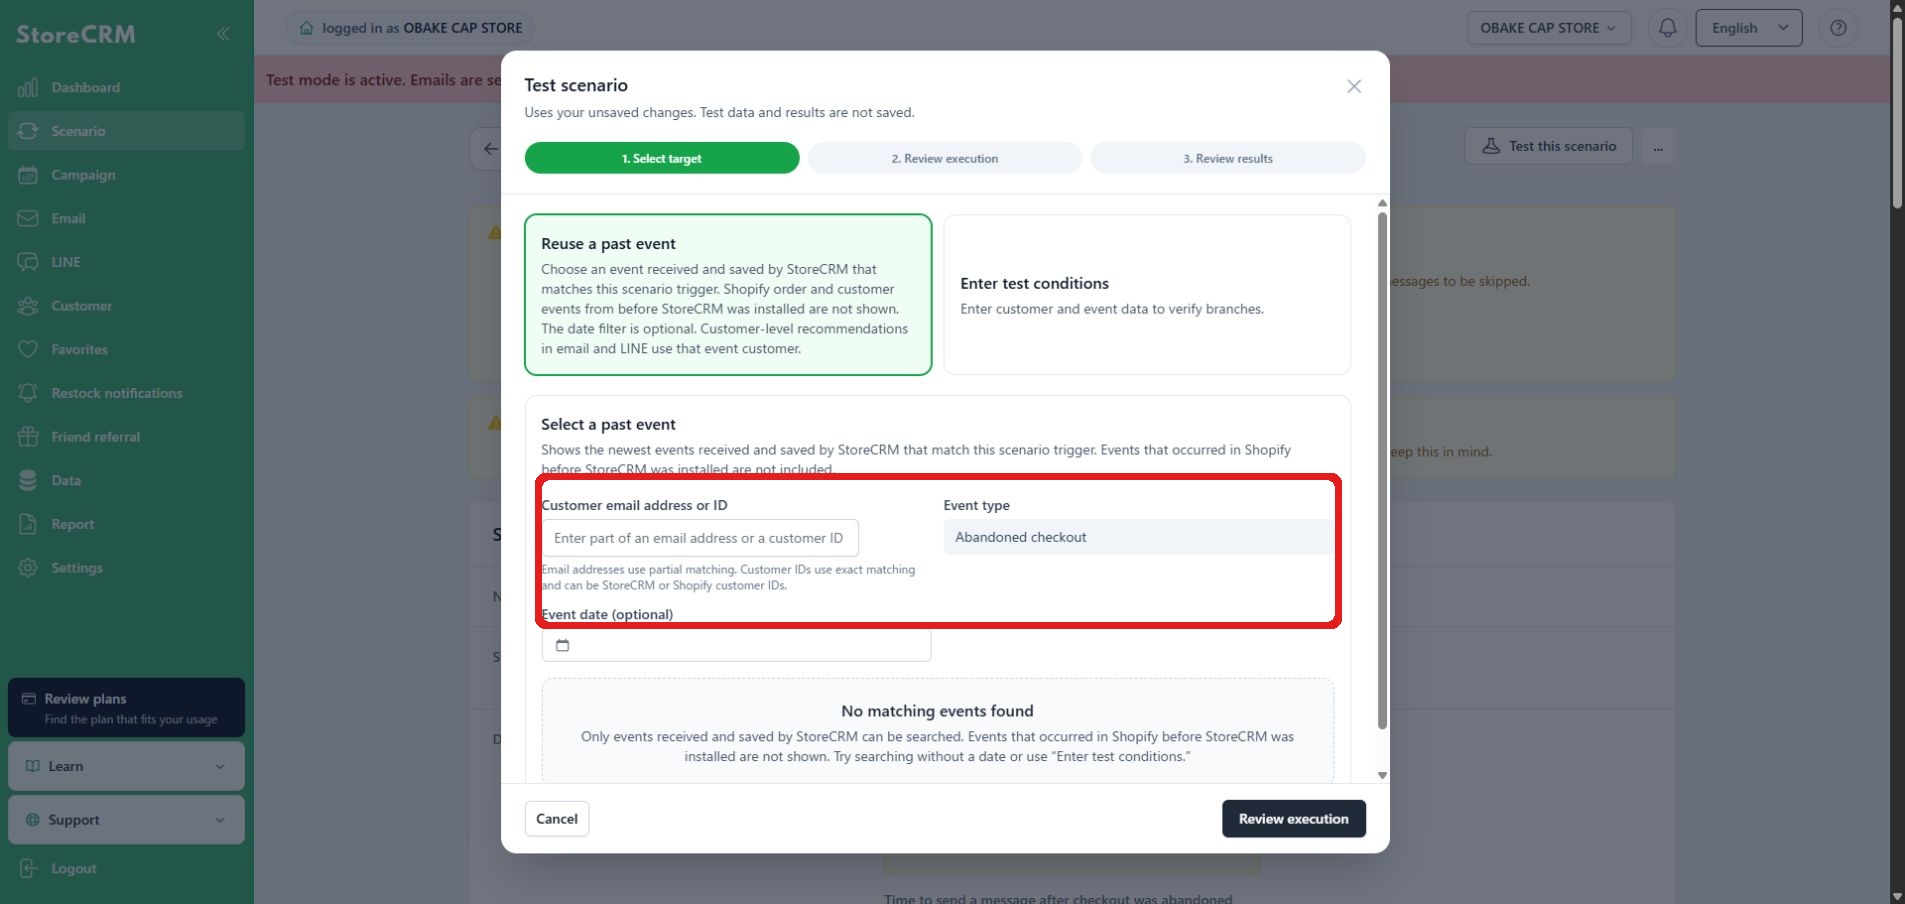
If no history appears, change the search conditions or use [Enter test conditions]. If history retrieval fails, select [Load again] to retry.
Review the execution
After entering the test data, click [Review execution]. A standard test does not send external messages or issue coupons. Explicitly turn on only the operations you need.
Send an actual test email
When [Send an actual test email] is on, email is sent only to recipients configured in StoreCRM test settings. It is not sent to the entered customer or the customer from the past event.
Send an actual LINE test message
When [Send an actual LINE test message] is on, the message is sent only to the eligible LINE test recipient displayed on the screen. It is not sent to the entered customer or the customer from the past event.
If there is no eligible recipient, LINE sending cannot be selected. From [Configure or change LINE test recipient], open [Settings] → [Test mode] and check the email address and LINE linking status.
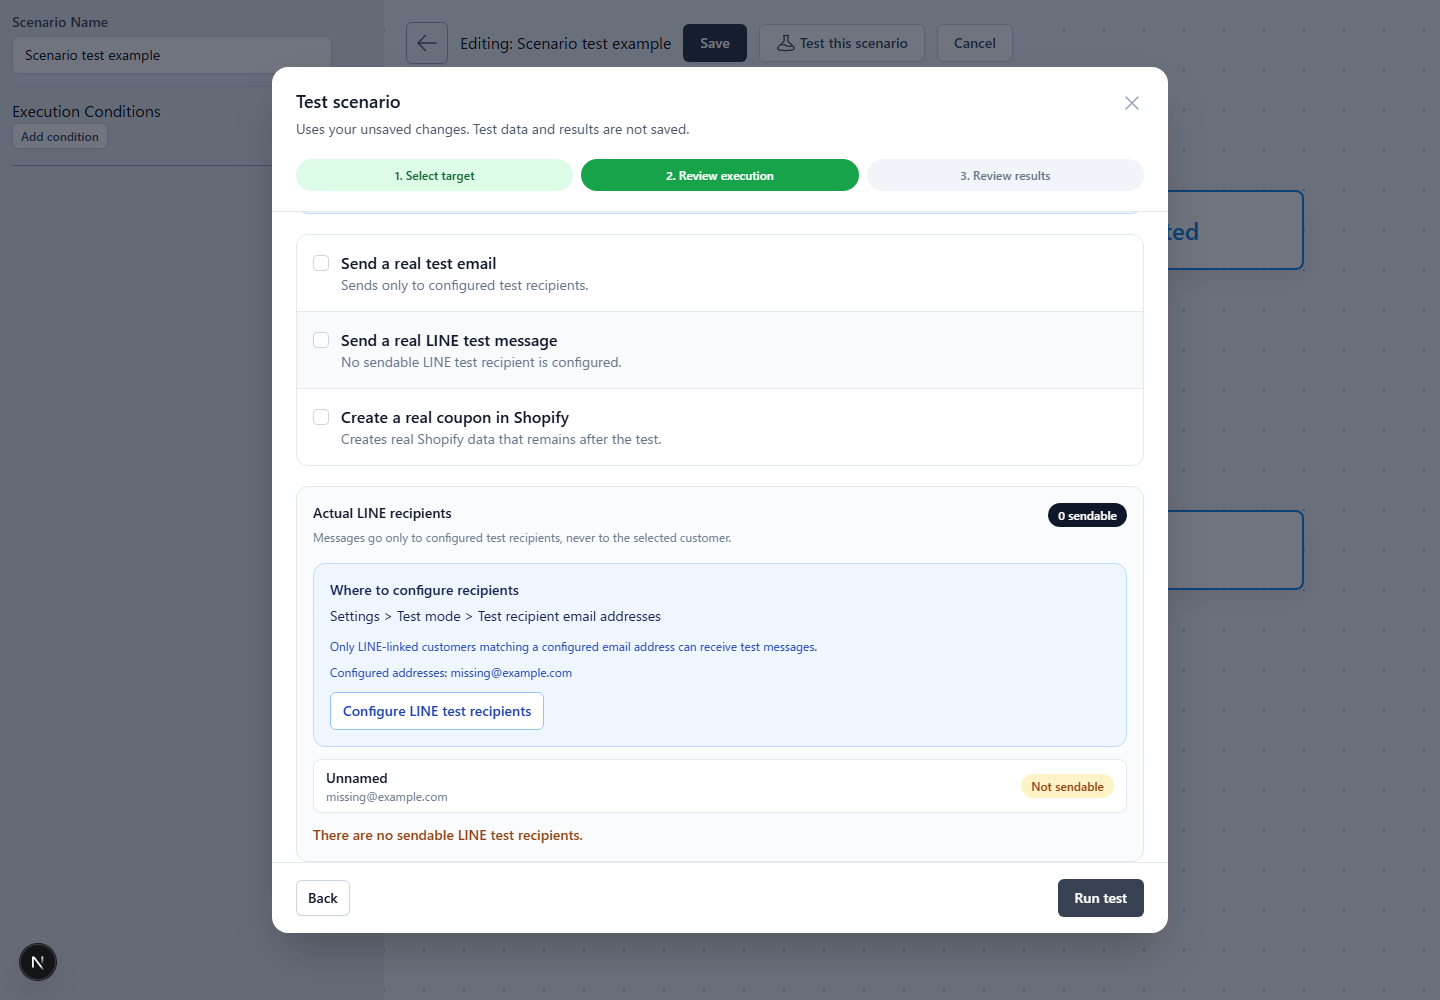
Issue an actual coupon in Shopify
When [Issue an actual coupon in Shopify] is on, a real coupon is created in Shopify. It is not deleted automatically after the test. Review the coupon details and run this only when necessary.
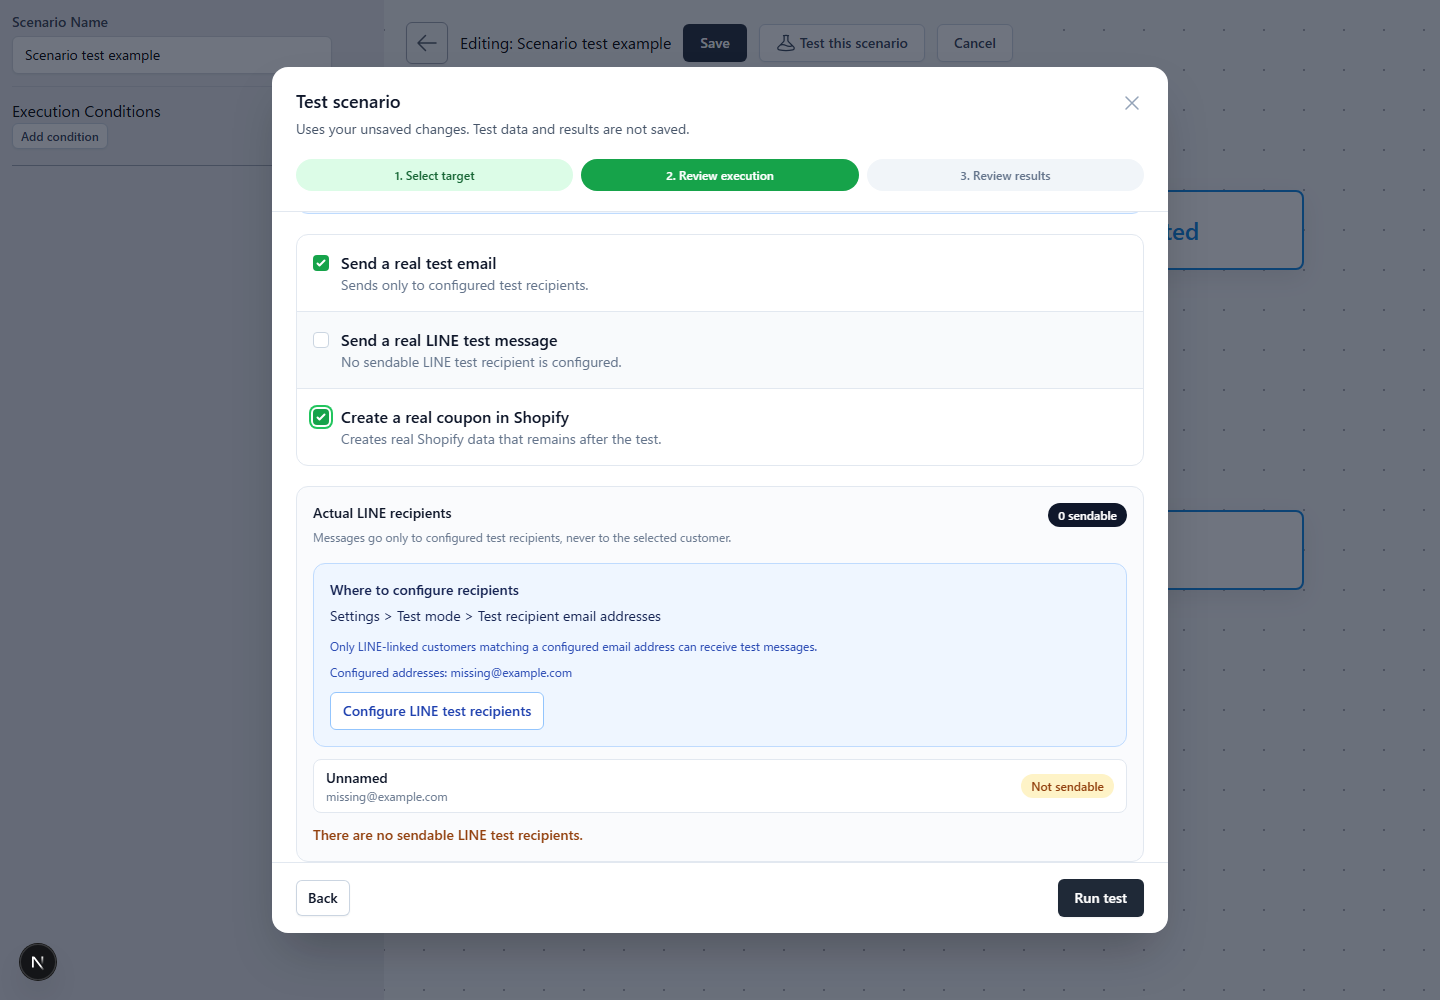
Note:A test with external operations enabled includes actual sending and issuance. Check the recipient, target message, and coupon settings before clicking [Test with these settings].
Check the TEST-ONLY coupon sample
When a test send does not create an actual coupon, StoreCRM uses TEST-ONLY as the sample coupon code and coupon-link value. This value is for display verification and is not a coupon that can be redeemed in Shopify. In normal deliveries, TEST-ONLY is not used.
Enable Actually issue the coupon in Shopify only when you need to create and verify a real coupon. A coupon created this way is not deleted automatically after the test.
Review the execution path
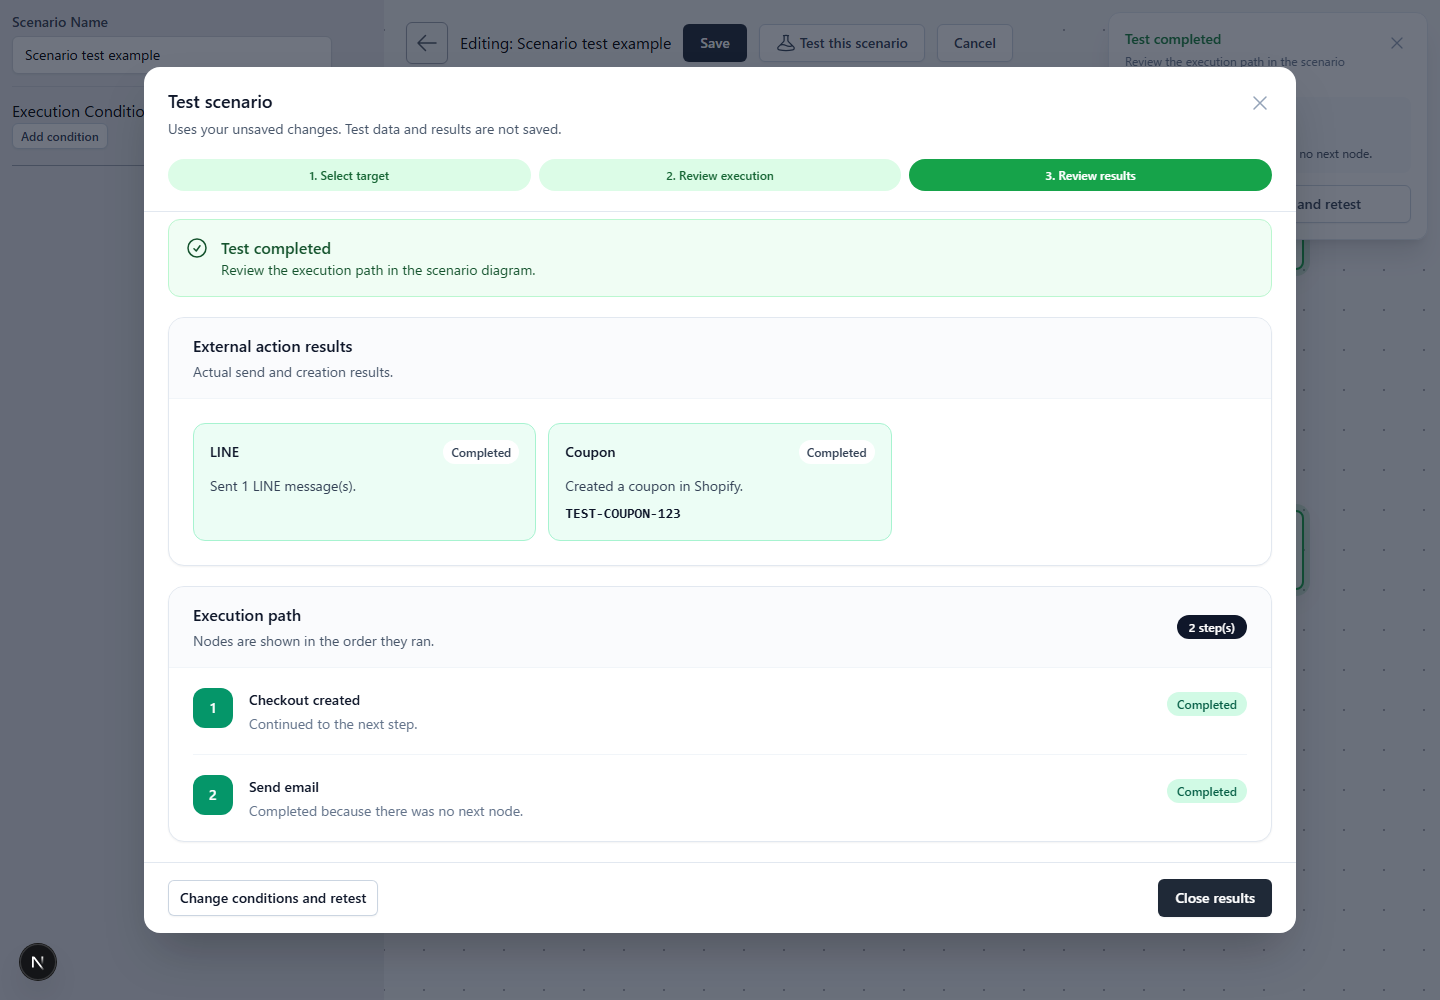
When the test finishes, the nodes actually followed are displayed in order from top to bottom. Check each node's completed, skipped, or failed status, the selected branches, and the reason execution ended. Wait nodes indicate that their wait time was skipped.
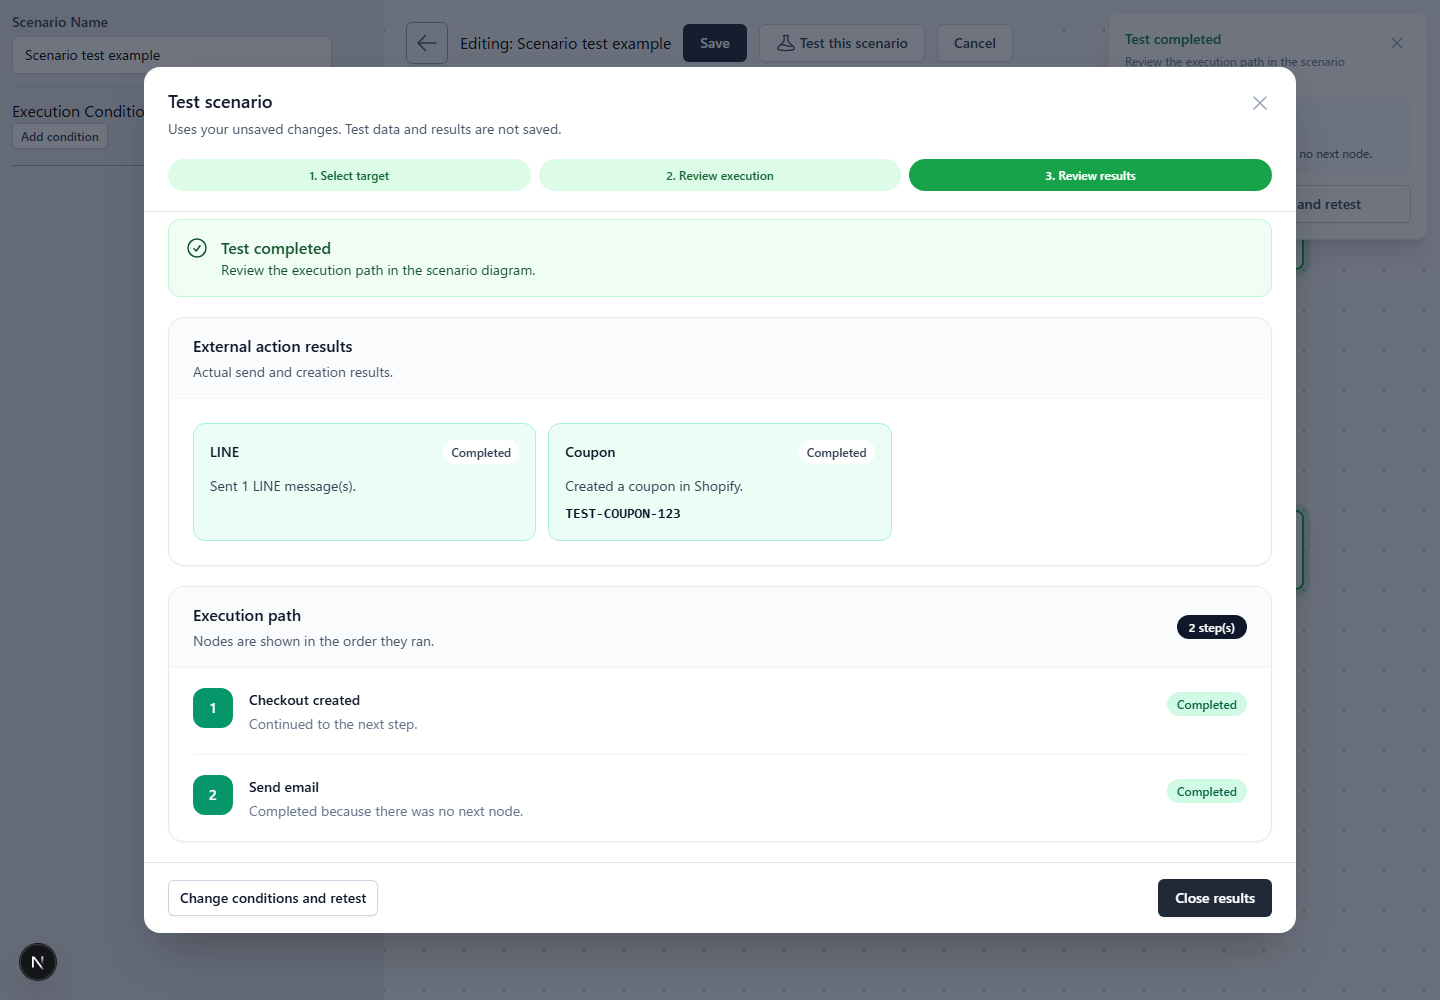
To check different conditions, click [Change conditions and retest]. When finished, click [Close results] to return to automation editing.
Review external operation results
If you selected external operations, [External operation results] shows whether email, LINE, and coupon operations completed, failed, or were not run. You can also check the number of messages sent and issued coupon codes.
Checks when a test cannot run
If a required product or variant is not selected, the missing information appears when you click [Review execution]. Enter the displayed items and try again.
- Cannot select an event:If no history matches the start condition, use [Enter test conditions].
- Cannot proceed with product conditions:For orders and checkouts, select at least one product. For back-in-stock and favorites, select a product and variant.
- A JSON error appears:Confirm that the event details JSON is a valid JSON object rather than an array or string.
- Email is not sent:Check the test recipient, email settings, and test-send limit.
- Cannot select LINE sending:Confirm that a LINE-linked customer matches the configured email address and can receive messages.
- Coupon is not issued:Check the automation's coupon settings and whether coupon issuance was turned on when running the test.
- Execution ends partway through:Check the execution path for an unmatched condition, end node, or node with an error.
Related pages
 English
  Japanese