

- After installing StoreCRM, you can set it up in 3 steps.
- If you have StoreCRM installed in more than one store, click here.Notes for more information.
Watch the video to set up
See the manual and set it up.
1. installation of the application
1. Shopify App Storeto view StoreCRM and click "Install" to install.
If not found,herePlease access it from
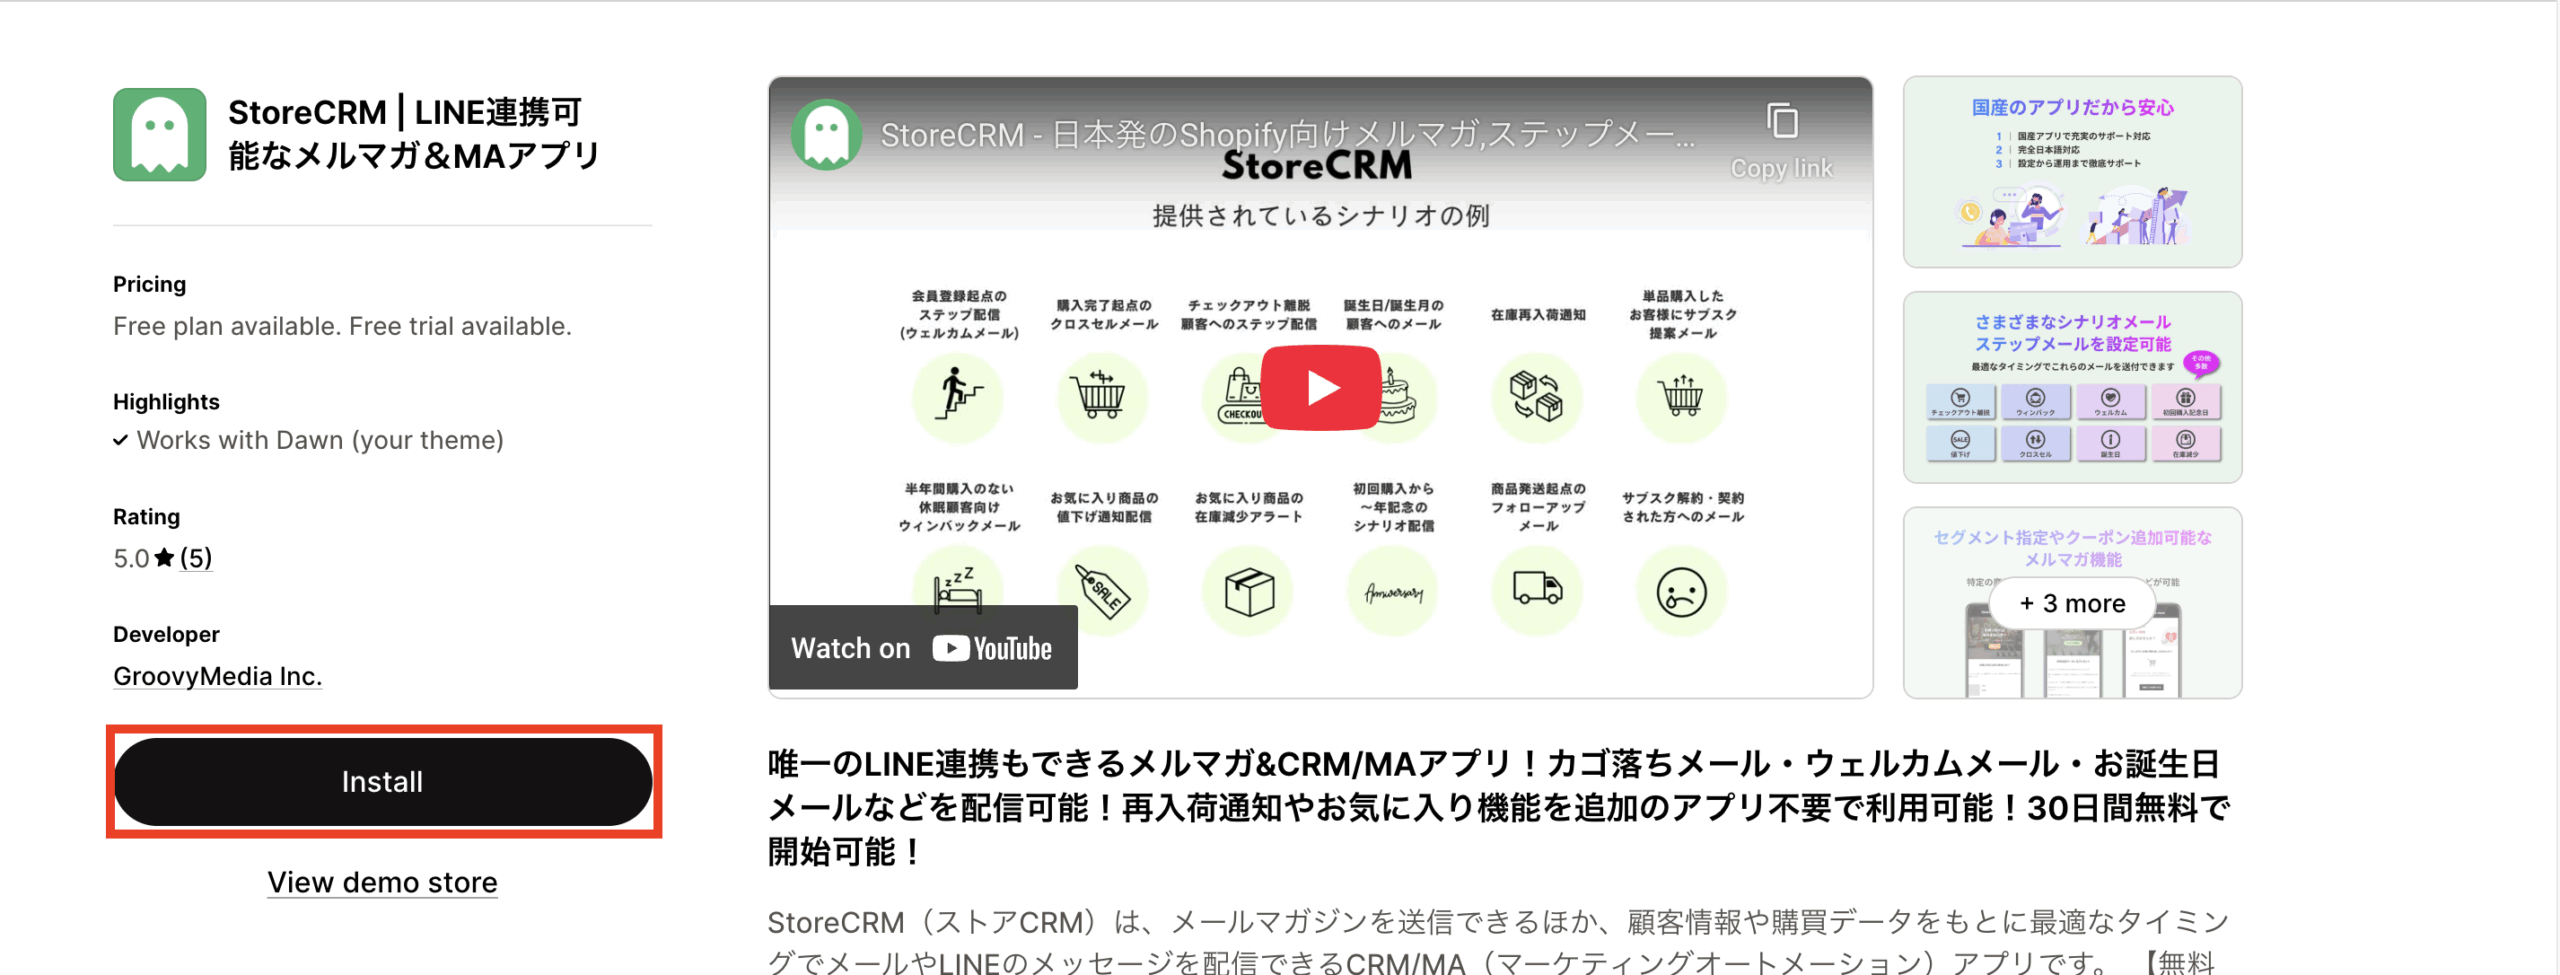
Click "Install.
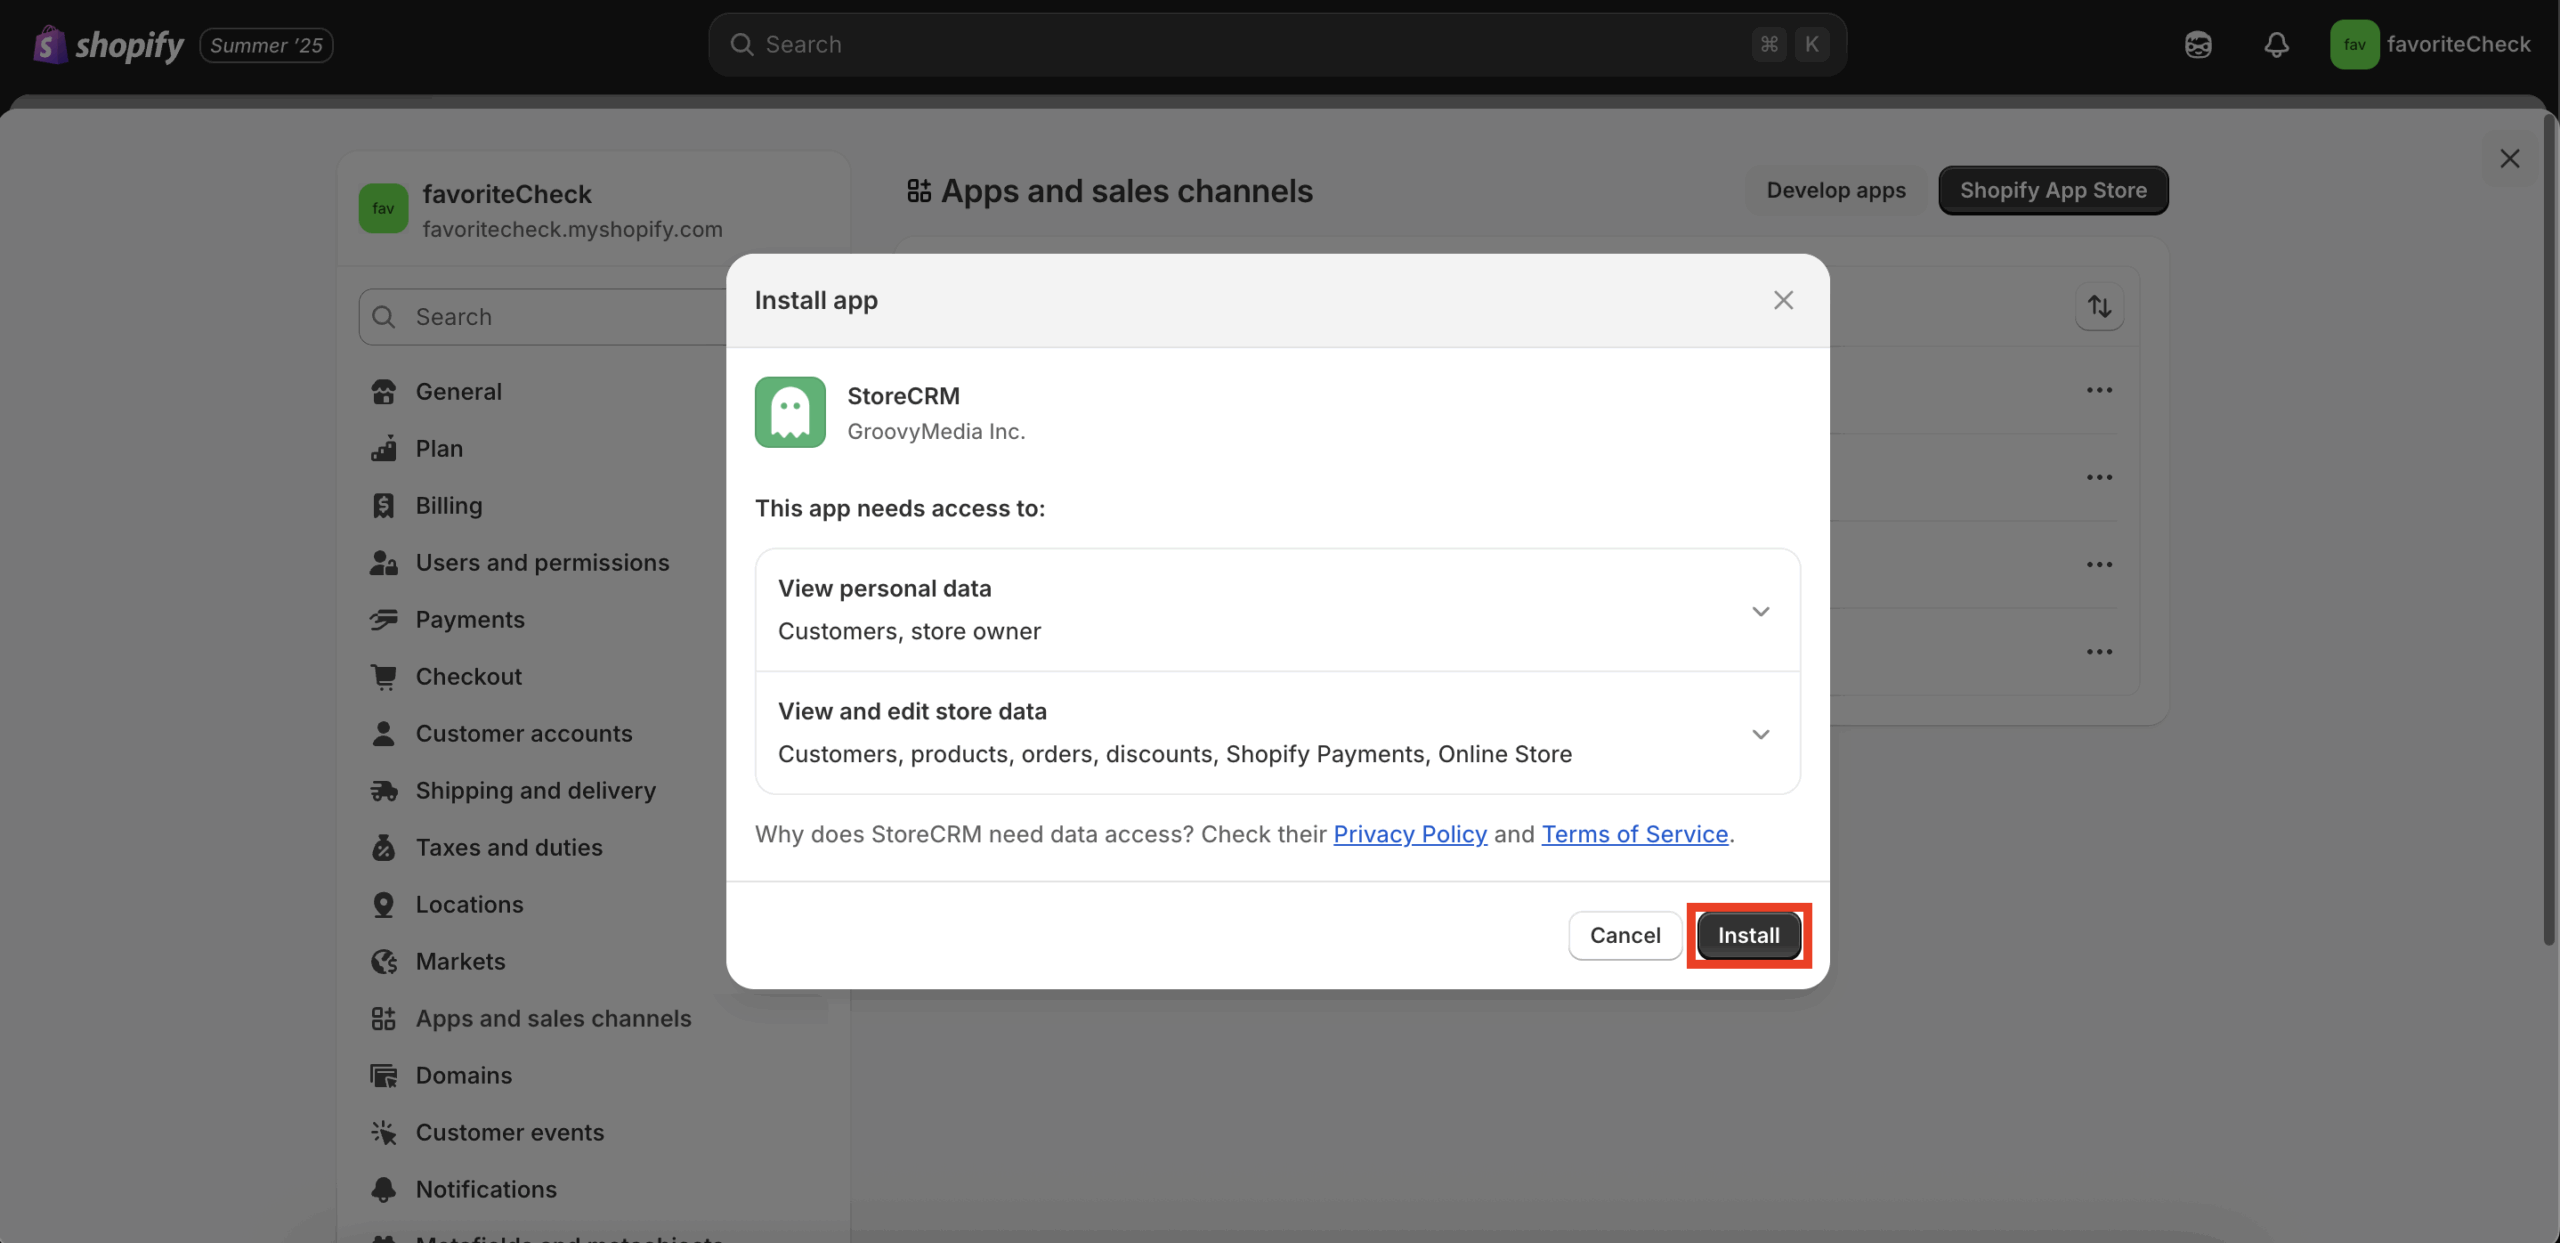
2. Basic app settings
When you first launch StoreCRM, configure the display language, information required to send email, contact details, and agreement to the terms. If you select Japanese, an optional 1-on-1 support scheduling screen is shown at the end.
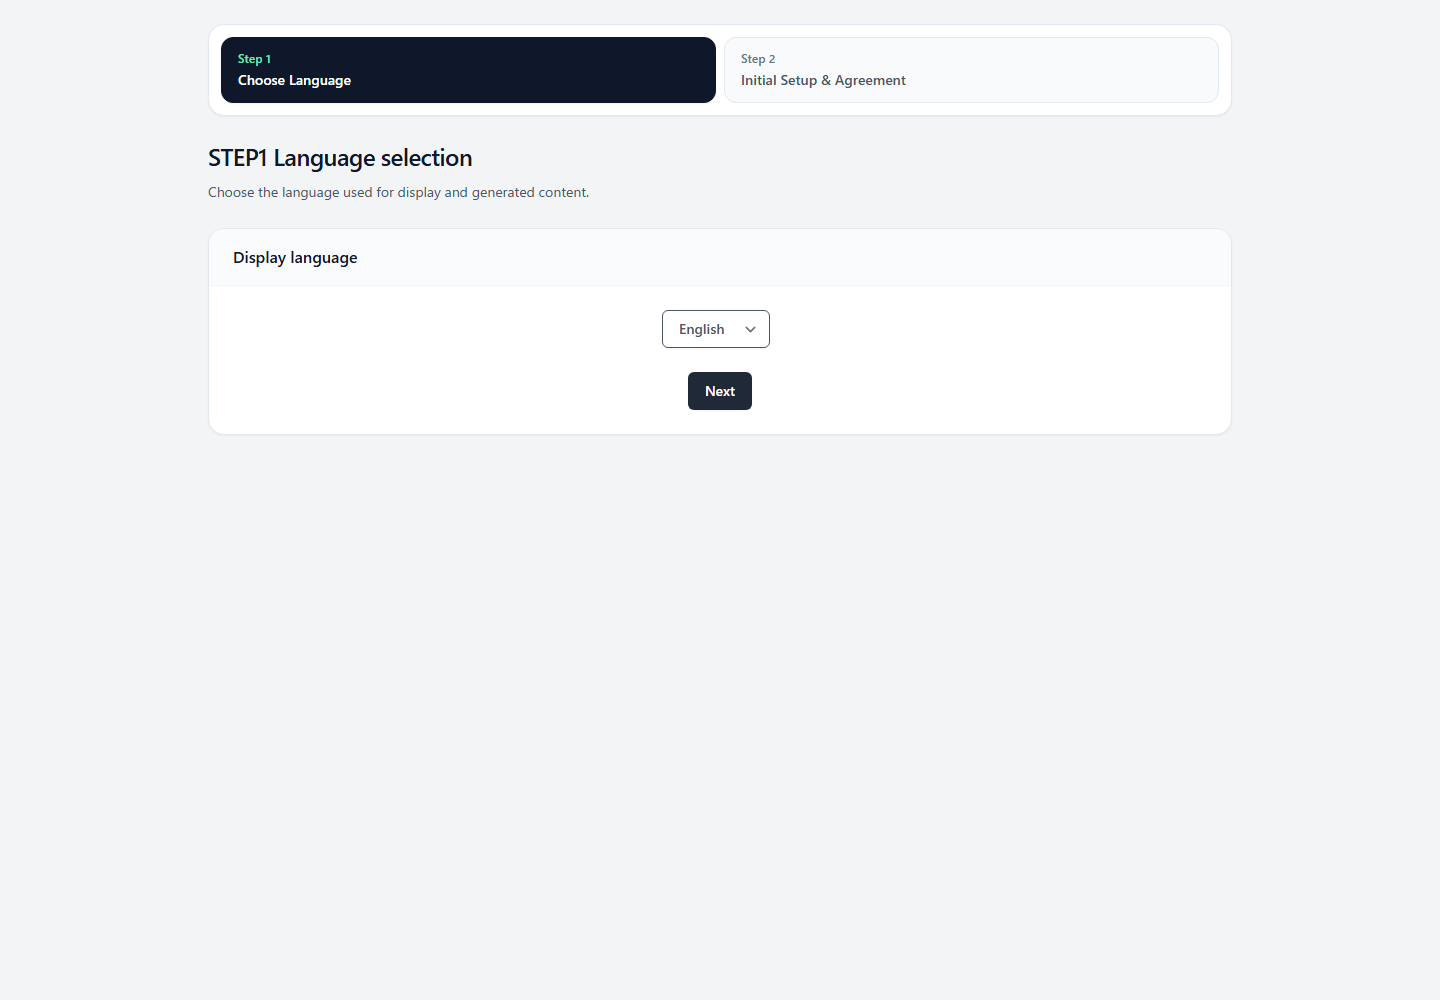
STEP 1 Select a language
- Select the StoreCRM display language from the dropdown. The selected language is used for the admin interface and content generation.
- Click [Continue] to proceed to STEP 2.
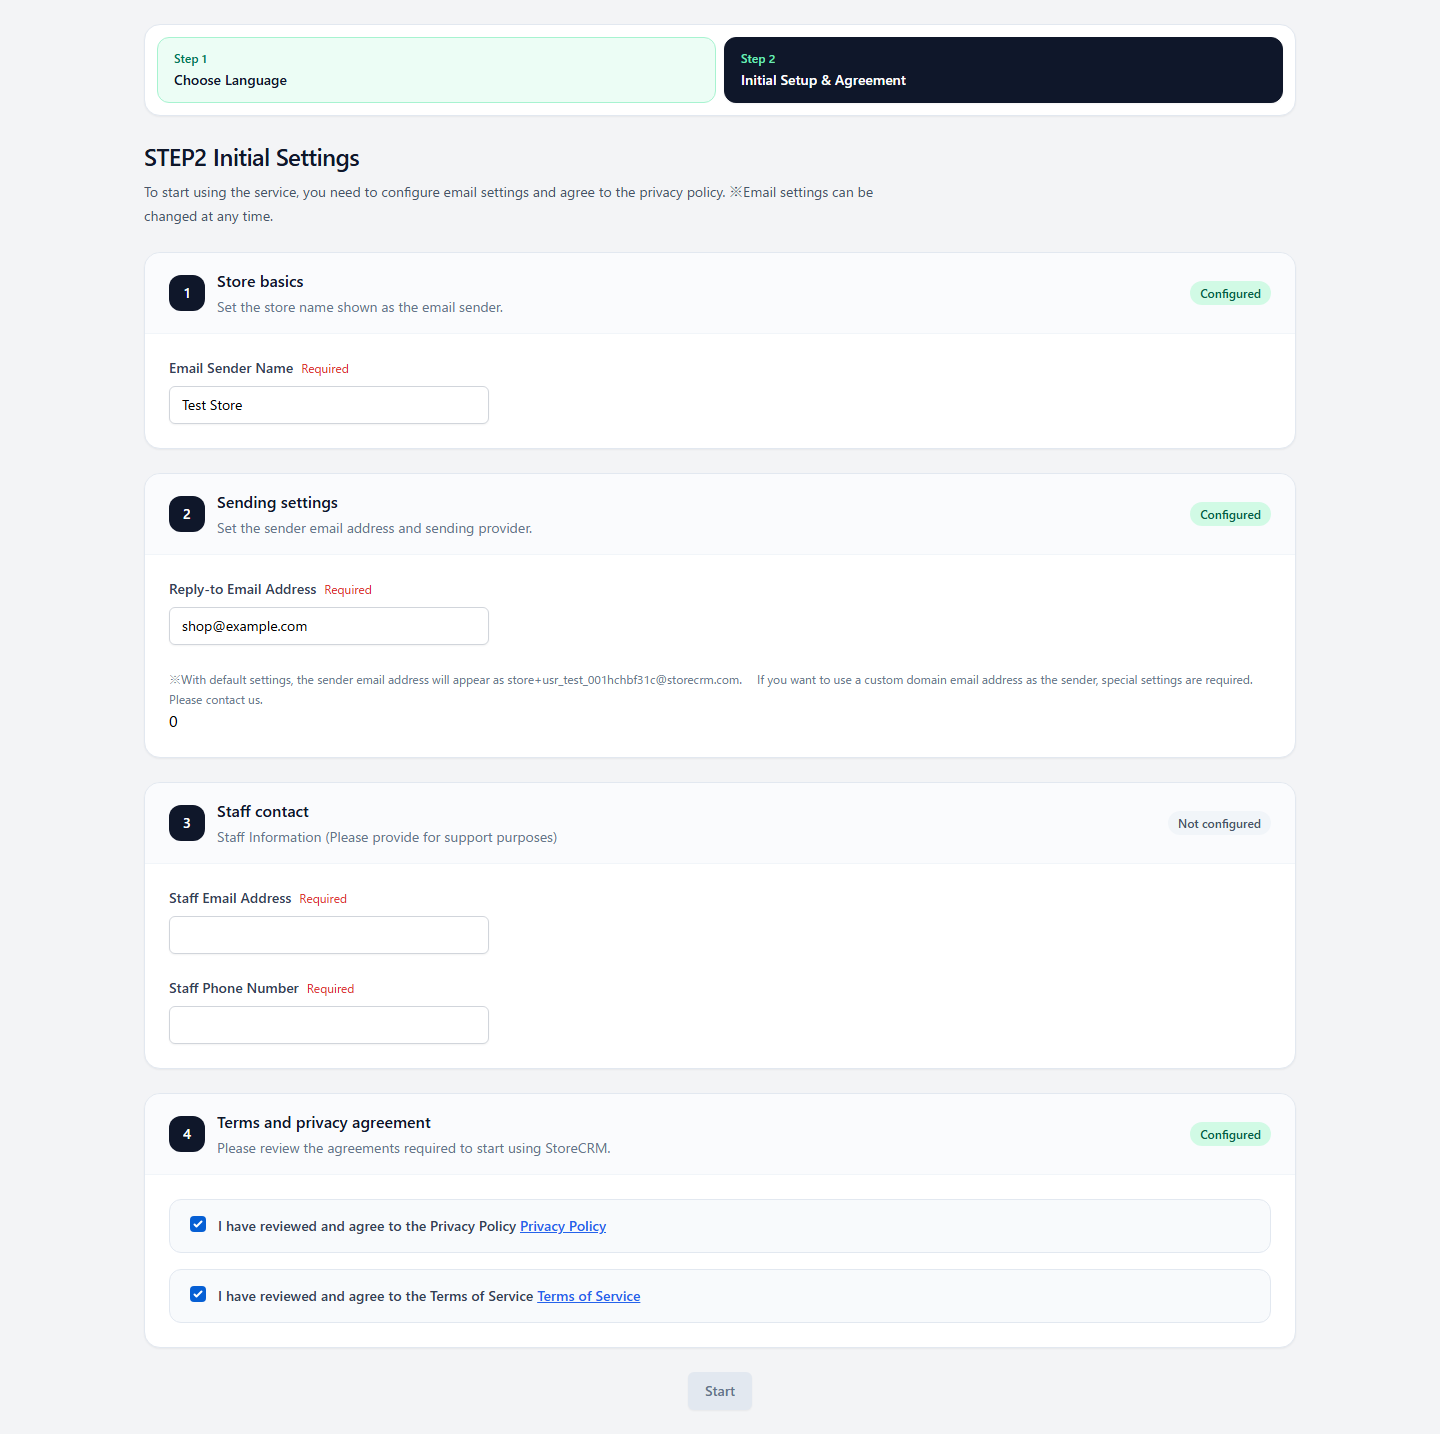
STEP 2 Initial Setup and Agreement of Terms and Conditions
In STEP 2, complete the following four sections. [Continue] or [Get started] remains disabled if a required field is incomplete or invalid.
| Item | Description. |
|---|---|
| Store basic settings | Enter the email sender name. Use a store or brand name that recipients will recognize. |
| Sending settings | Enter the reply-to email address. A dedicated StoreCRM address is shown as the sender. Additional domain setup is required to use a sender address on your own domain. |
| Contact information | Enter the contact email address and phone number. When available, the email address of the logged-in staff account is used as the default. Enter it manually if the field is blank. |
| Agree to the Terms of Service and Privacy Policy | Review the linked documents and turn on both agreement checkboxes. You cannot continue with only one selected. |
If a validation error appears
- Enter the email address in a format such as
[email protected]. - Phone numbers may contain digits, hyphens, parentheses, plus signs, and spaces. Values containing letters cannot be saved.
- Correct the fields with errors, confirm both agreements, and then check the button state again.
STEP 3 Schedule 1-on-1 support (optional; shown when Japanese is selected)
If you selected Japanese in STEP 1, clicking [Continue] in STEP 2 opens the 1-on-1 support scheduling screen. Scheduling is optional.
| Options | Behavior |
|---|---|
| Schedule initial onboarding | Click the button and select a preferred date and time from the calendar. After scheduling is complete, you are taken to the dashboard after three seconds. |
| Start without scheduling | Complete initial setup without scheduling and go to the dashboard. You can schedule 1-on-1 support later. |
If you select English or another language other than Japanese, the scheduling step is not shown. Click [Get started] in STEP 2 to complete initial setup.
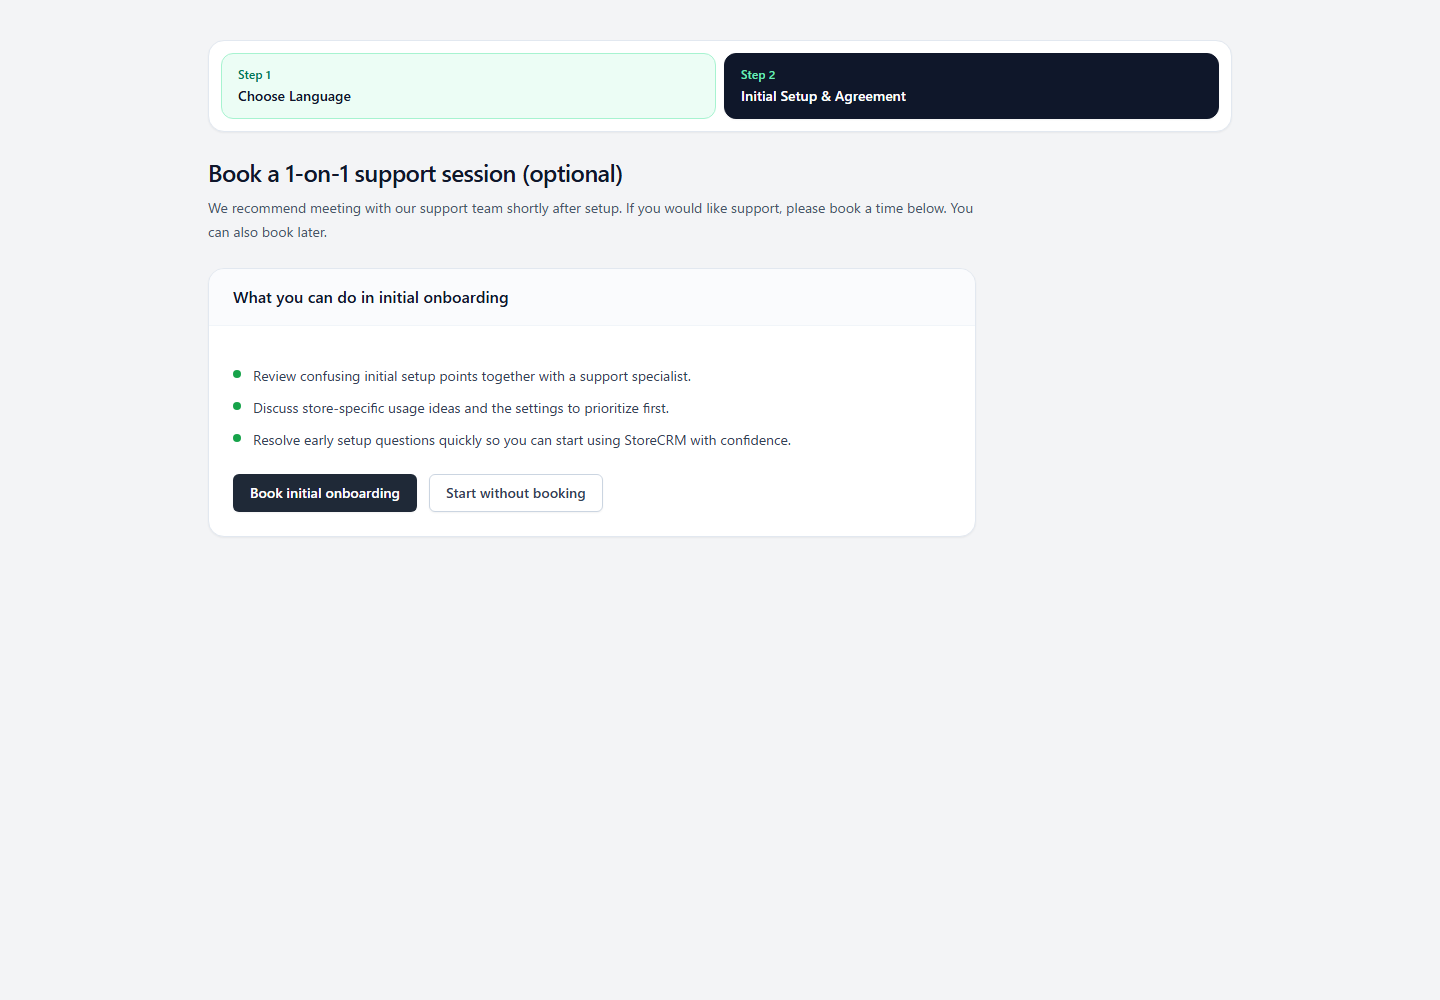
Confirm setup completion
STEP 4 Production delivery setup
After initial setup, select the delivery channel you will use in production and the first campaign you want to launch, and then follow the on-screen guidance. StoreCRM checks configuration on the server as you proceed, so you can complete only the unfinished items in order.
1. Select a channel
Select either email or LINE as the first channel to use. You are not asked to configure a channel you did not select.
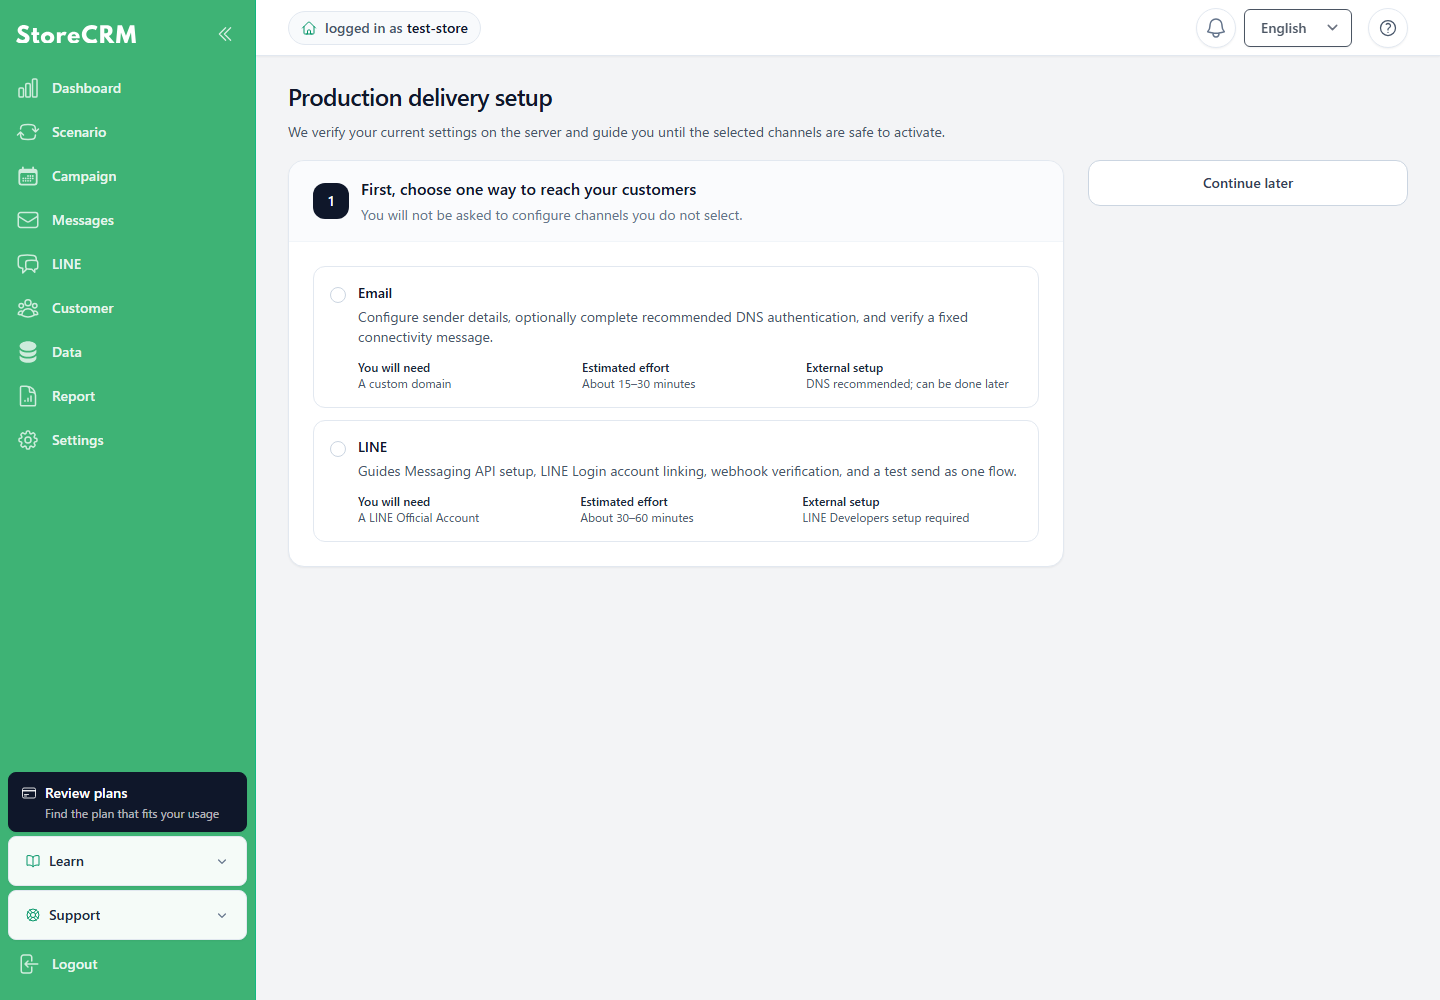
2. Select your first objective
Select an objective such as checkout abandonment, restock notifications, email campaigns, or post-purchase follow-up. Only the additional tasks required for that objective are shown.
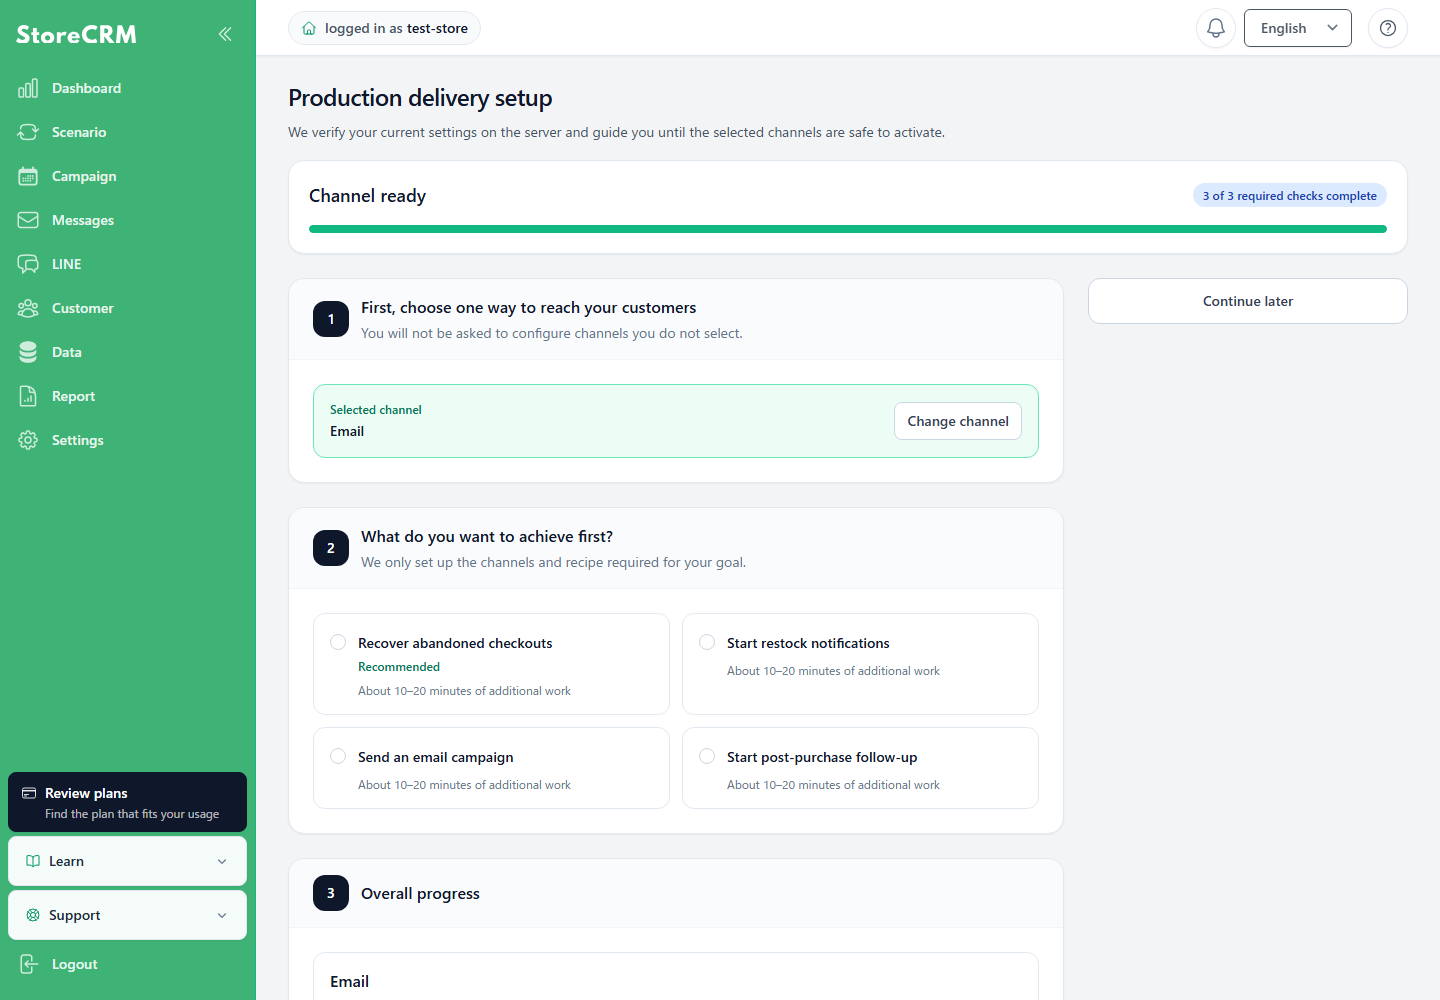
3. Complete the current task
For email, confirm the sender address, DNS domain authentication, and test delivery. DNS authentication can be skipped and configured later, but we recommend completing it before production delivery.
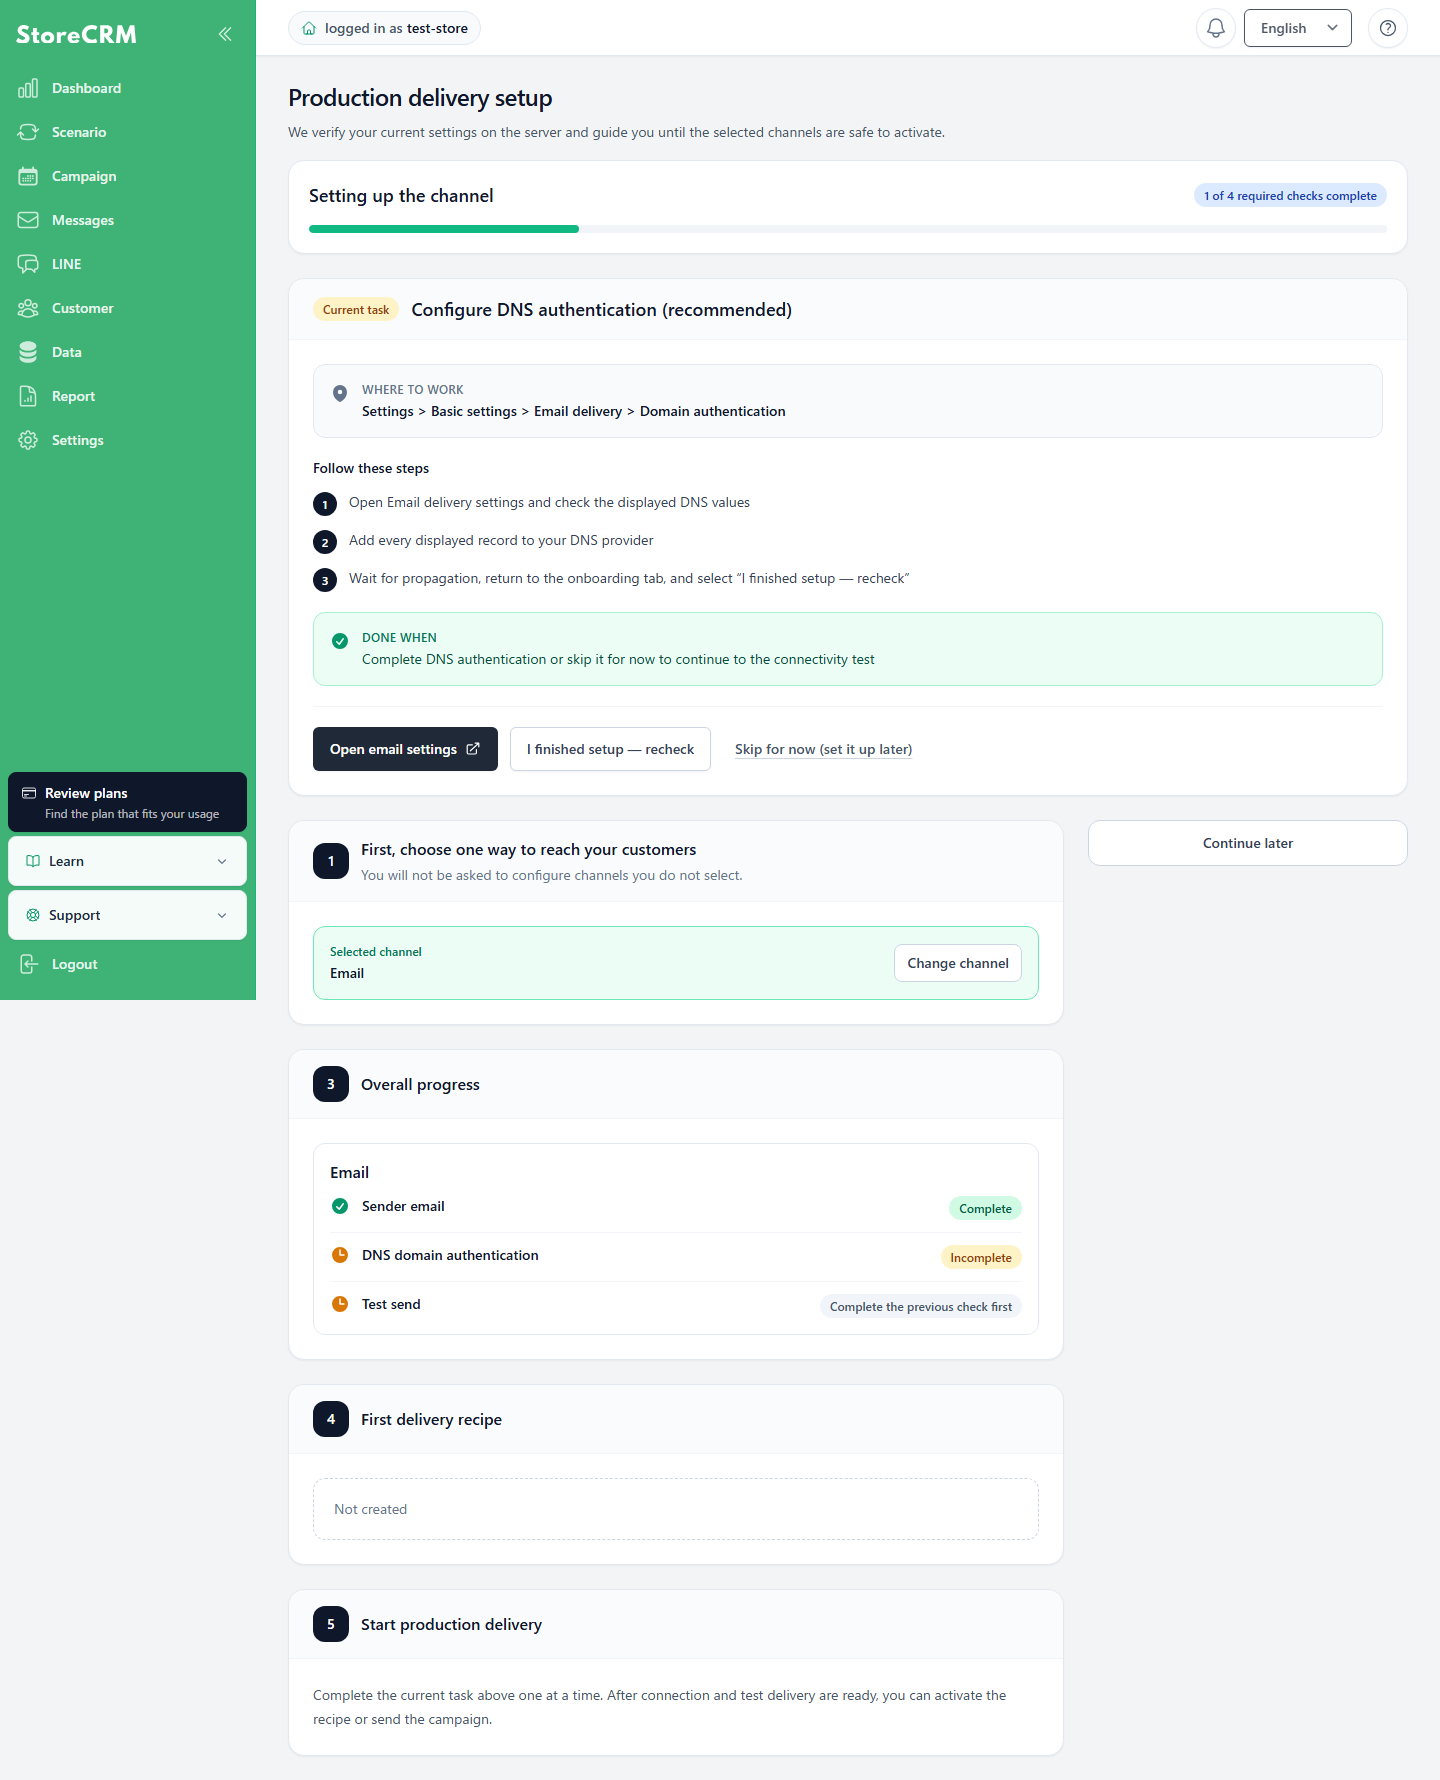
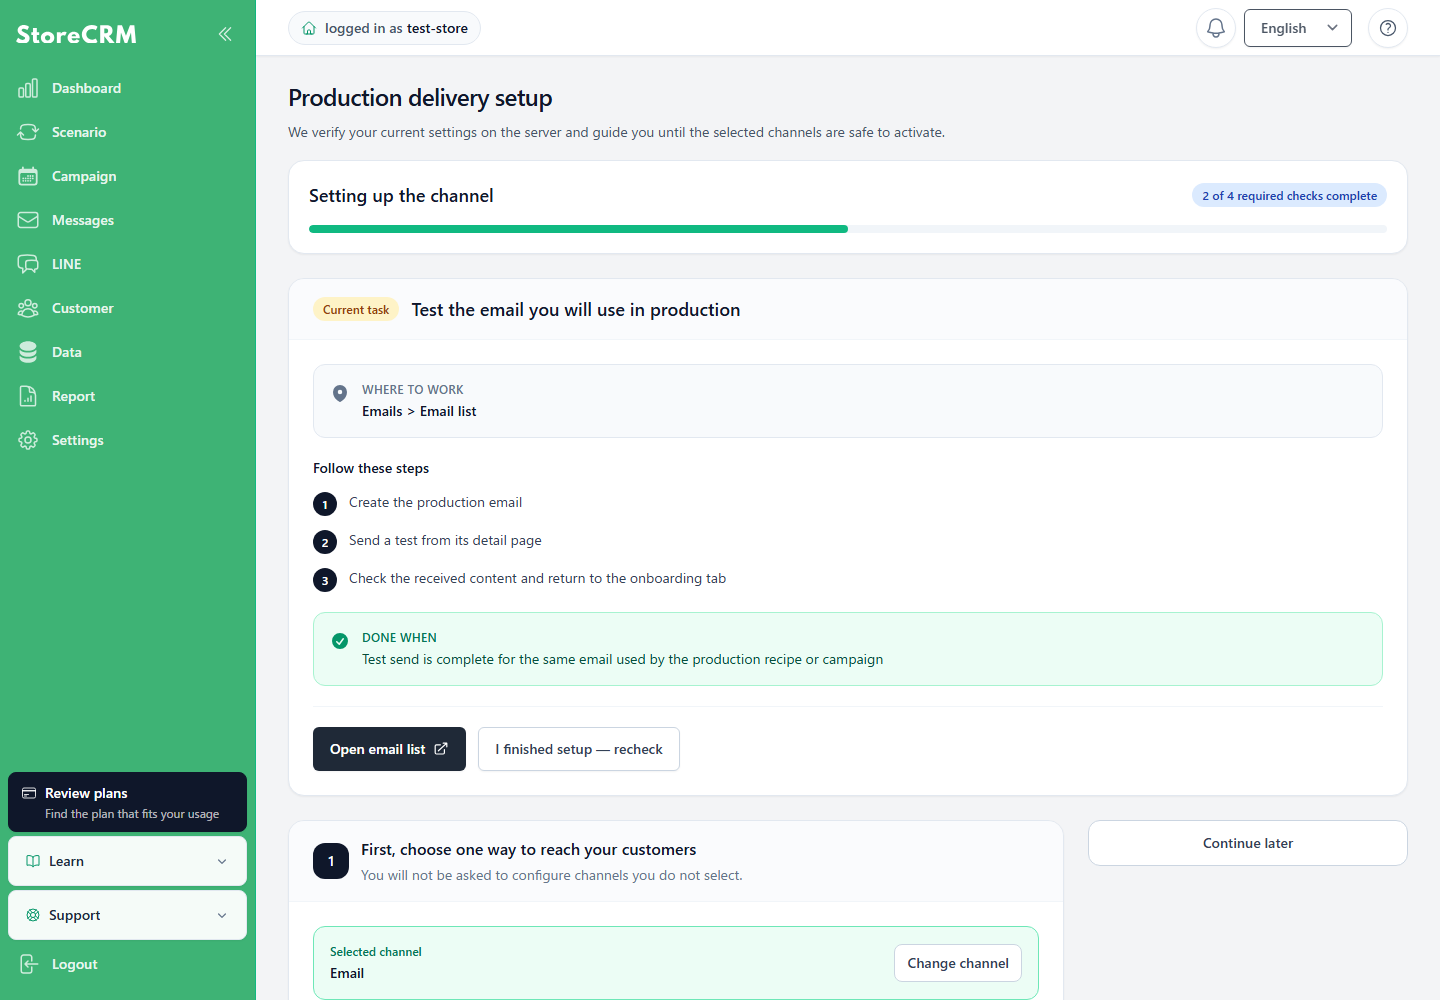
4. Start production delivery
After completing the required items, proceed to activate a scenario or send a campaign. SelectContinue laterin the upper-right corner to save your progress and resume later.
Initial setup is complete when the dashboard appears after scheduling or selecting [Start without scheduling]. Test mode is enabled initially. Send a test before starting production delivery, and then disable Test mode from Settings.
3. change Shopify settings
Enable marketing options
In Shopify settings, enable the marketing option.
1. click on Shopify -> [Settings] -> [Checkout].
2. Under [Marketing opt-in], select a display location for [Email].
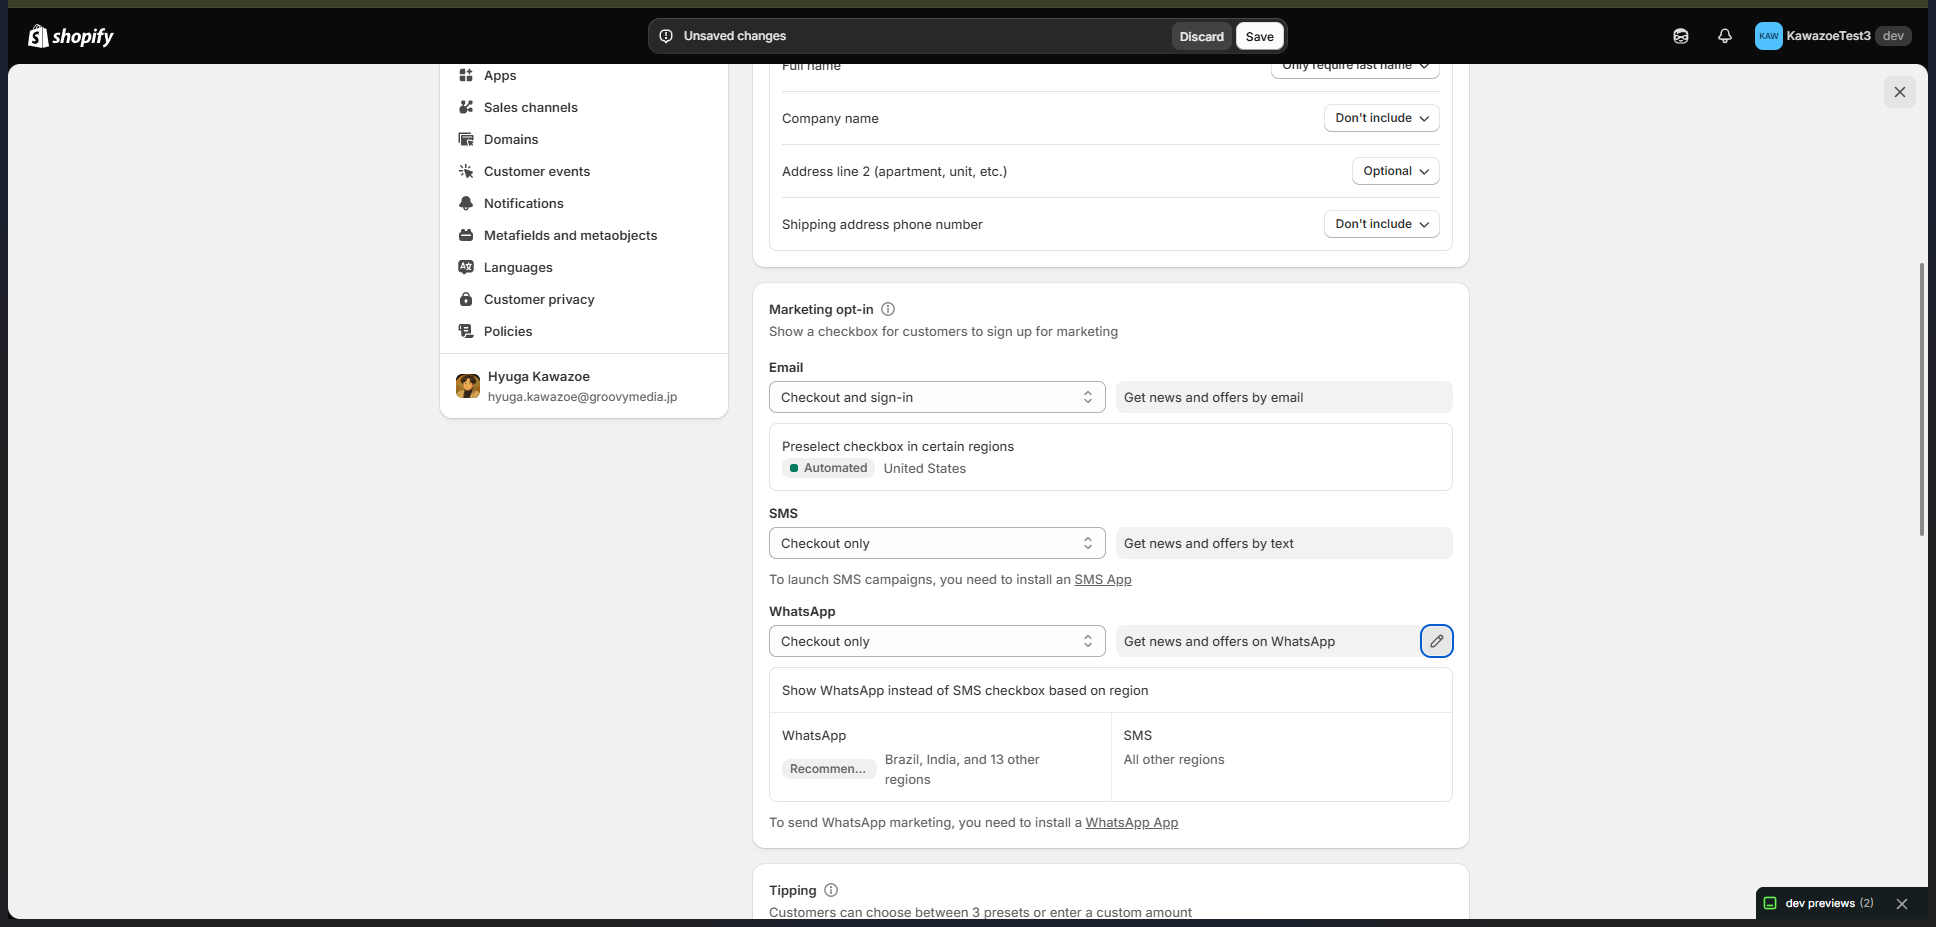
Click "Save.
Settings have been saved.
Prevent duplicate abandoned checkout emails
- Confirm that Shopify does not send abandoned checkout emails automatically.
- If enabled, both StoreCRM and Shopify will send an email to the customer.
1. click on Shopify -> [Settings] -> [Checkout].
2. Under [Abandoned checkout emails], clear [Send abandoned checkout emails automatically].
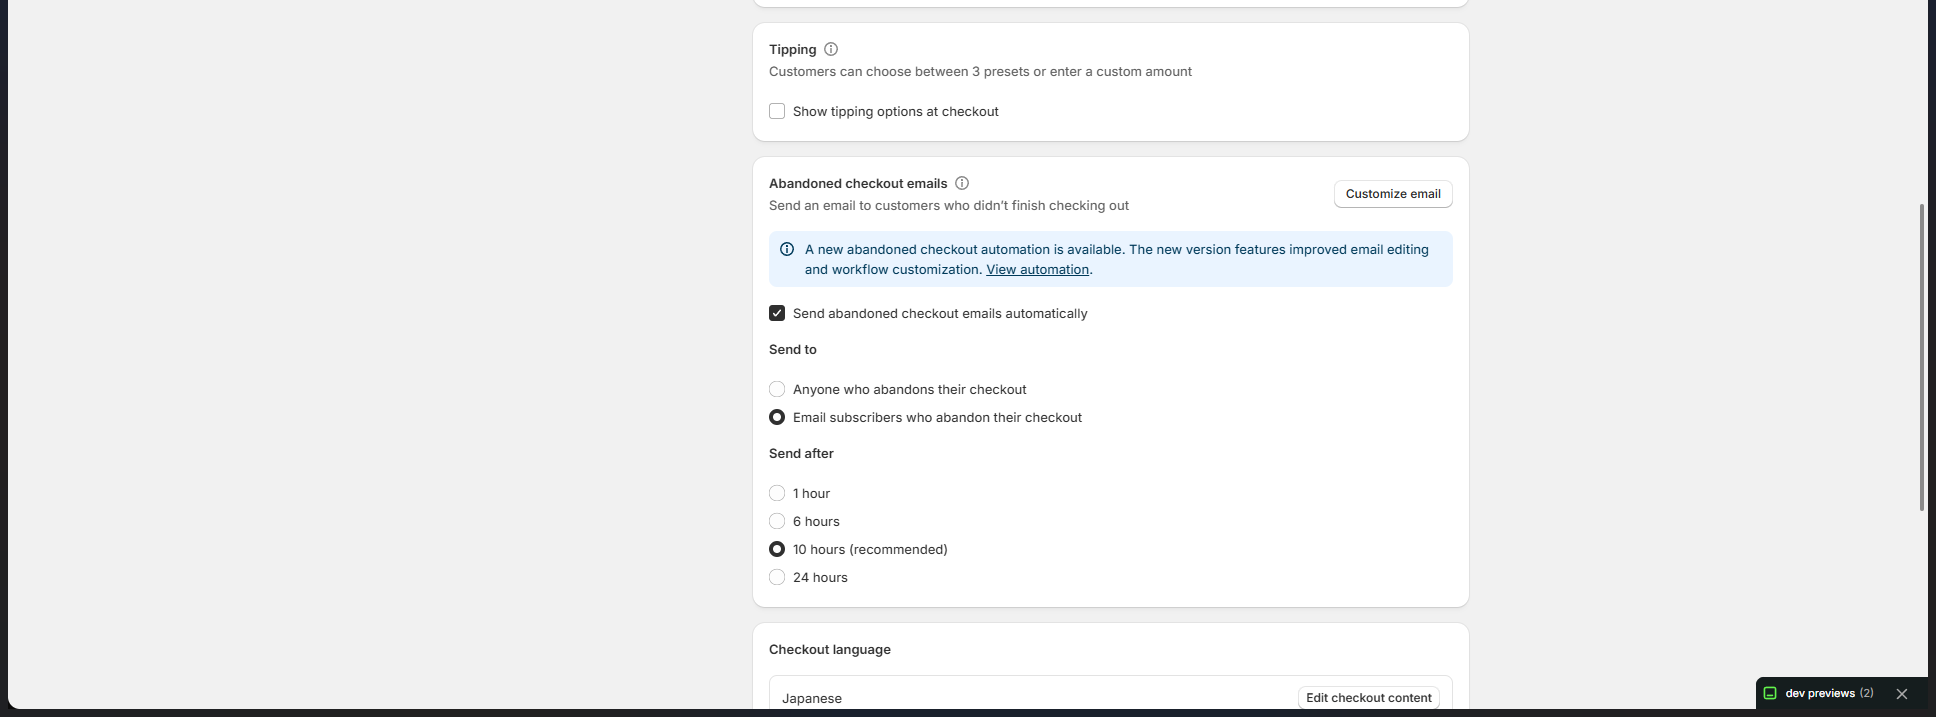
Click "Save.
Settings have been saved.
Related pages
 English
 Japanese