

This page provides an overview of the Shopify App VIP and StoreCRM integration features and how to set them up.
How to cooperate
- Based on the "Customer's points changed" trigger in VIP's Shopify Flow, the "Add customer metrics data" action in StoreCRM will import data into StoreCRM when points change. StoreCRM action "Add customer metrics data".
- Based on the "Customer moved up a rank" trigger in VIP's Shopify Flow, the "Add customer metrics data" action in StoreCRM imports data from each point change into StoreCRM.
- Based on the "Customer moved down a rank" trigger in VIP's Shopify Flow, the StoreCRM action "Add customer metrics data" was used to import data from each point change into StoreCRM.
What can be done through collaboration
- Mail magazine and LINE policies based on events such as when points are earned or spent
- Mail magazine and LINE distribution policies for the created segments
Set up a linkage process in Shopify Flow when points change.
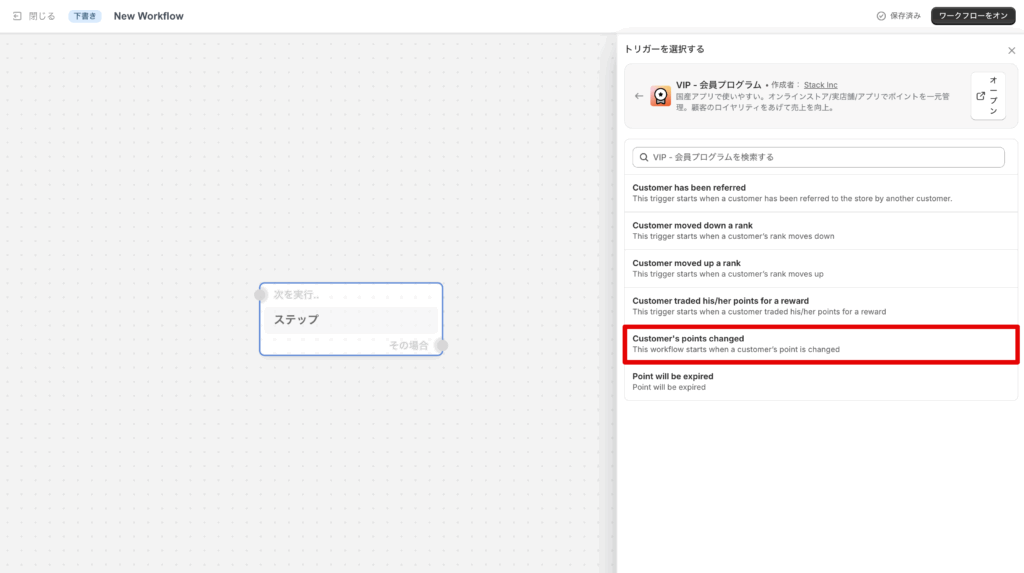
Create a new Flow in Shopify Flow. Select the "Customer's points changed" trigger.
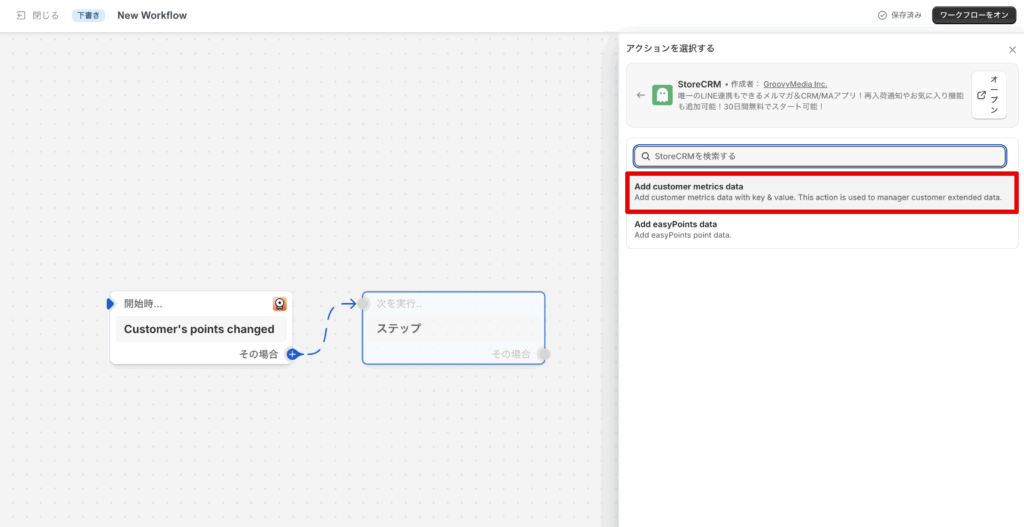
(2) As an action, the StoreCRM action "Add customer metrics dataSelect the "Action.
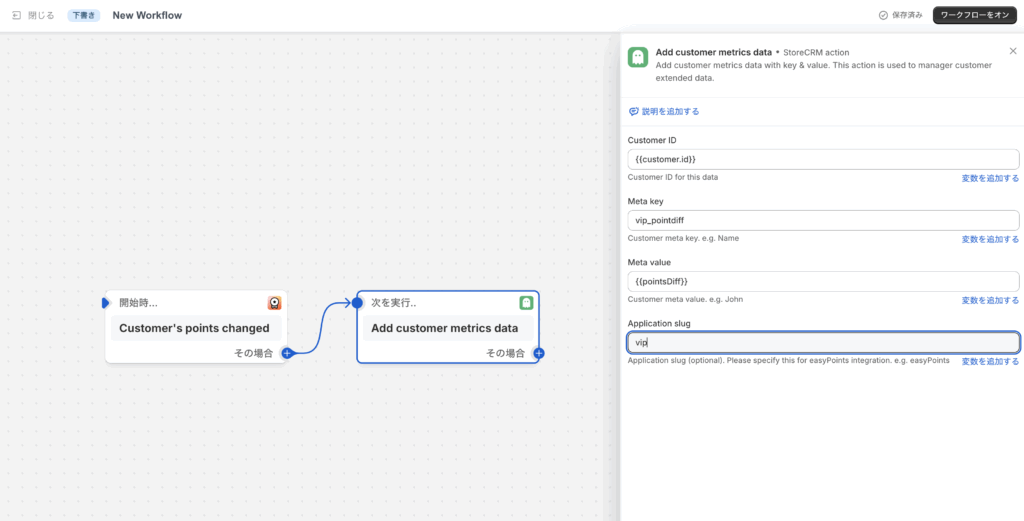
(iii) "Add customer metrics dataThe various values will be entered in the "Action" section of the "Action". The values to be specified are as follows
Customer ID: {{customer.id}}
Meta key: any value (in this case, enter vip_pointdiff to proceed)
Meta value: {{pointsDiff}}
Application slug: any value (in this case, enter vip to proceed)
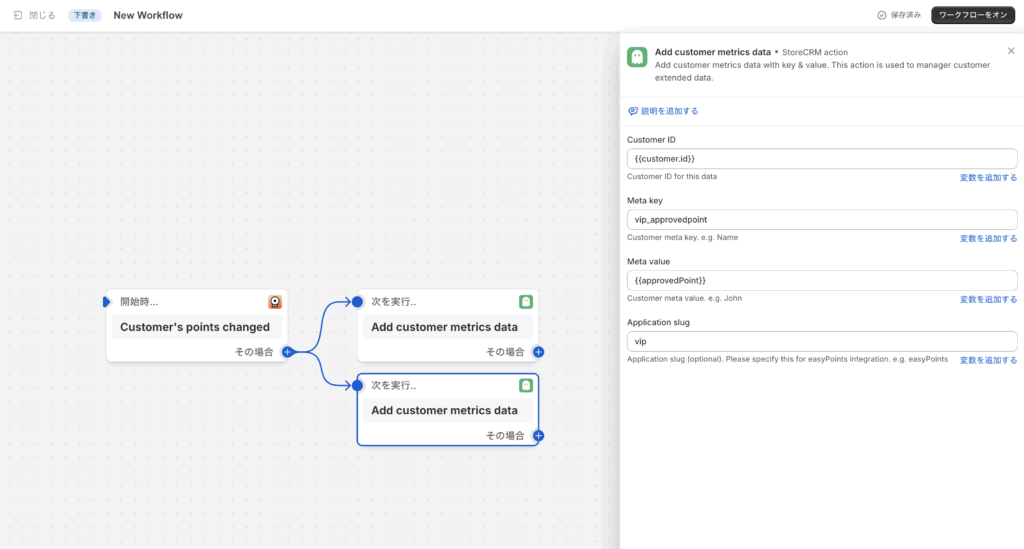
(4) "Add customer metrics dataWe will add another action for the "+" action and enter the various values. The values to be specified are as follows
Customer ID: {{customer.id}}
Meta key: any value (in this case, enter vip_approvedpoint to proceed)
Meta value: {{approvedPoint}}
Application slug: any value (in this case, enter vip to proceed)
Turn on the workflow when you have completed the entry.
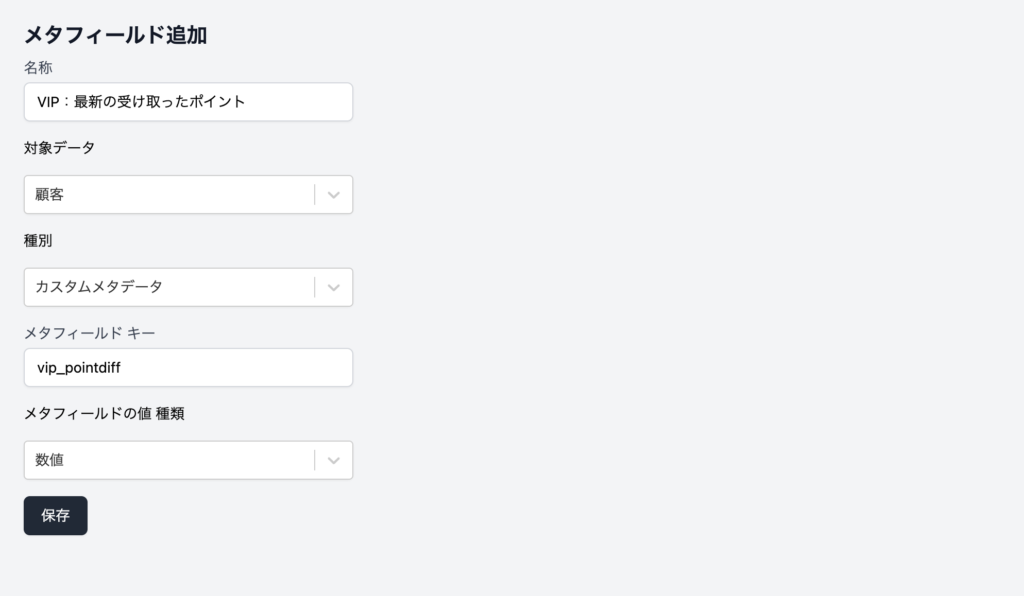
⑤In order to retain the value of points received by StoreCRM, go to the StoreCRM screen and add a new metafield from [Data] > [Metafield List]. On the meta field addition screen, enter as shown below and save.
Name: Any character string (Here, enter "VIP: Latest received points" to proceed)
Target data: Customer
Type: Custom metadata
Meta field key: Meta key value specified in ③ (Here, enter vip_pointdiff to proceed)
Meta field value Type: numeric
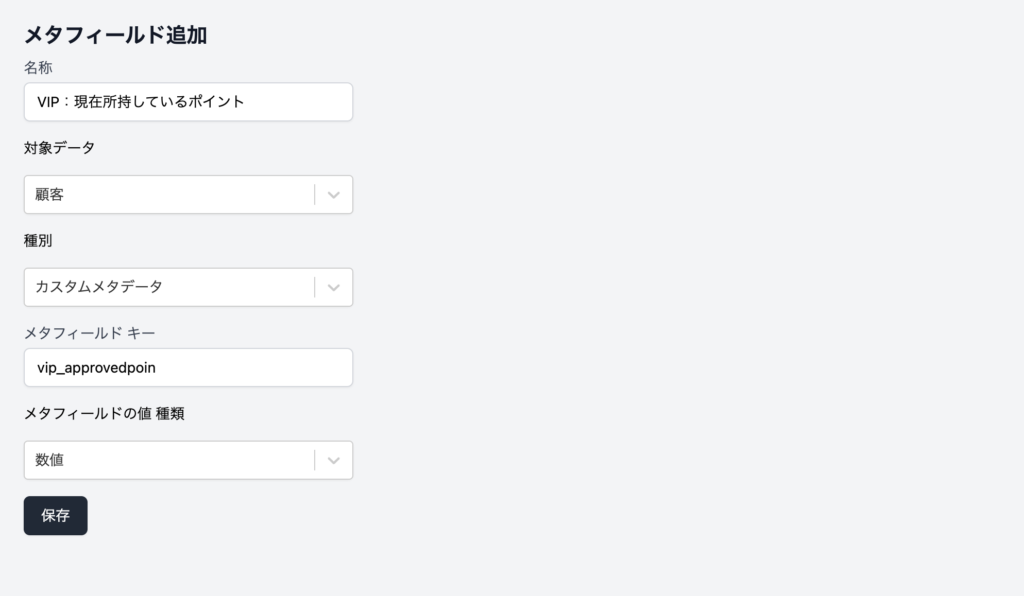
⑥In order for StoreCRM to retain the current point value, go to the StoreCRM screen and add a new metafield from [Data] > [Metafield List]. On the meta field addition screen, enter as shown below and save.
Name: Any character string (Here, enter "VIP: Points you currently have" to proceed)
Target data: Customer
Type: Custom metadata
Meta field key: Meta key value specified in ④ (Here, enter vip_approvedpoint to proceed)
Meta field value Type: numeric
Set up rank-up linkage process in Shopify Flow
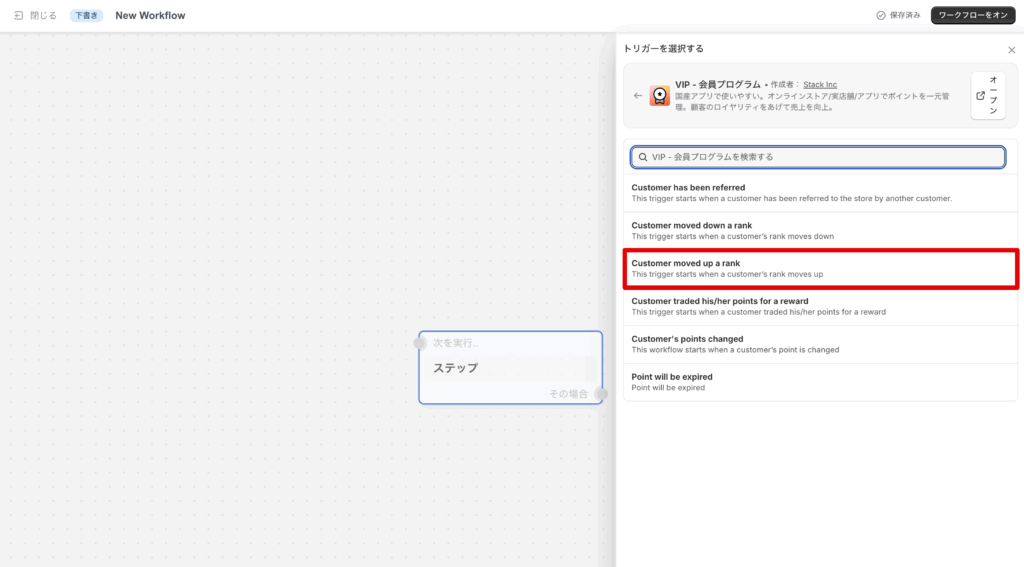
Create a new Flow in Shopify Flow. Select the "Customer moved up a rank" trigger.
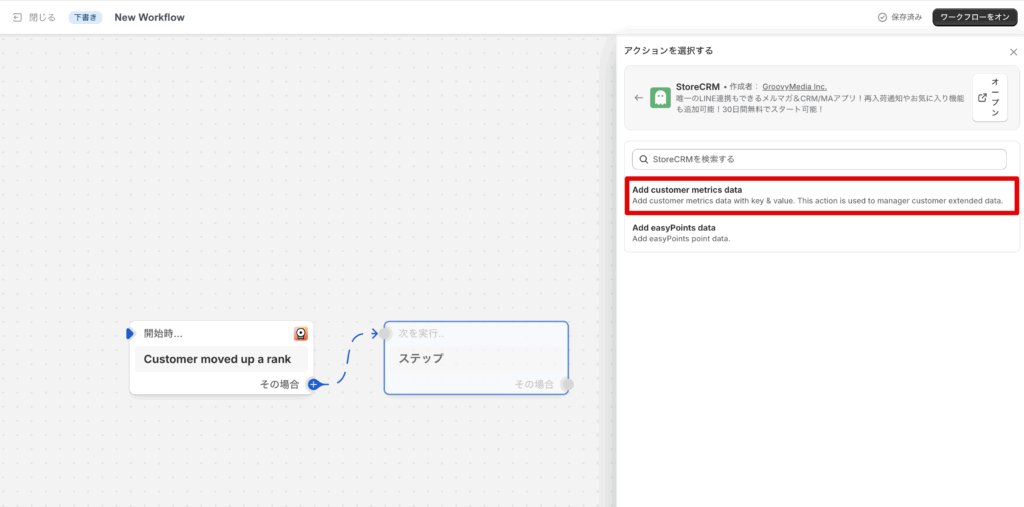
(2) As an action, the StoreCRM action "Add customer metrics dataSelect the "Action.
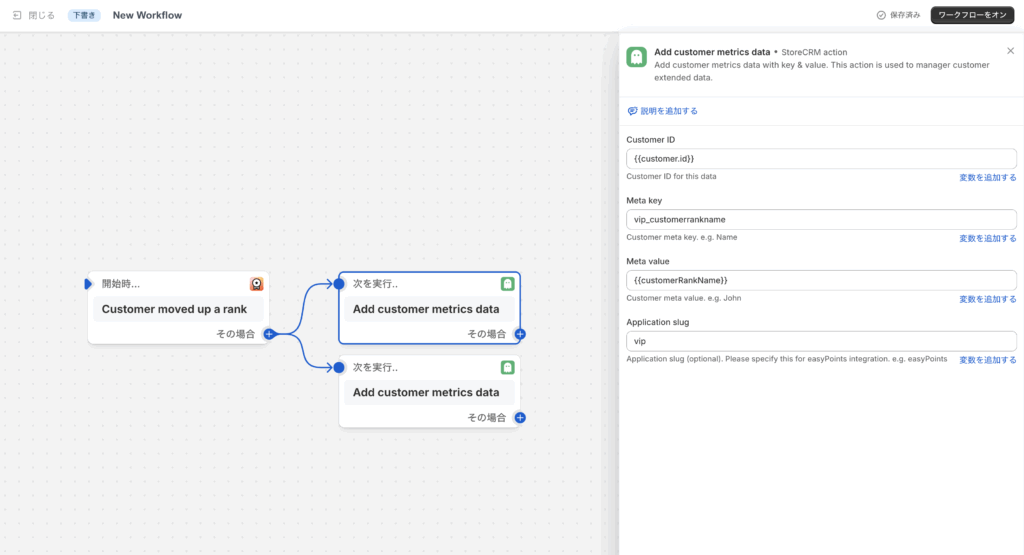
(iii) "Add customer metrics dataThe various values will be entered in the "Action" section of the "Action". The values to be specified are as follows
Customer ID: {{customer.id}}
Meta key: any value (in this case, enter vip_customerrankname to proceed)
Meta value: {{customerRankName}}
Application slug: any value (in this case, enter vip to proceed)
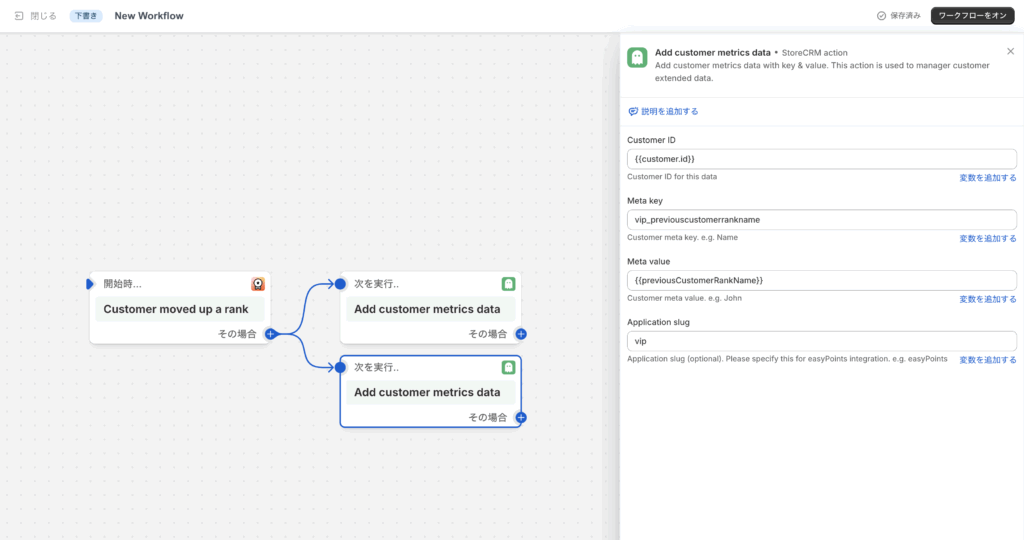
(4) "Add customer metrics dataWe will add another action for the "+" action and enter the various values. The values to be specified are as follows
Customer ID: {{customer.id}}
Meta key: any value (in this case, enter vip_previouscustomerrankname to proceed)
Meta value: {{previousCustomerRankName}}
Application slug: any value (in this case, enter vip to proceed)
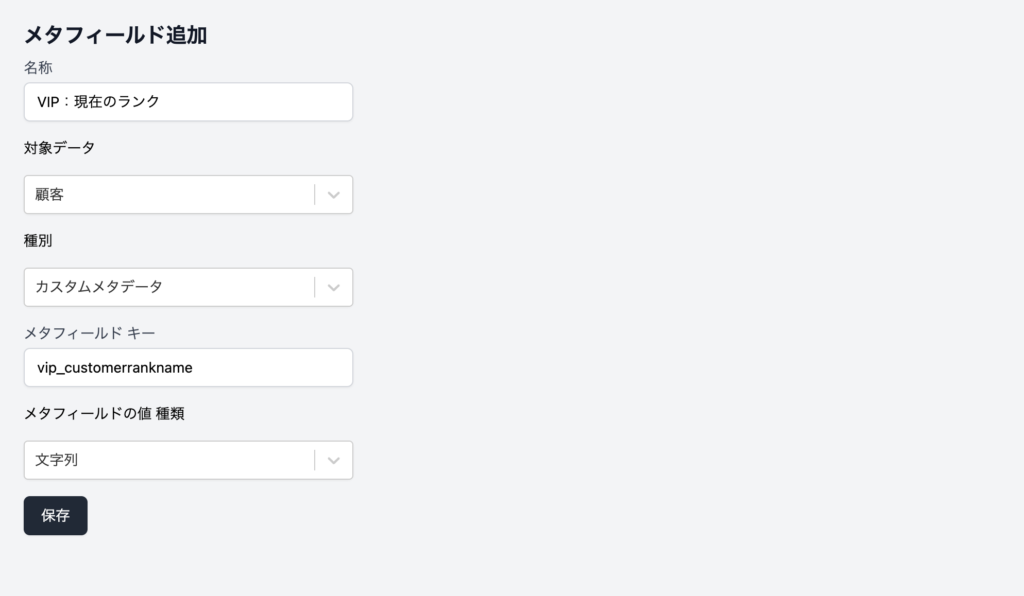
⑤In order for StoreCRM to retain the current rank information, go to the StoreCRM screen and add a new metafield from [Data] > [Metafield List]. On the meta field addition screen, enter as shown below and save.
Name: Any character string (here, enter "VIP: current rank" to proceed)
Target data: Customer
Type: Custom metadata
Meta field key: Meta key value specified in ③ (Here, enter vip_customerrankname to proceed)
Meta field value Type: string
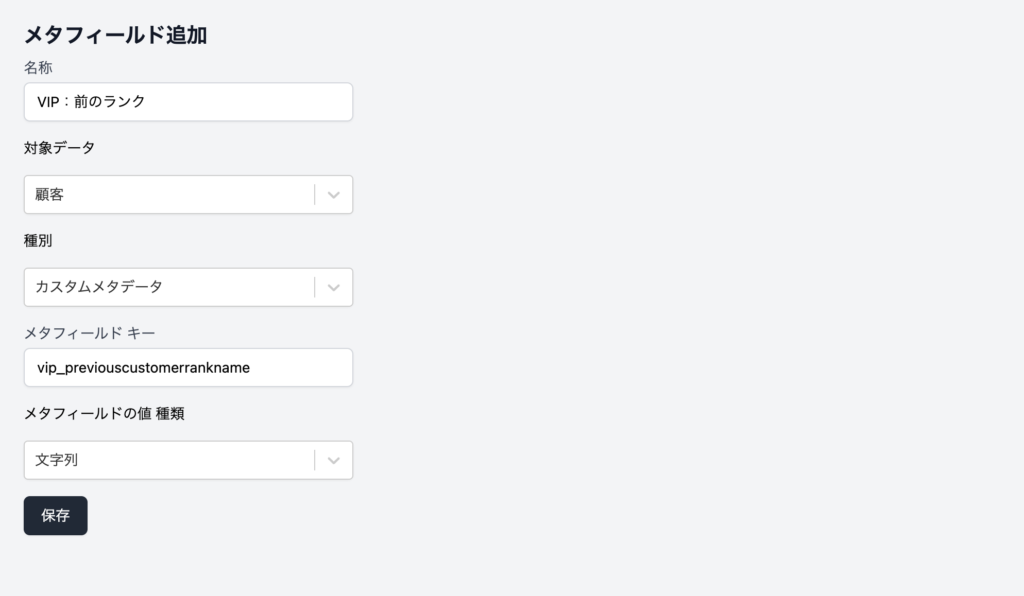
⑥In order for StoreCRM to retain the previous rank information, go to the StoreCRM screen and add a new metafield from [Data] > [Metafield List]. On the meta field addition screen, enter as shown below and save.
Name: Any character string (here, enter "VIP: previous rank" to proceed)
Target data: Customer
Type: Custom metadata
Meta field key: Meta key value specified in ④ (Here, enter vip_previouscustomerrankname to proceed)
Meta field value Type: string
Set up a linkage process for rank down in Shopify Flow.
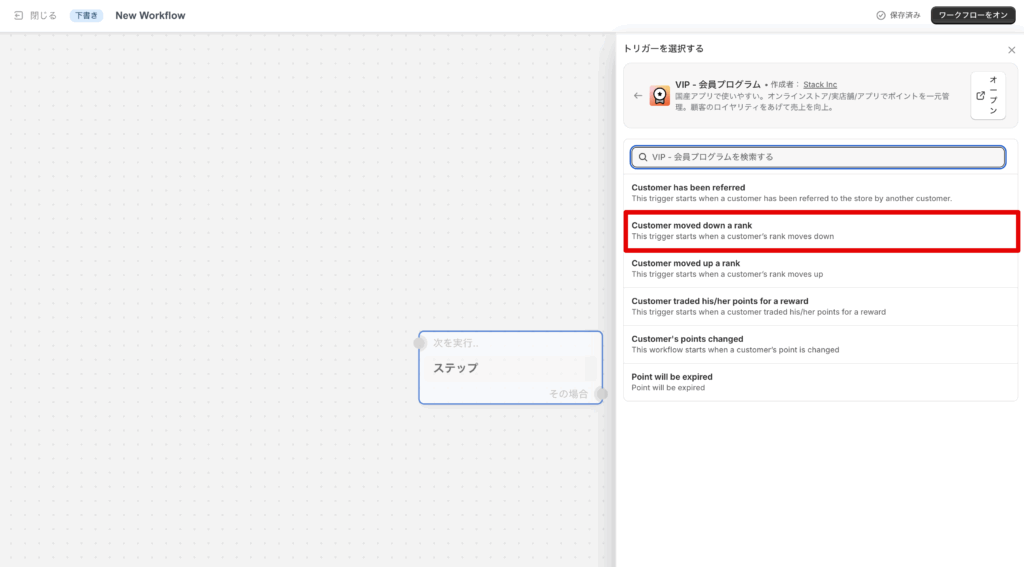
Create a new Flow in Shopify Flow. Select the "Customer moved up a rank" trigger.
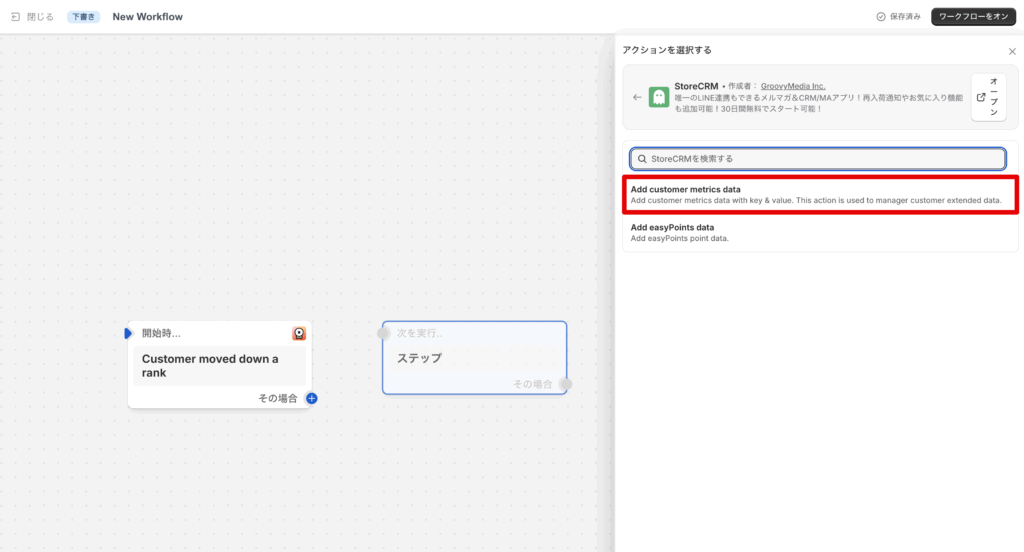
(2) As an action, the StoreCRM action "Add customer metrics dataSelect the "Action.
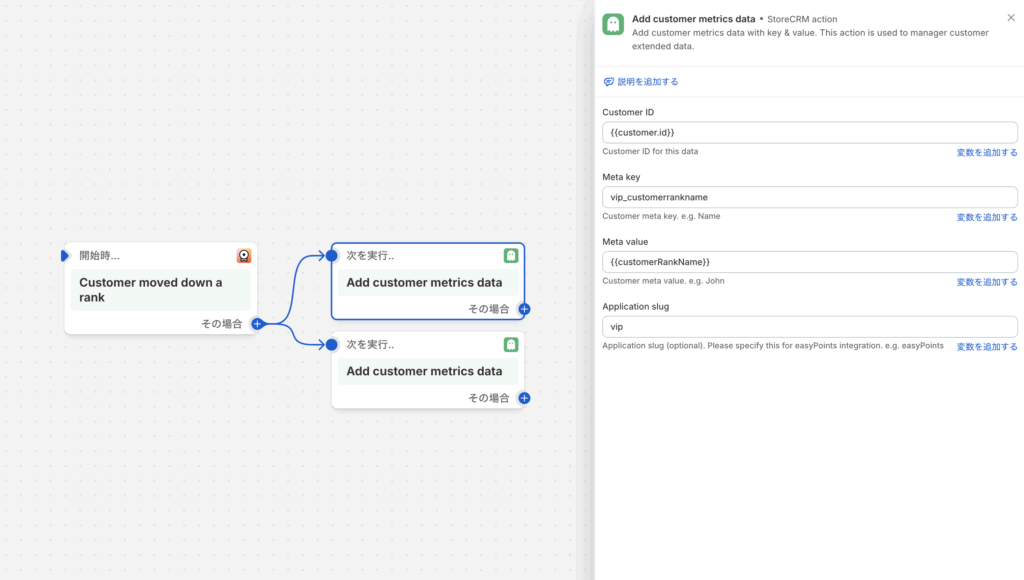
(iii) "Add customer metrics dataThe various values will be entered in the "Action" section of the "Action". The values to be specified are as follows
Customer ID: {{customer.id}}
Meta key: any value (in this case, enter vip_customerrankname to proceed)
Meta value: {{customerRankName}}
Application slug: any value (in this case, enter vip to proceed)
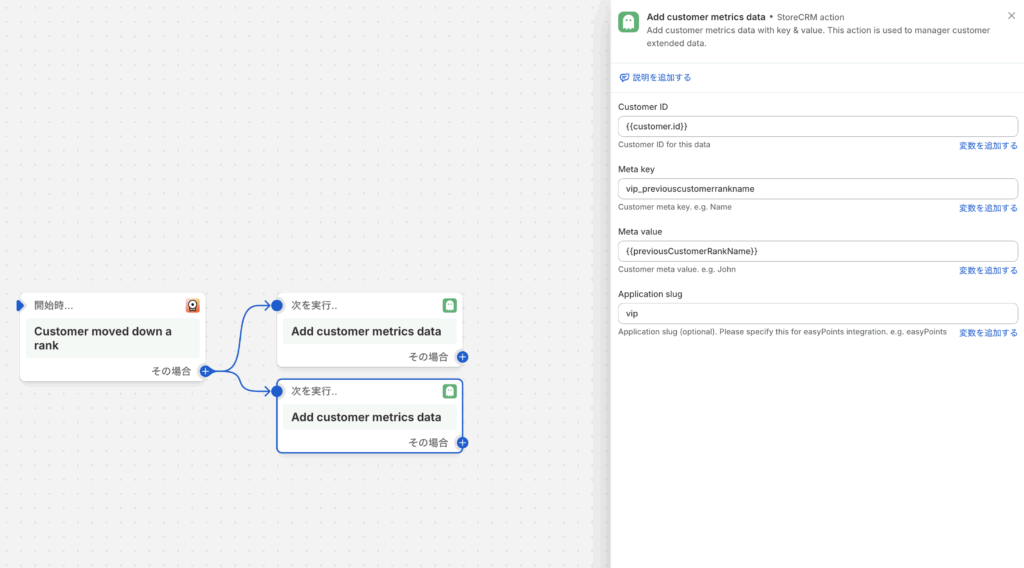
(4) "Add customer metrics dataWe will add another action for the "+" action and enter the various values. The values to be specified are as follows
Customer ID: {{customer.id}}
Meta key: any value (in this case, enter vip_previouscustomerrankname to proceed)
Meta value: {{previousCustomerRankName}}
Application slug: any value (in this case, enter vip to proceed)
operation check
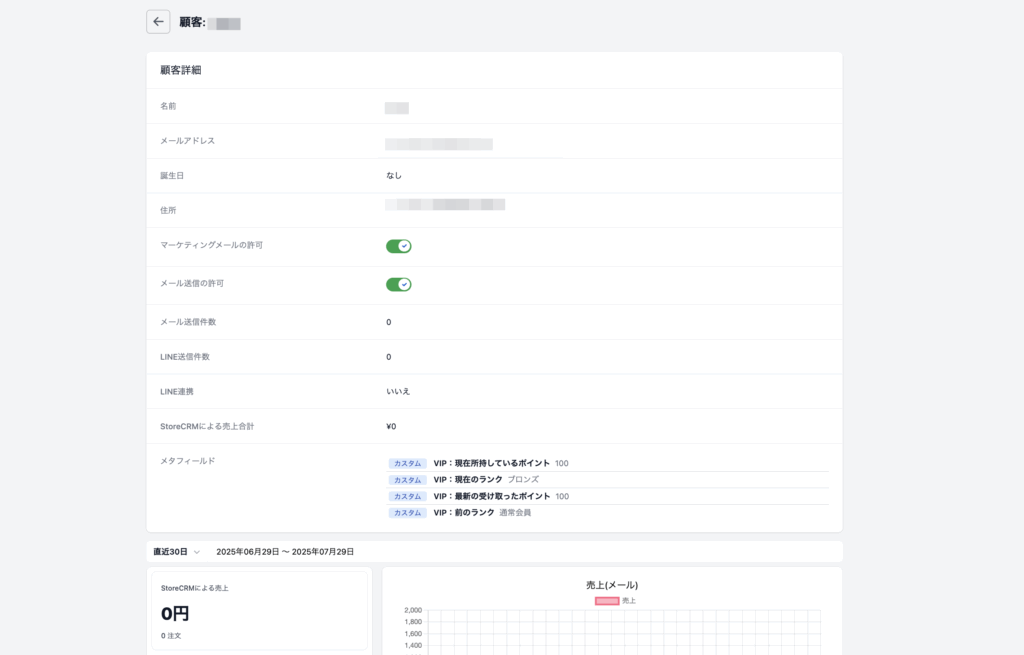
The VIP value will be linked to StoreCRM when there is a change in points or rank. When the linkage is correctly performed, the value of the added meta-field will be displayed in the meta-field item in the customer details screen of StoreCRM.
 English
  Japanese