To send a cross-sell email after a purchase, do the following
A cross-sell e-mail is an e-mail sent to a customer to suggest another product related to the one the customer has already purchased.
Watch the video to set up
See the manual and set it up.
1. Introduction
This article explains how to use StoreCRM to send cross-sell emails to customers who have purchased products on Shopify, introducing recommended products and related products, and what to keep in mind while creating a scenario to send an email introducing recommended products to a customer who has actually purchased a product.
The EC market has been growing in size and competition has been increasing, making it more difficult to acquire new customers.
In such a situation, it is very important to increase sales to existing customers and raise LTV (Life Time Value) in order to grow the e-commerce site.
One effective measure to increase LTV is cross-selling mailings.
A cross-sell e-mail is a marketing e-mail sent to a customer to suggest another product related to the one the customer has already purchased.
Since cross-selling mailings approach existing customers, they are less costly than acquiring new customers, and can be marketed efficiently by suggesting related products based on the products purchased.
StoreCRM allows you to set cross-sell e-mail conditions and create e-mails in just a few steps.
The application also allows users to check at a glance information necessary for analysis, such as open rates, click rates, and sales via e-mail, for each e-mail sent.
By sending cross-sell emails, you can expect to increase LTV, so we encourage you to utilize StoreCRM to send email newsletters to customers who have purchased your products.
2. creation of email scenarios (cross-sell emails at the time of product purchase)
About the purpose of the scenario
It is very important to clarify the purpose of marketing activities. First, let's confirm the purpose of the "cross-sell email scenario for product purchases" that we will create this time.
memo
Increase per-customer spend
By thanking customers for their purchases immediately after purchase and proposing products that are related to the products they purchased and that the customer will find valuable, additional purchases can be encouraged and LTV can be increased.
Creating scenarios in practice
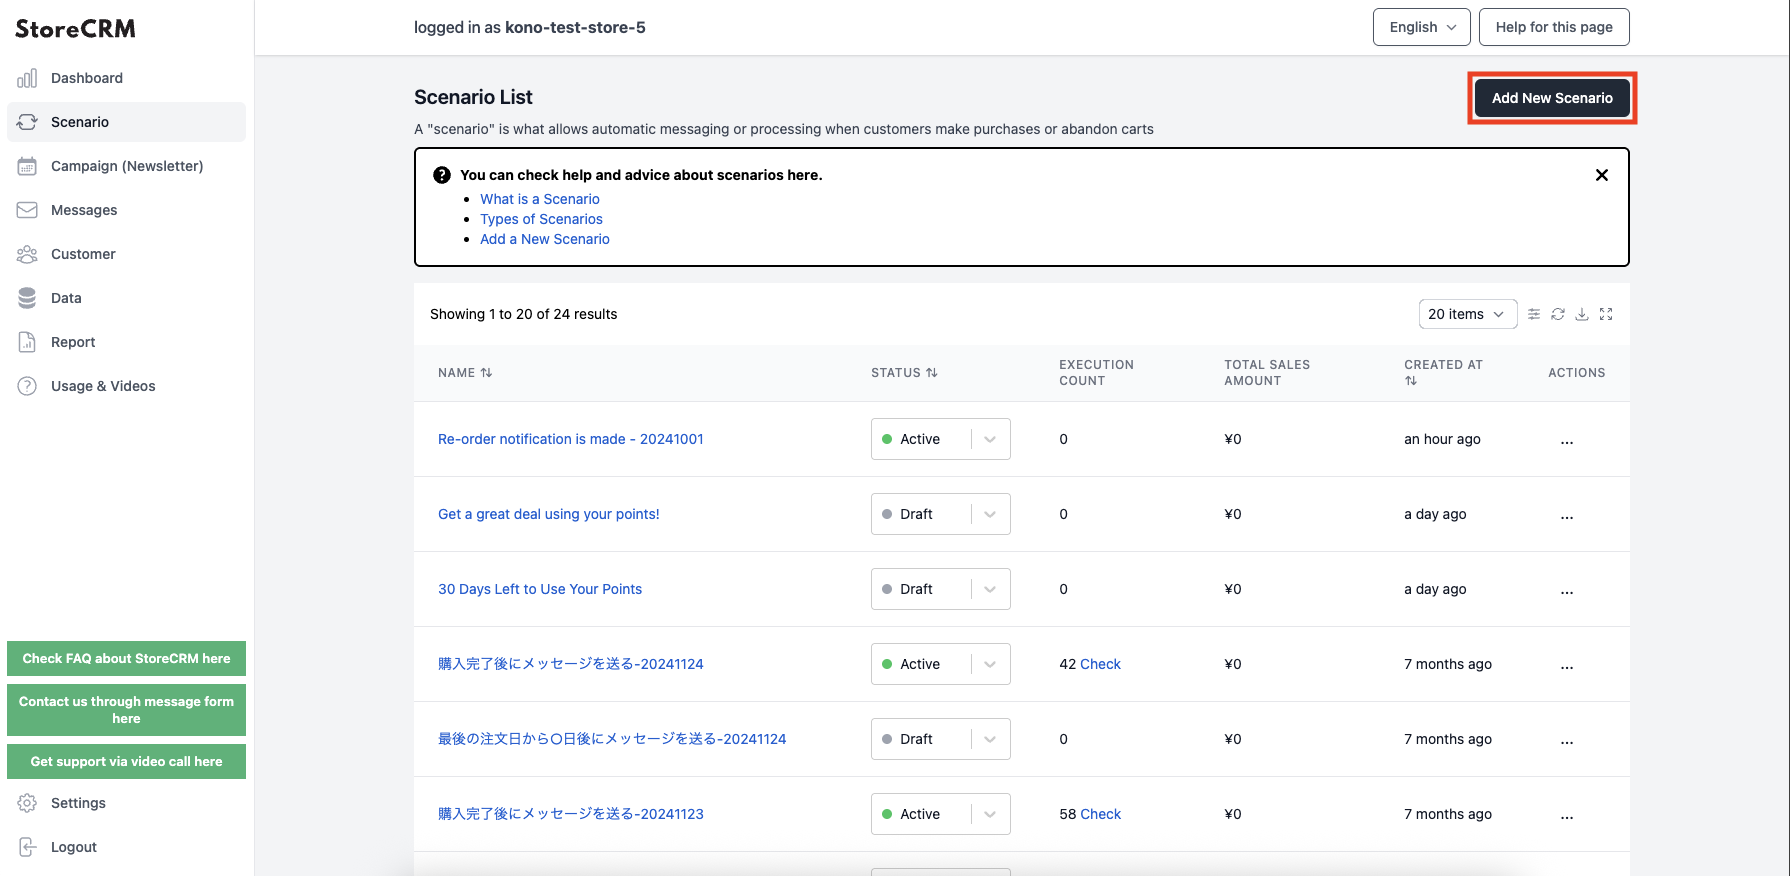
➀Click [StoreCRM App Screen] > [Scenarios] to open the Scenarios List page.
Click on "Add new scenario" in the upper right corner of the screen.
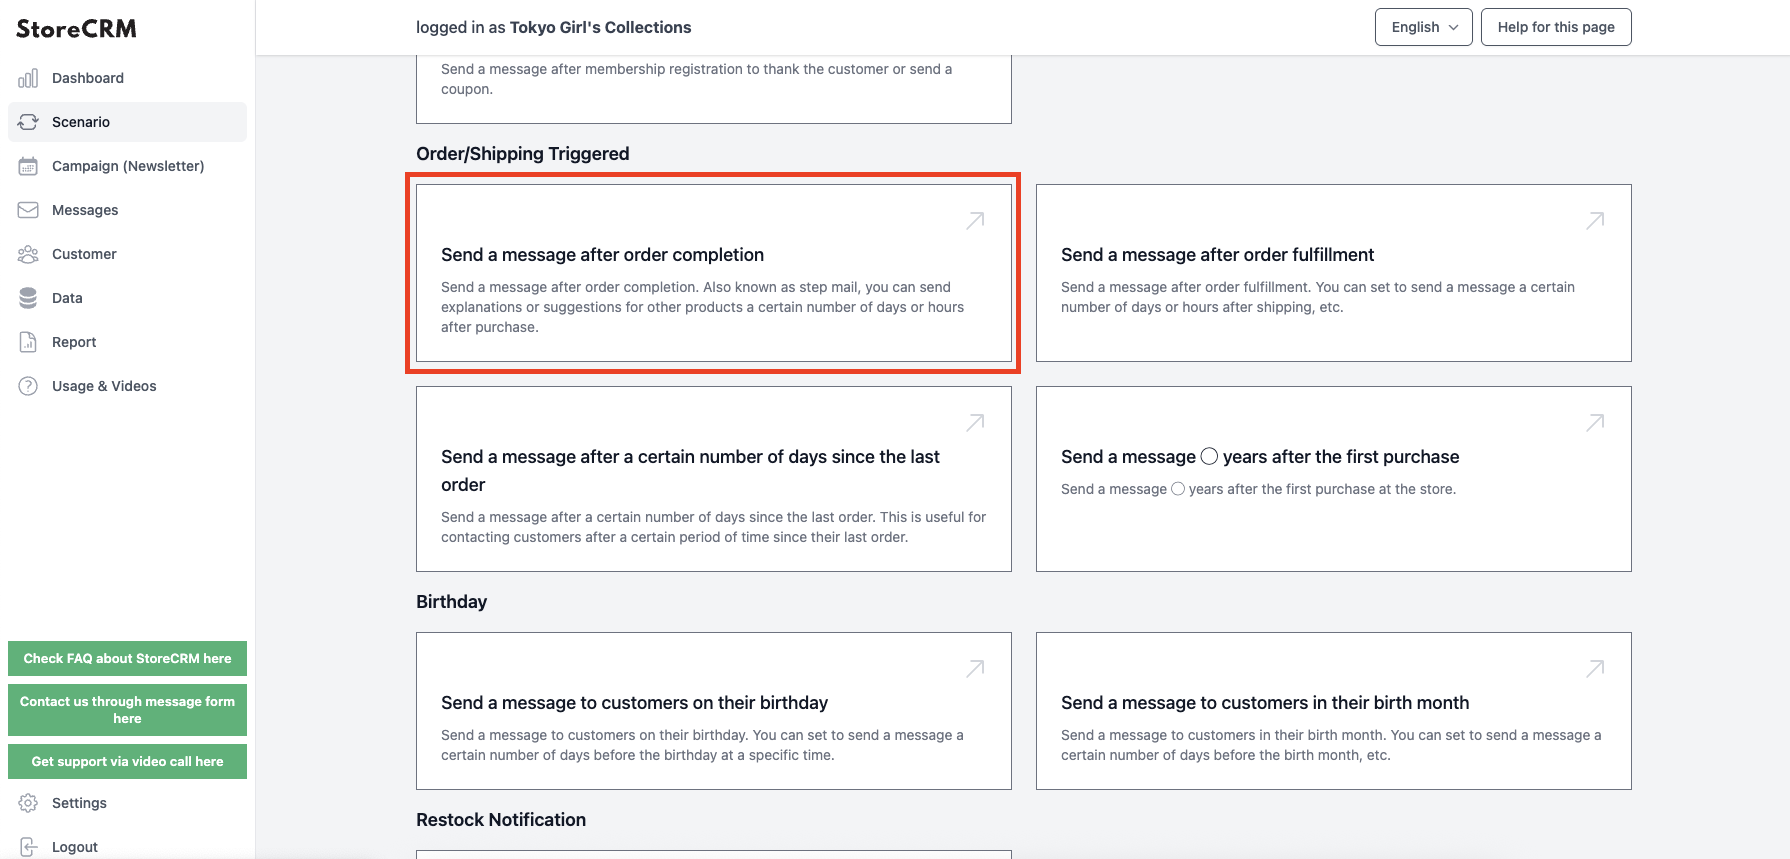
➁In this case, we will create a cross-sell email scenario after the product purchase is complete, so [send triggered by order or shipment]>[email after purchase is completeClick on the "+" button.
*If you would like to send a cross-sell e-mail after the shipment is completed, please select a scenario from [E-mail after shipment is completed].
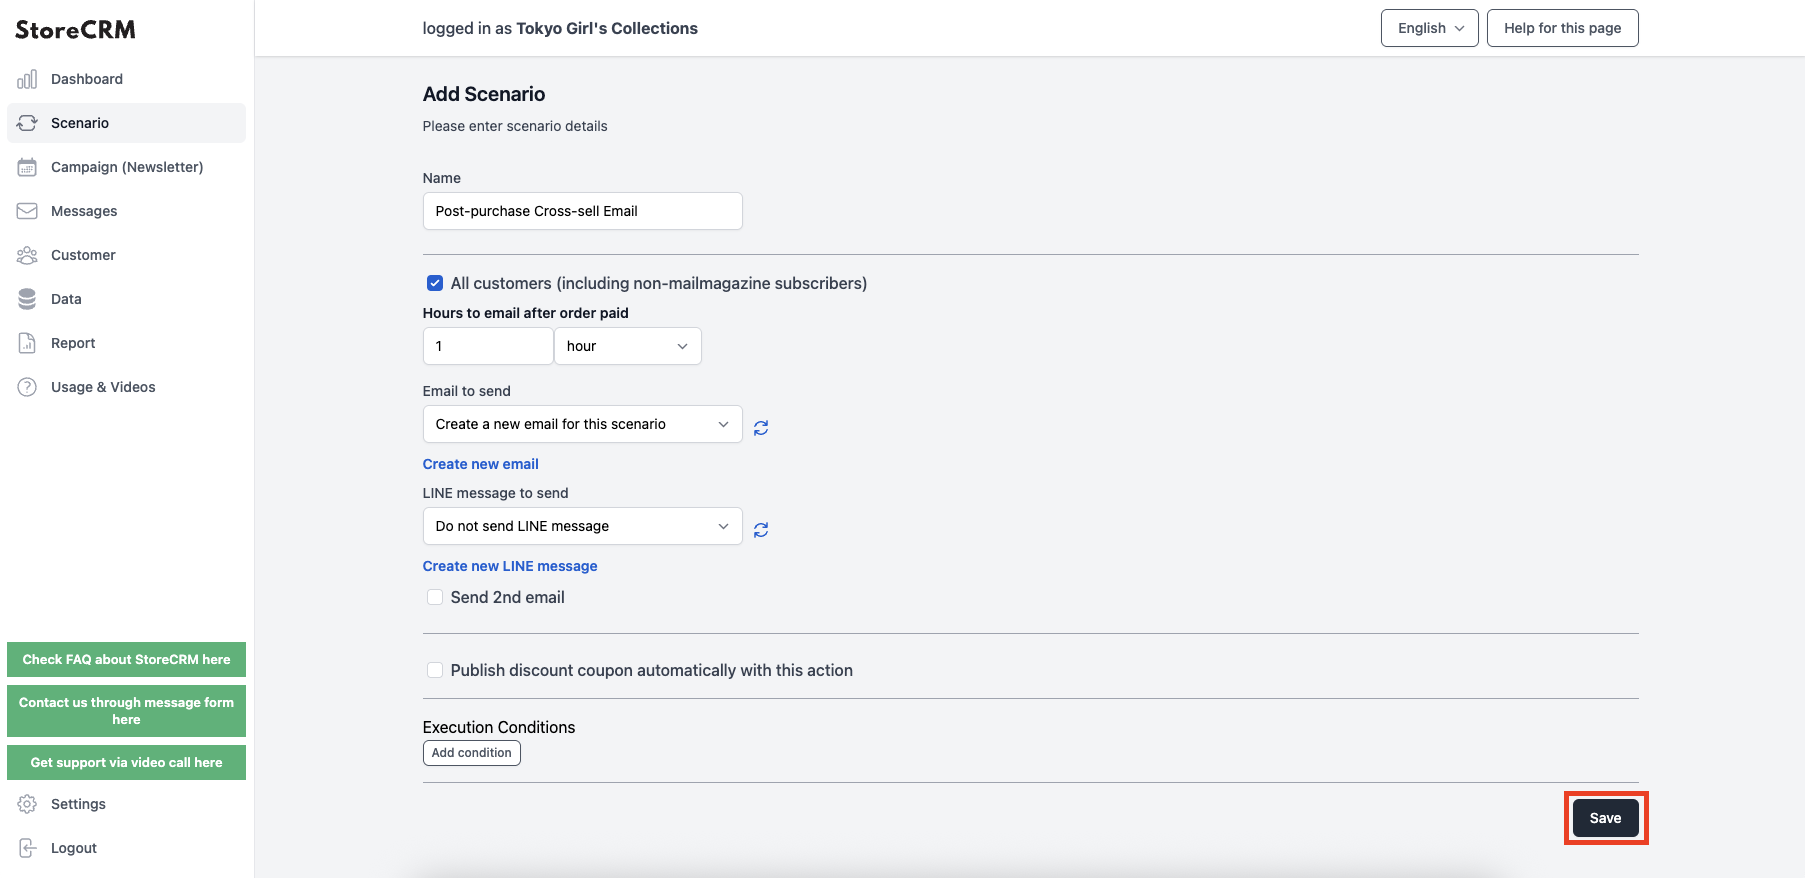
The "Scenario Settings" screen will appear, and you can set the date and time to send the e-mail. In this case, we set the date and time based on the following specifications. After completing the settings, click "Save" in the lower right corner of the screen.
important
Send a thank you email and product introduction email one hour after purchase.
(4) Compose the mail to be sent.
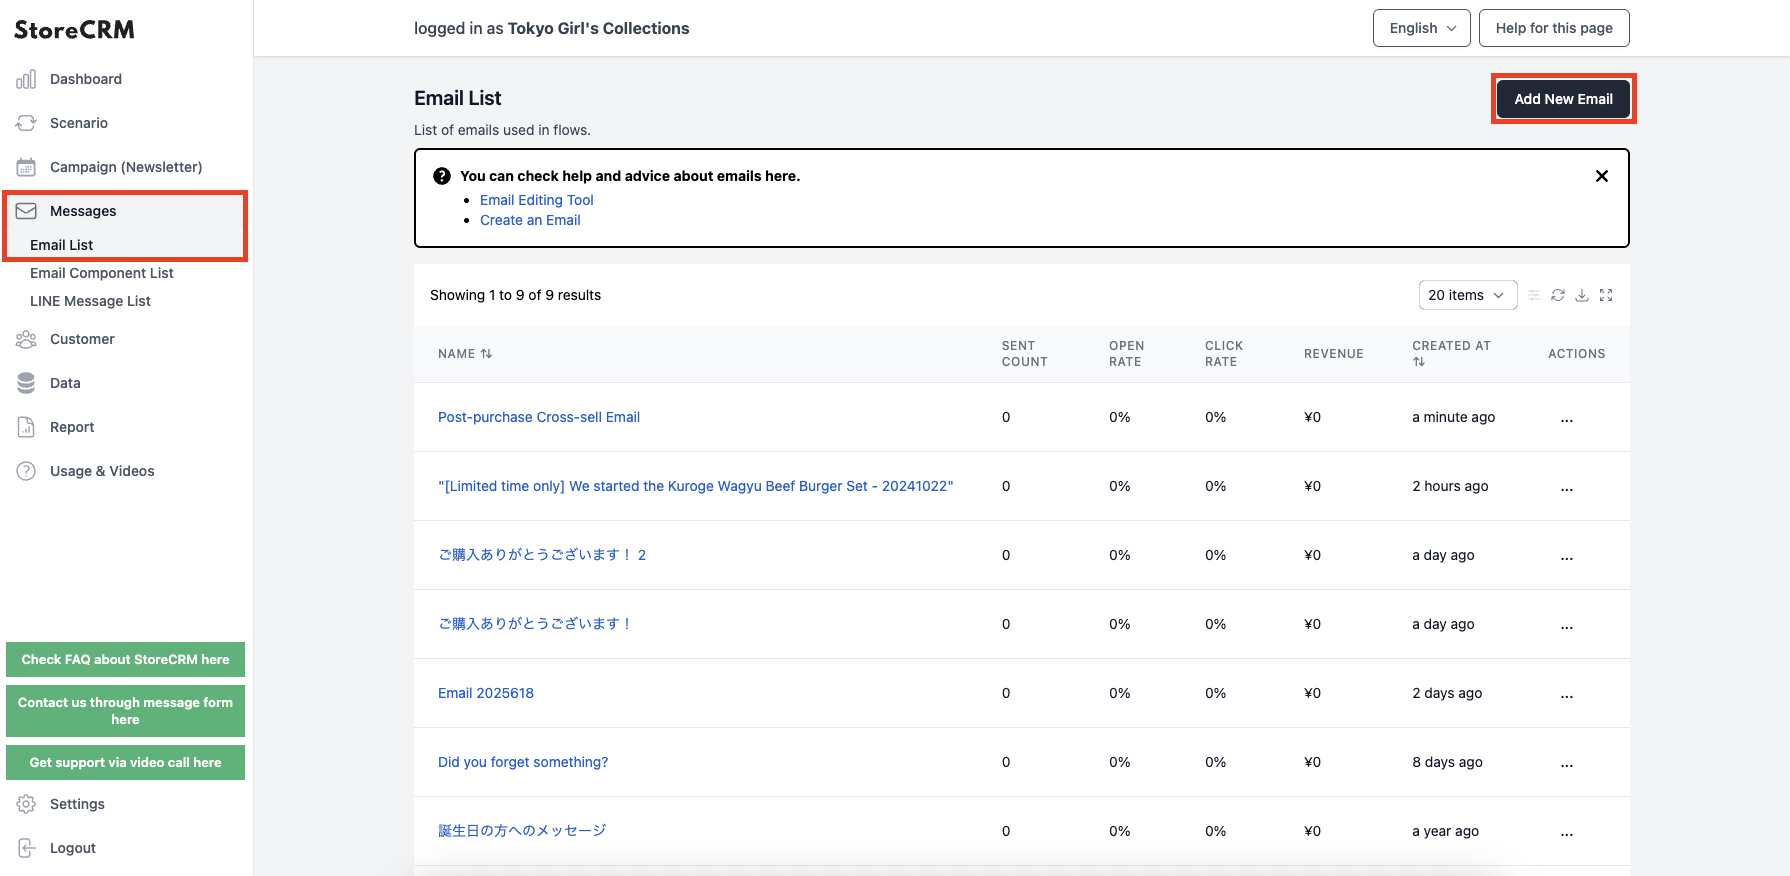
Select [Mail] > [Mail List] from the left menu to open the Mail List screen, then click [Add New Mail] in the upper right corner.

Enter a name for management in the [Name] field and the title of the e-mail to be sent in the [Mail Title] field.
Click "Next" when you have completed the form.
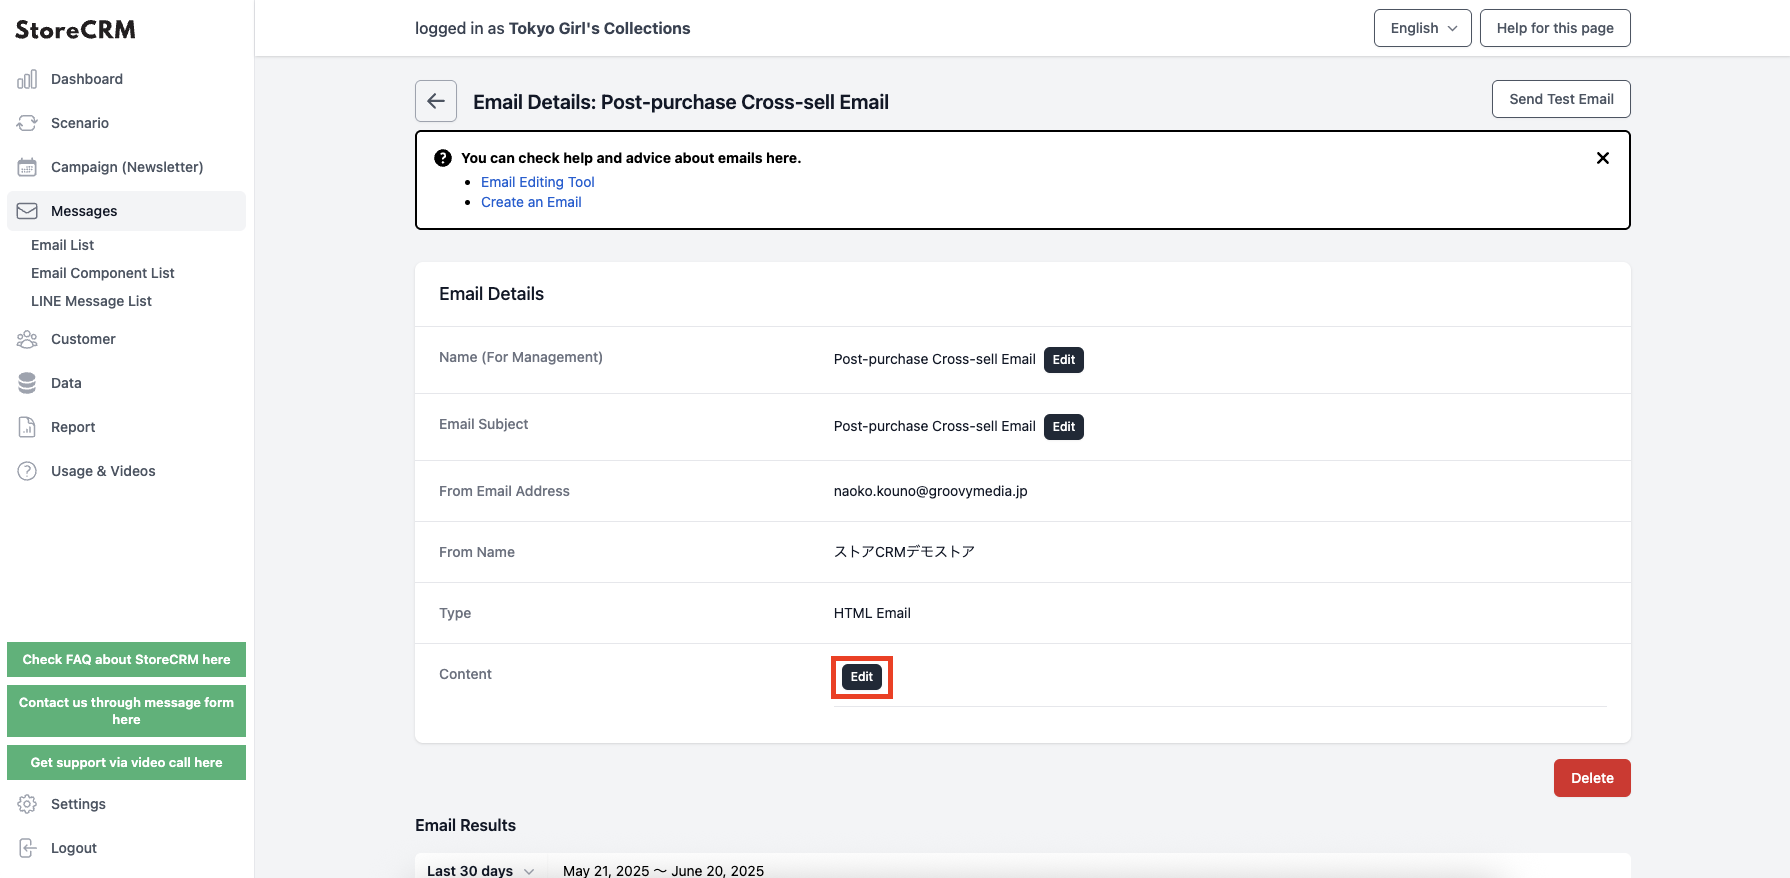
(6) An email will be created and the email detail page will open. Click [Body]>[Details].
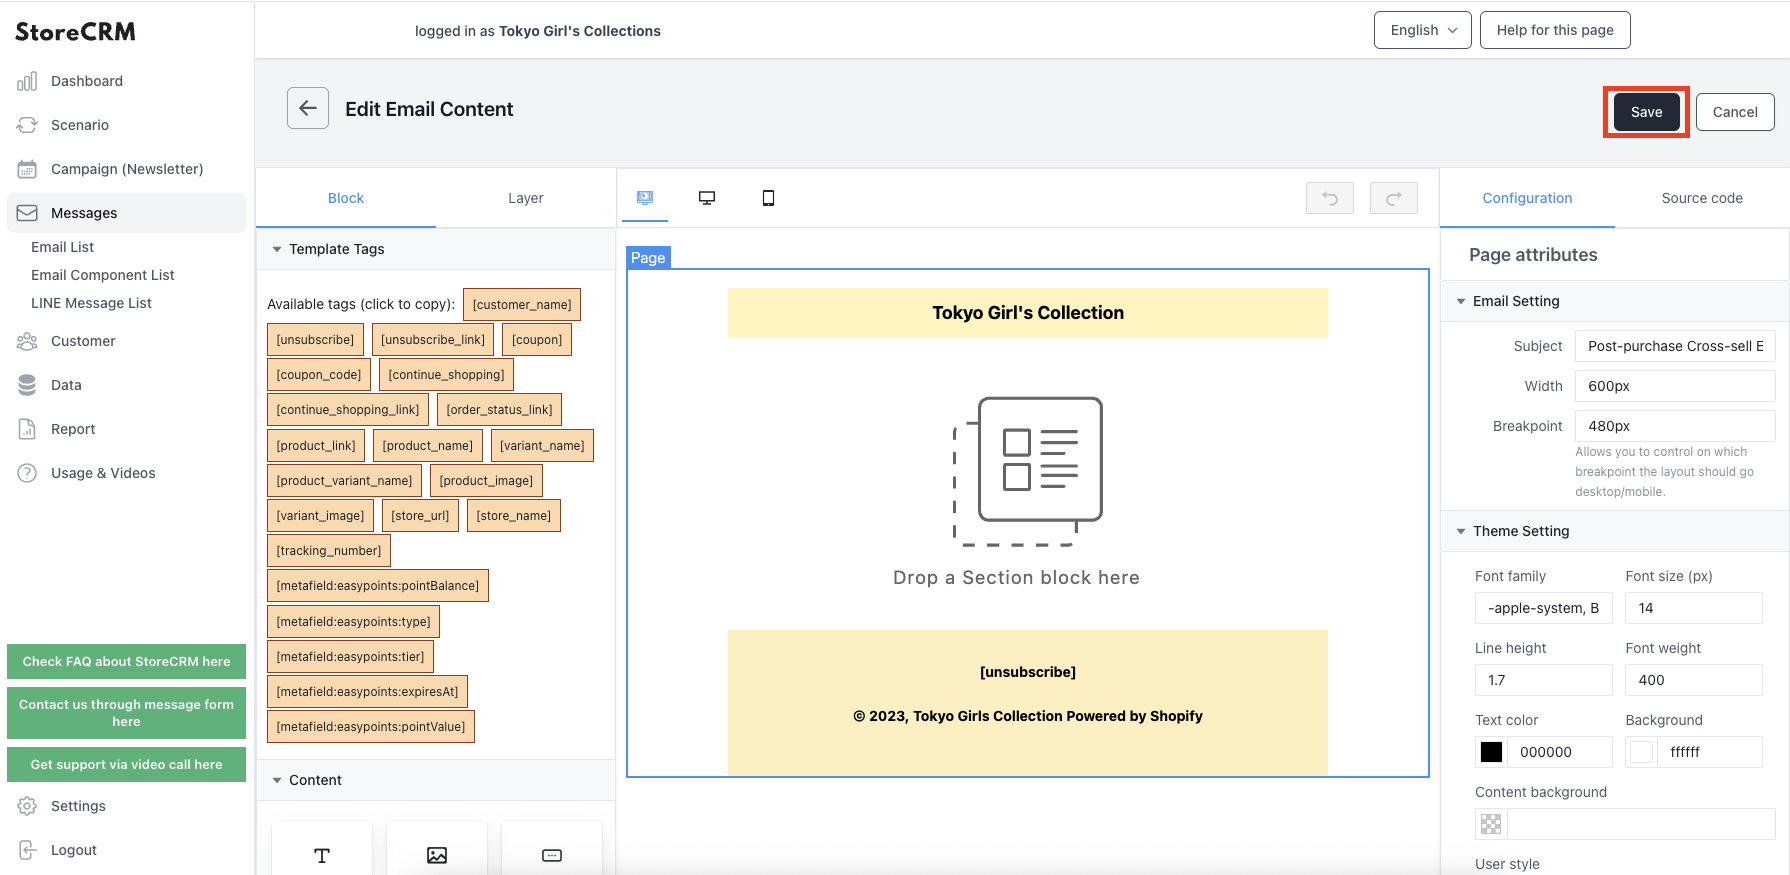
(7) The mail editor screen will open. Drag and drop contents to create a mail with the layout of your choice.
Remember to click "Save" when you have completed the creation.
important
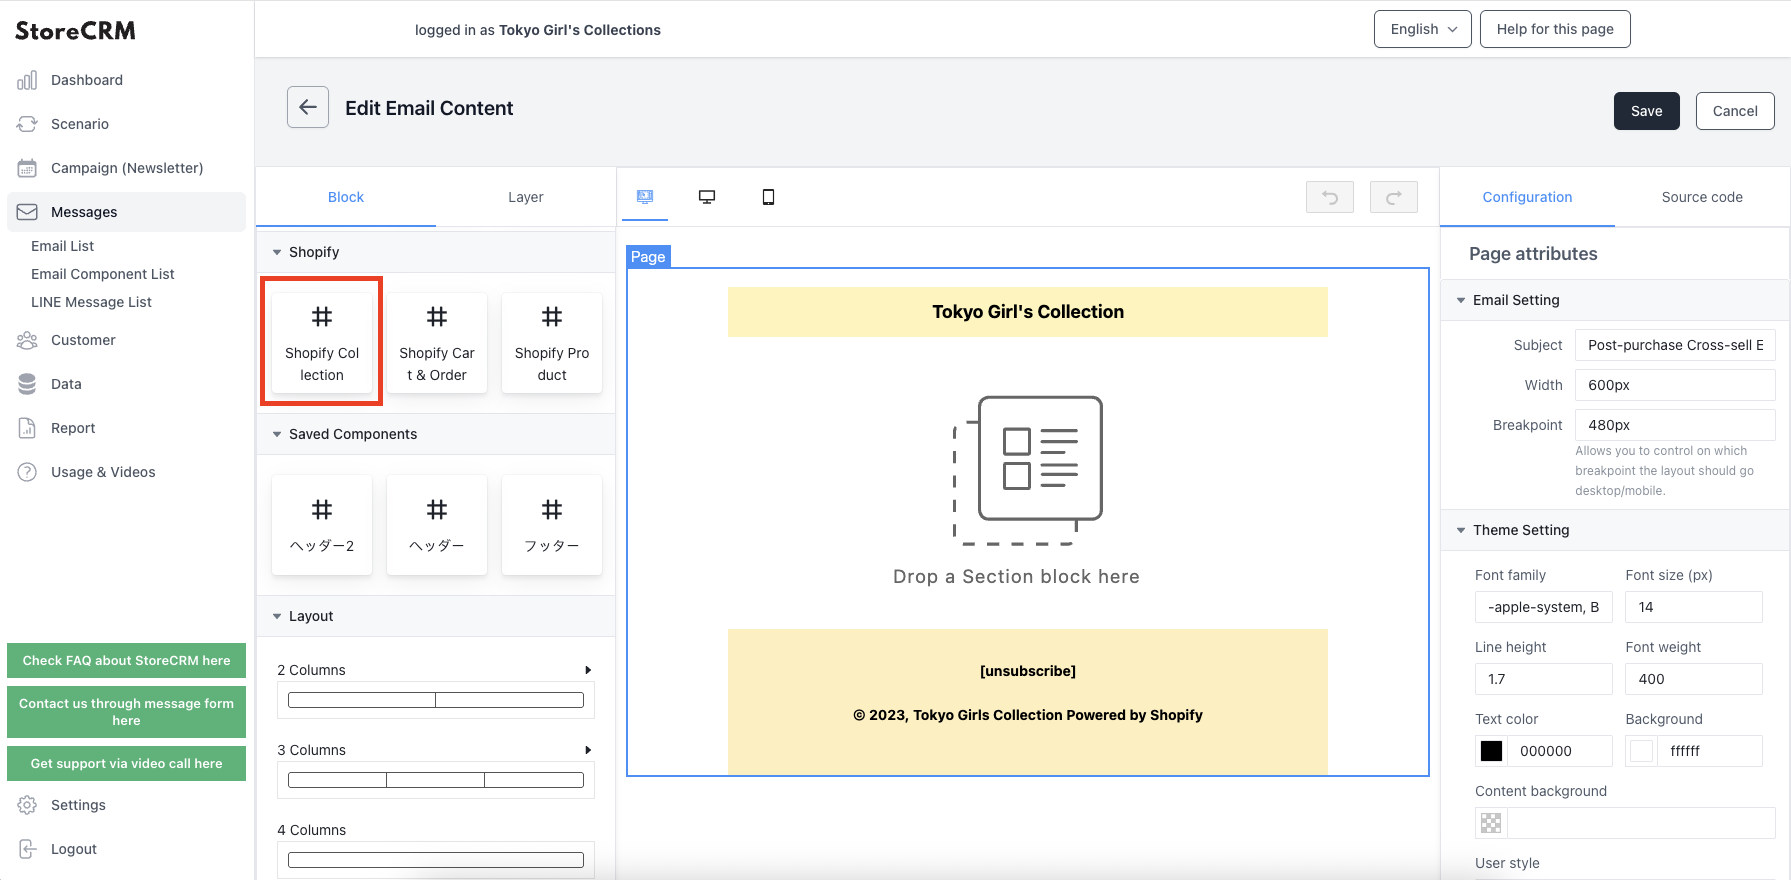
If you want to include product information in the email, you can use a block in the Shopify collection. Implement it according to your situation.
(8) When you have finished creating the email, set the email you created in the scenario.
[Click on Scenarios>Scenario List>Created Scenarios.
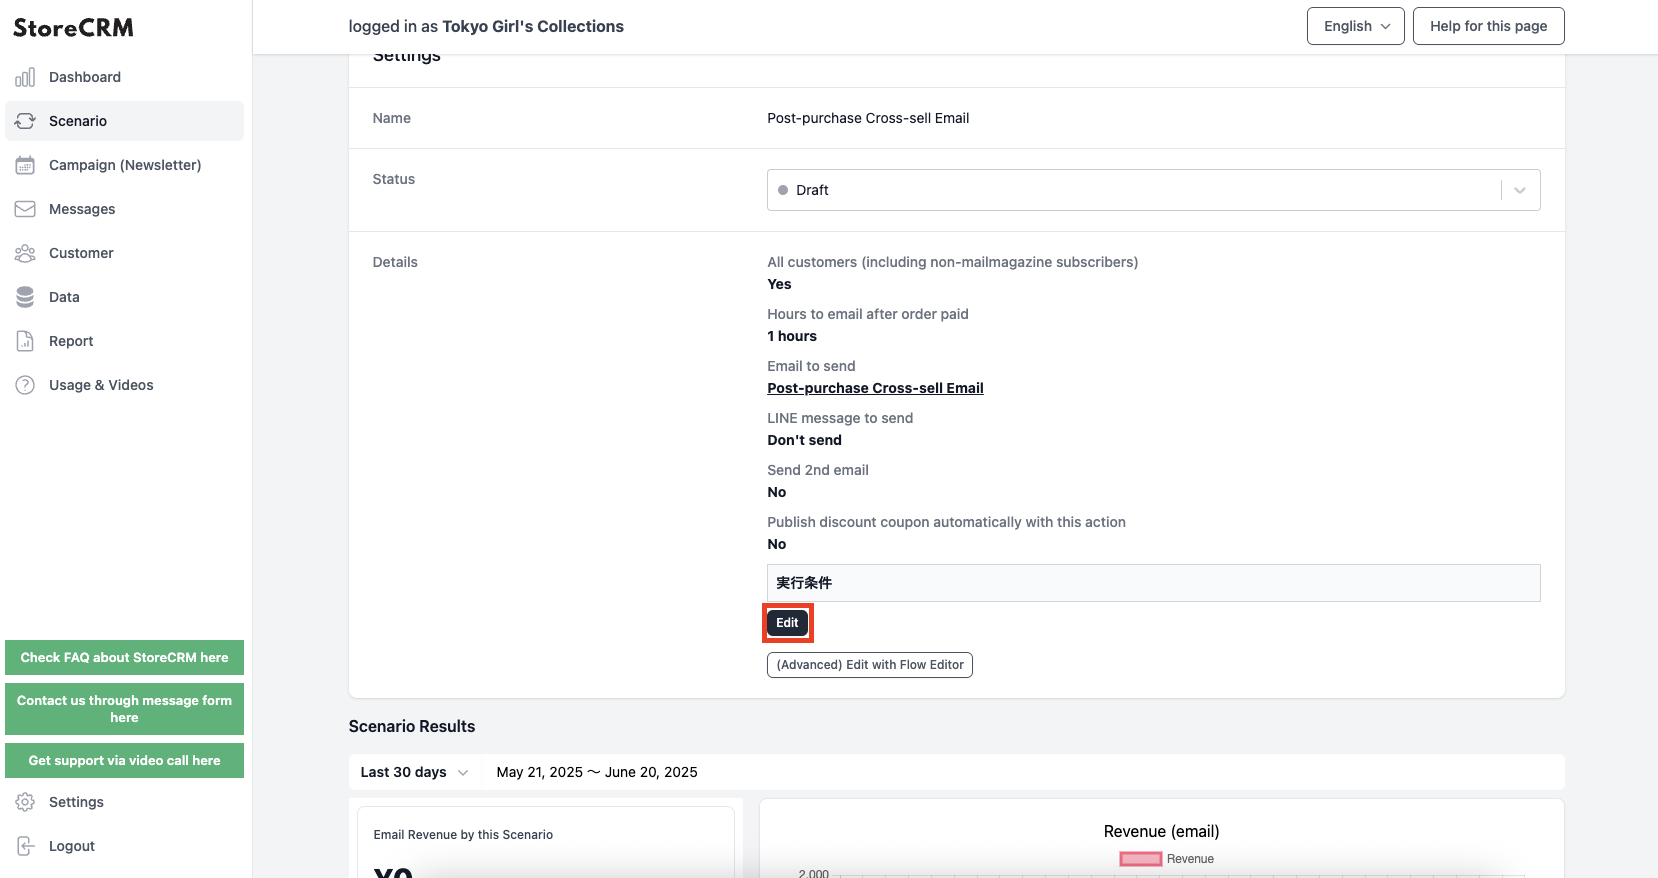
Click [Details]>[Edit].
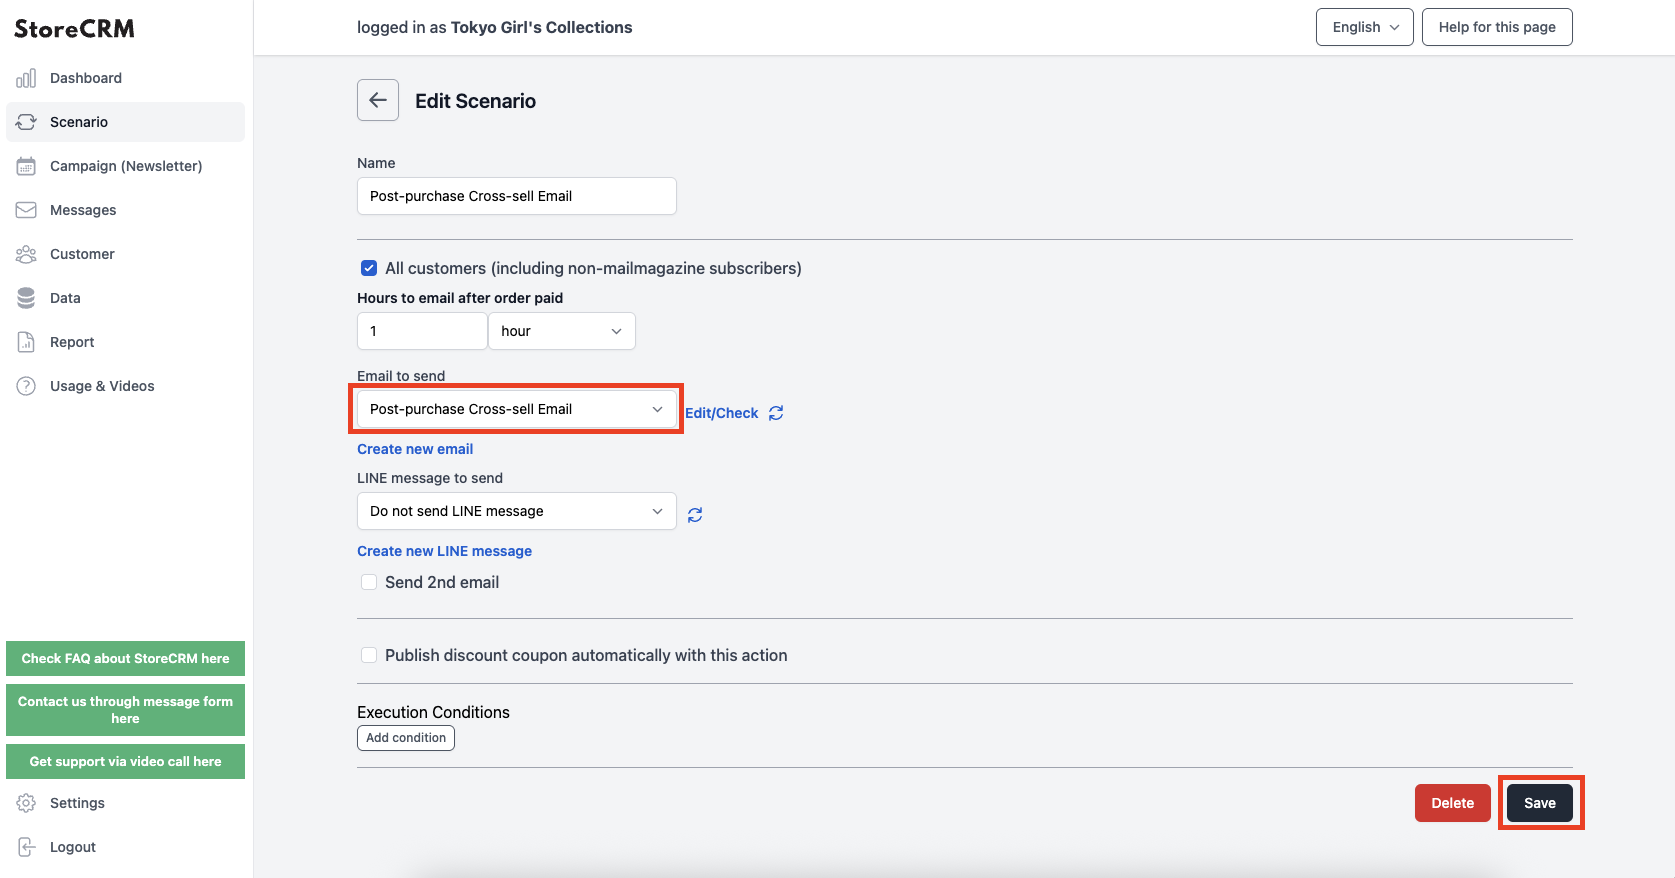
(10) Set the email created in the previous section as the email template. (The administrative name will be displayed.)
After making your selection, click "Save.
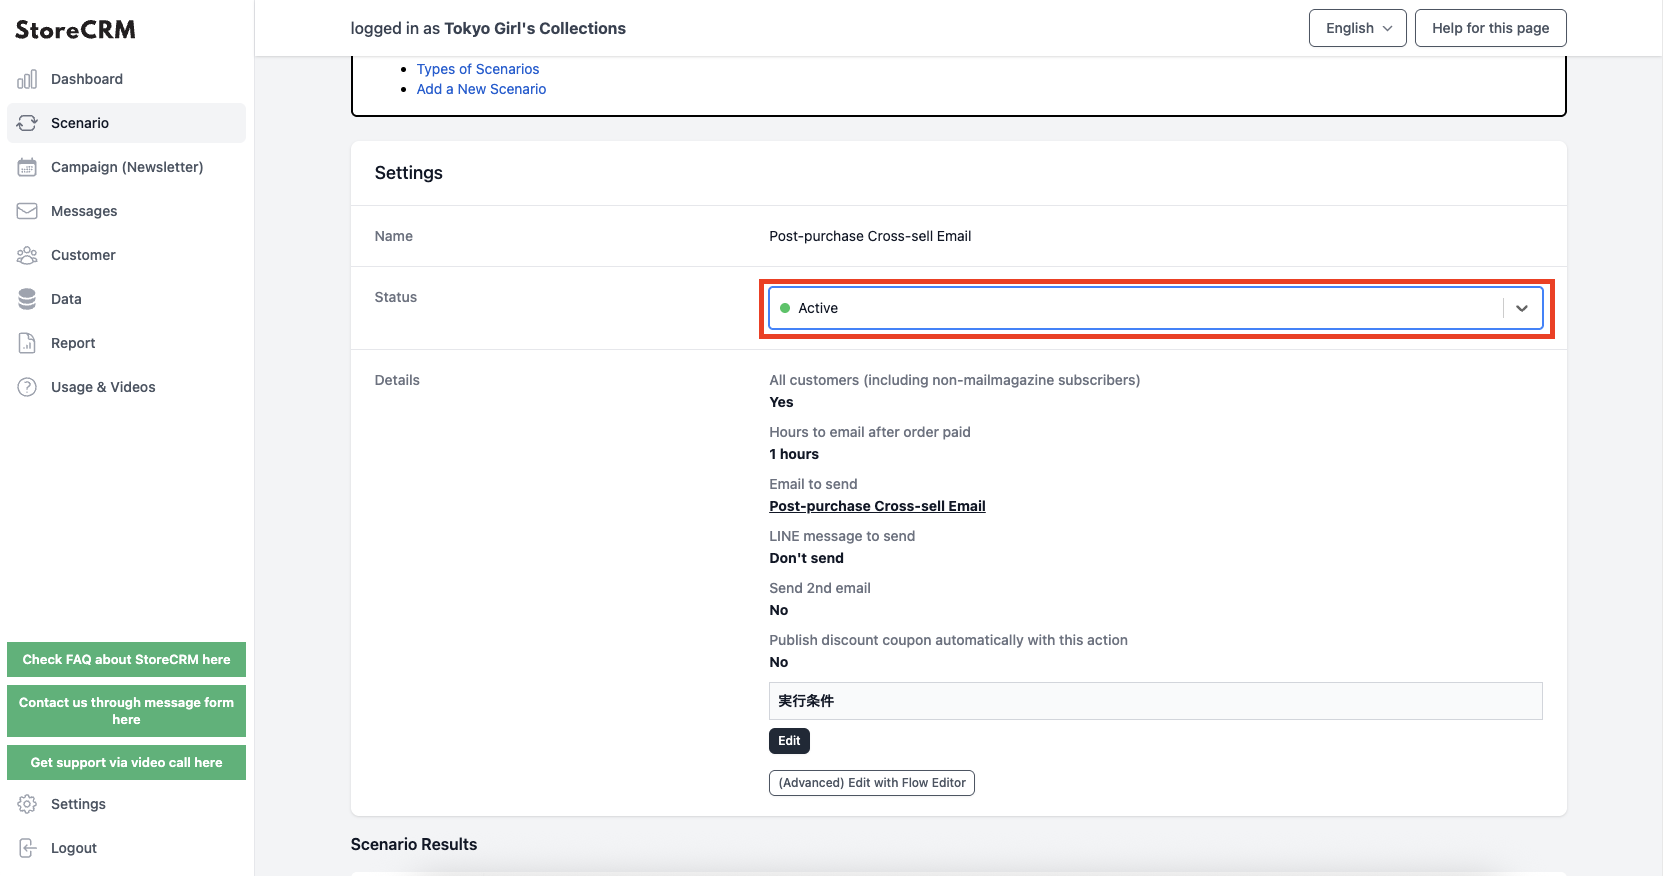
(11) Click the [Save] button to display the scenario details.
[Clicking on the "Status" pull-down will activate the scenario and the email will be sent according to the conditions you set.
*The effects of scenario-based measures such as sales and email open rates can be checked from the "Scenario Results" page.
This completes the creation of the scenario.
3. advanced scenario customization
About Flow Editor
Generic scenarios can be easily created in a few steps as described in the previous section.
However, for stores of a certain size, we receive many requests to create complex scenarios, such as sending out different types of e-mails based on customer attributes and status.
StoreCRM offers a feature called the Flow Editor, which allows for the creation of more advanced scenarios for mid-size and larger stores and CRM-savvy personnel.
In this section, we will explain the usage and notes of the Flow Editor while actually customizing the scenario in the Flow Editor based on the [Cross-Sell Email Scenario after Purchase of Stratified Products] created in the previous section.
Customization specifications and scenario replication
First, we will formulate the specifications for the scenario to be customized in the flow editor. In this case, we would like to customize the following specifications.
important
- Customers whose purchased items include the tag [2024AW_TOPS] will receive an email introducing the 2024AW_BOTOMS collection via email
- Customers whose purchased items do not include [2024AW_TOPS] in their tags will receive an email introducing the TOPSELLS collection via email
Duplicate the scenario in preparation for the actual customization.
If a base scenario exists, as in this case, the duplicate scenario function can be used for smooth customization.
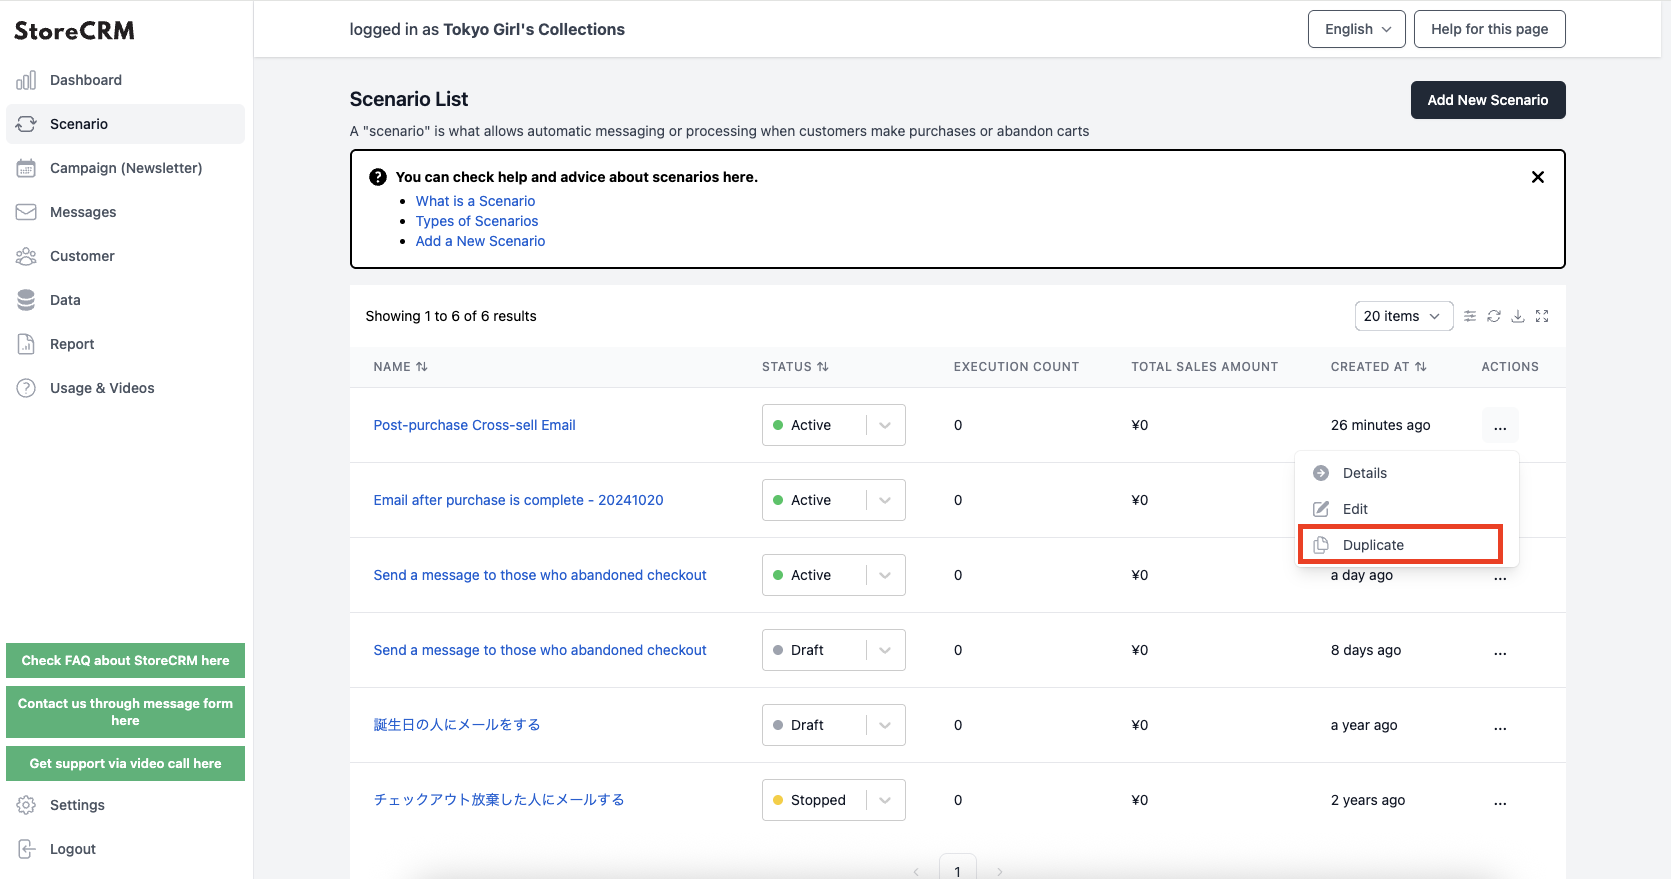
(1) Click on [Scenarios] to open the list of scenarios. Click [...] to the right of the scenario you created in the previous section [Cross-Sell Email after Completed Purchase], and click [Duplicate] in the menu that appears.
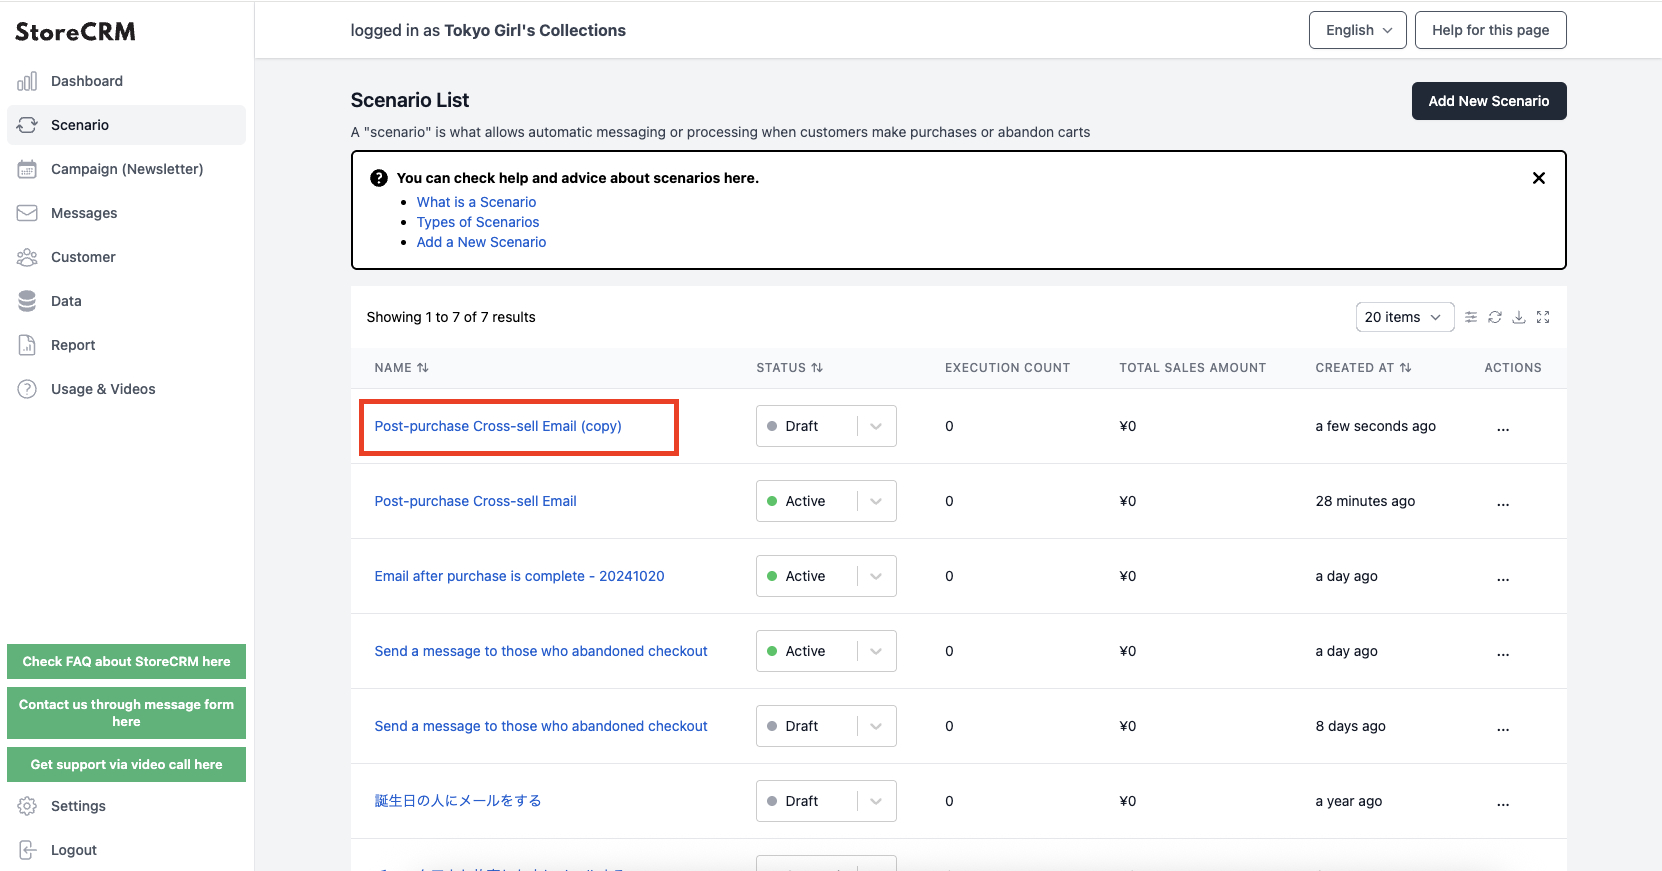
➁Click "OK" in the pop-up window, and if the scenario is created with (copy) added to the scenario name, you are done.
In this article, we will customize this scenario.
*The scenario name can be changed by editing the scenario.
Scenario Customization
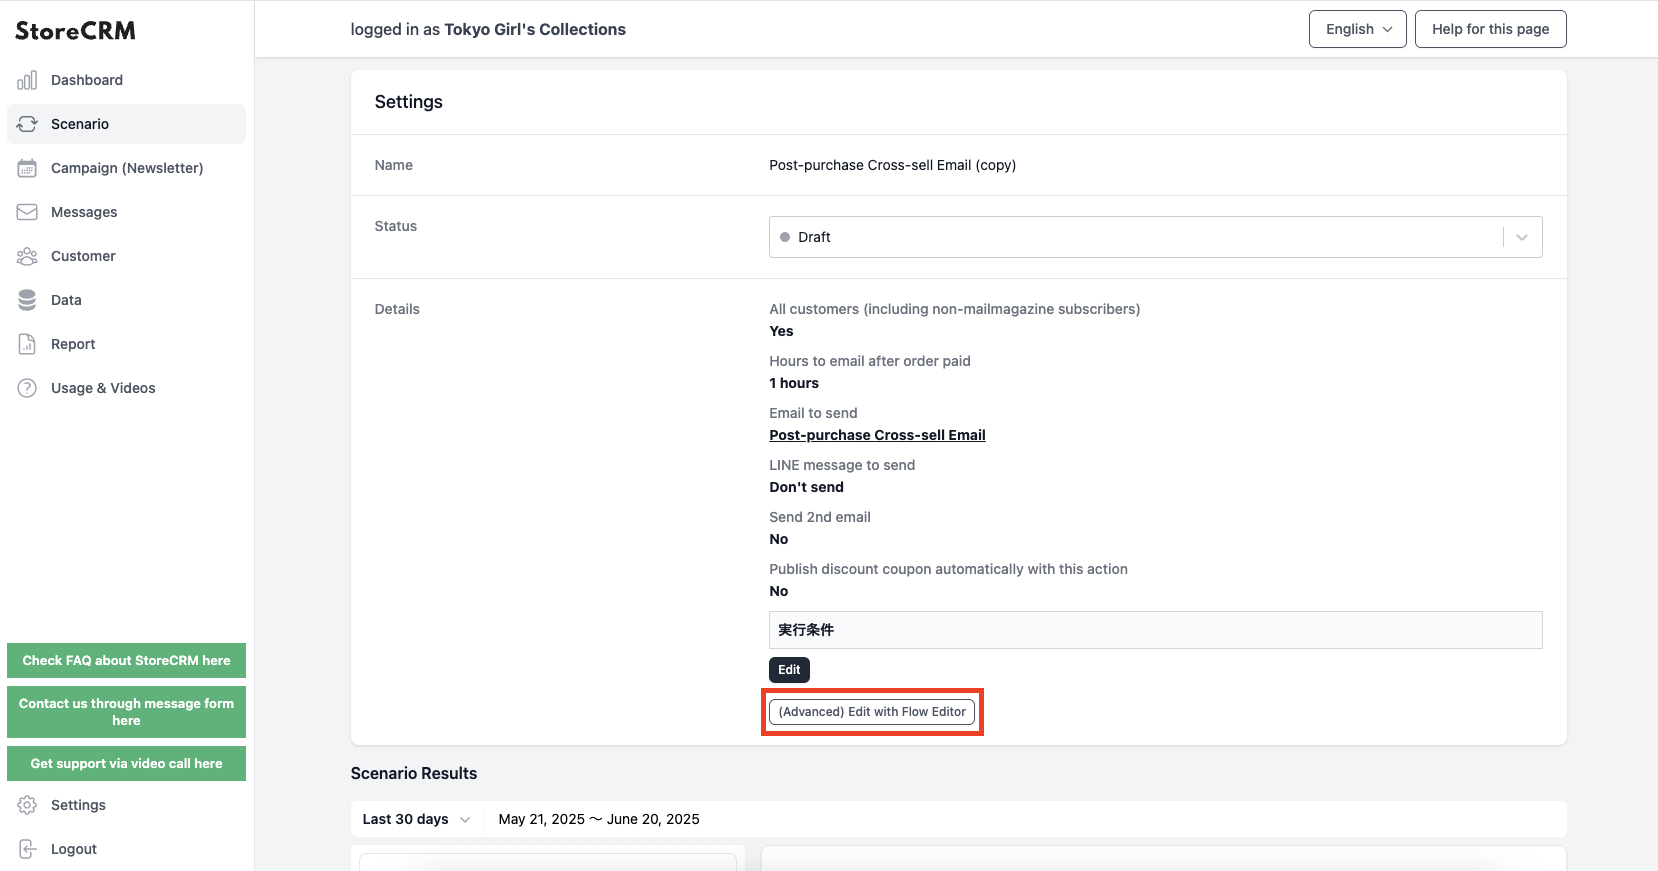
1) Open the details screen of the scenario you wish to customize. Click [Details]>[Edit in (Advanced) Flow Editor].
Click "OK" if all is well.
important
Once you save in the flow editor, you will not be able to return to the mode where you can modify it with easy settings. Be sure to duplicate the scenario and customize it if you want to try it on a scenario that is in production.
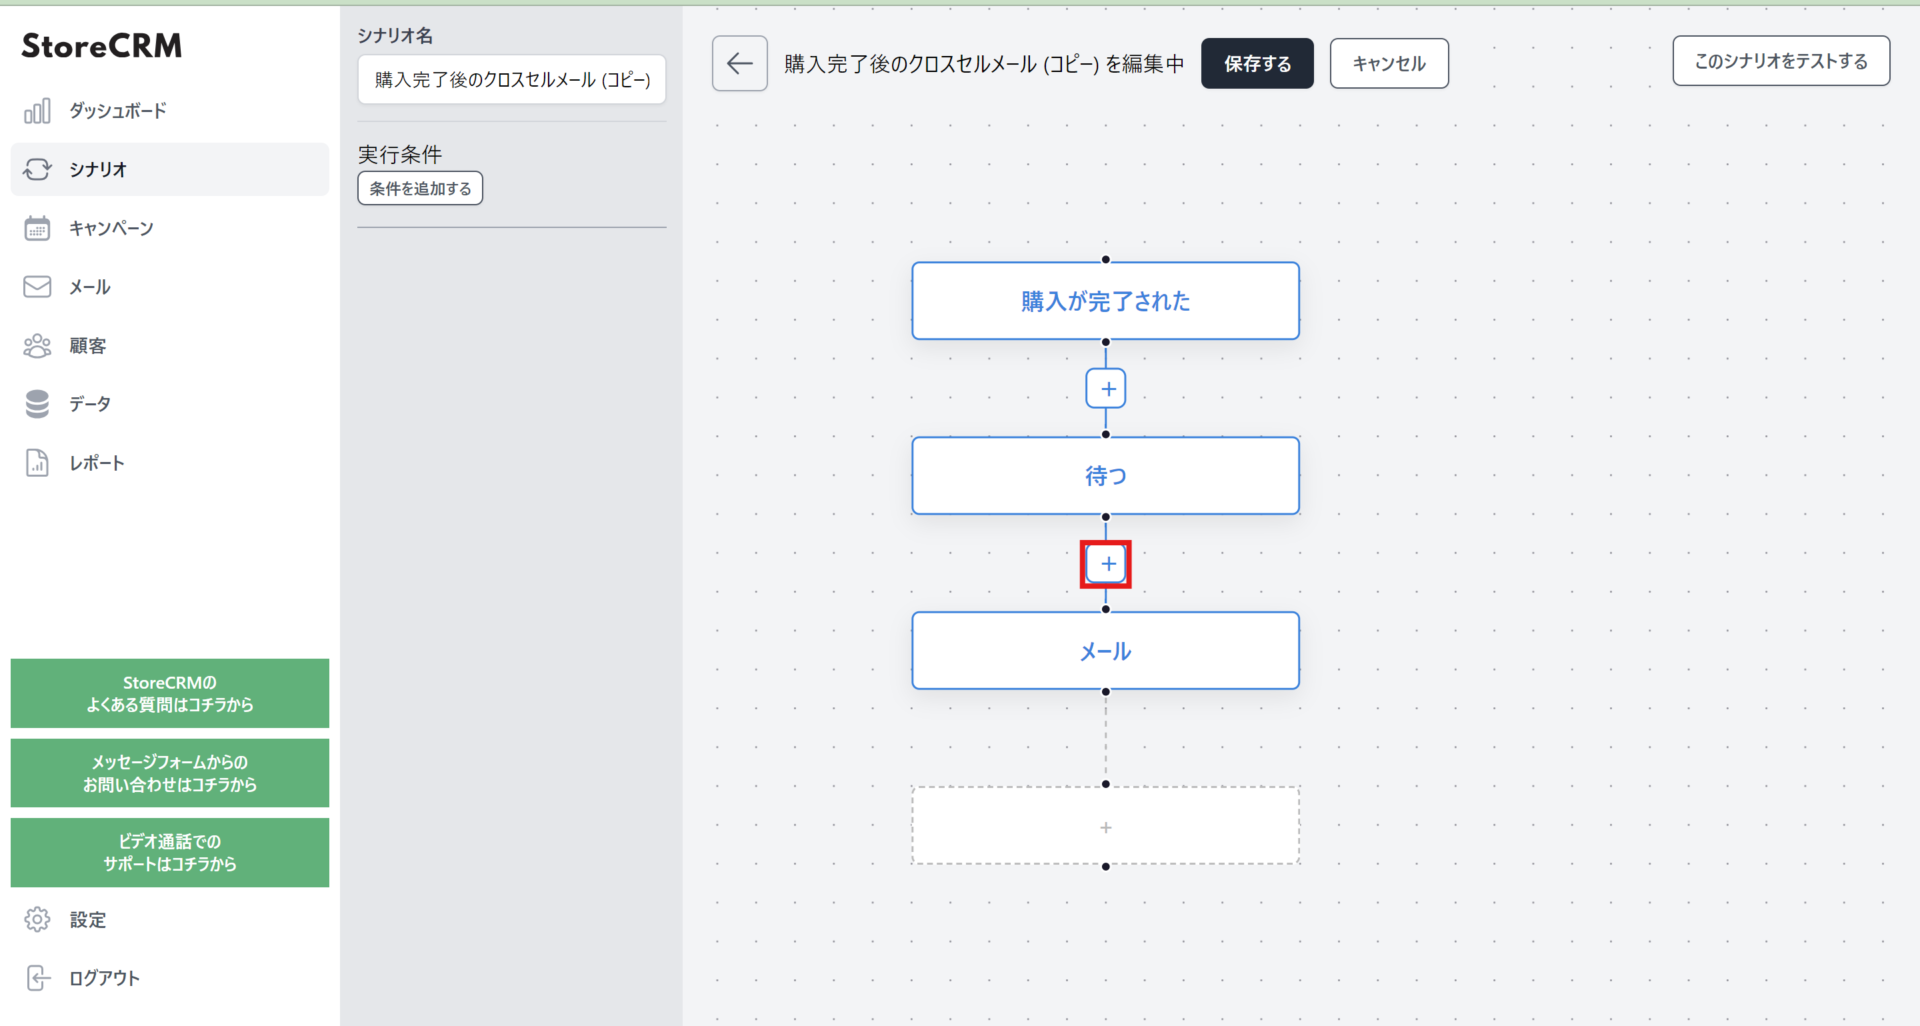
The ➁Flow Editor screen will open. This time, since we want to send out different emails, click the + between [Wait] and [Email].
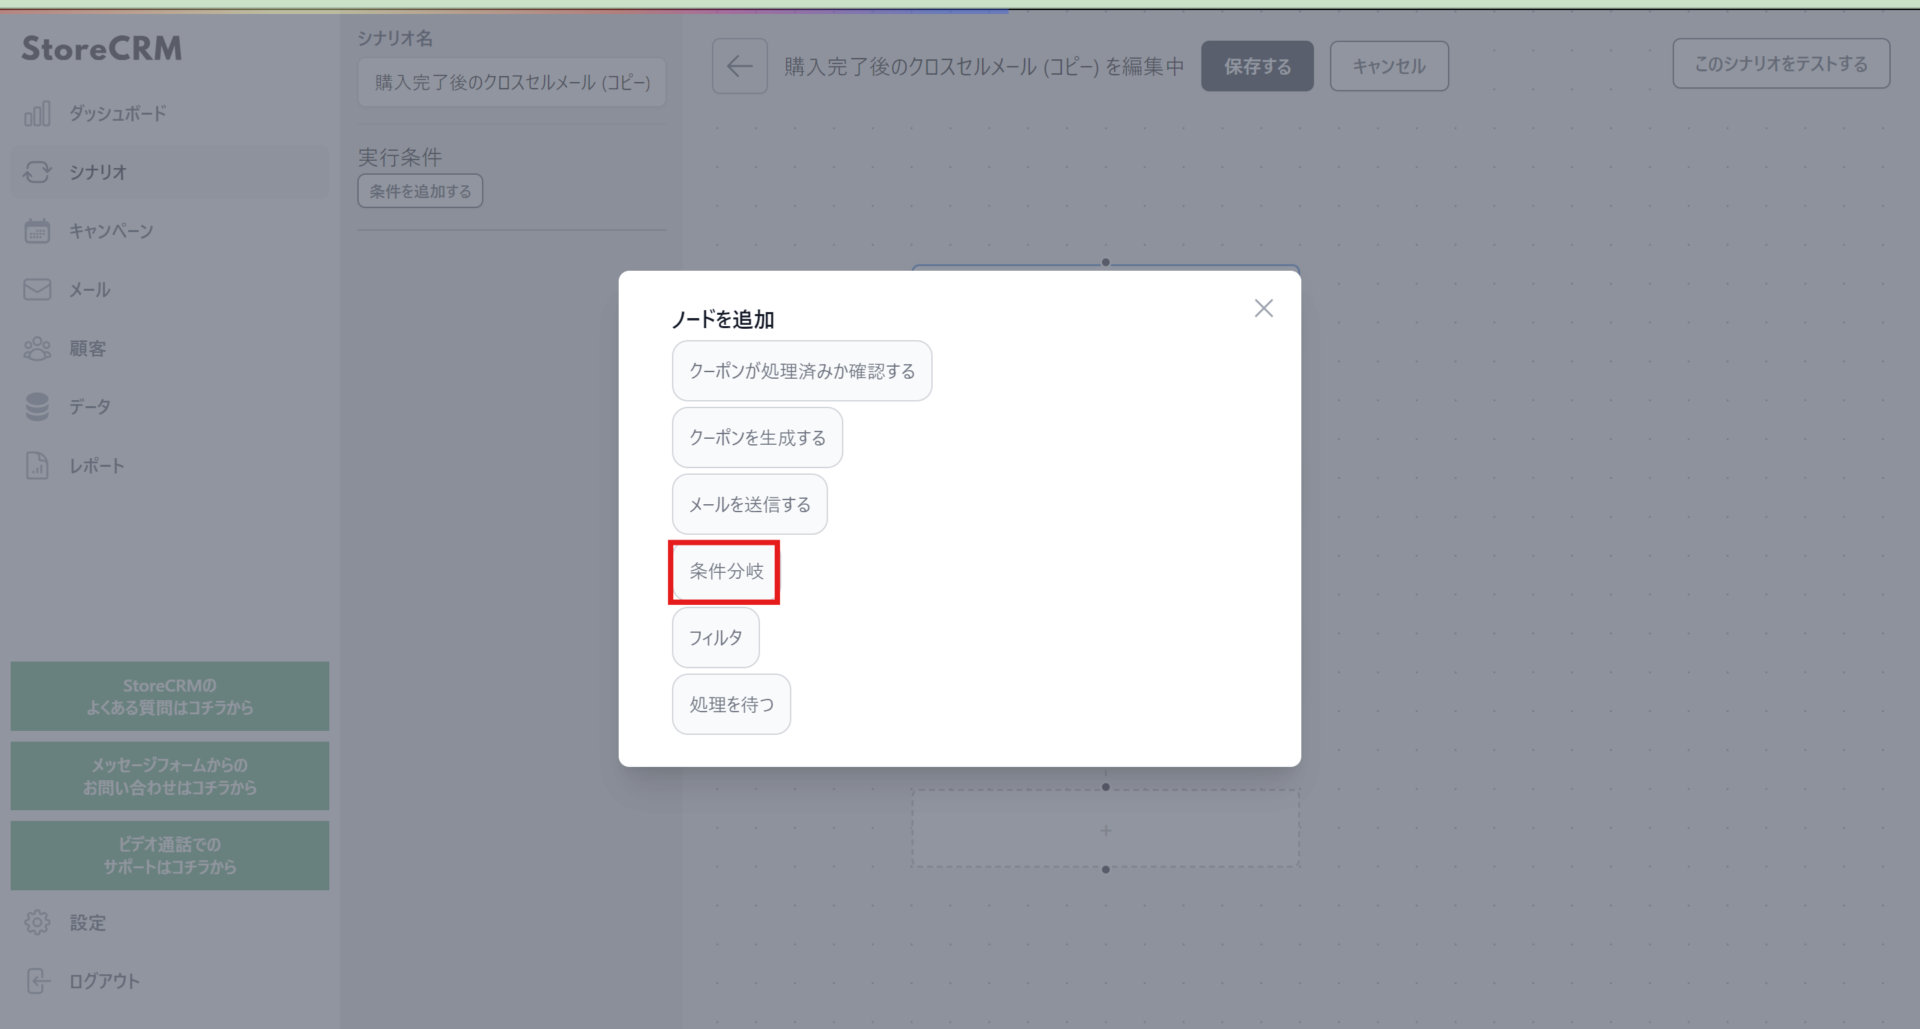
(3) Click "Conditional Branch" on the node selection screen.
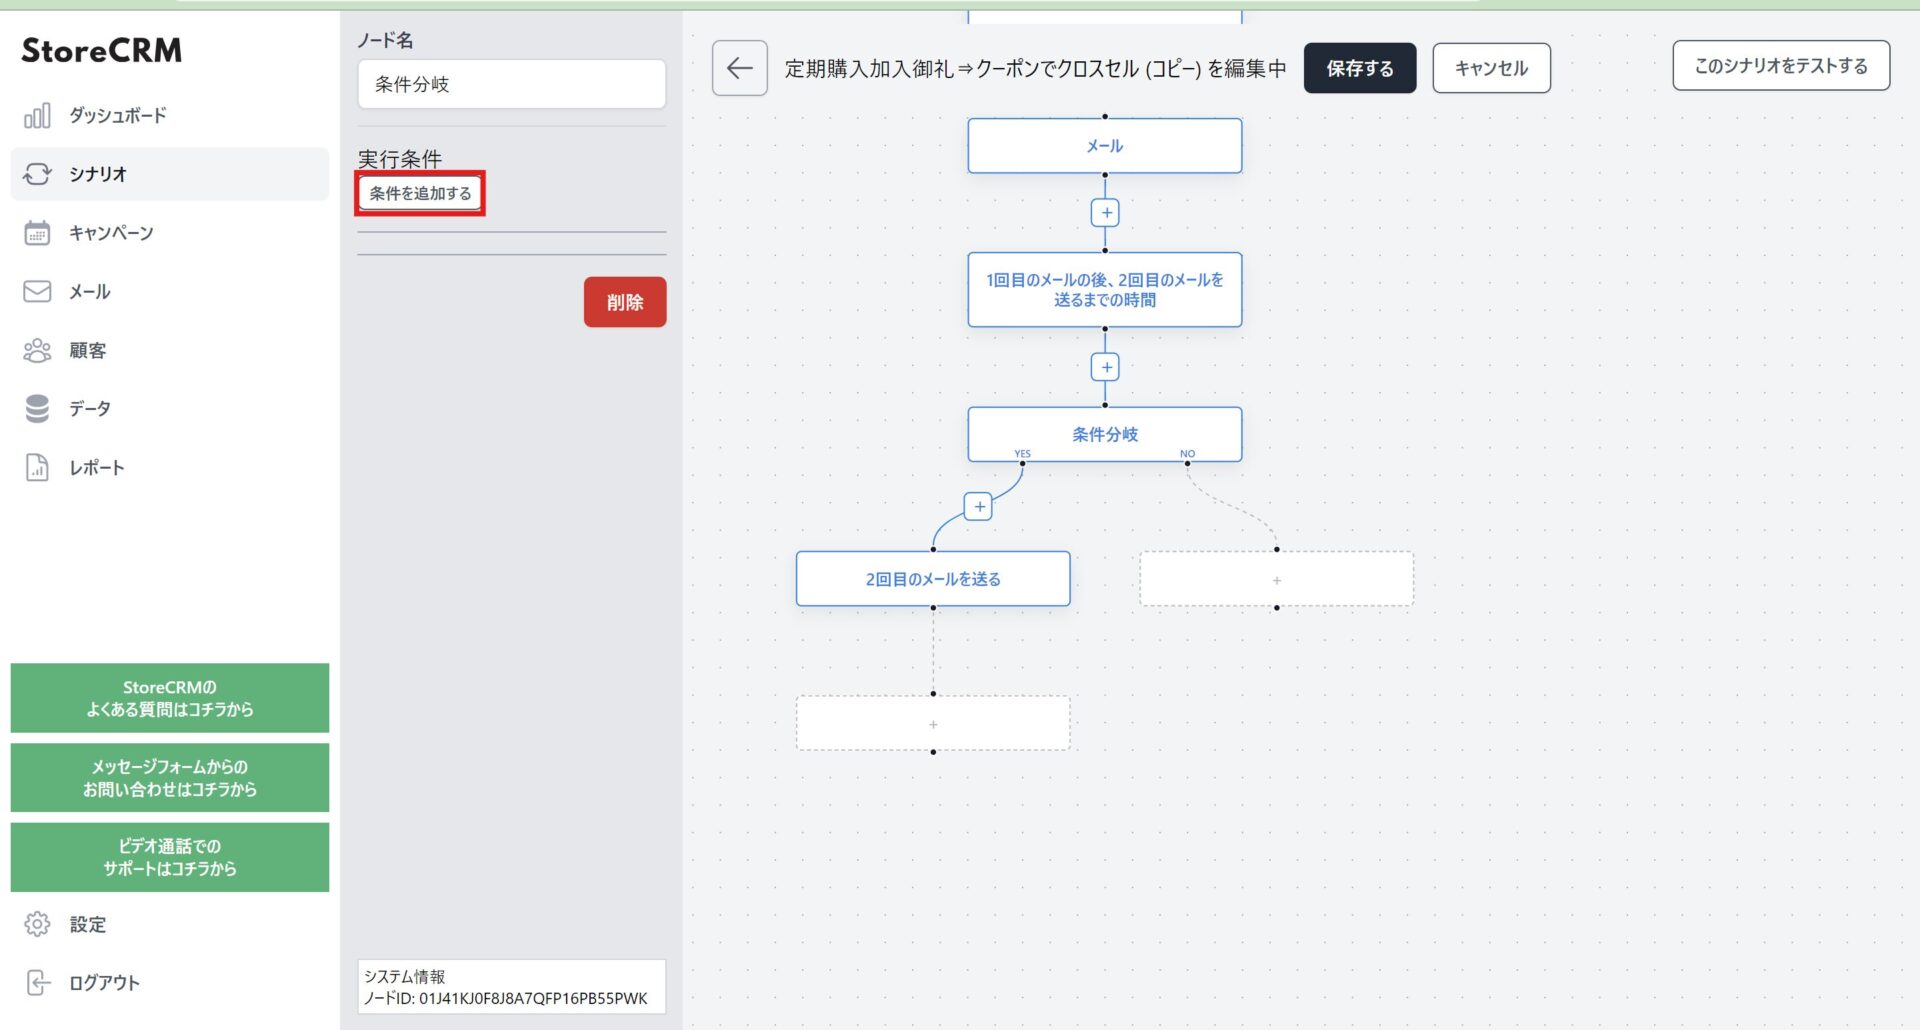
(4) Since a conditional branch node is created, the conditional branchClick on the node and click "Add Condition.
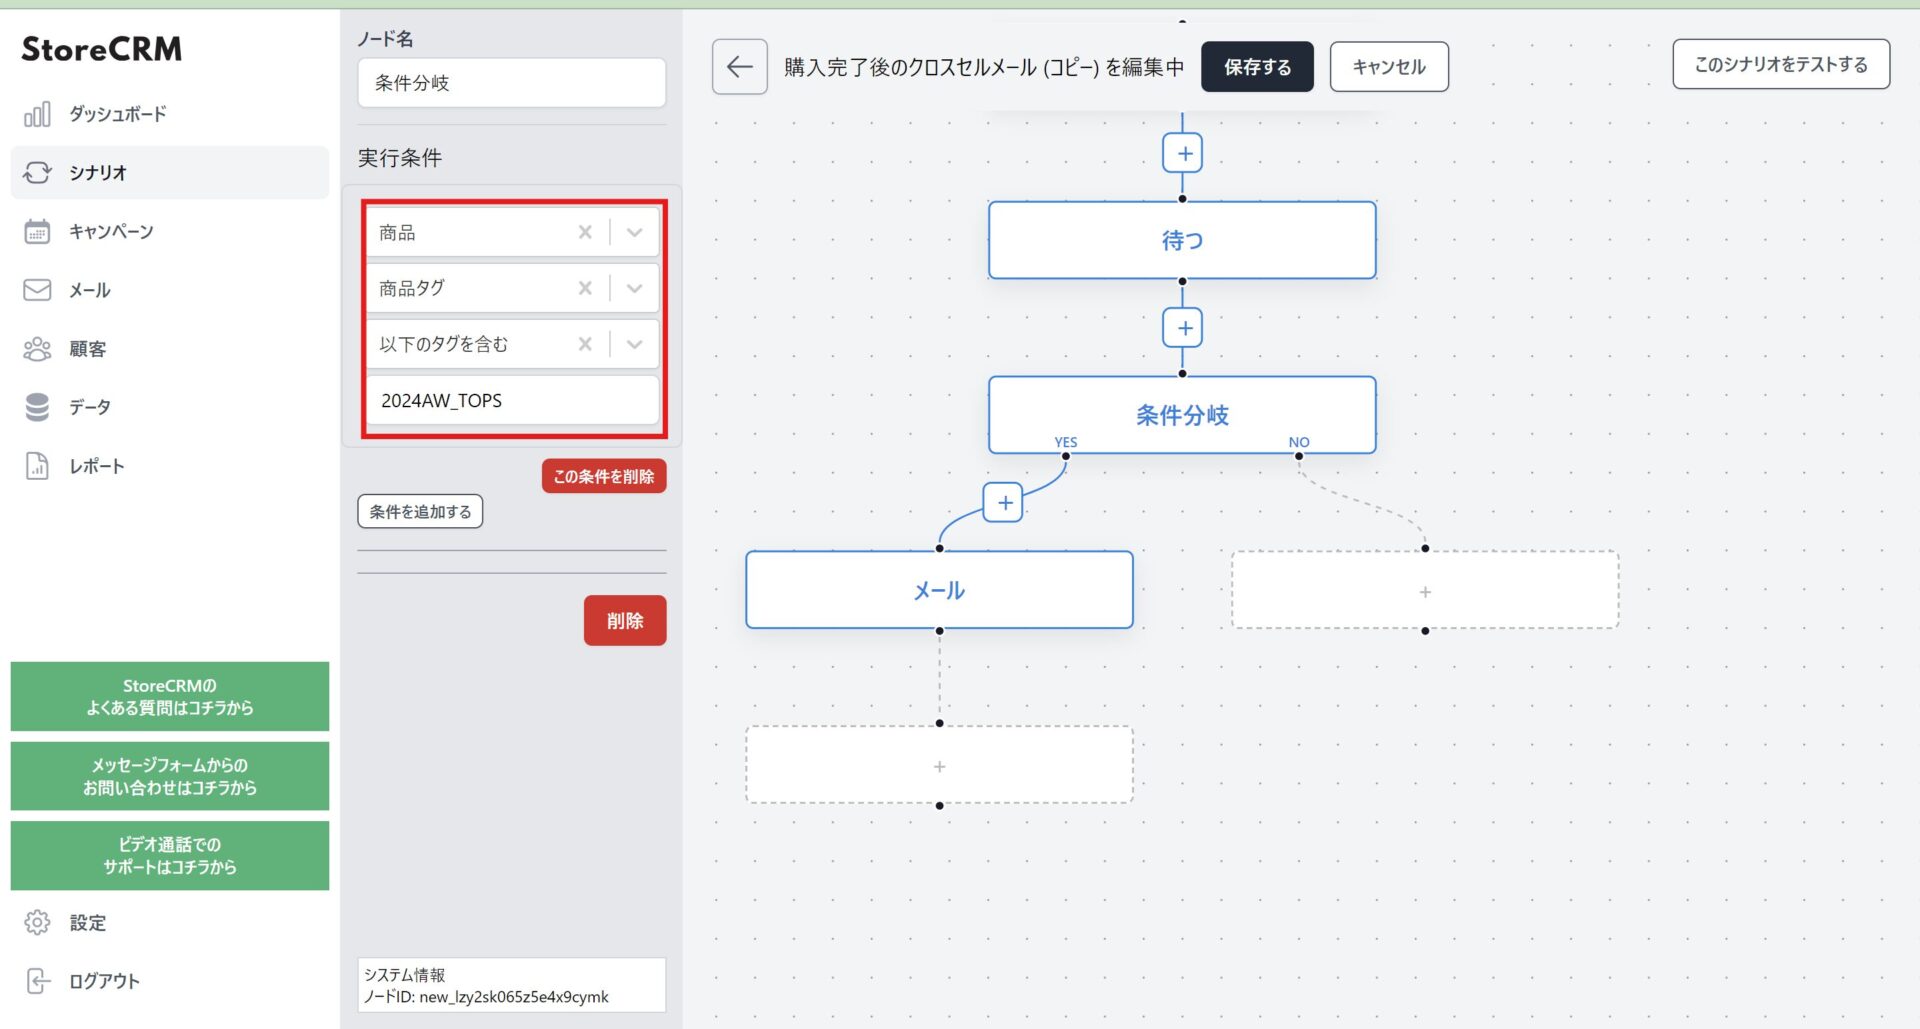
(5) Select [Product] > [Product Tags] > [Include the following tags], and enter [2024AW_TOPS].
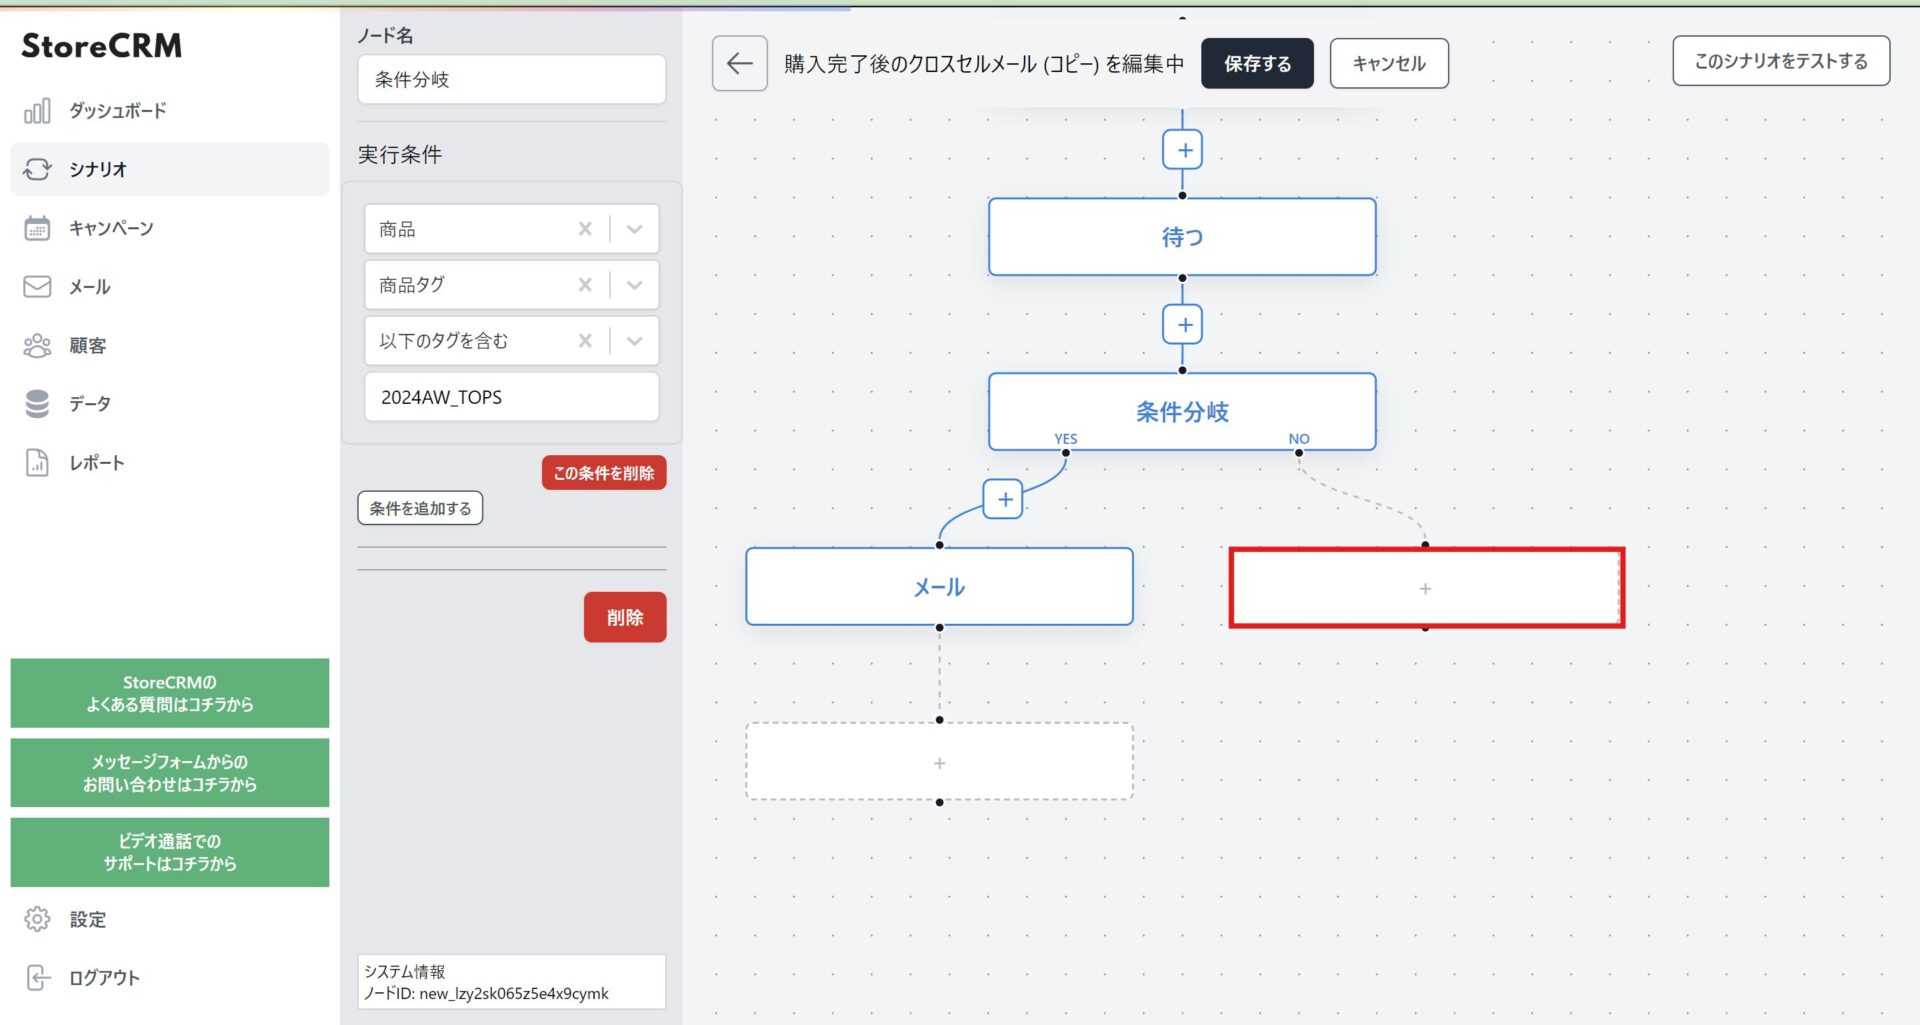
(6) On the tag of the purchased productCustomers who did not receive [2024AW_TOPSWe want to send another email to the "+", so we add an action by clicking the + at the end of the NO in the conditional branch.
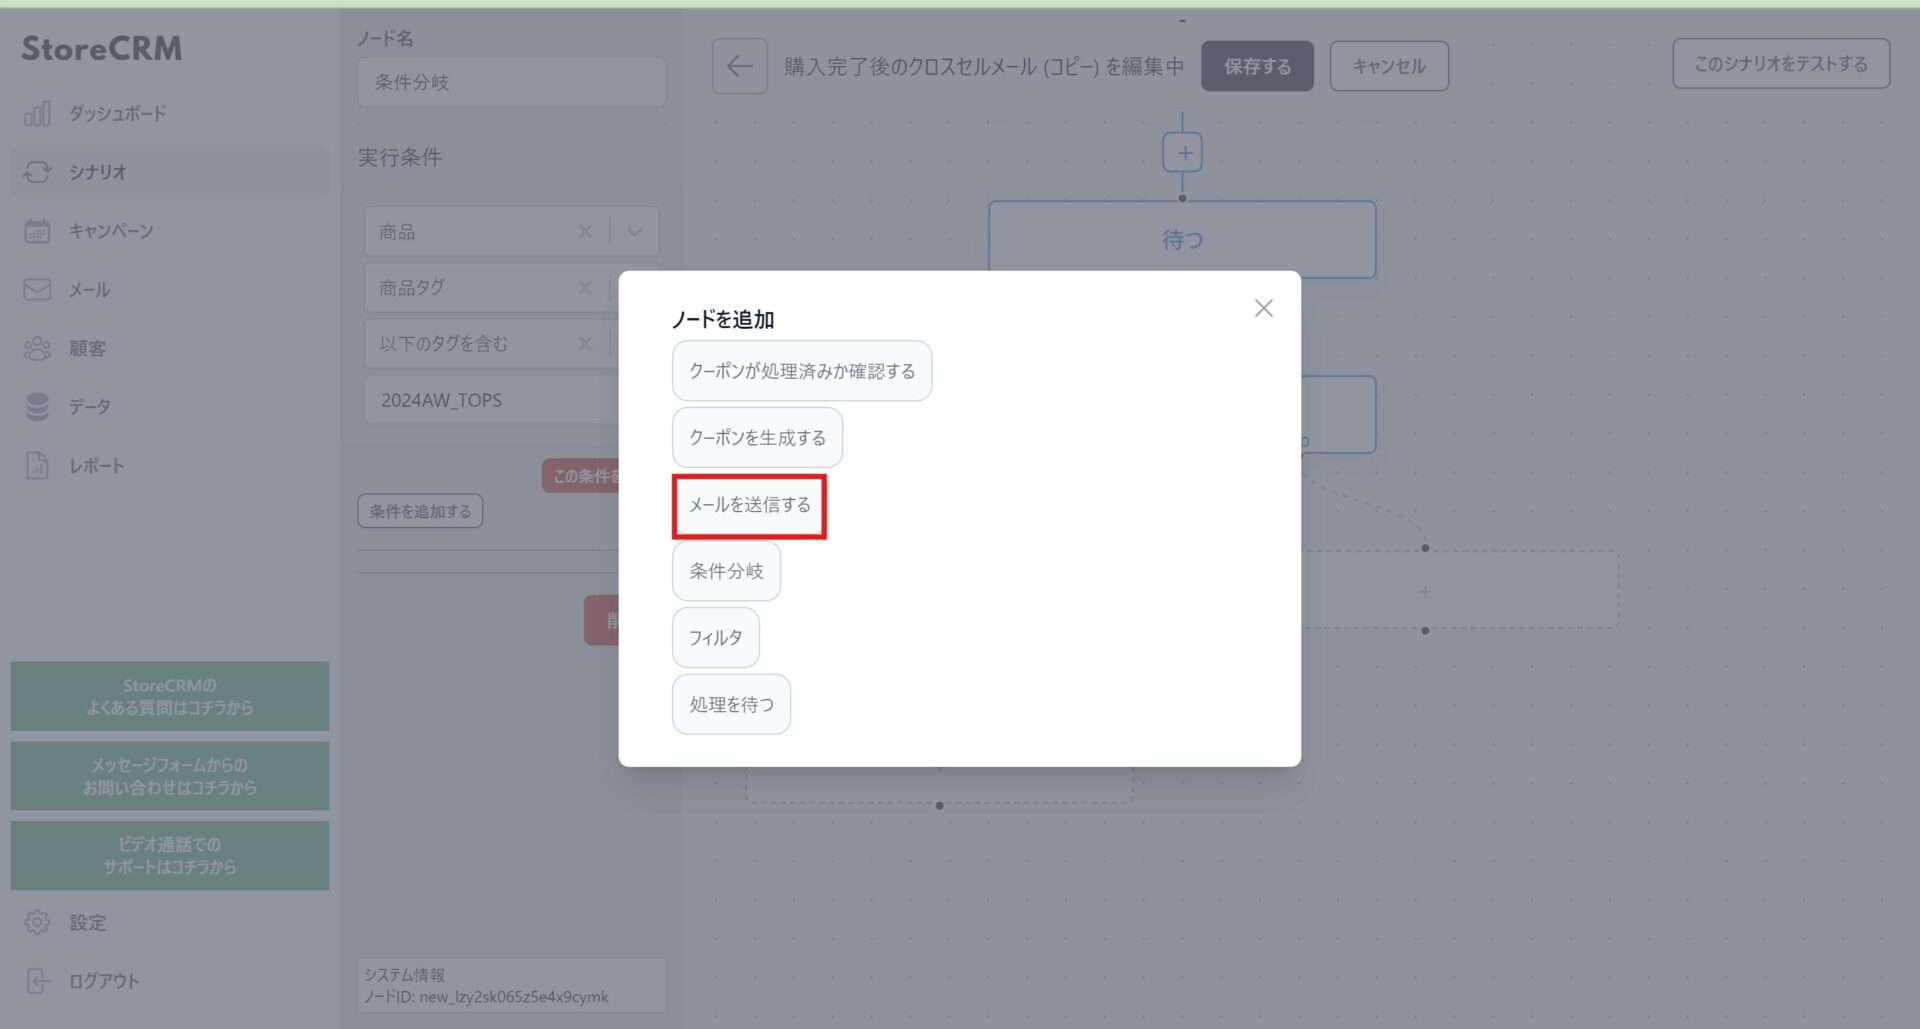
(7) Click "Send Email" when the Add Node screen appears.
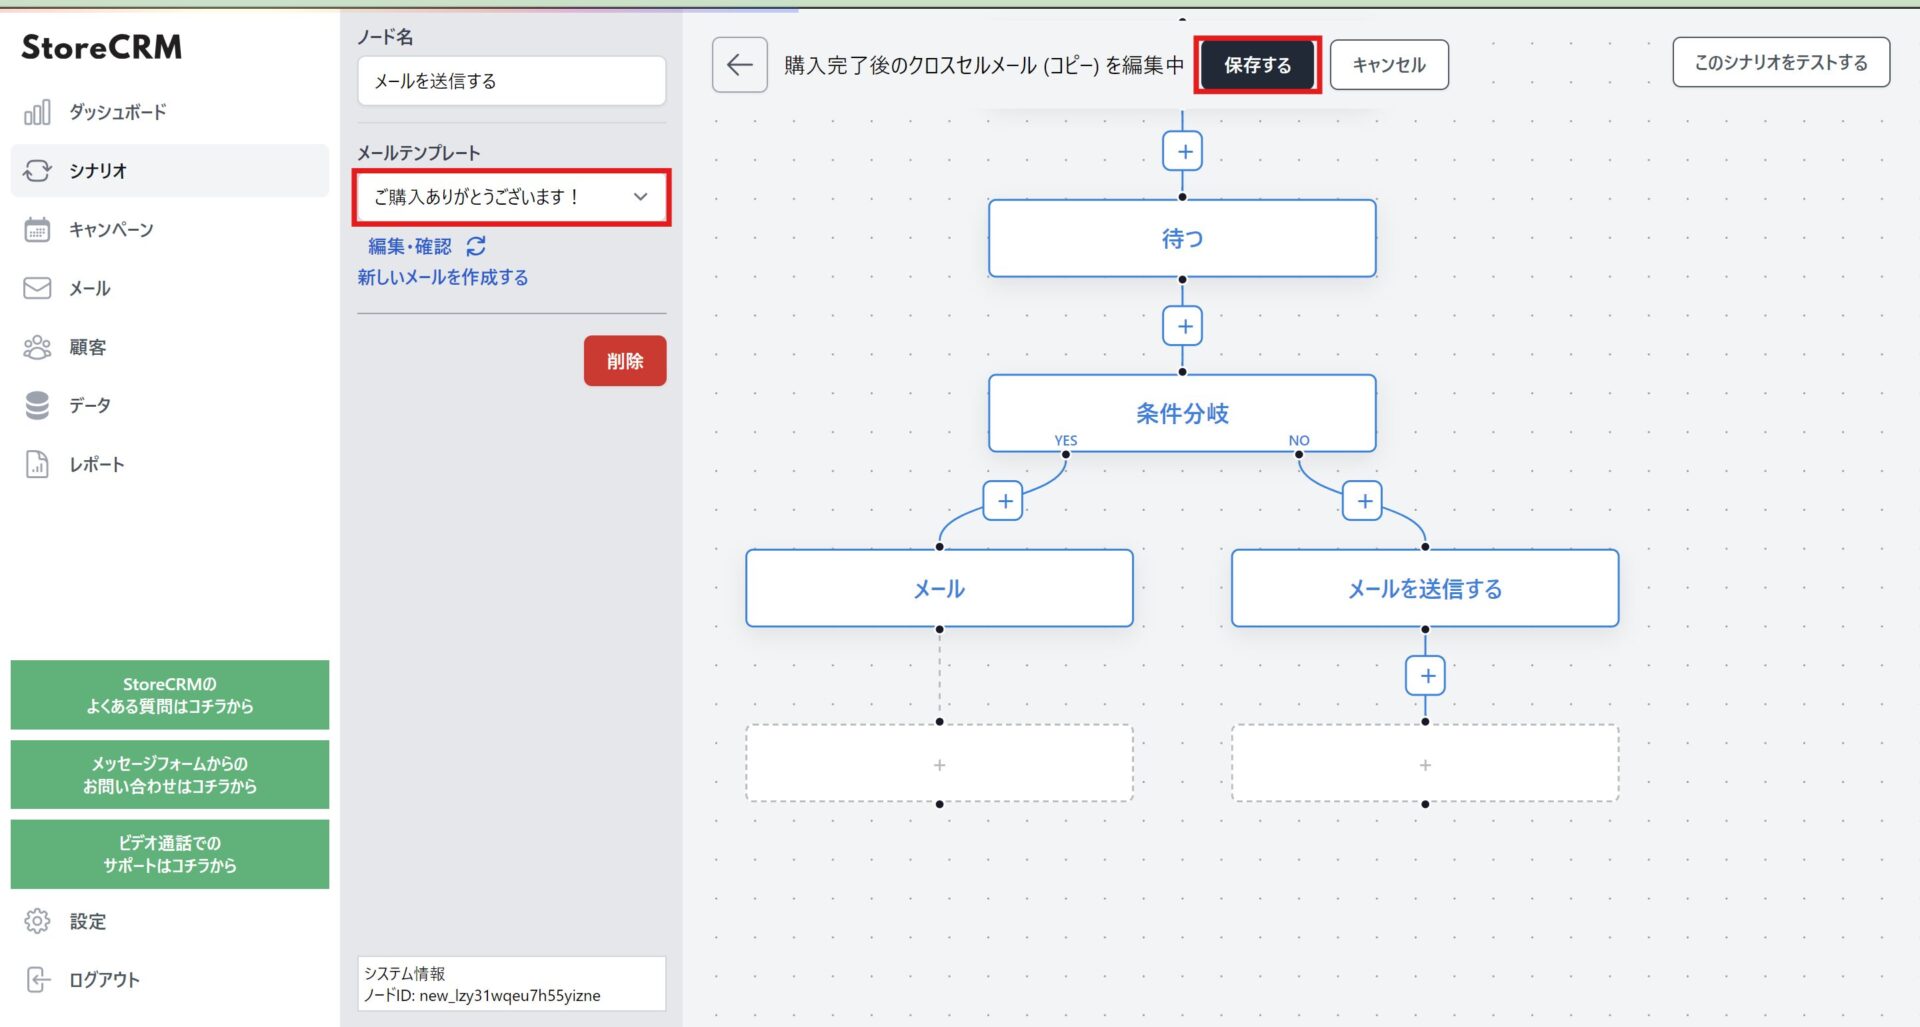
(8) A node will be created, and select the email template you wish to send. After that, select [Mail] on the YES side of the conditional branch, and select the mail you want to send immediately as well. Then click "Save" to save the scenario.
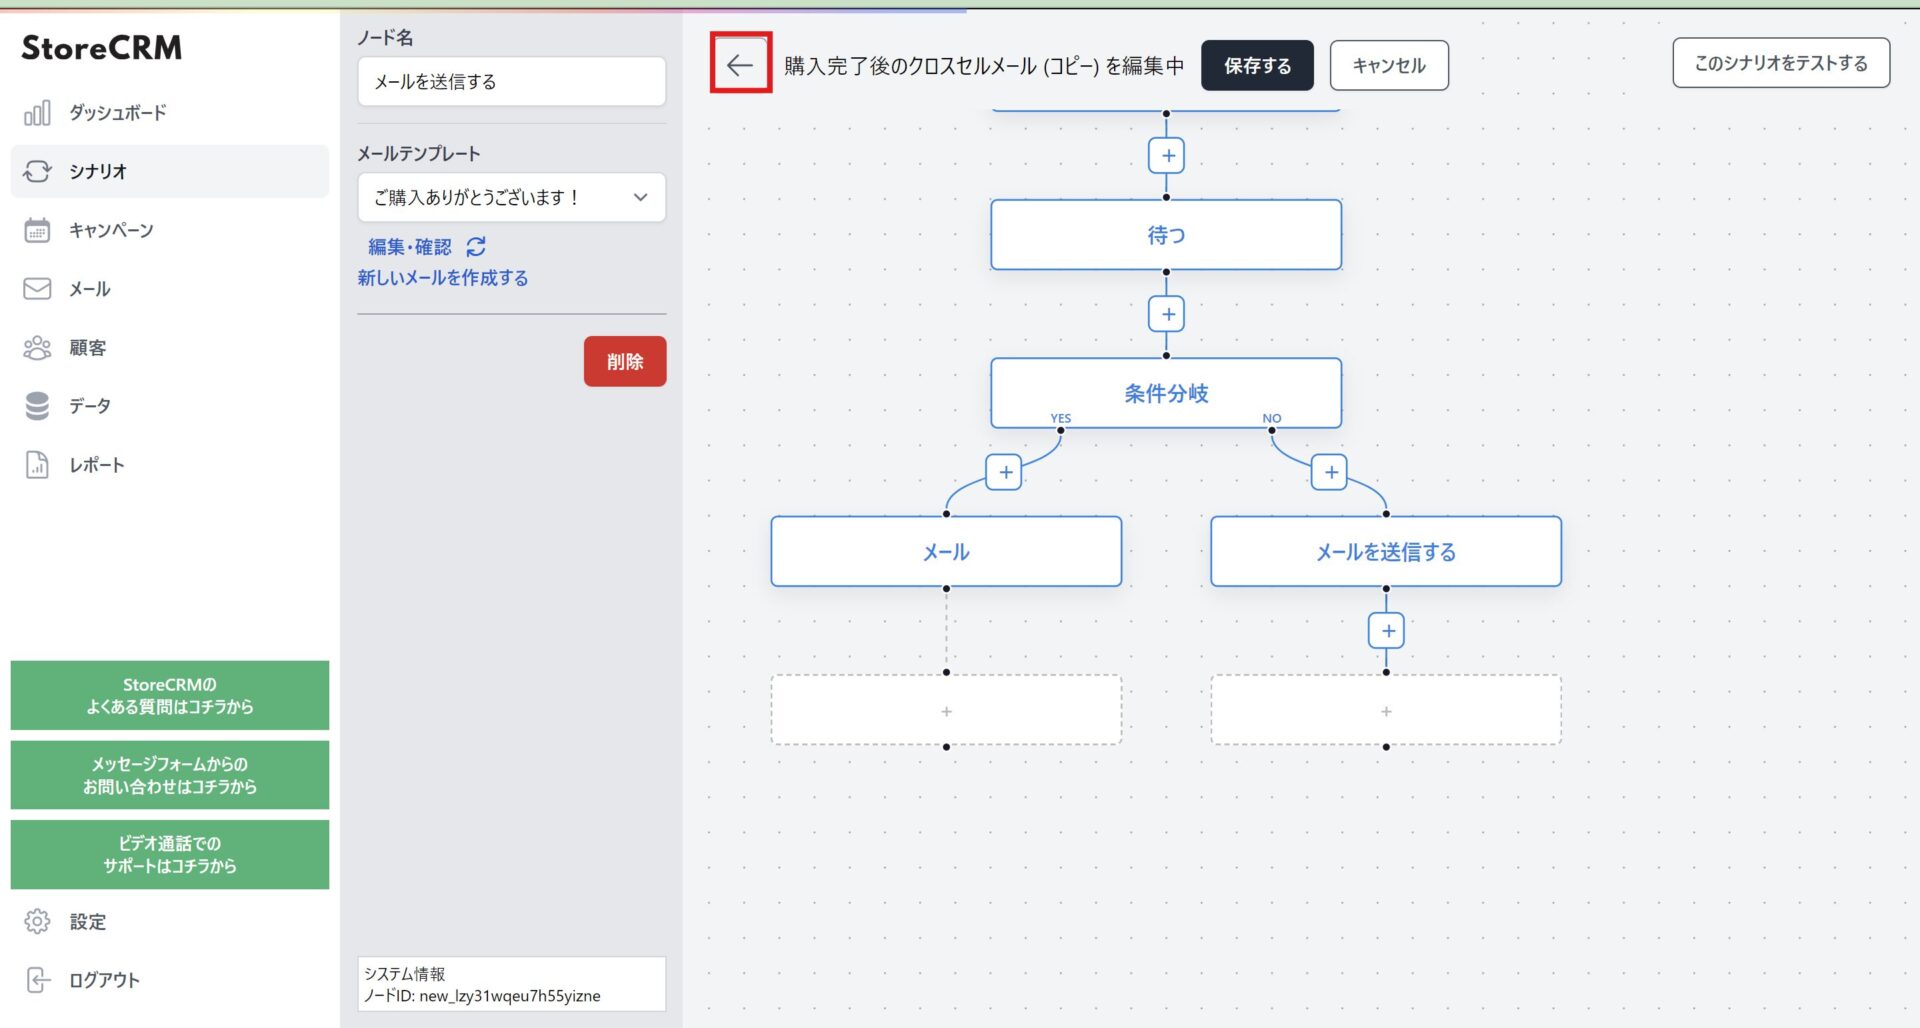
When saving is complete, click [←] at the top of the screen to return to the scenario details screen.
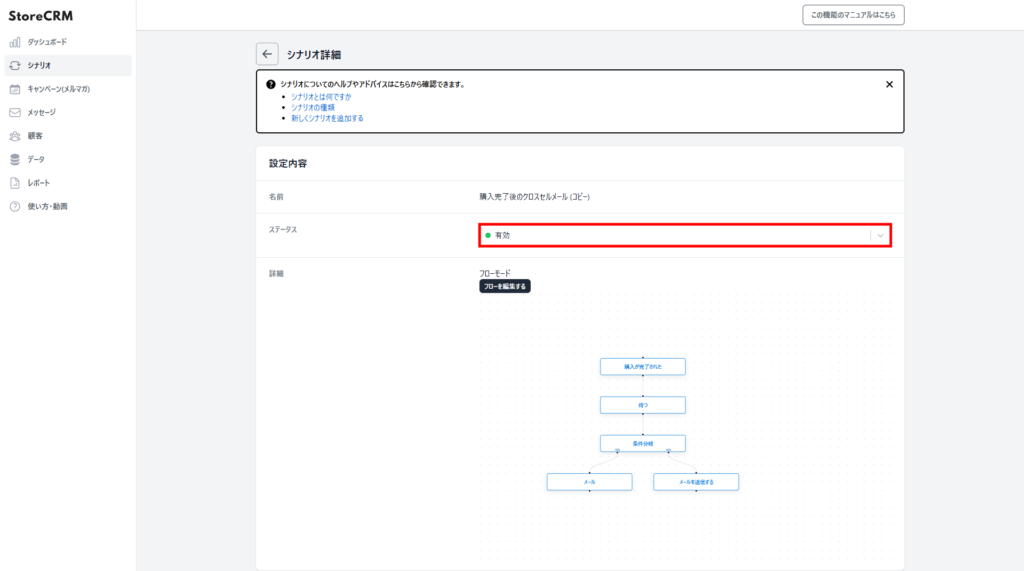
⑩Click on the [Settings]>[Status] pull-down to activate the scenario and this section is complete.
important
When activating a scenario, make sure there are no other scenarios activated with the same trigger. If you are working on a completely different scenario, this is not a problem. Especially when activating a duplicated scenario, make sure that the scenario from which you are duplicating is valid.
Conclusion
By utilizing StoreCRM, you can expect to increase sales through cross-selling. In addition to sending e-mails, this application enables analysis of each e-mail and scenario using e-mail open rates, click rates, and other data.
StoreCRM also provides support for application-related settings and consulting services to help customers increase sales.
Inquiry FormPlease feel free to contact us from
Related Pages