
Introduction
This article explains how to add a wishlist button to collection pages as part of StoreCRM's wishlist feature for Shopify.
A wishlist is an important addition to any ecommerce store. It saves customers from having to search for a product again, and it gives them an easy route from a saved product to related items and offers they will care about — a better experience all round.
For the merchant, it also reveals what each customer is interested in, which sharpens your marketing, and it opens up extra sales through recommendations and campaigns based on saved items (cross-selling and upselling).
With StoreCRM you do not need a separate wishlist app: the wishlist itself and the campaigns built on the data it collects are all handled inside this one app.
Because a wishlist benefits both the customer and the store, it is well worth adding.
For how to add the wishlist button to product pages and how to customise it, see this article.
The steps below use the free Dawn theme. Paid themes and heavily customised themes may have a different file structure; if that is the case, contact StoreCRM customer support and we can carry out the implementation for you. Feel free to get in touch through the contact form.
Related pages
How to add a wishlist to Shopify
7 Shopify wishlist apps compared
Adding a wishlist button to collection pages
What you will build in this section
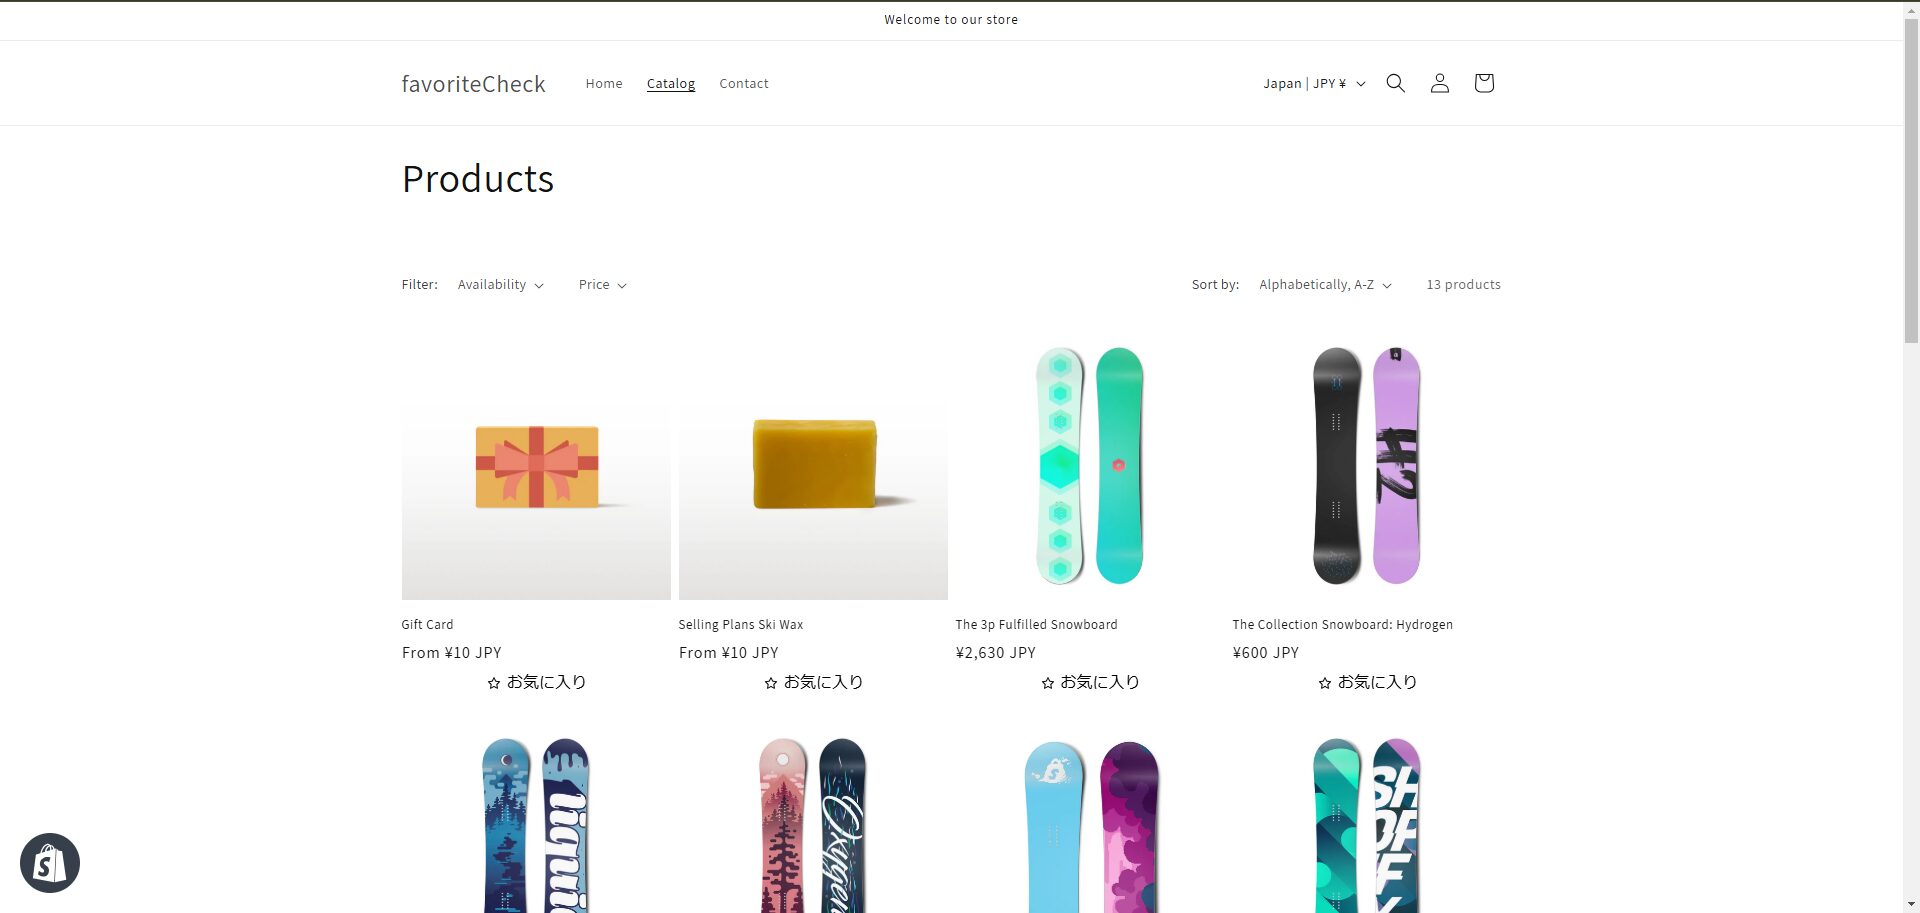
Let us start by looking at the finished wishlist button.
Opening the code editor
The steps that follow involve editing your theme, so if you are at all unsure, use "Duplicate" to make a copy of the theme and edit the copy instead.
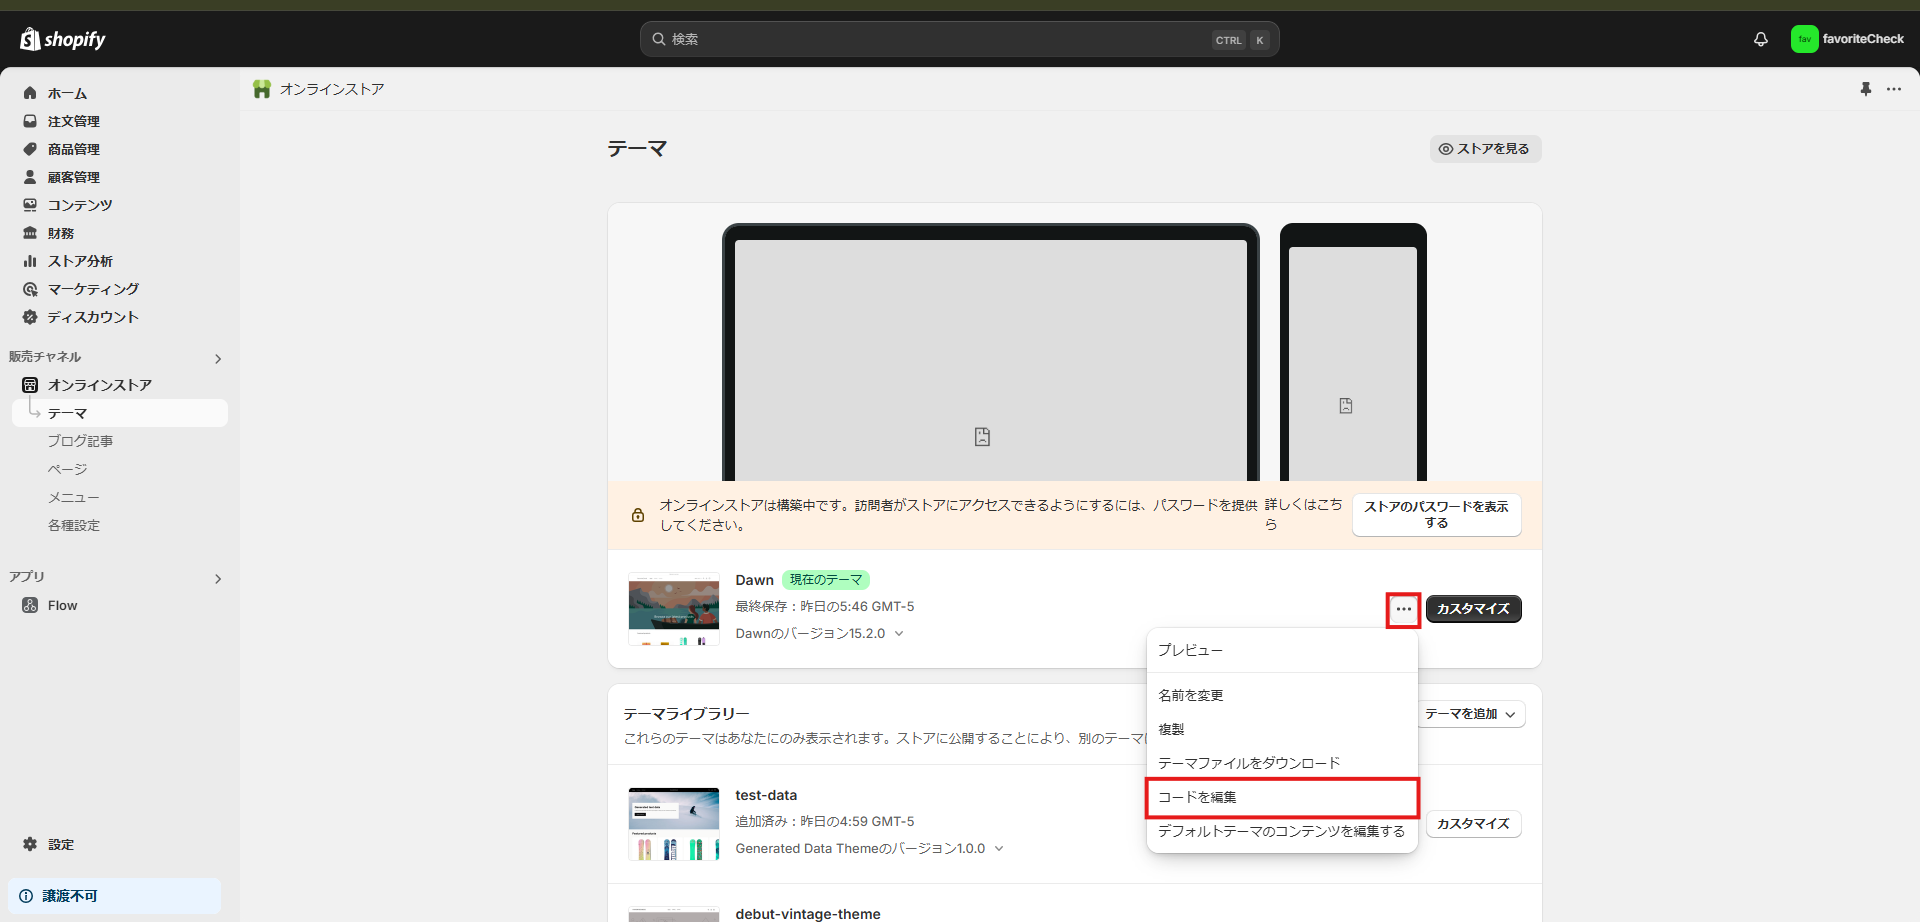
1. Open the code editor from [Shopify admin] > [Sales channels] > [Online Store] > [Themes] > [...] > [Edit code].
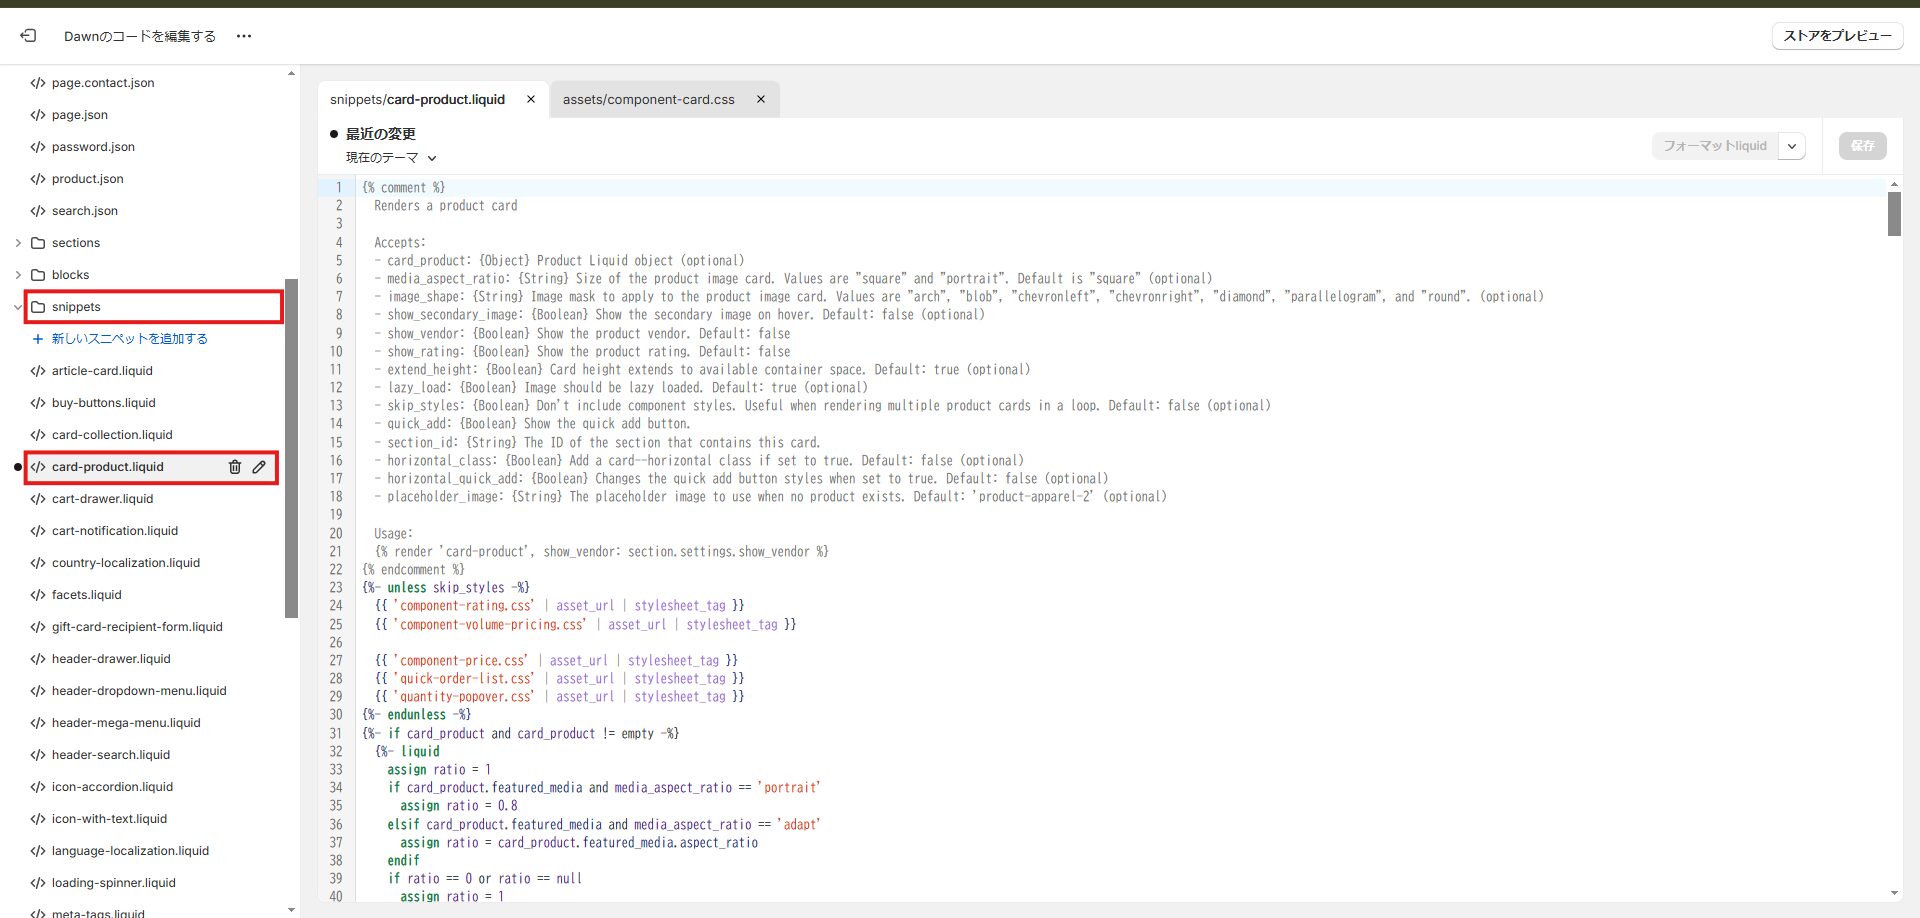
2. Open [snippets] > [card-product.liquid].
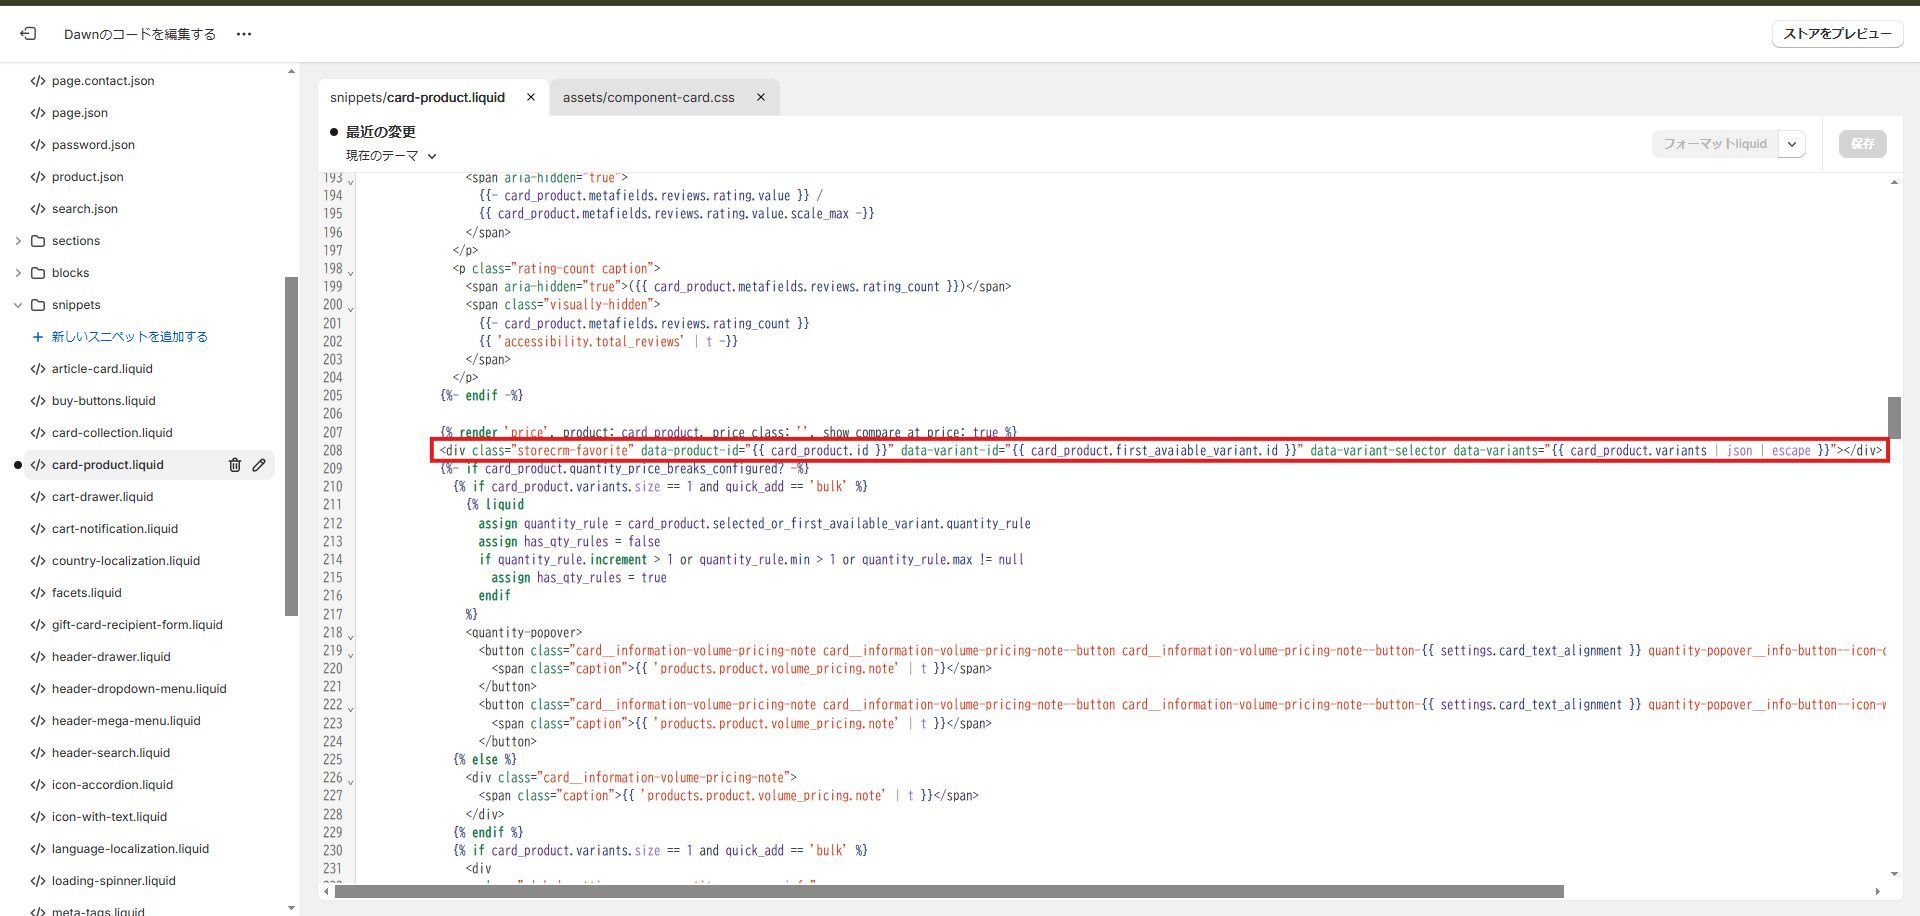
3. On line 207, paste the code below beneath \{% render 'price', product: card_product, price_class: '', show_compare_at_price: true %\}. You can choose whether or not the button carries a label, so pick whichever suits your store.
Remember to save.
[With a label]
<div class="storecrm-favorite"
data-product-id="{{ card_product.id }}"
data-product-tags="{{ card_product.tags | json | escape }}"
data-variant-selector
data-variants="[{%- for v in card_product.variants -%}{"id":{{ v.id }},"title":{{ v.title | json | escape }}}{%- unless forloop.last -%},{%- endunless -%}{%- endfor -%}]"></div>
[Without a label]
<div class="storecrm-favorite"
data-product-id="{{ card_product.id }}"
data-product-tags="{{ card_product.tags | json | escape }}"
data-no-label
data-variant-selector
data-variants="[{%- for v in card_product.variants -%}{"id":{{ v.id }},"title":{{ v.title | json | escape }}}{%- unless forloop.last -%},{%- endunless -%}{%- endfor -%}]"></div>
Keeping the page HTML small
Output only id and title in data-variants, the fields used by the current wishlist button. Serialising the complete variants object repeats prices, images, inventory details and other unused fields for every product card. Pages with many variants or product cards can become much larger as a result.
These examples are for wishlist buttons. Restock buttons also use fields such as available, so do not apply this reduction to restock buttons unchanged. If your theme uses a product variable such as product, replace card_product with that variable. Use straight double quotes (") for attributes.
Leave data-variant-id unset when showing the variant selector on a collection page. For a product with only one variant, the app selects its ID automatically.
For an existing installation, duplicate the theme before replacing the button's data-variants attribute with the format above. An app update does not change manually pasted theme code. After updating, check the heart icon, selection of multiple variants, registration of a single variant, adding and removing wishlist items, and the wishlist page.
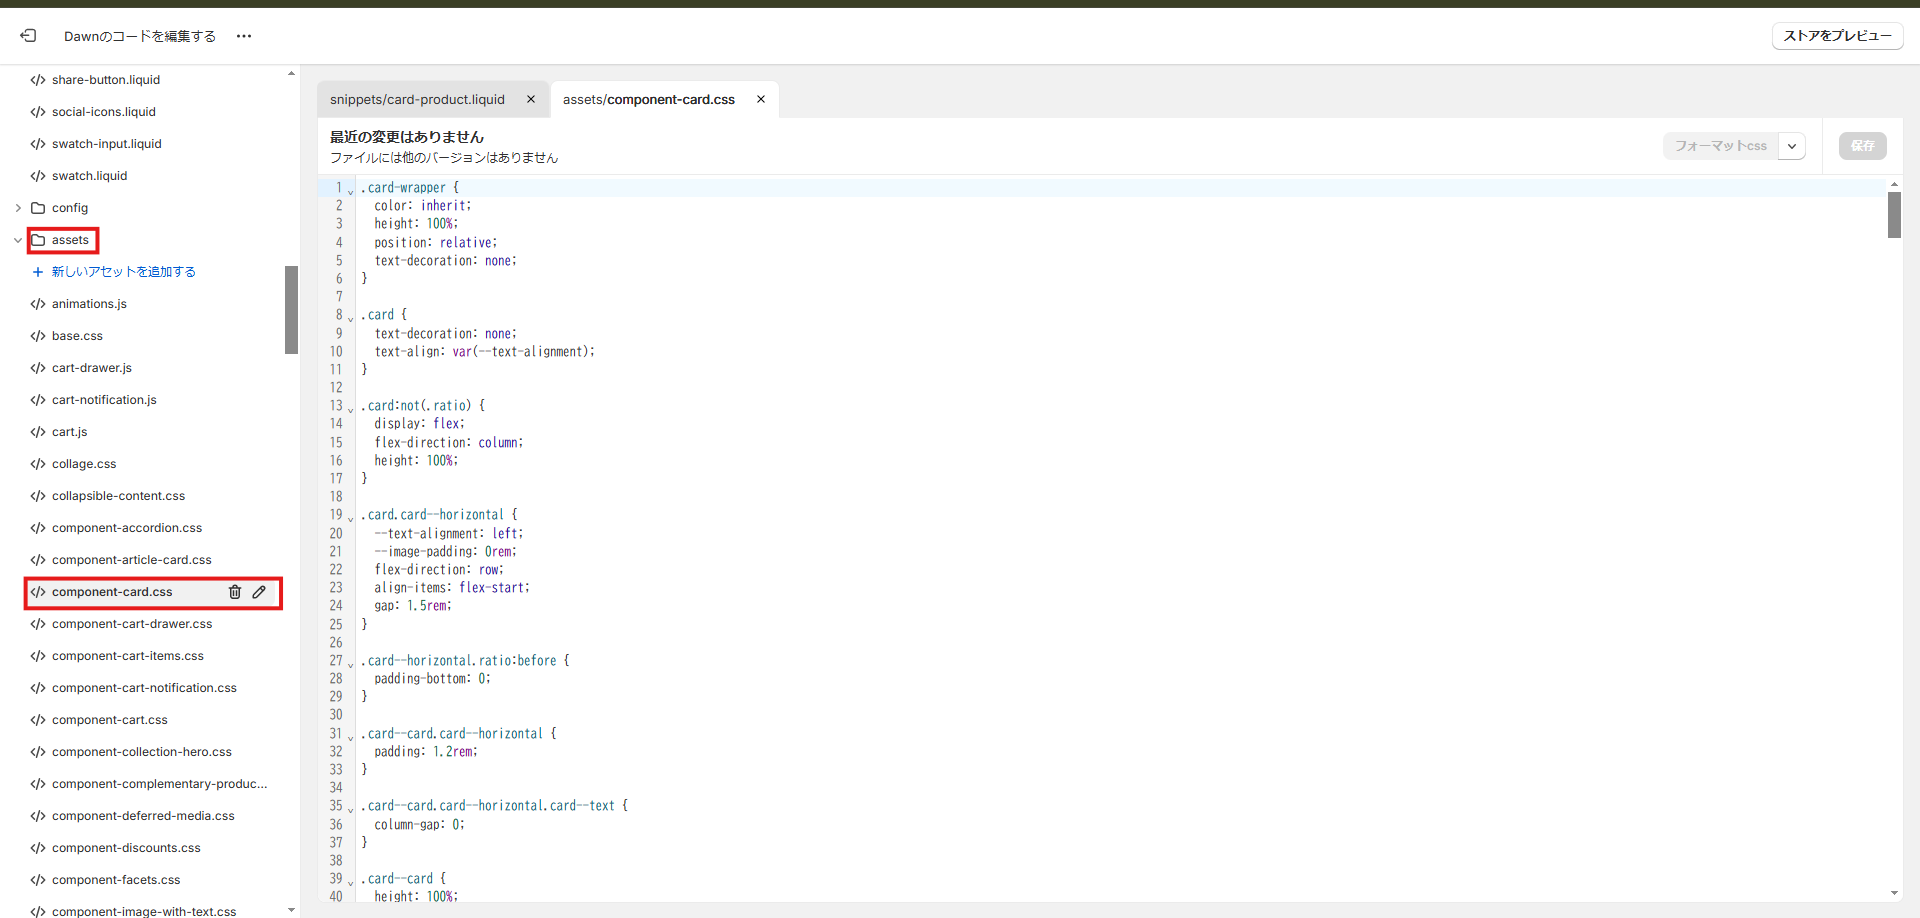
4. Open [assets] > [component-card.css].
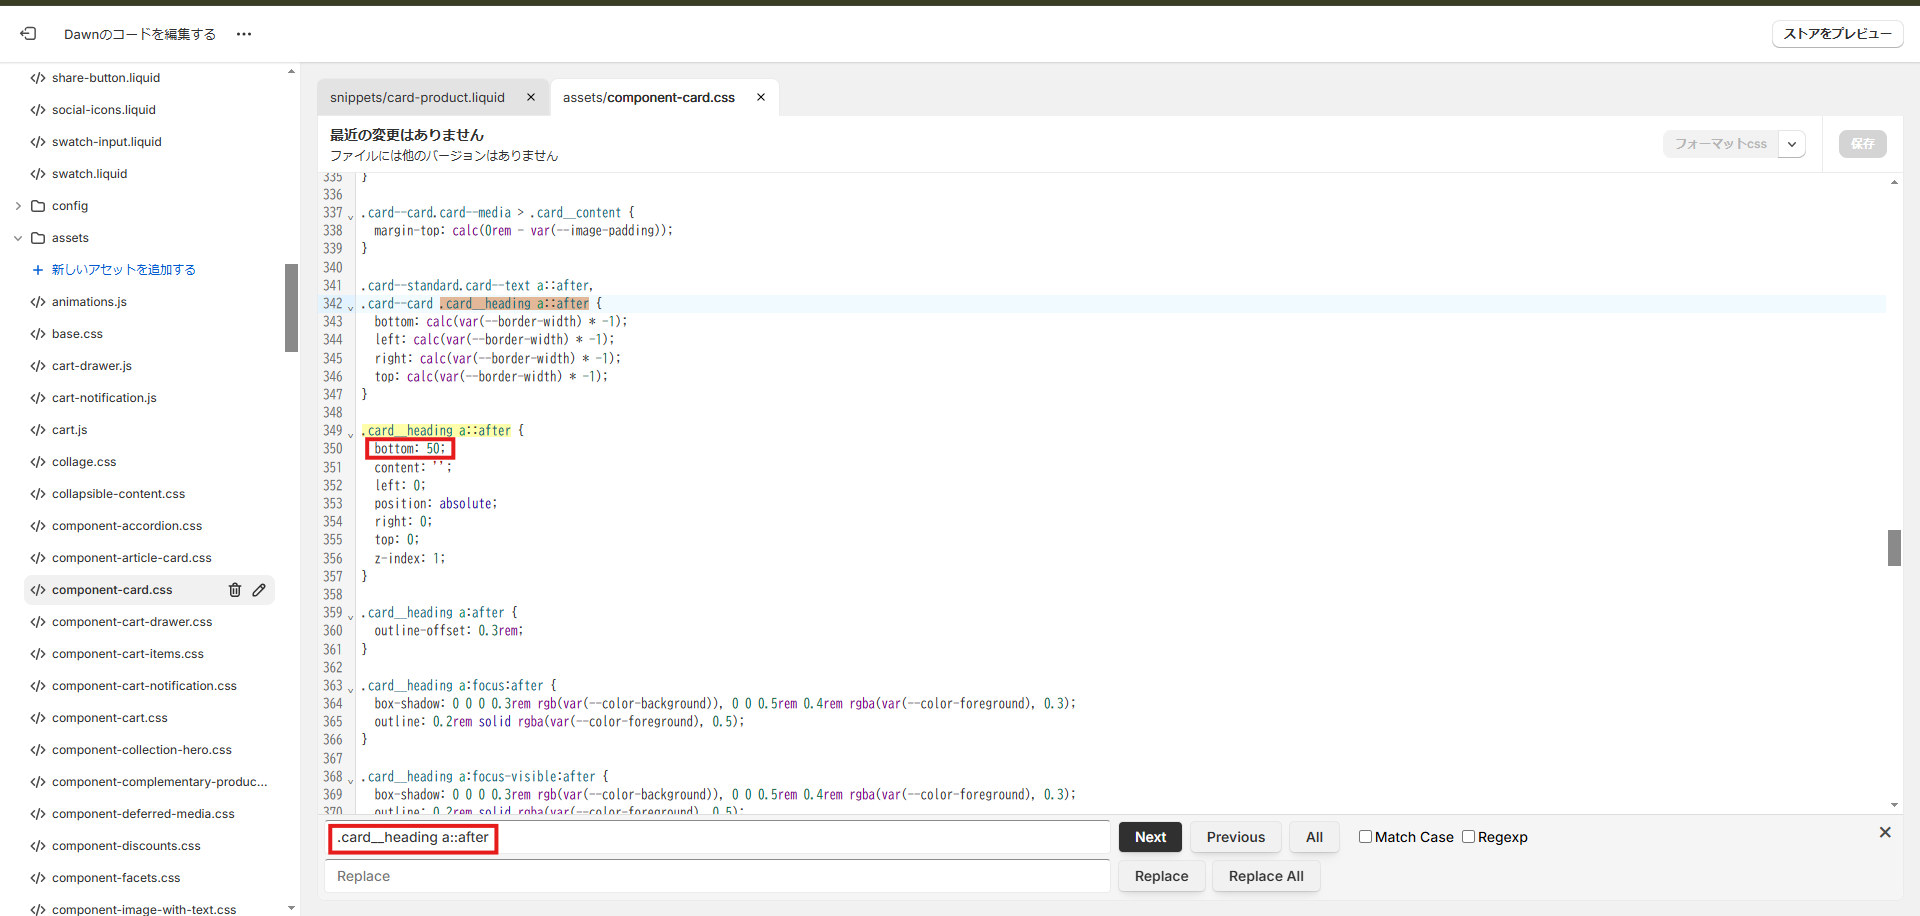
5. Search for [.card__heading a::after] and, on line 350, change
bottom: 0; → bottom: 50;.
Remember to save.
6. Open a collection page and confirm that the wishlist button appears correctly.
Summary
As this wishlist example shows, StoreCRM lets you run in a single app the kind of features that previously required installing another app or wiring up a separate marketing automation tool. Automations built on the wishlist data you are now collecting are in the works, so watch this space. We also offer free setup support — we will configure the app for you — and consulting on growing revenue for customers who have adopted StoreCRM. Feel free to get in touch through the contact form.


