Table of Contents
ToggleThis article explains how to use StoreCRM to send cross-sell emails to customers who have purchased products on Shopify. We’ll walk through how to create a scenario that introduces recommended or related products to actual customers, along with key points to keep in mind.
In recent years, the e-commerce market has continued to expand, leading to increased competition and making it more difficult to acquire new customers.
To grow your online store under these conditions, it’s crucial to boost sales from existing customers and increase their LTV (Lifetime Value).
One highly effective strategy for increasing LTV is cross-sell emails.
Cross-sell emails are marketing emails sent to propose products related to those the customer has already purchased.
Because these emails target existing customers, they are less costly than acquiring new ones. By recommending related items based on previous purchases, you can implement highly efficient and targeted marketing.
With StoreCRM, setting conditions for cross-sell emails and creating the emails themselves can be done in just a few simple steps.
Additionally, StoreCRM allows you to easily view key analytics—such as open rates, click-through rates, and revenue generated from each email—right within the app.
Sending cross-sell emails can significantly help improve customer LTV, so be sure to take advantage of StoreCRM to run targeted email campaigns for your existing customers.
Increase in Customer Unit Price
By sending a thank-you message immediately after a purchase and recommending products related to the purchased item that the customer may find valuable, you can encourage additional purchases and expect an increase in LTV (Customer Lifetime Value).
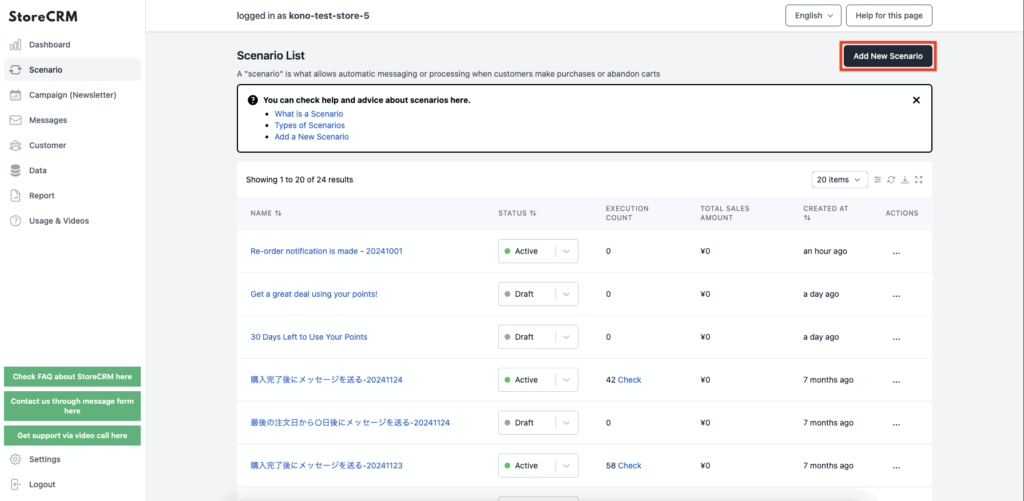
➀[StoreCRM App Screen] > [Scenarios]
Click to open the list of scenarios.Click [Add New Scenario] at the top right of the screen.

➁Since we are creating a cross-sell email scenario triggered after a purchase is completed, click [Triggered by Order or Shipping] > [Send Email After Purchase Completion
* If you prefer to send a cross-sell email after shipping is complete, please select the scenario from [Send Email After Shipping Completion].
➁Since we are creating a cross-sell email scenario triggered after a purchase is completed, click [Triggered by Order or Shipping] > [Send Email After Purchase Completion]
* If you prefer to send a cross-sell email after shipping is complete, please select the scenario from [Send Email After Shipping Completion].
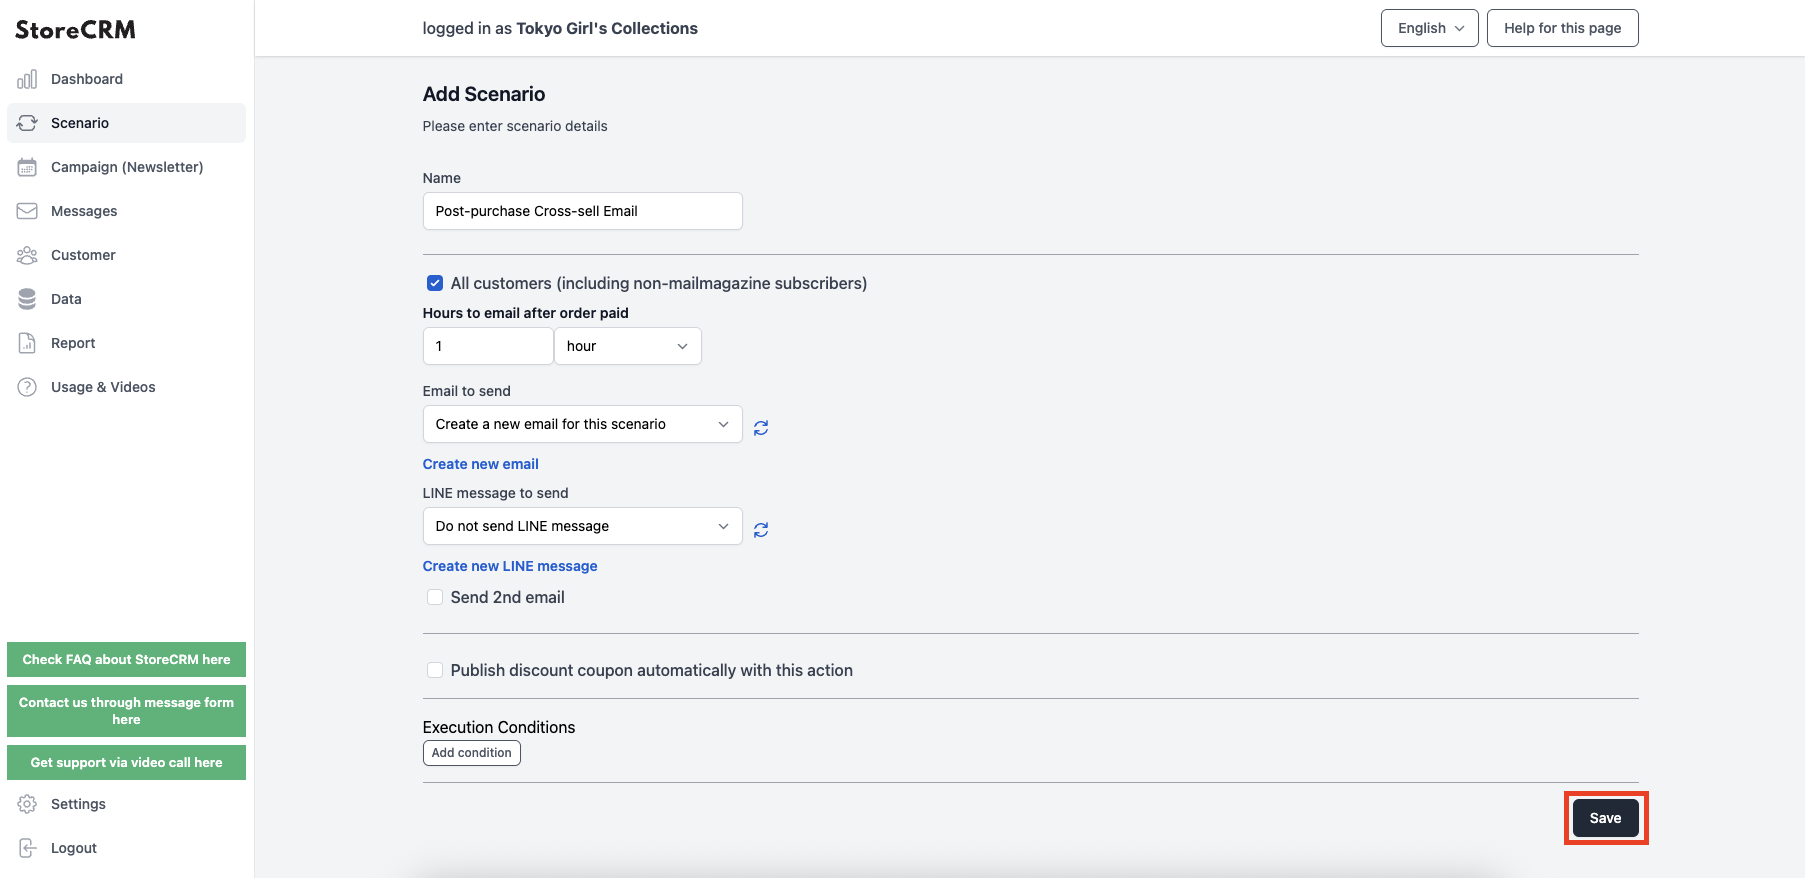
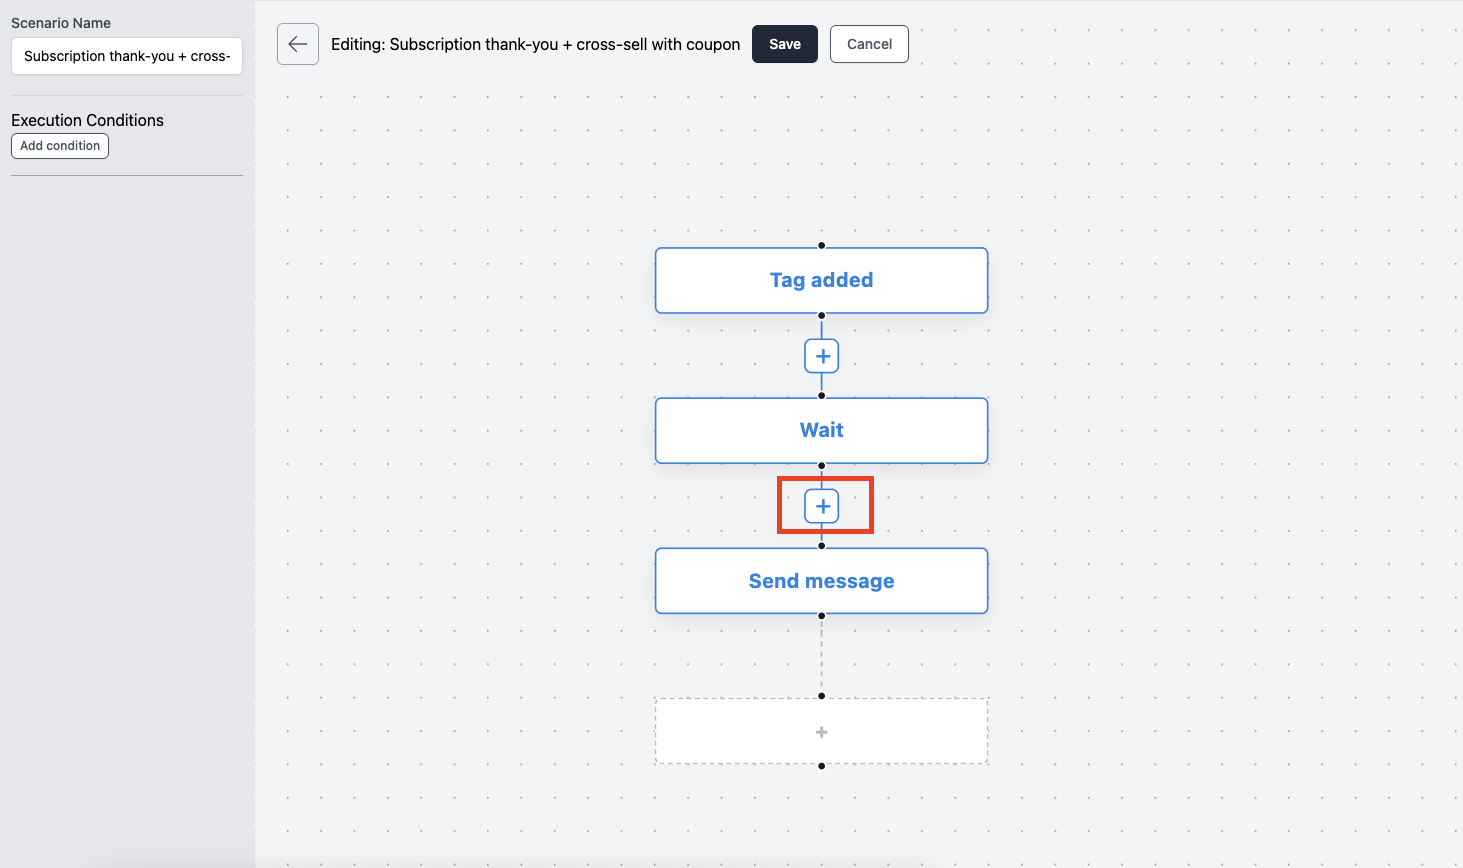
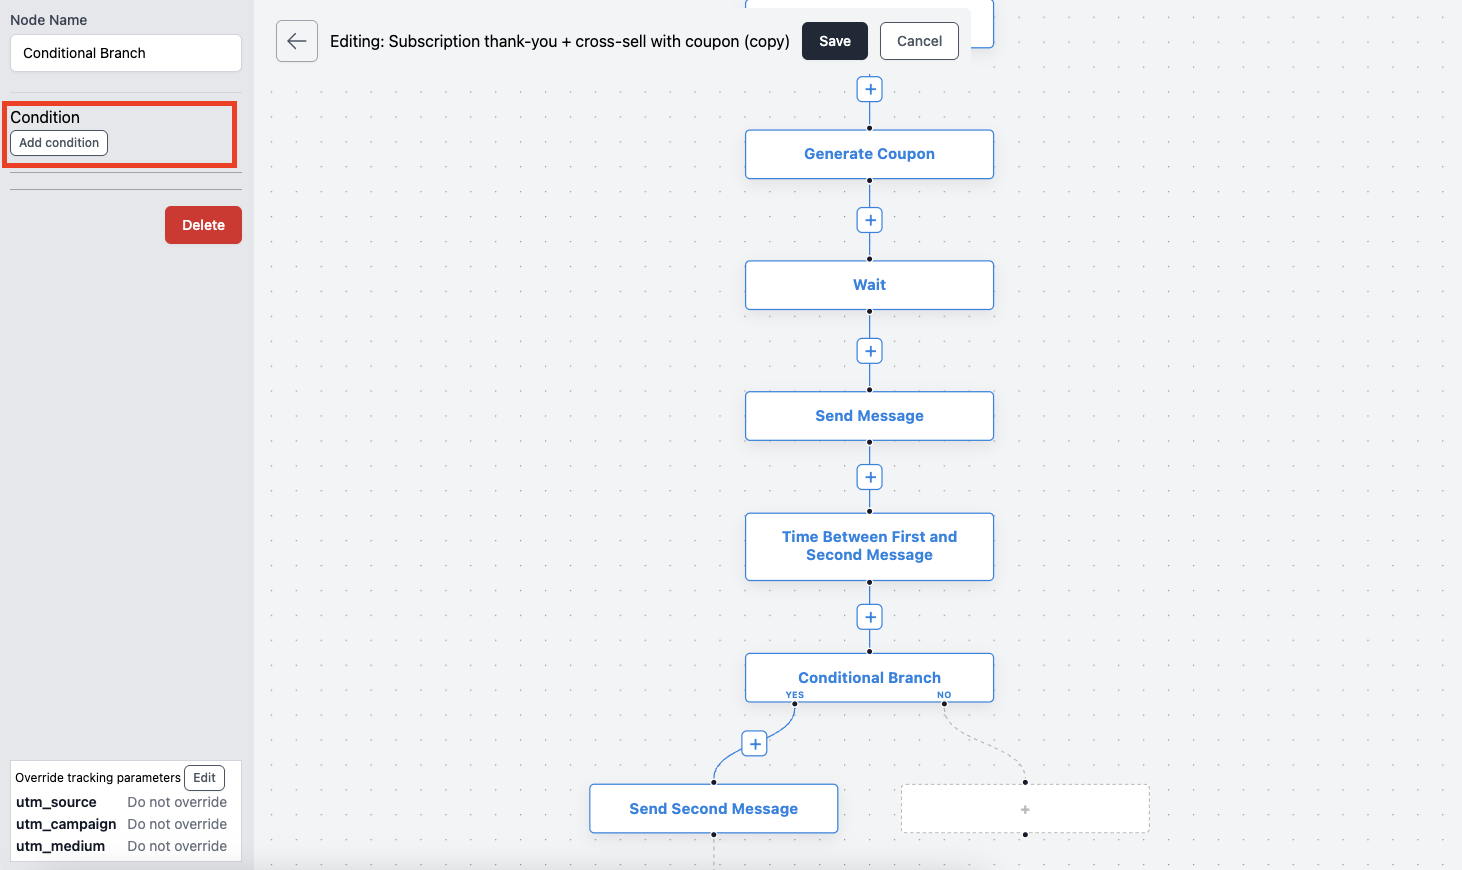
・Send a thank-you email and a product recommendation email 1 hour after a purchase.
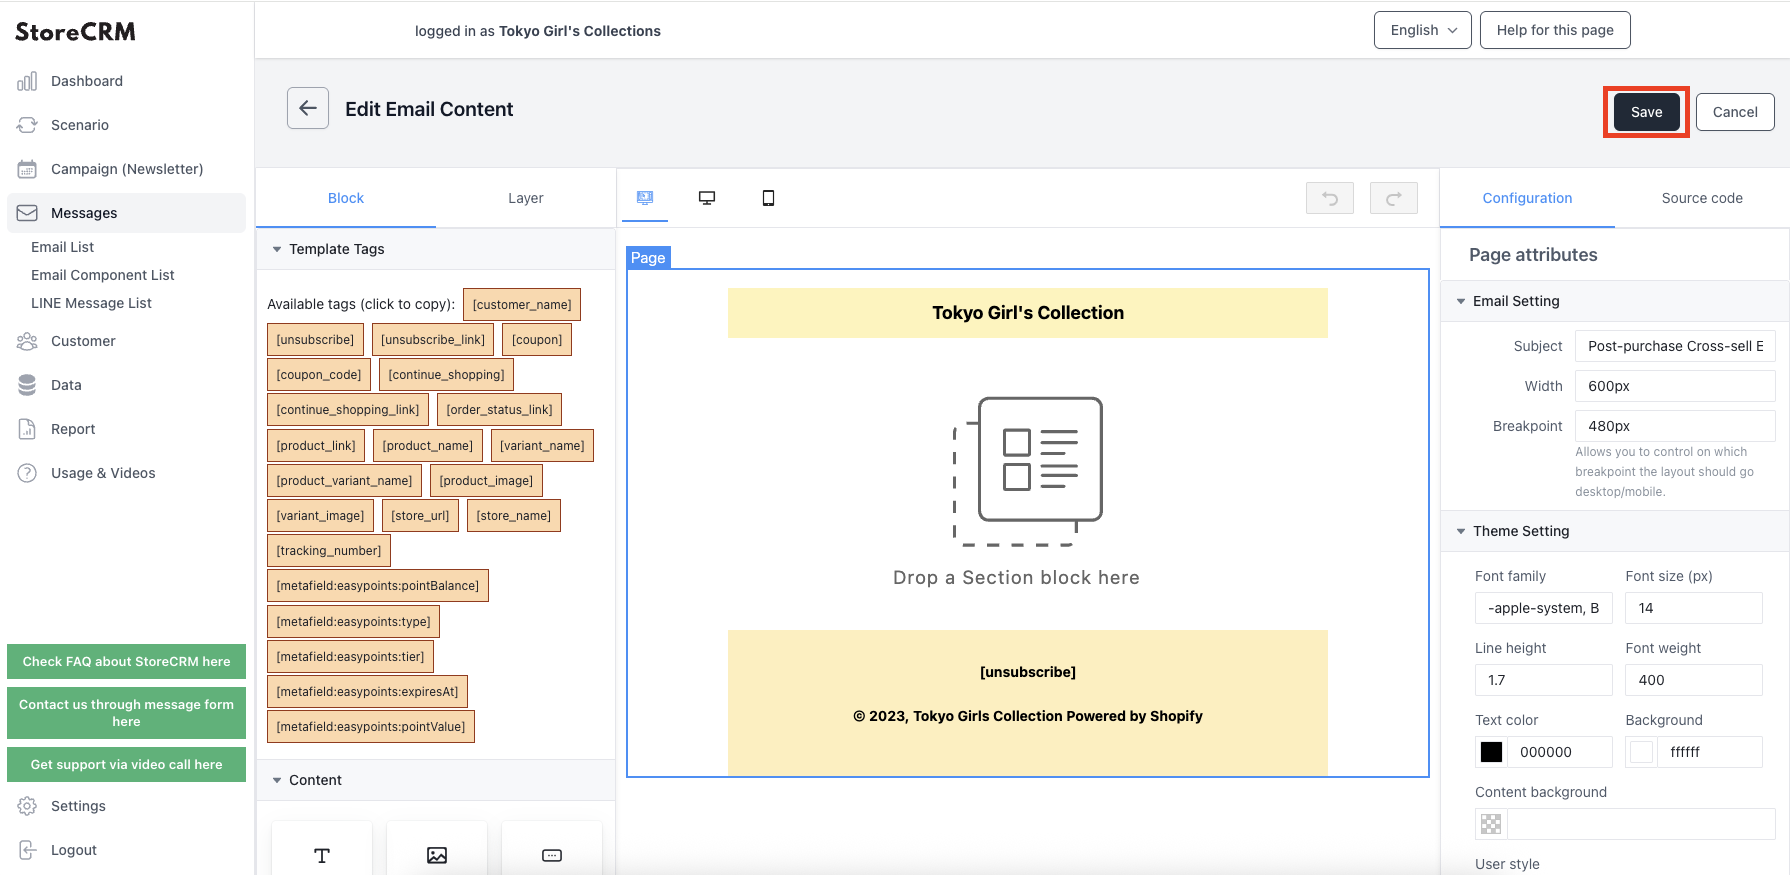
④Create the email to be sent.
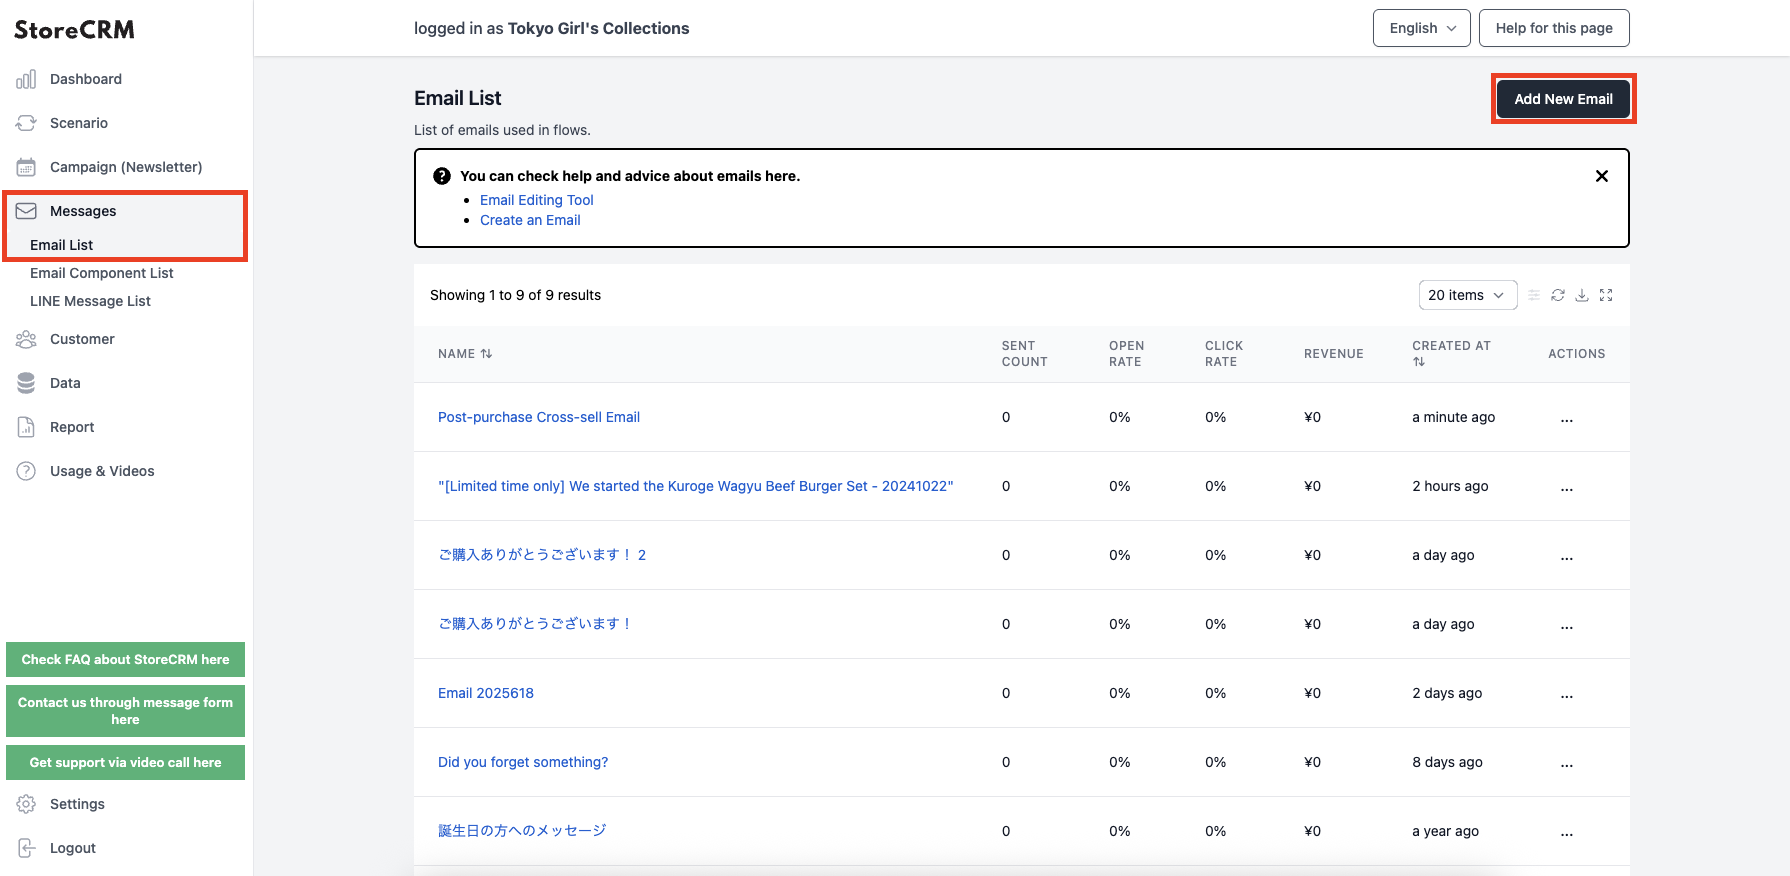
From the left-hand menu, select [Emails] > [Email List] to open the list of emails, then click [Add New Email] at the top right of the screen.
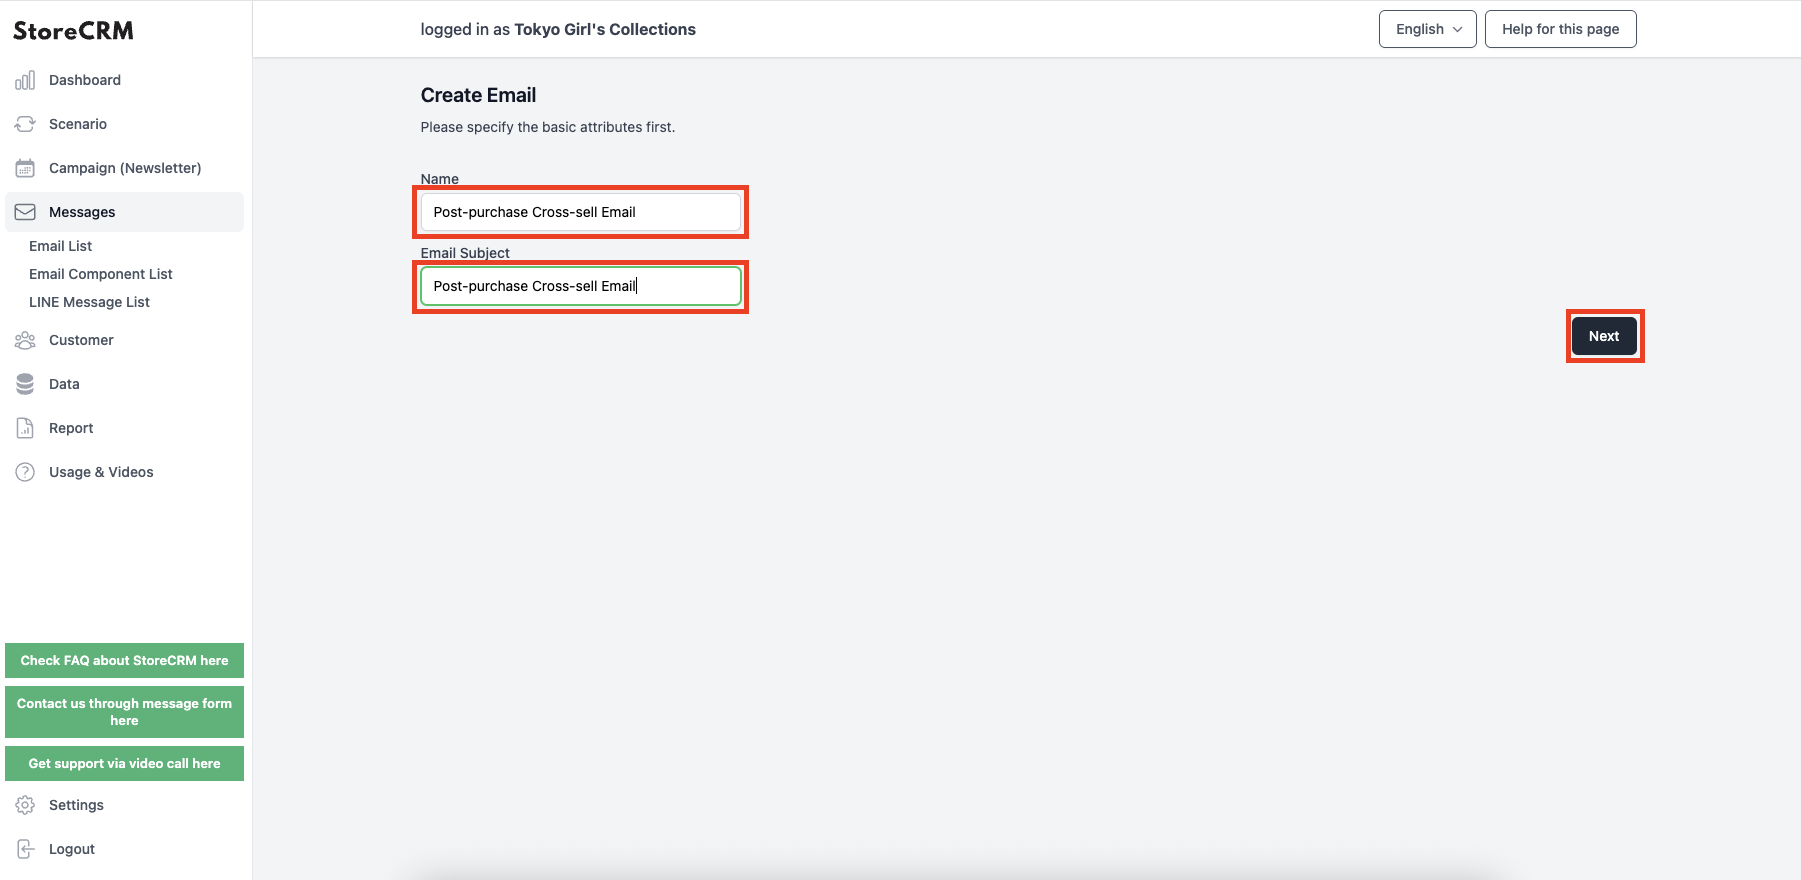
⑤The creation screen will appear. Enter an internal name in [Name] and the email subject in [Email Title].
Once you have finished entering the information, click [Next].
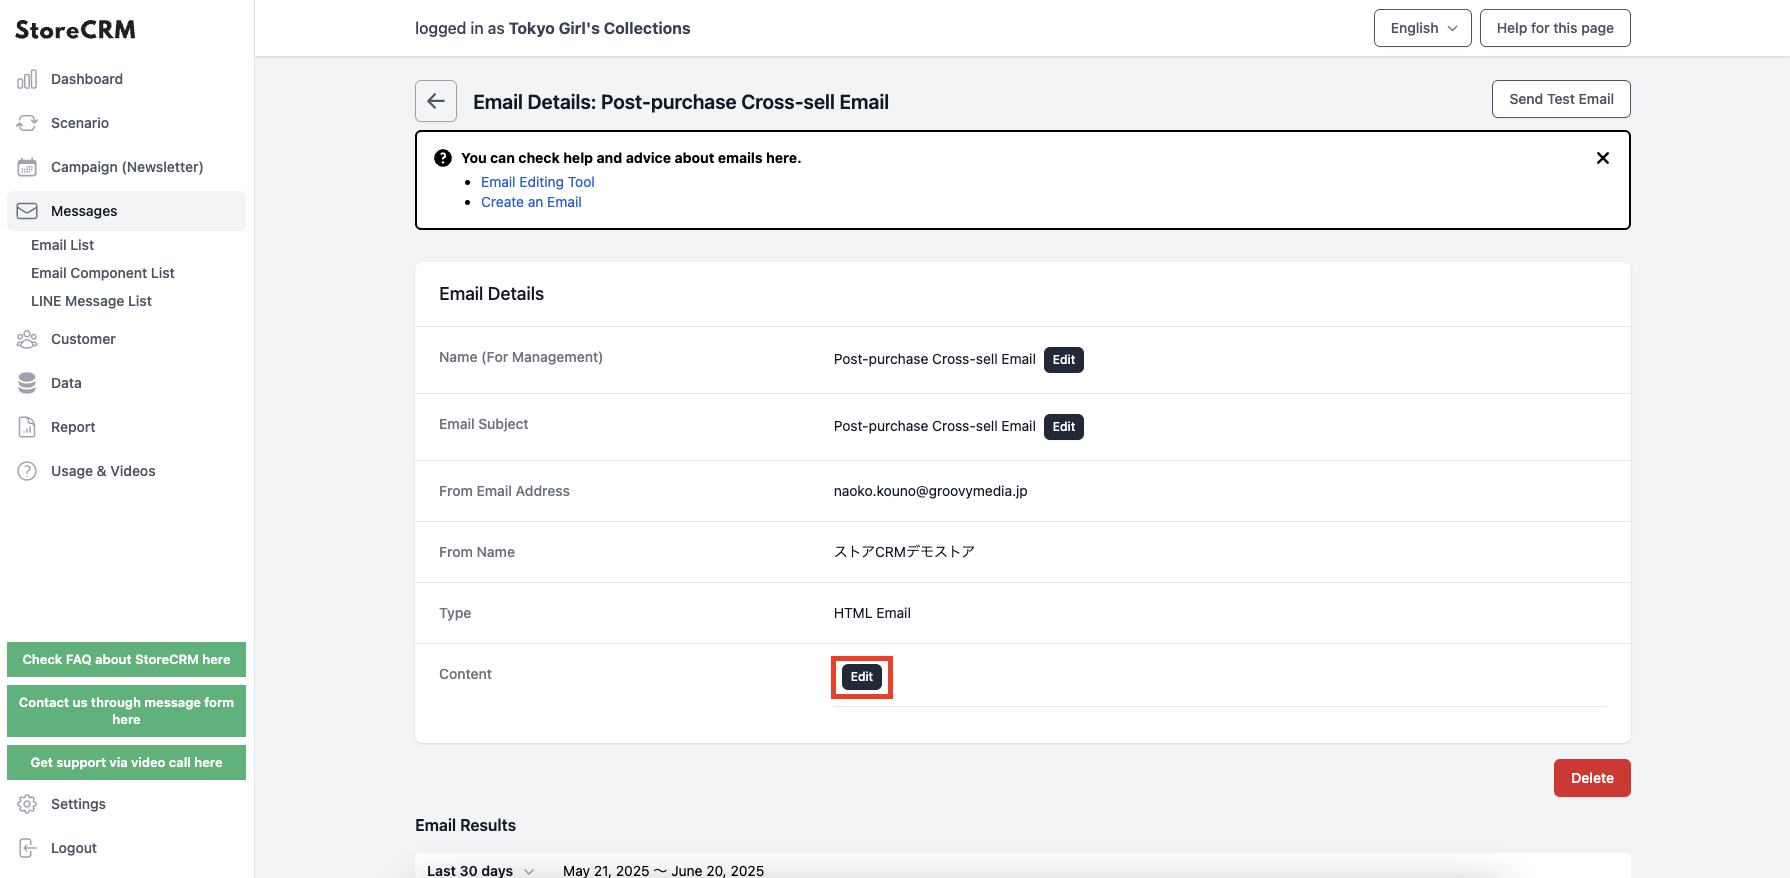
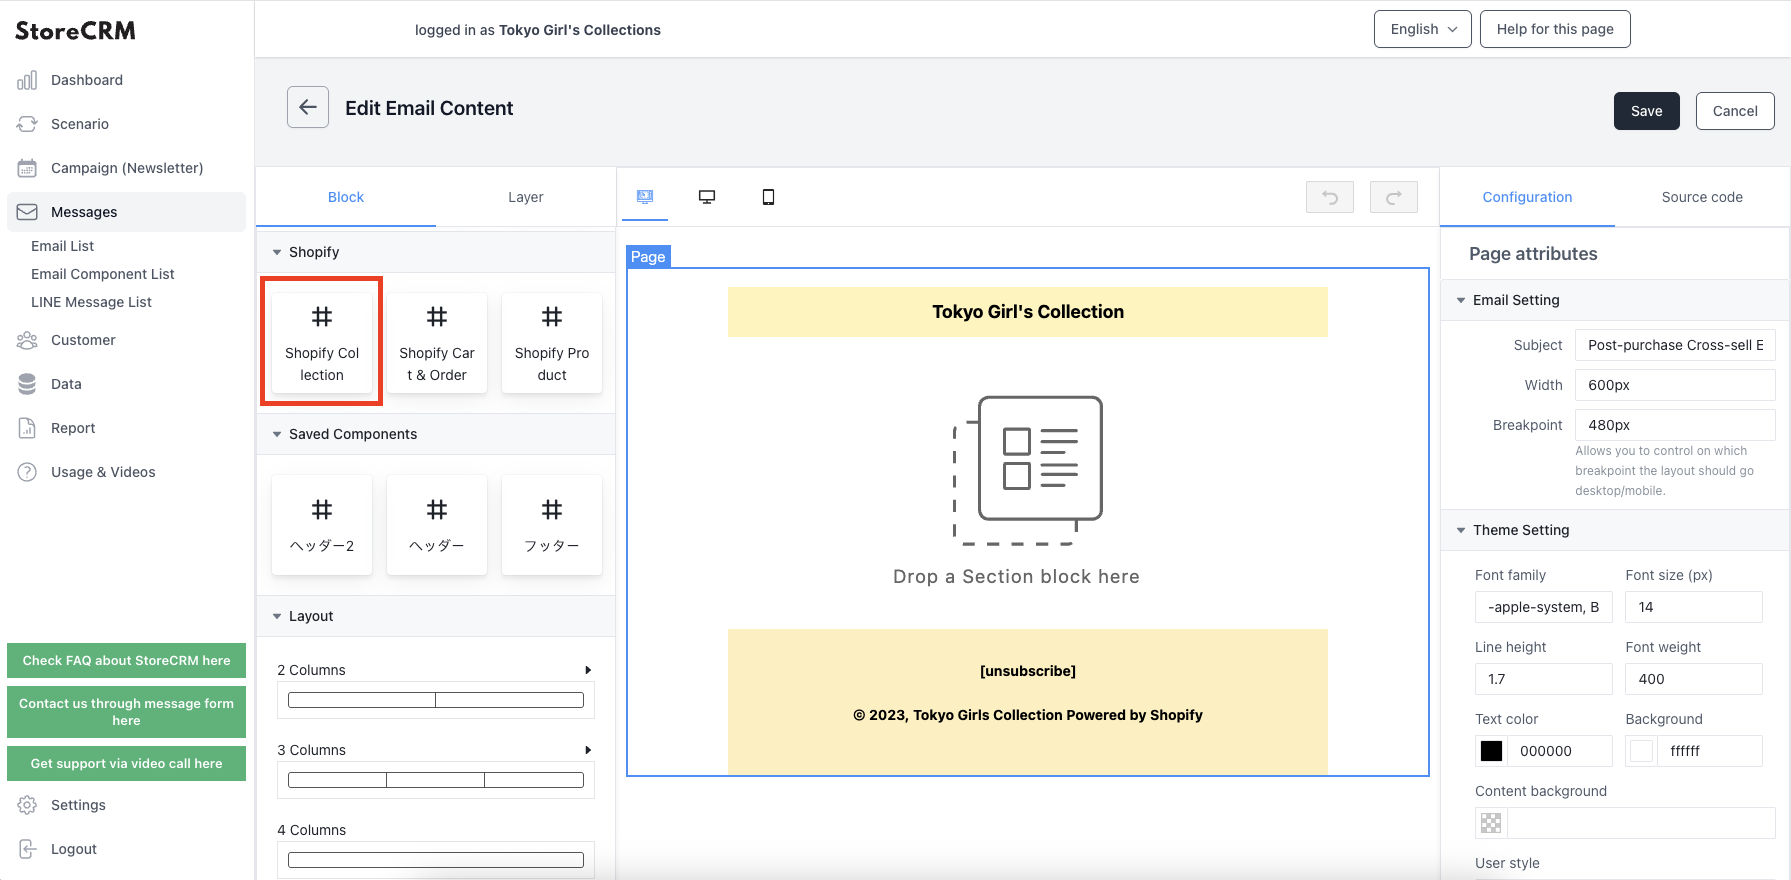
If you want to include product information in the email, you can use the Shopify Collection block. Implement it as needed depending on the situation.
⑧After creating the email, set it to the scenario.
Go to [Scenarios] > [Scenario List] > [Created Scenario] and click on it.
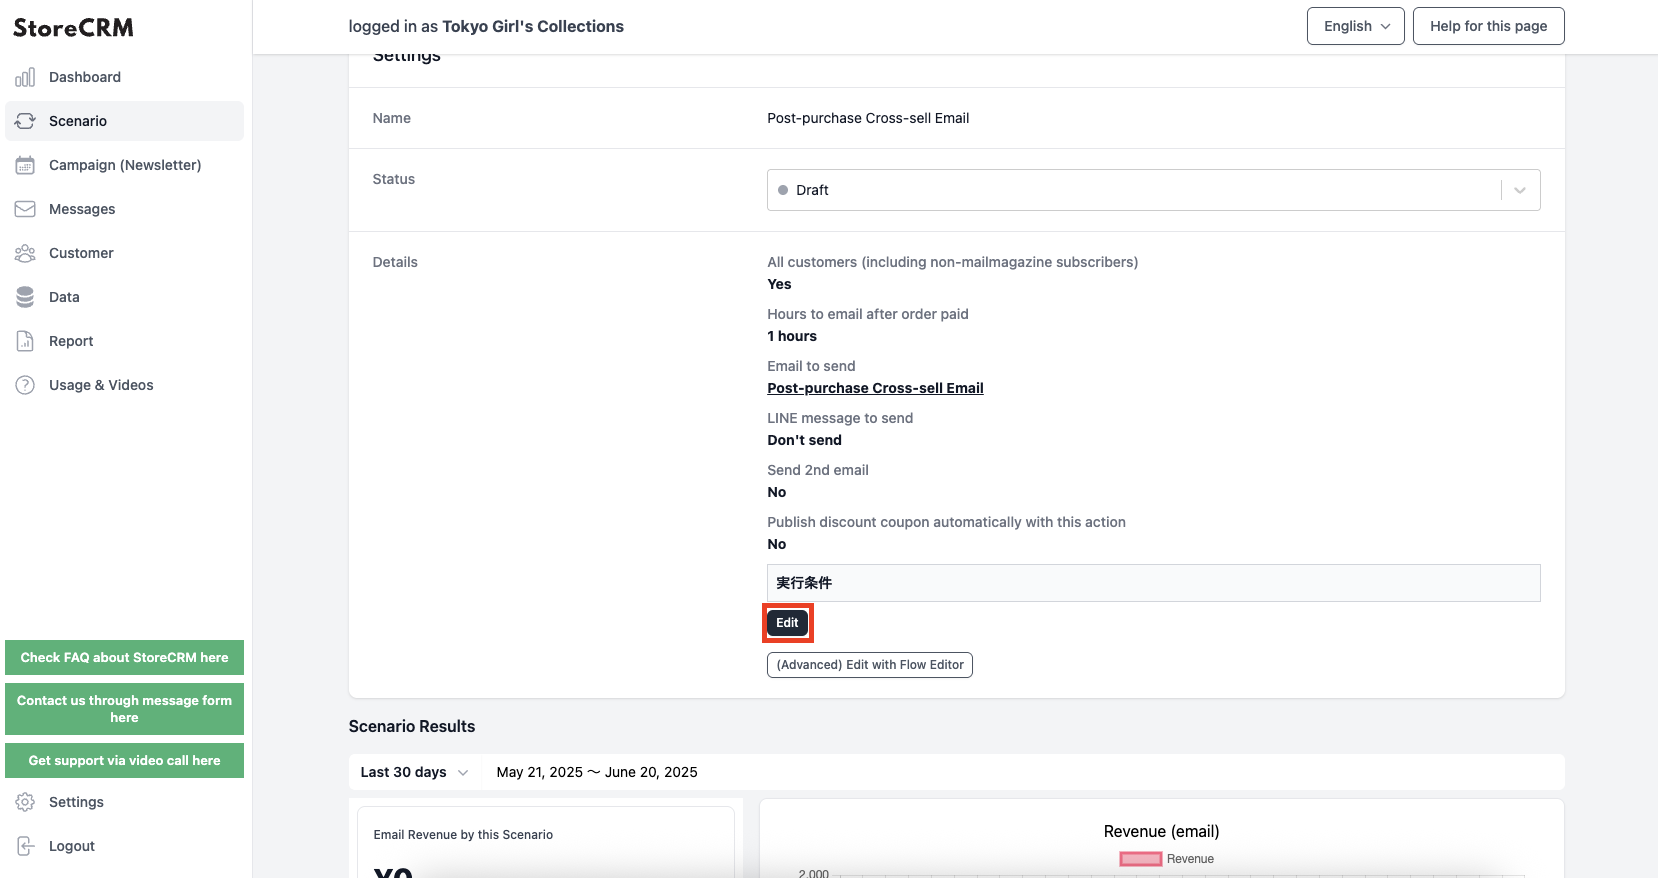
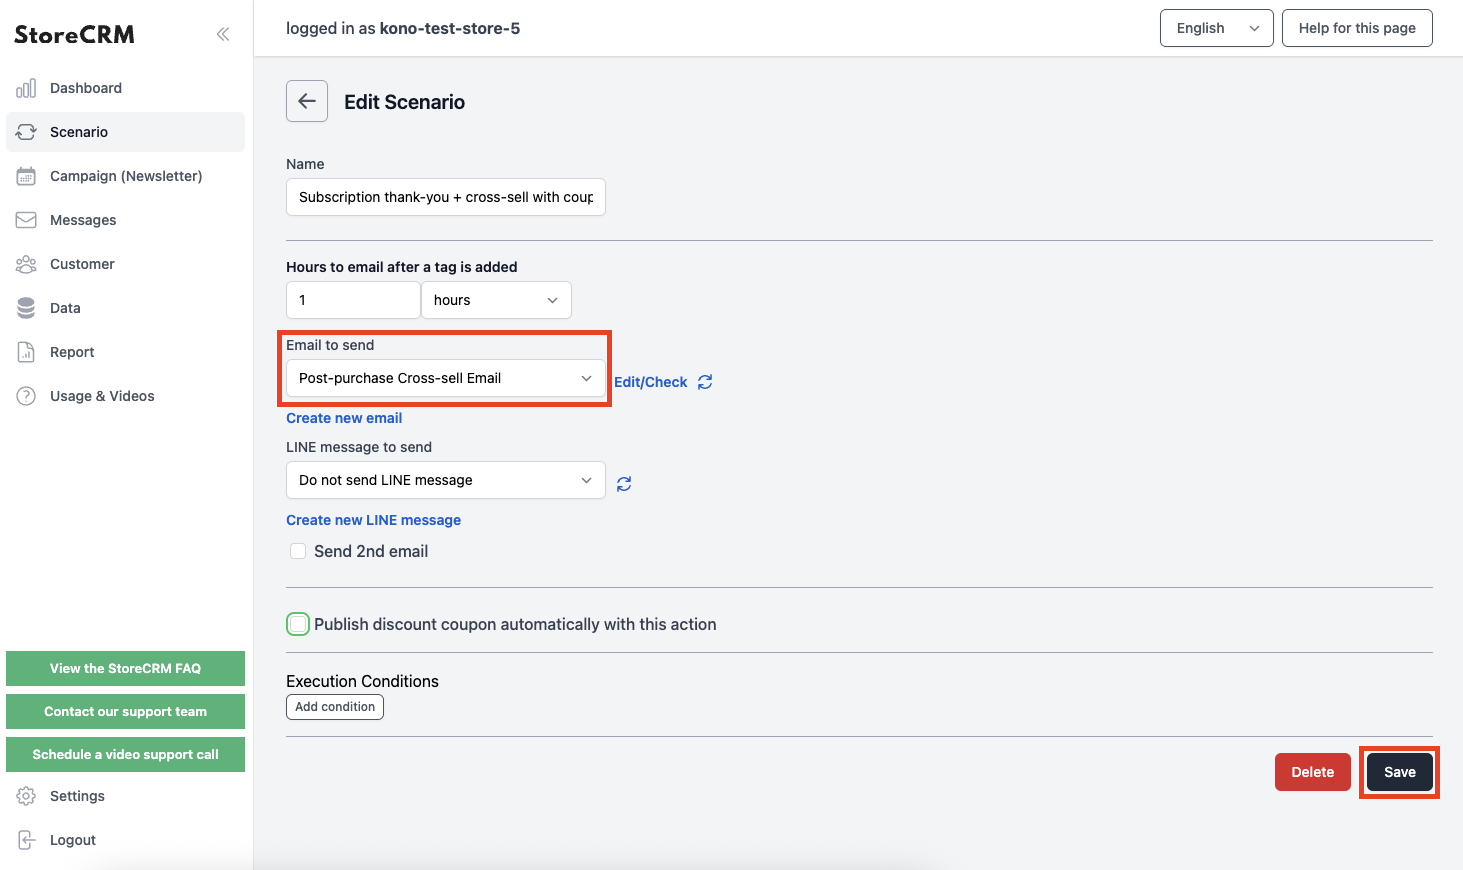
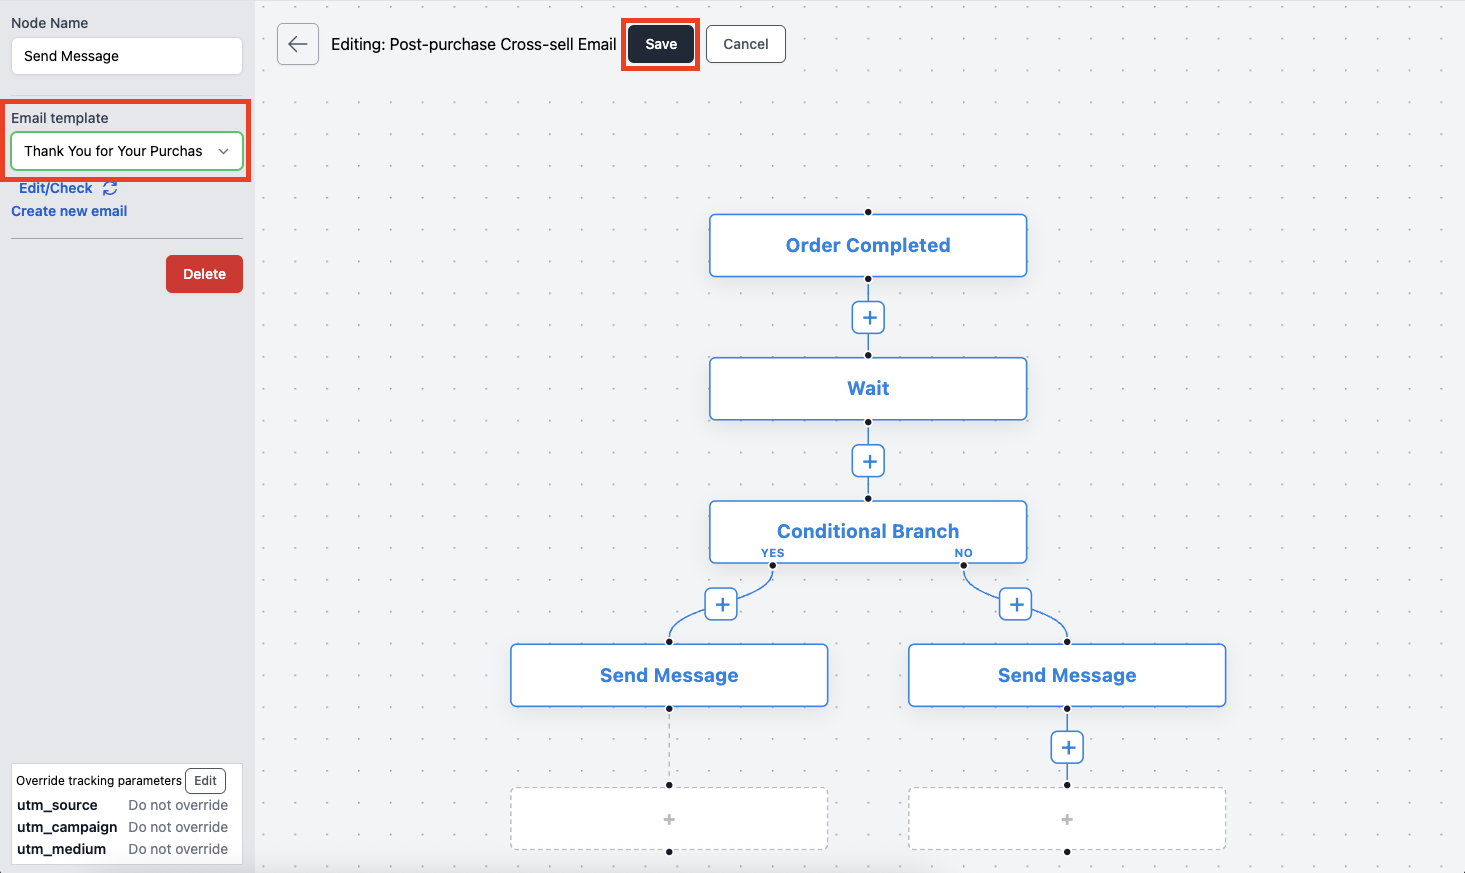
⑩Set the email created in the previous step as the template for the email. (The internal name will be displayed.)
After selecting it, click [Save].

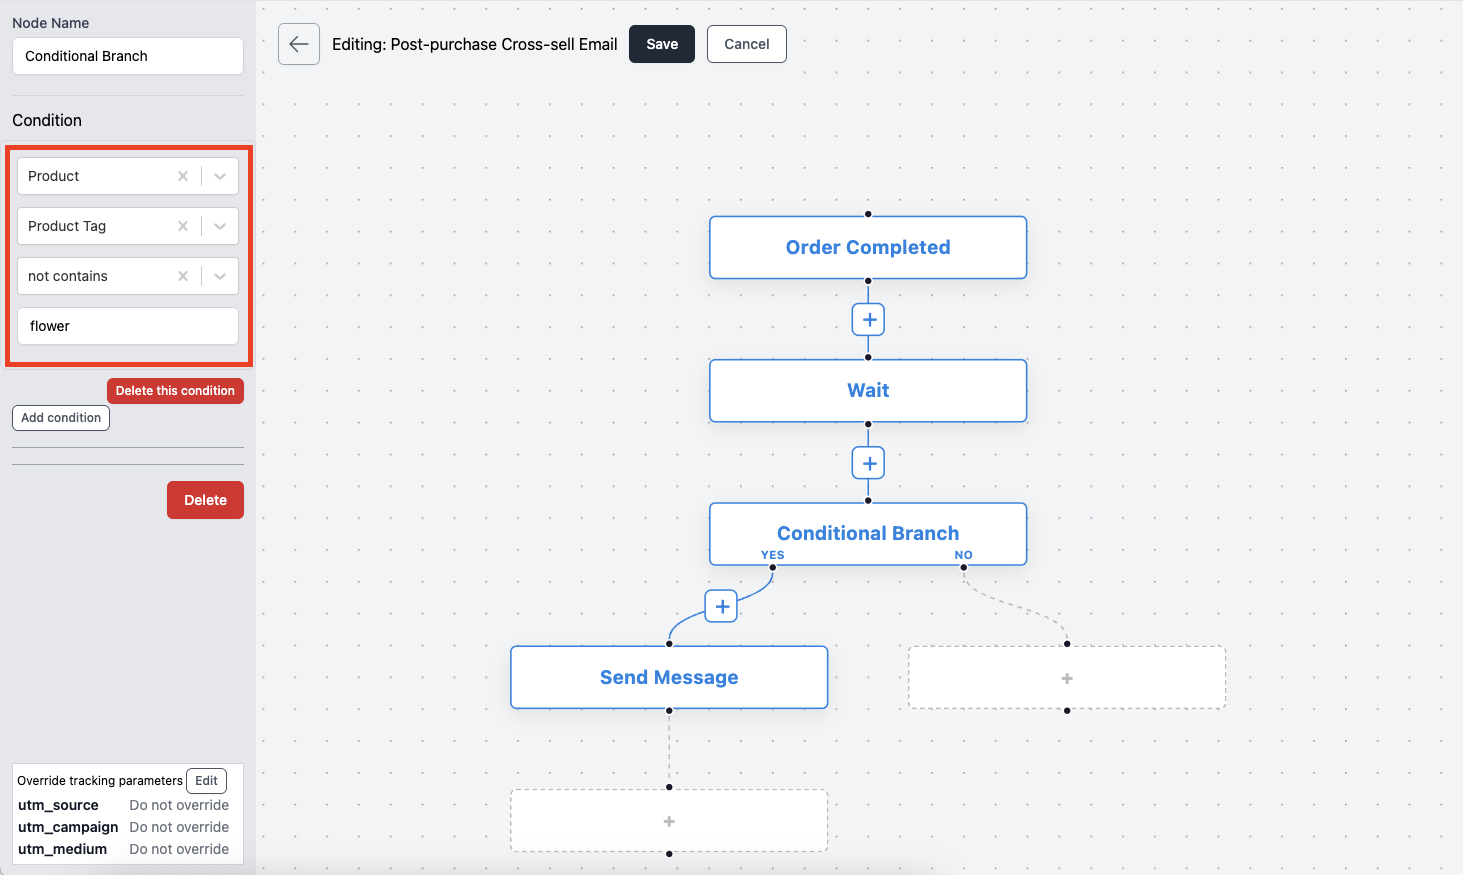
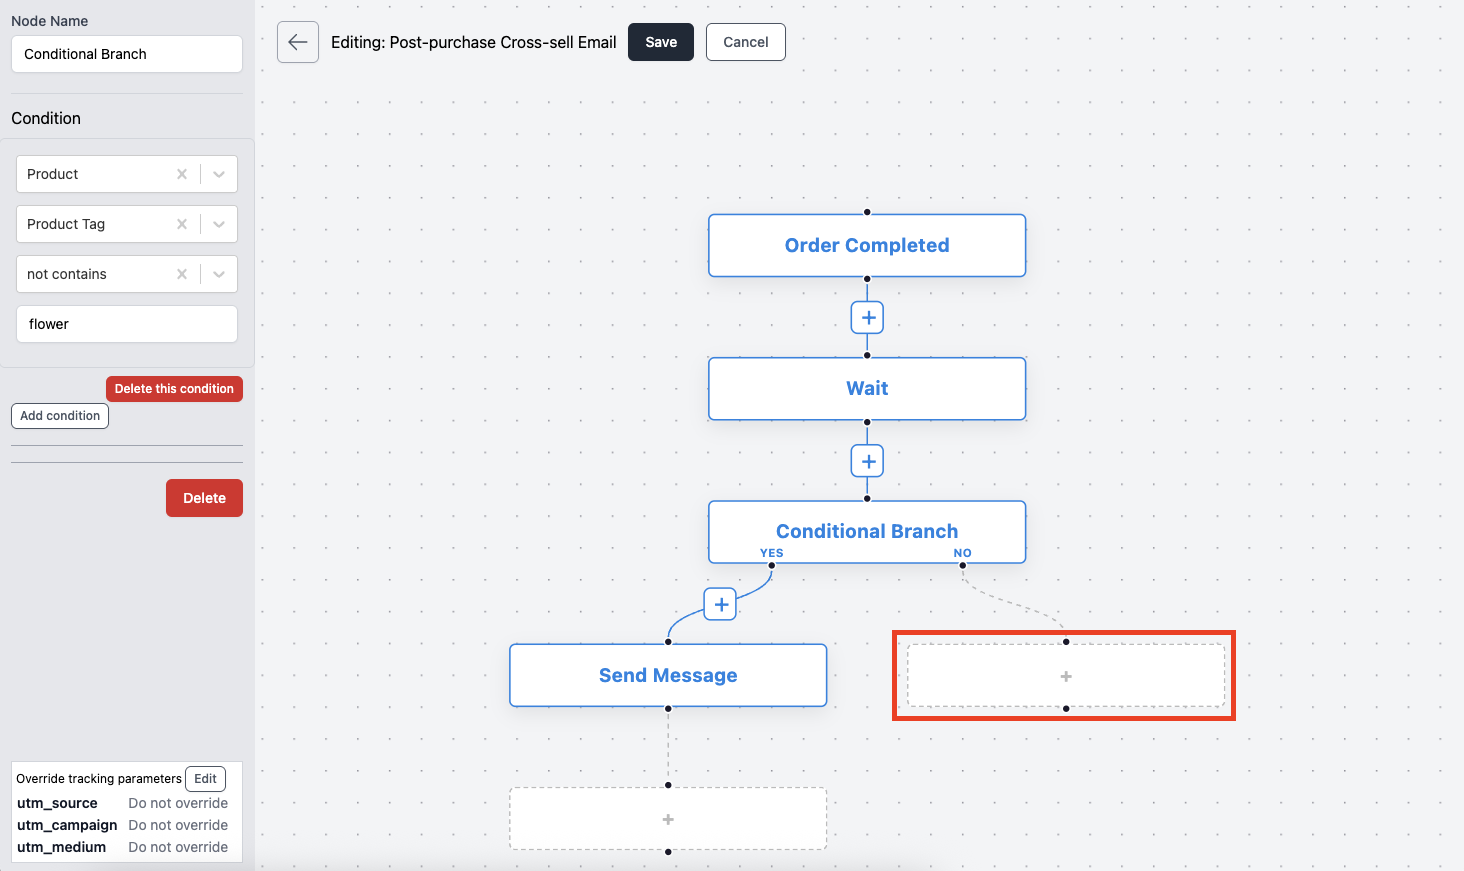
- For customers whose purchased product includes the tag [2024AW_TOPS], send an email introducing the 2024AW_BOTOMS collection.
- For customers whose purchased product does not include the tag [2024AW_TOPS], send an email introducing the TOPSELLS collection.
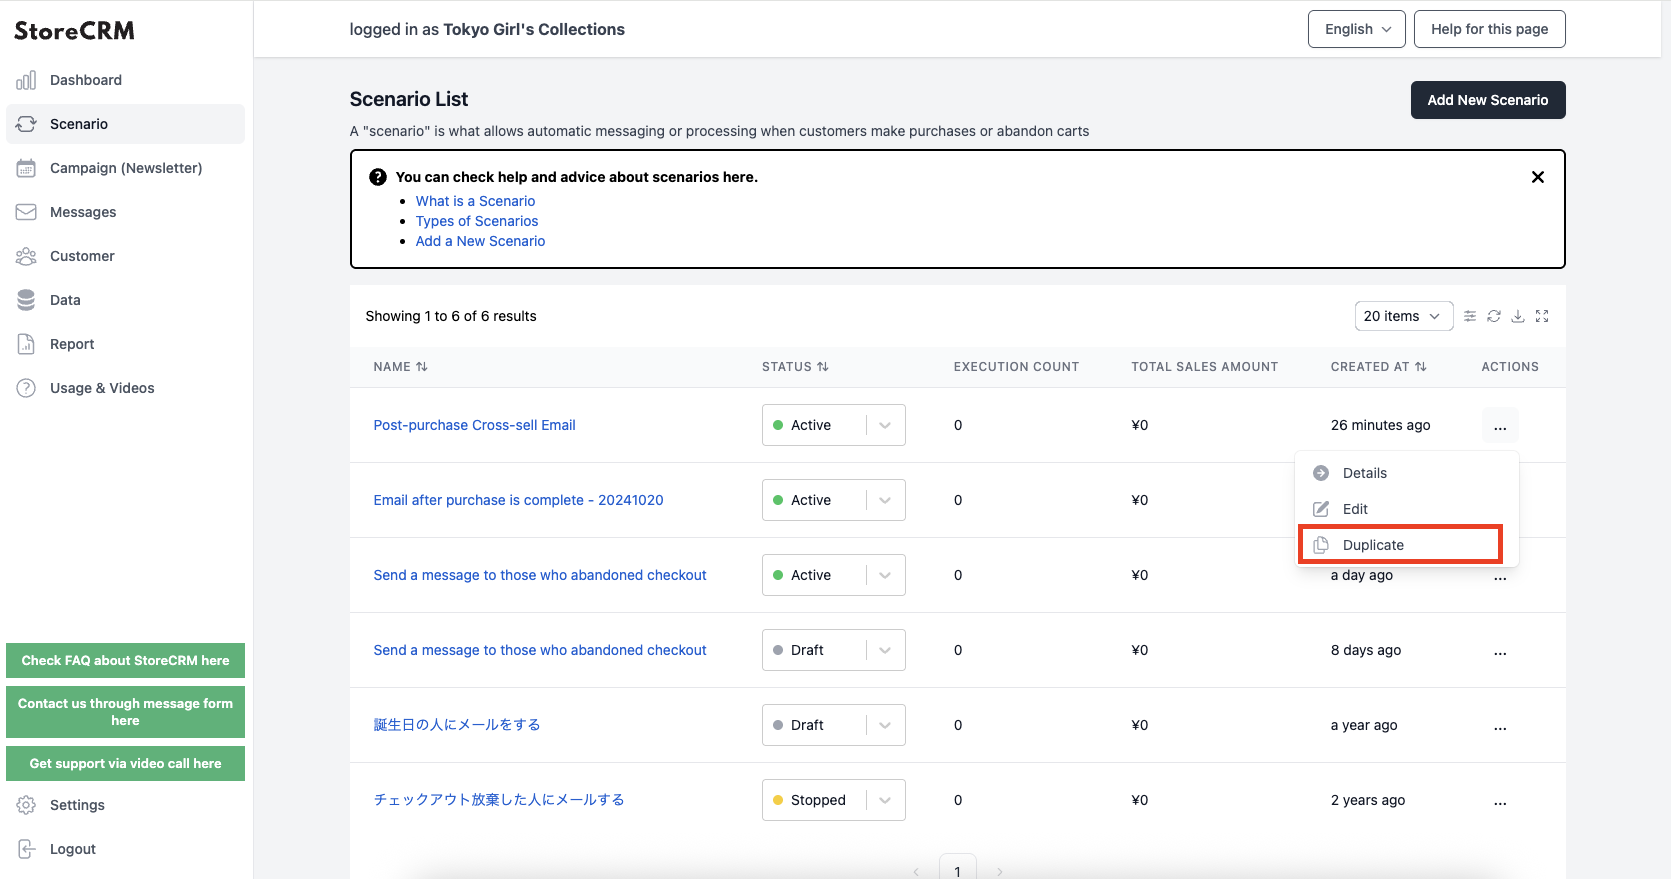
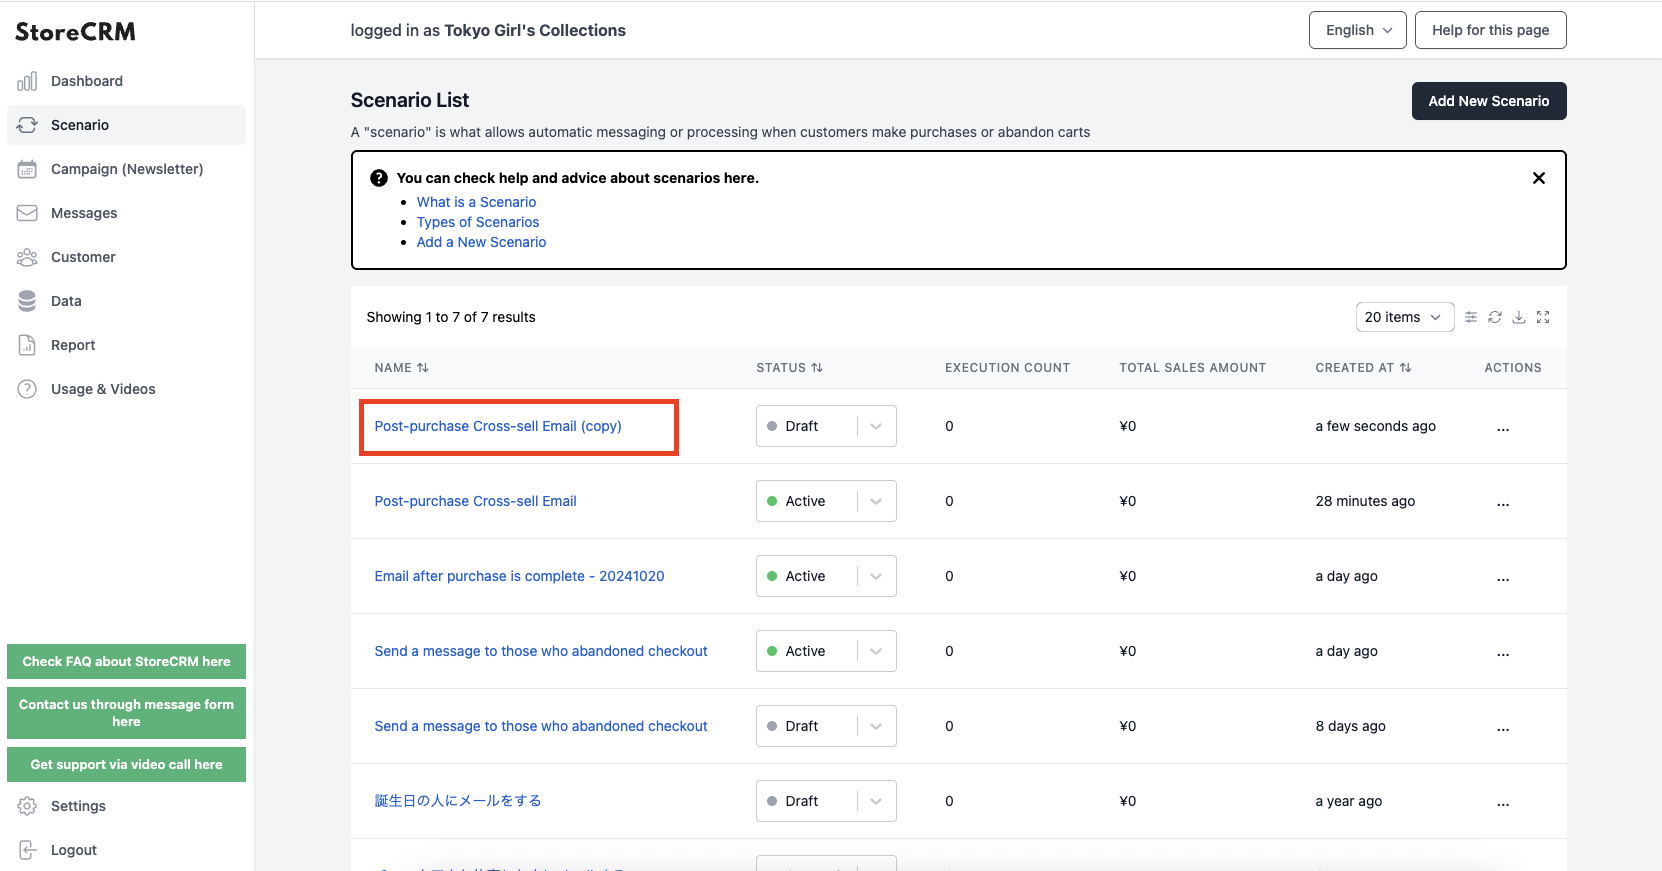
➁A popup will appear. Click [OK], and if a scenario with “(Copy)” added to the name is created, the duplication is complete.
We will customize this duplicated scenario.
* The scenario name can be changed from the scenario edit screen.
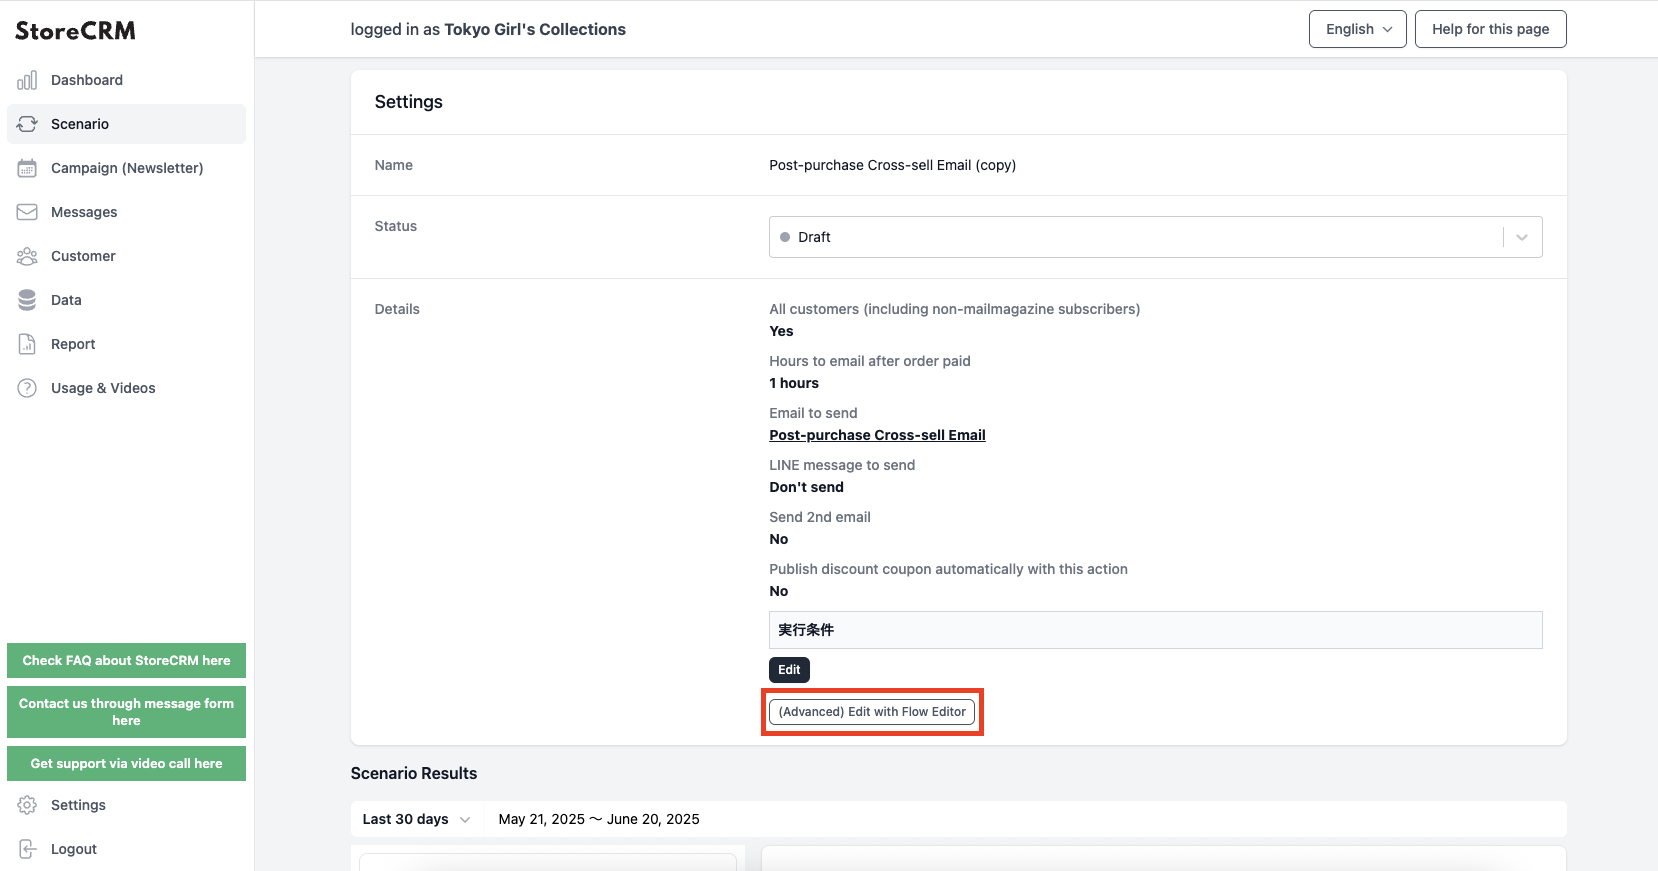
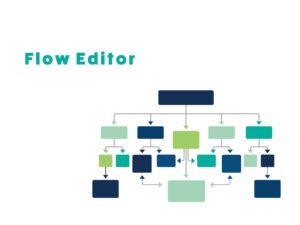
①Open the detail screen of the scenario you want to customize. Click [Details] > [Edit with Flow Editor (Advanced)].
A warning message will appear—please read it carefully, and if there are no issues, click [OK].
Once a scenario is saved using the Flow Editor, you cannot revert to the simplified editing mode. If you want to test changes on a scenario currently in use, be sure to duplicate the scenario before customizing it.


When activating a scenario, make sure that no other scenarios using the same trigger are currently active. If the scenarios are completely different, this is not an issue. Especially when activating a duplicated scenario, be sure to check whether the original scenario should remain active.
By using StoreCRM, you can expect to increase sales through cross-selling.
This single app not only enables you to send emails, but also allows you to analyze each email and scenario based on metrics such as open rates and click-through rates.
StoreCRM also offers support for app-related settings and consulting services to help increase sales for our clients.
Feel free to contact us through the inquiry form at the link below: