
Introduction
This article explains how to use StoreCRM to send win-back emails on Shopify — messages that bring back customers who have not bought for a while — and what to watch out for, by actually building an automation that encourages a repeat purchase from lapsed customers.
The ecommerce market keeps growing, and with more competitors than ever, it is common for a customer's interest to drift to another brand as time passes since their last purchase.
In that environment, sending a win-back email to customers whose interest has faded, encouraging a repeat purchase and heading off the loss, matters a great deal to growing an ecommerce store.
Because win-back emails target existing customers, they cost far less than acquiring new ones, and recommending products related to what the customer bought makes the marketing efficient.
With StoreCRM, everything from the conditions that trigger the win-back email to the email itself takes only a few steps.
You can also see open rates, click rates and email-attributed revenue at a glance inside the app.
Win-back emails lift LTV, so put StoreCRM to work and start emailing the customers who have bought from you.
[Video manual] Setting up StoreCRM win-back emails (a given number of days after the last purchase)
Building the email automation (a win-back email to lapsed customers)
The goal of the automation
Being clear about what a campaign is for matters. So let us start with the goal of the [win-back email to lapsed customers] automation we are about to build.
Reactivating customers Offering a coupon, or products related to what they bought before, to customers who have been quiet for a while renews their interest and brings them back.
Building the automation
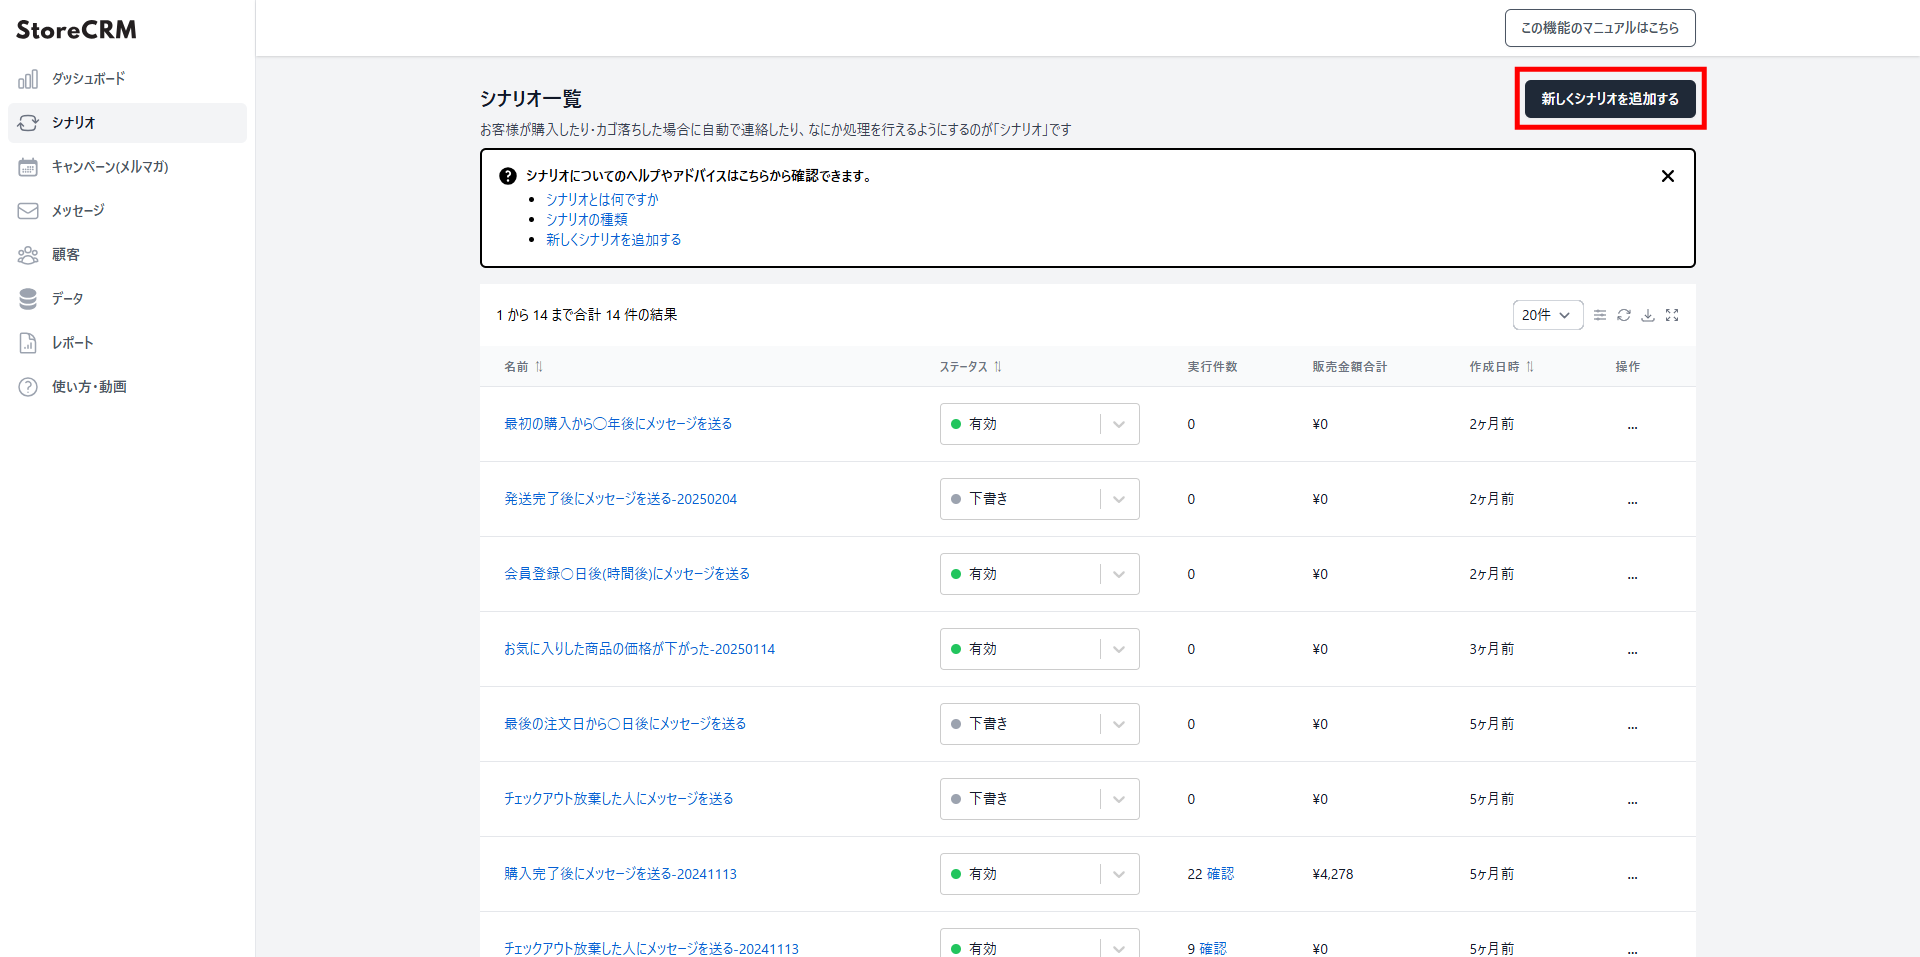
1. Open the automation list from [StoreCRM app] > [Automations]. Click [Add new automation] at the top right.
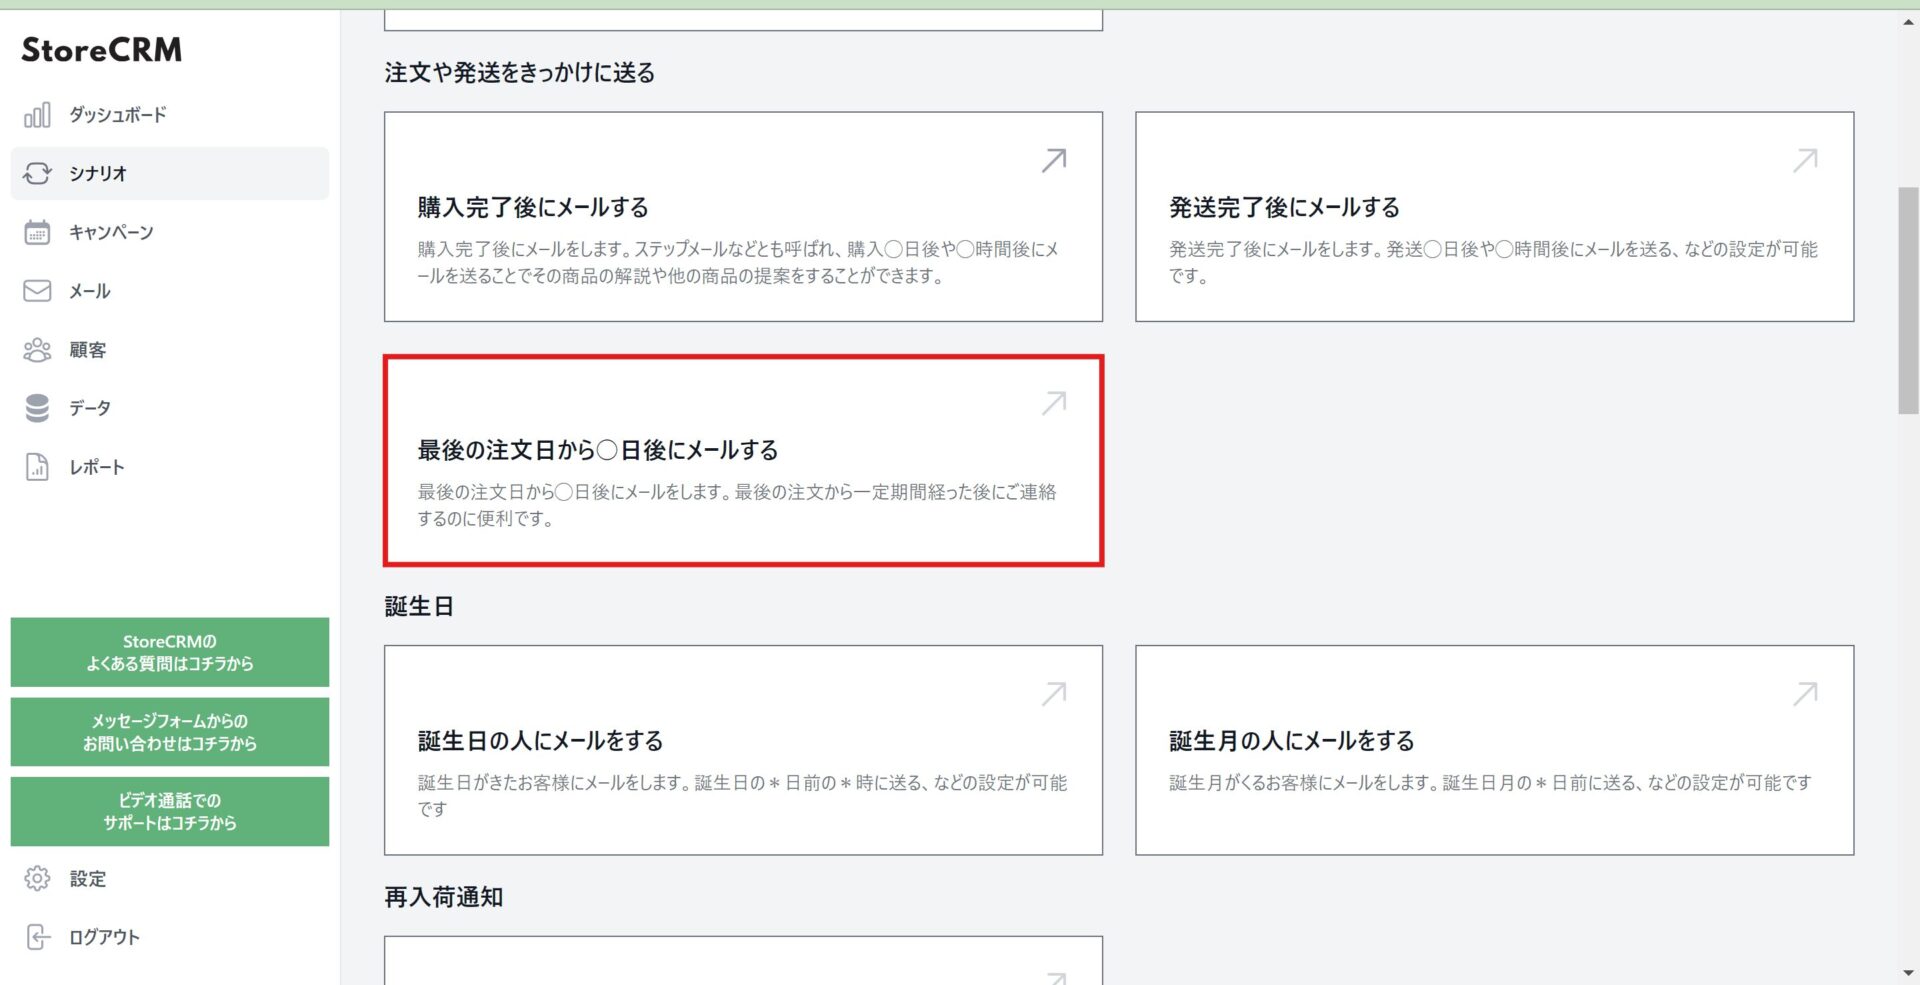
2. We are building a win-back email for lapsed customers, so click [Triggered by an order or shipment] > [Email a set number of days after the last order].
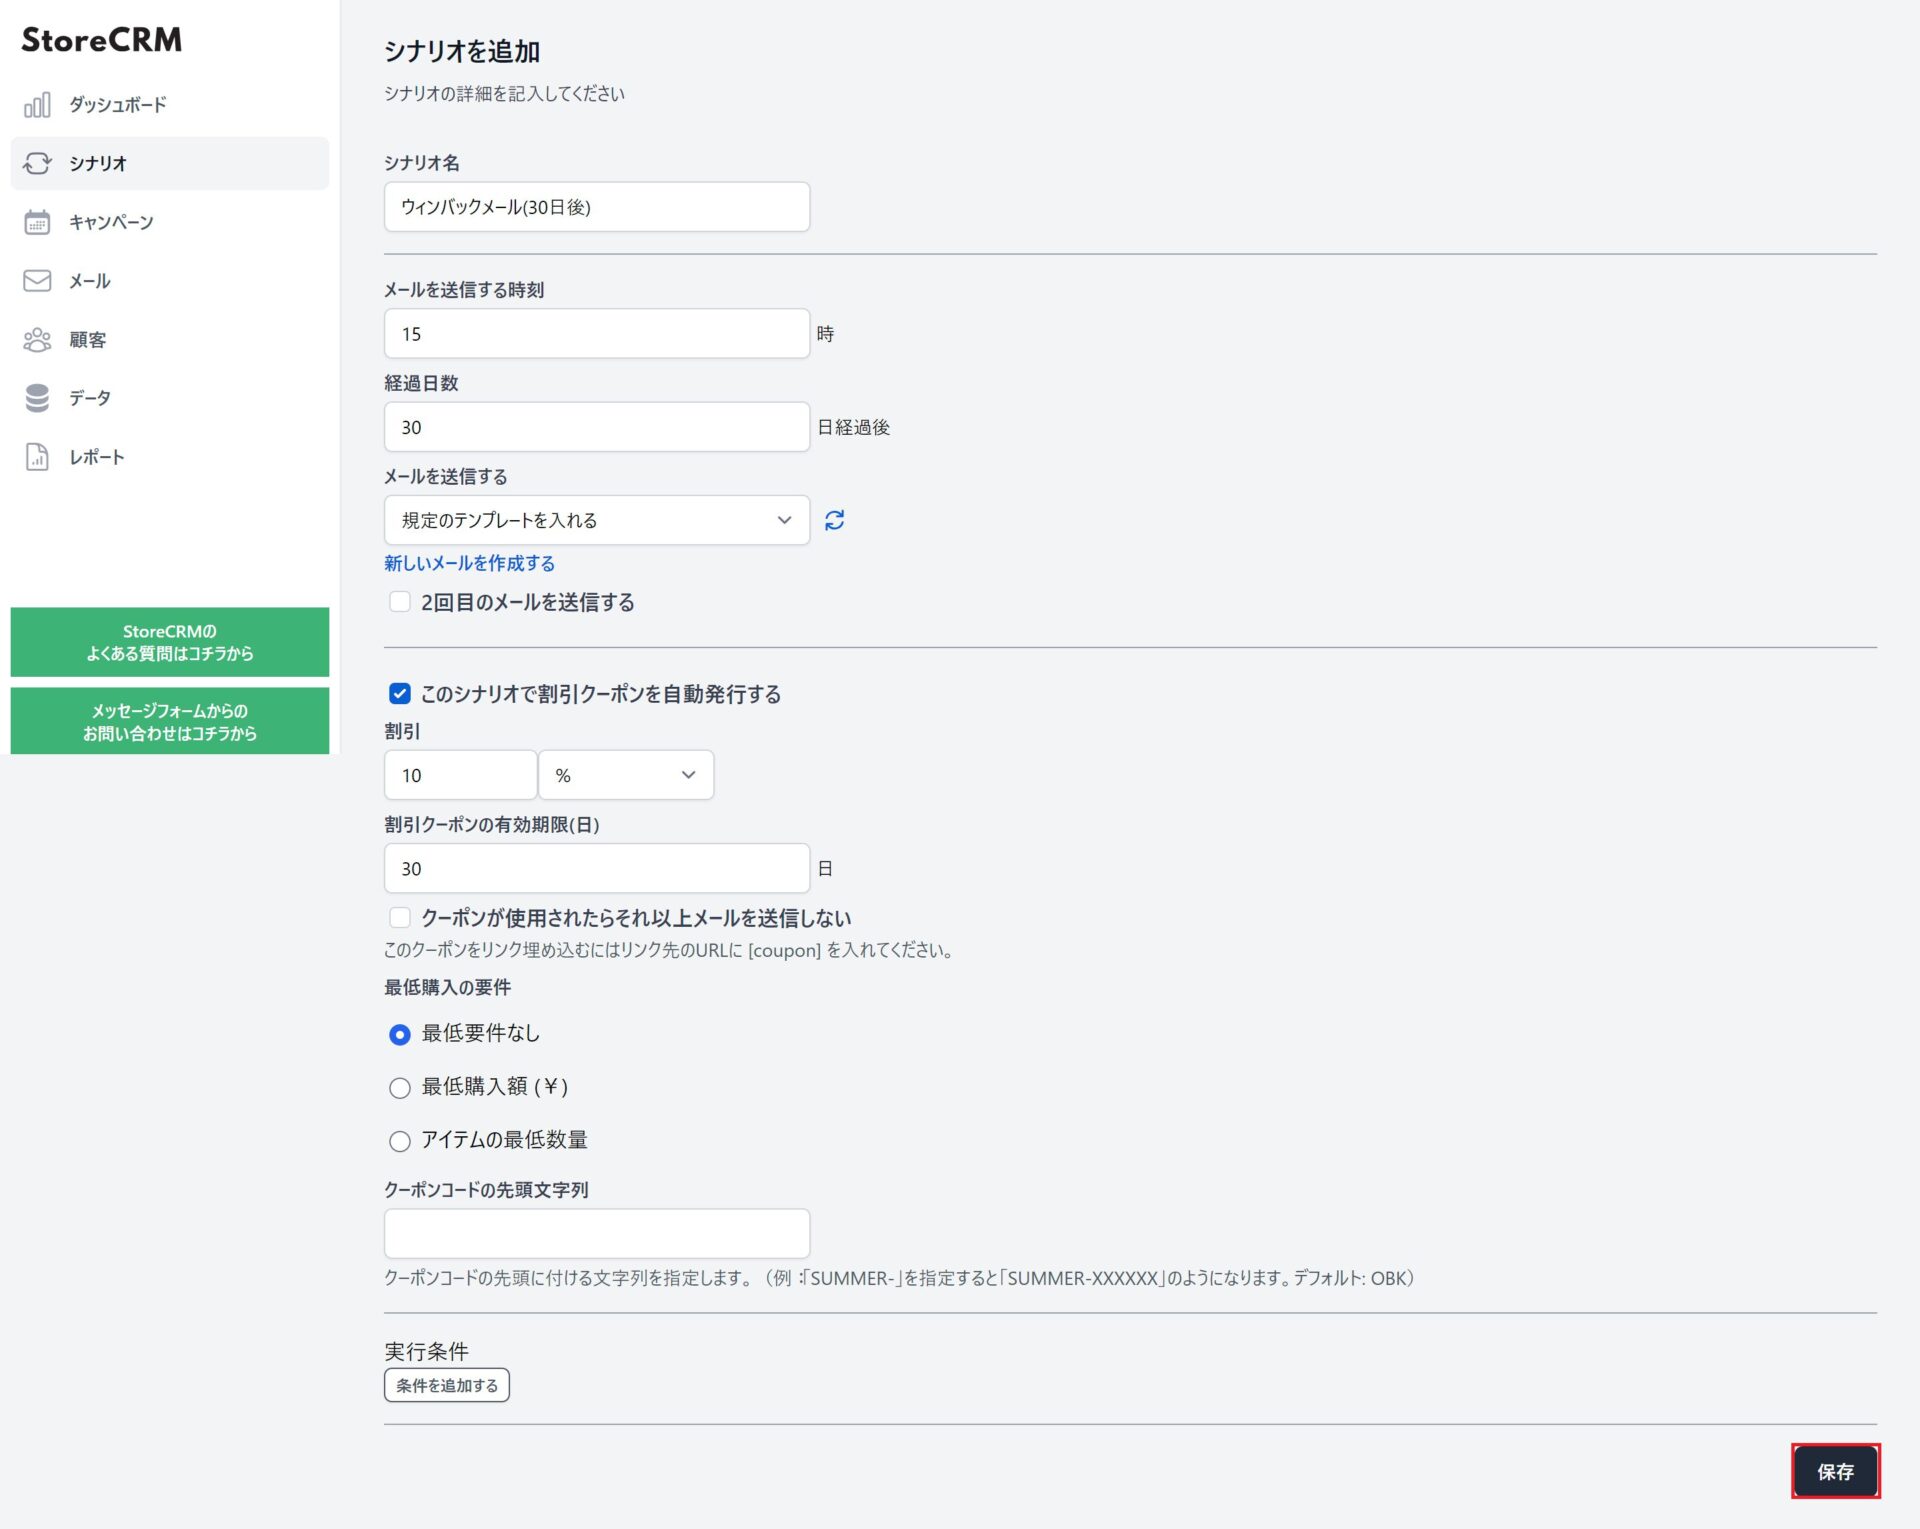
3. The automation settings appear; set when the email should go out. Here we used the following. When you are finished, click [Save] at the bottom right.
- Send an email with a coupon at 3pm to customers whose last purchase was 30 or more days ago.
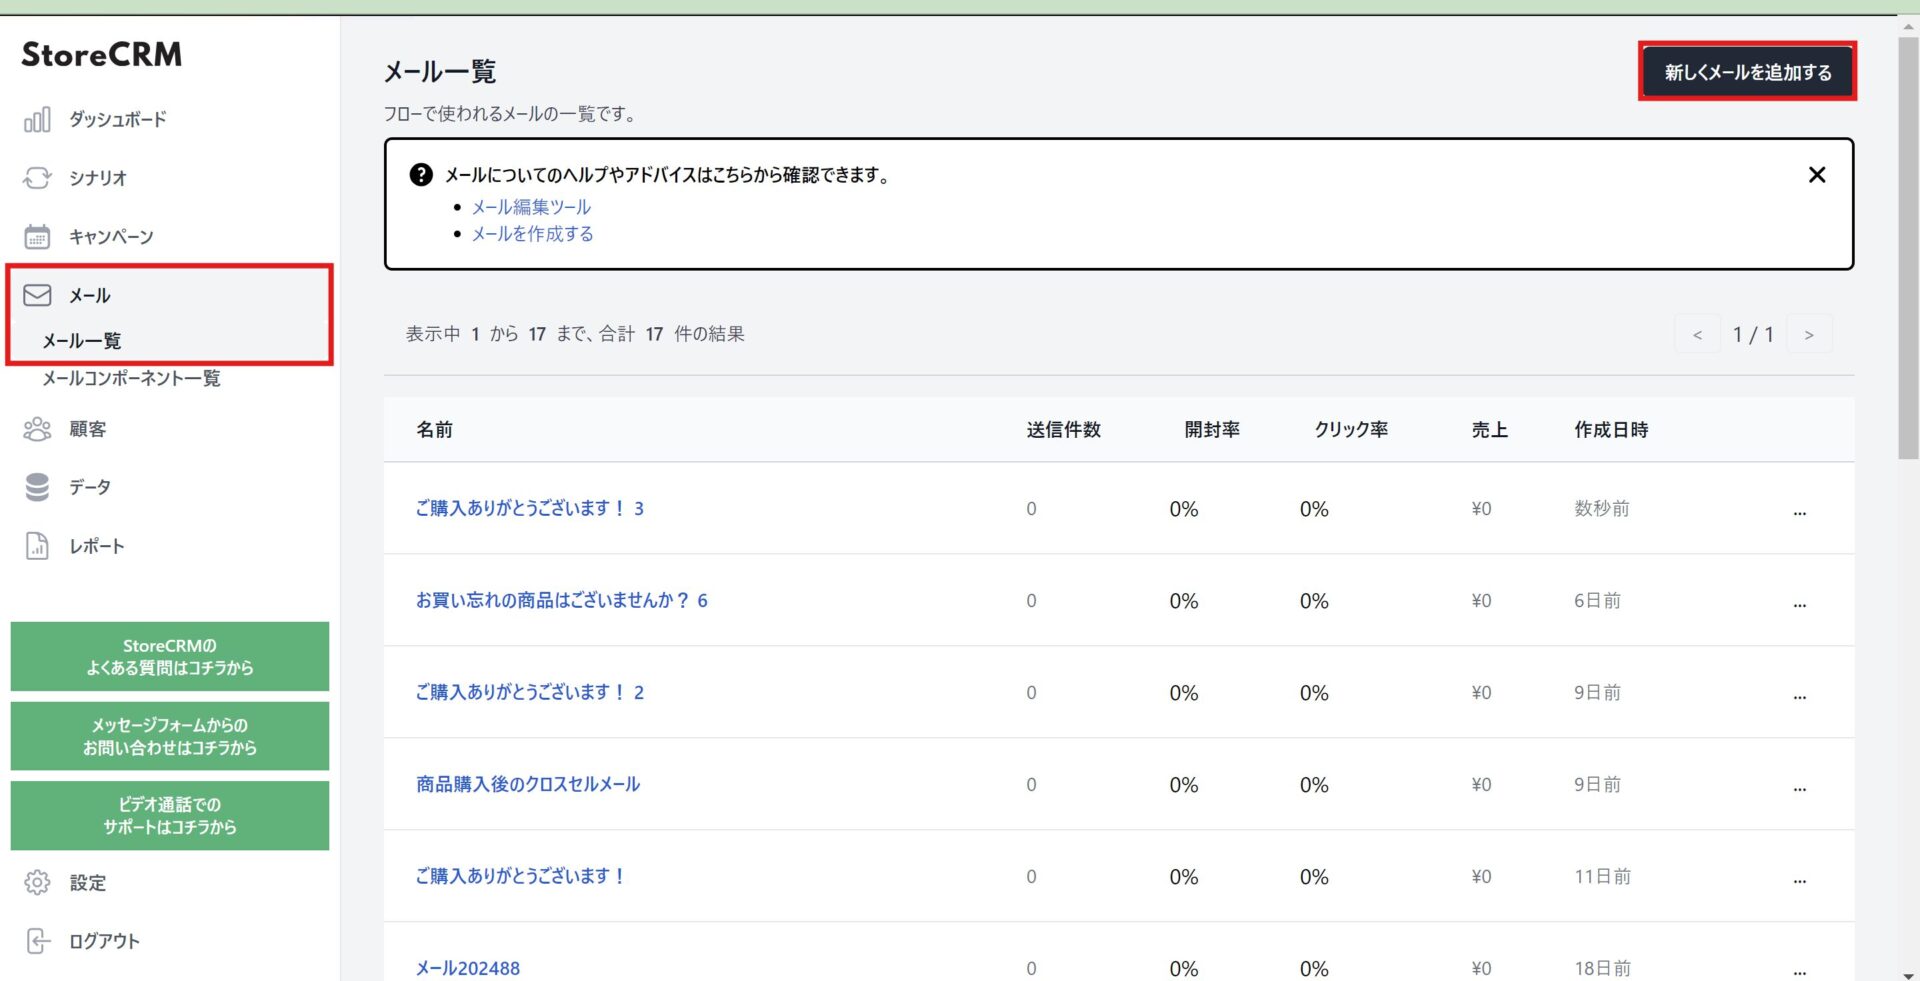
4. Next, create the email itself.
Select [Email] > [Email list] in the left-hand menu to open the email list, then click [Add new email] at the top right.
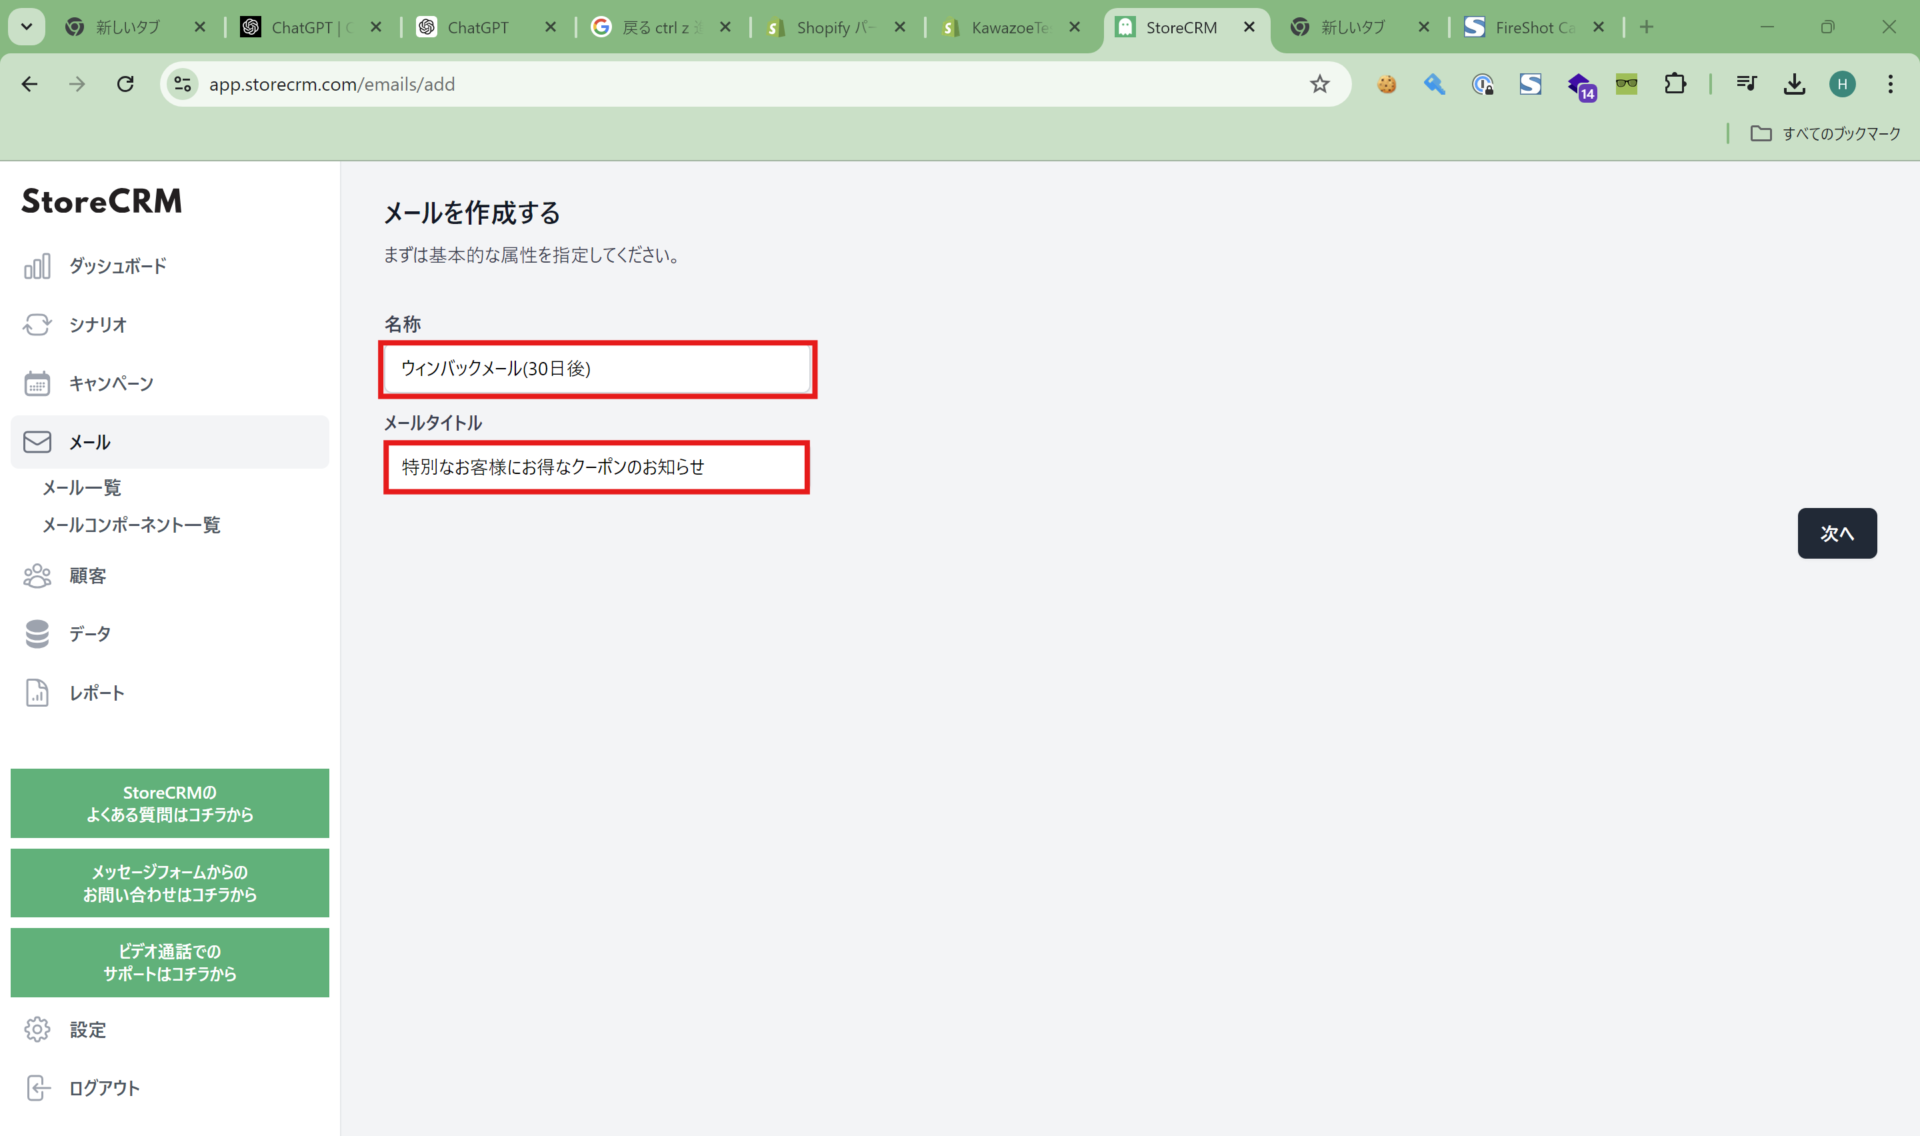
5. On the creation screen, enter an internal name under [Name] and the subject line under [Email title]. When you are done, click [Next].
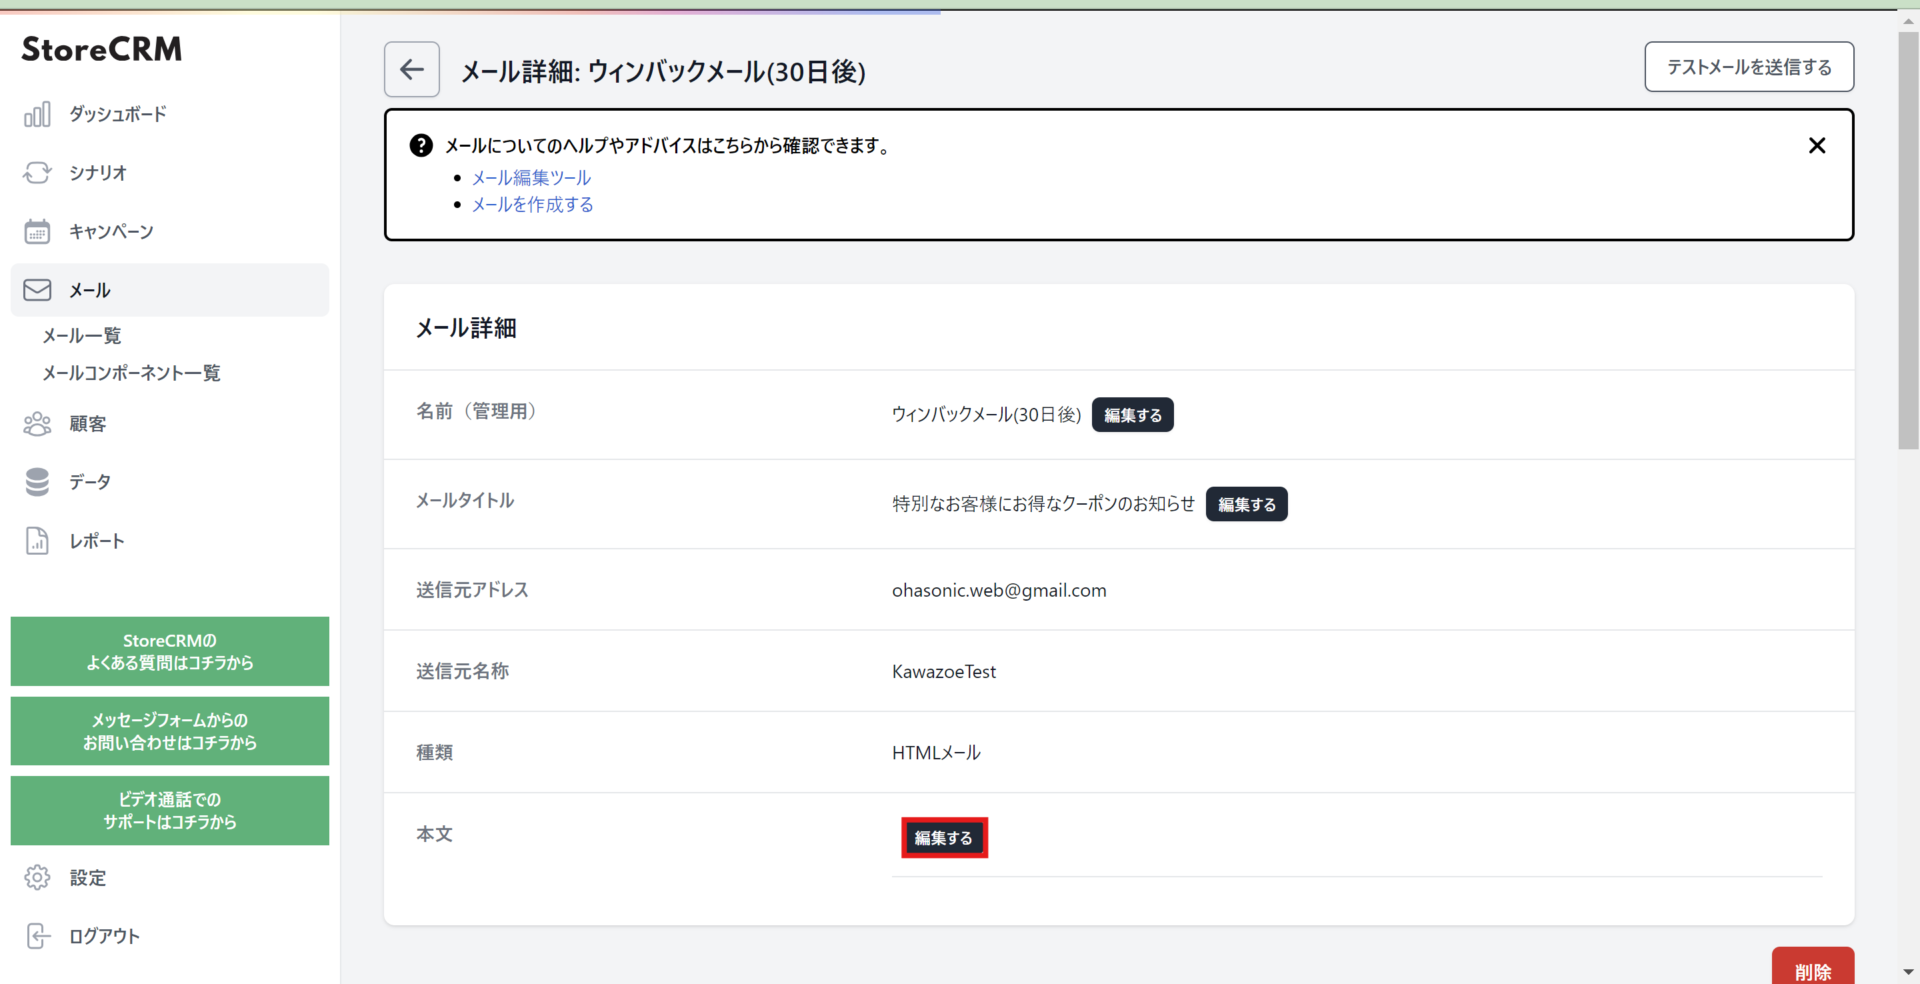

When you are finished, remember to click [Save].

To include products in the email, use the Shopify collection block. Add it wherever it fits your message.
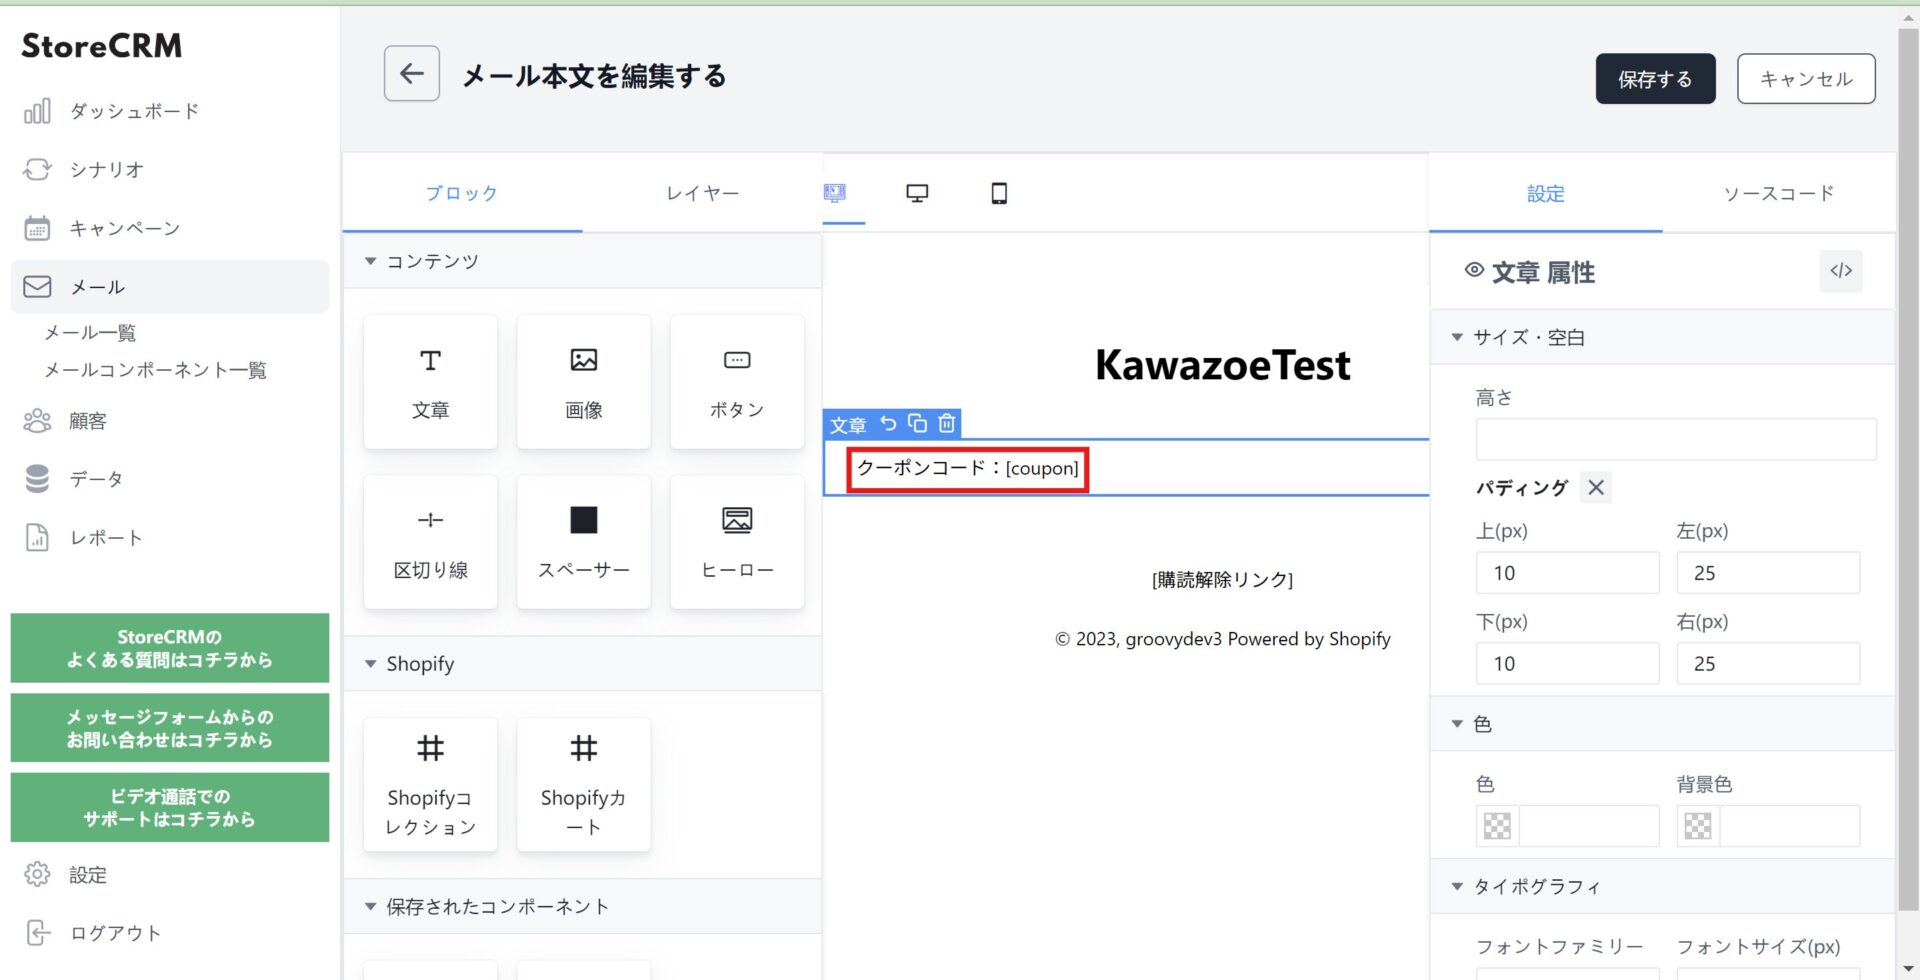
To show the coupon code in the email, write [coupon] where you want it to appear.
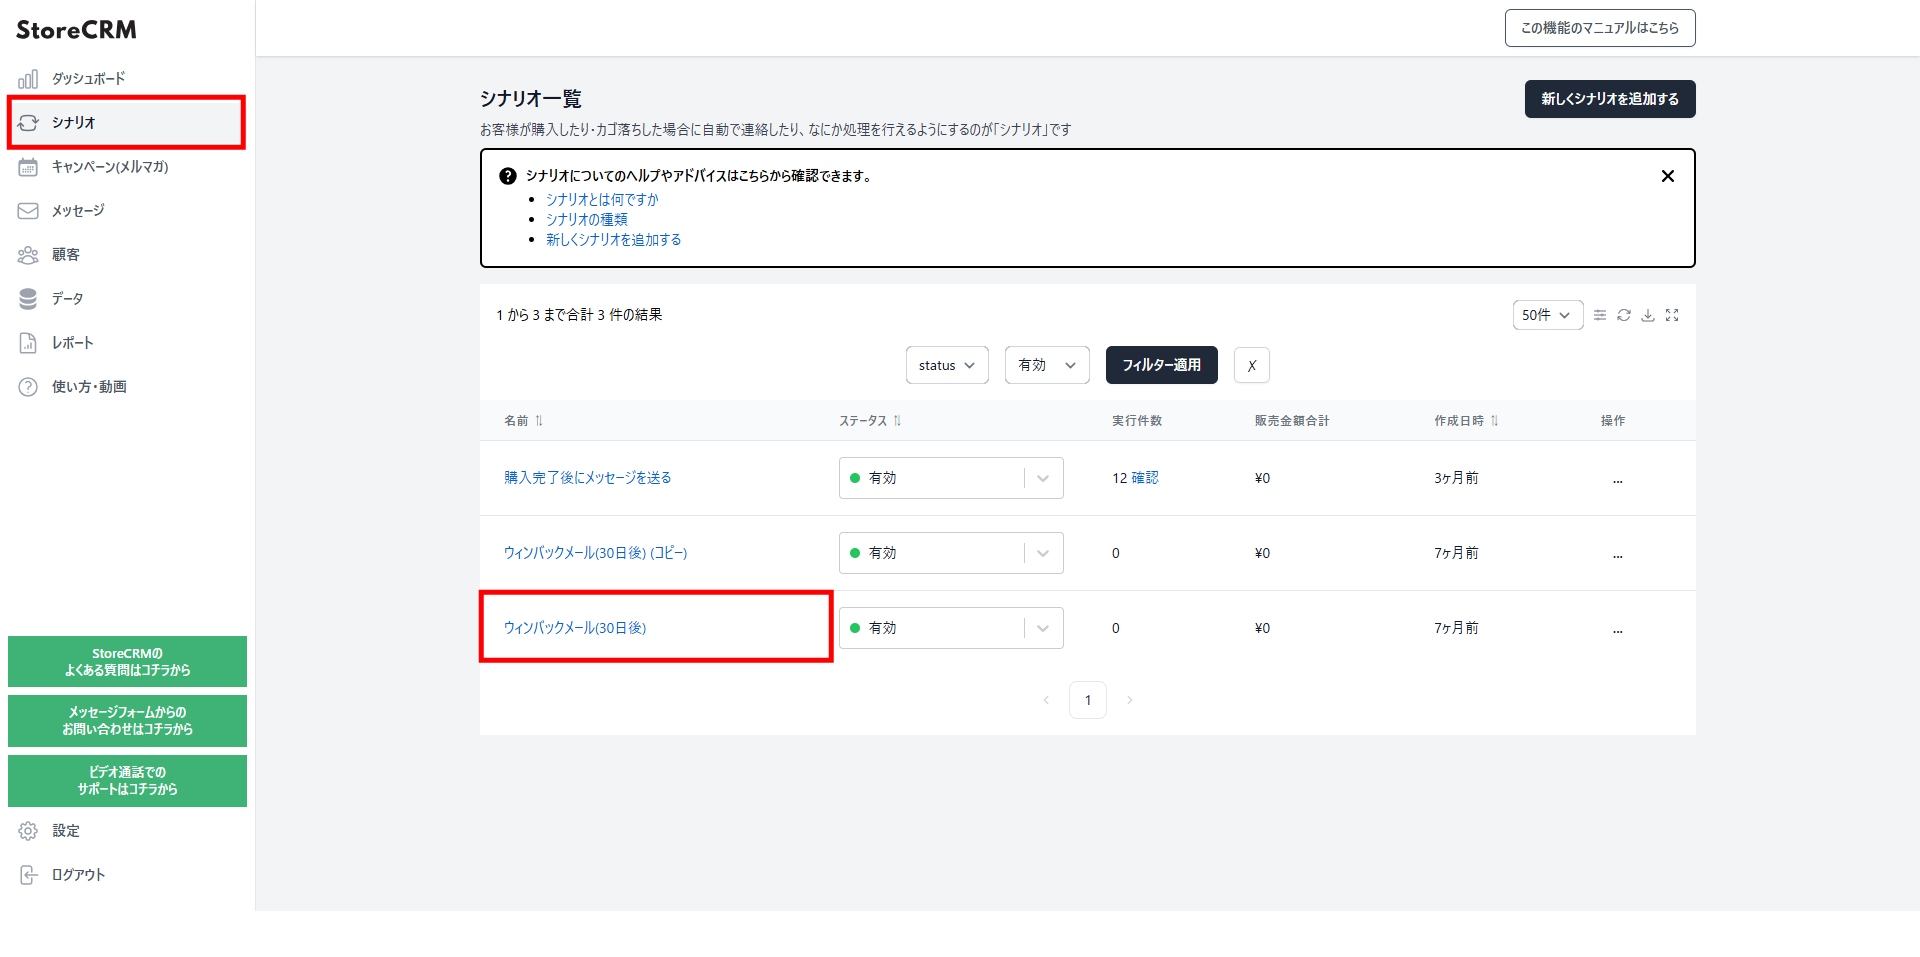
8. With the email written, attach it to the automation. Click [Automations] > [Automation list] > the automation you created.
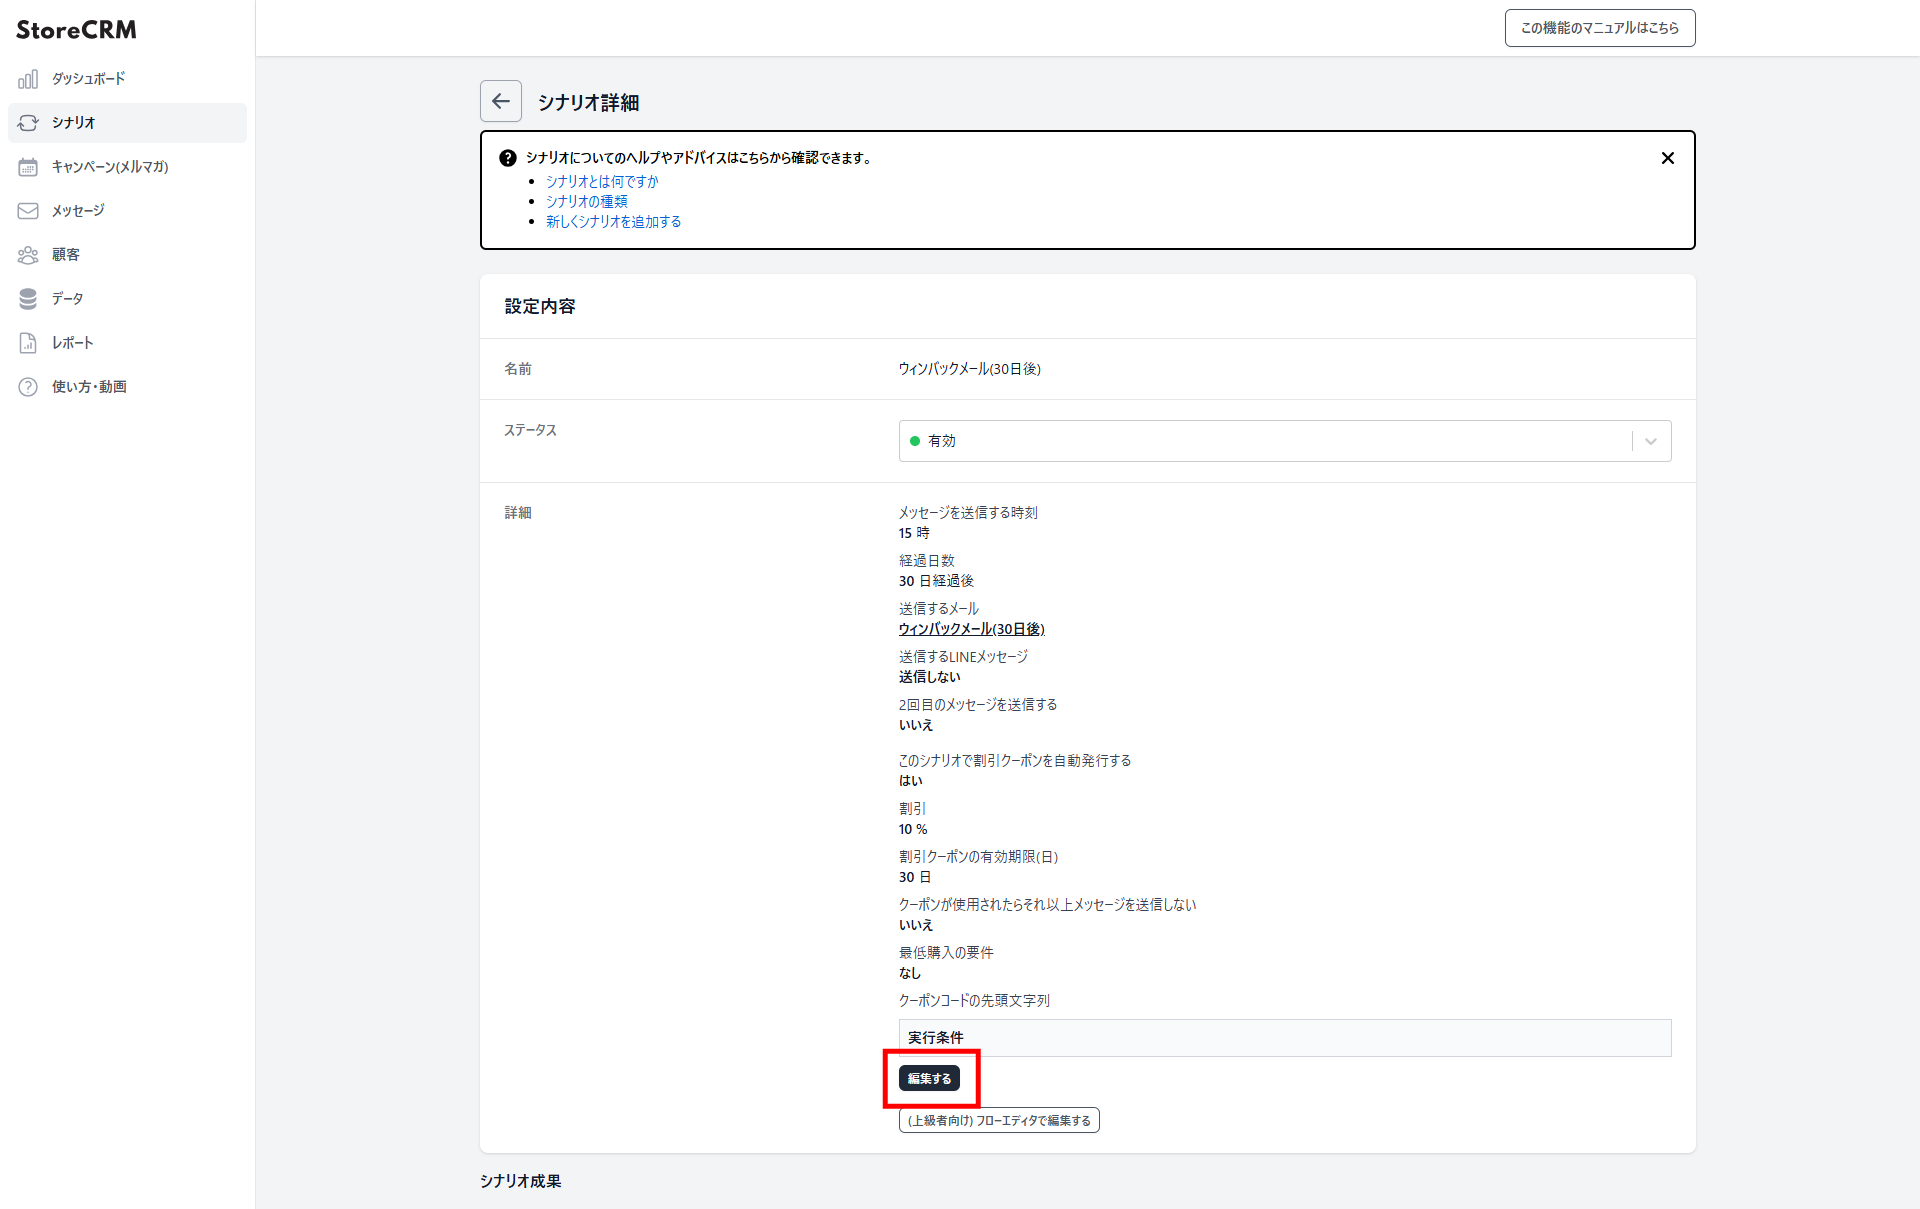
9. On the automation detail page, click [Details] > [Edit].
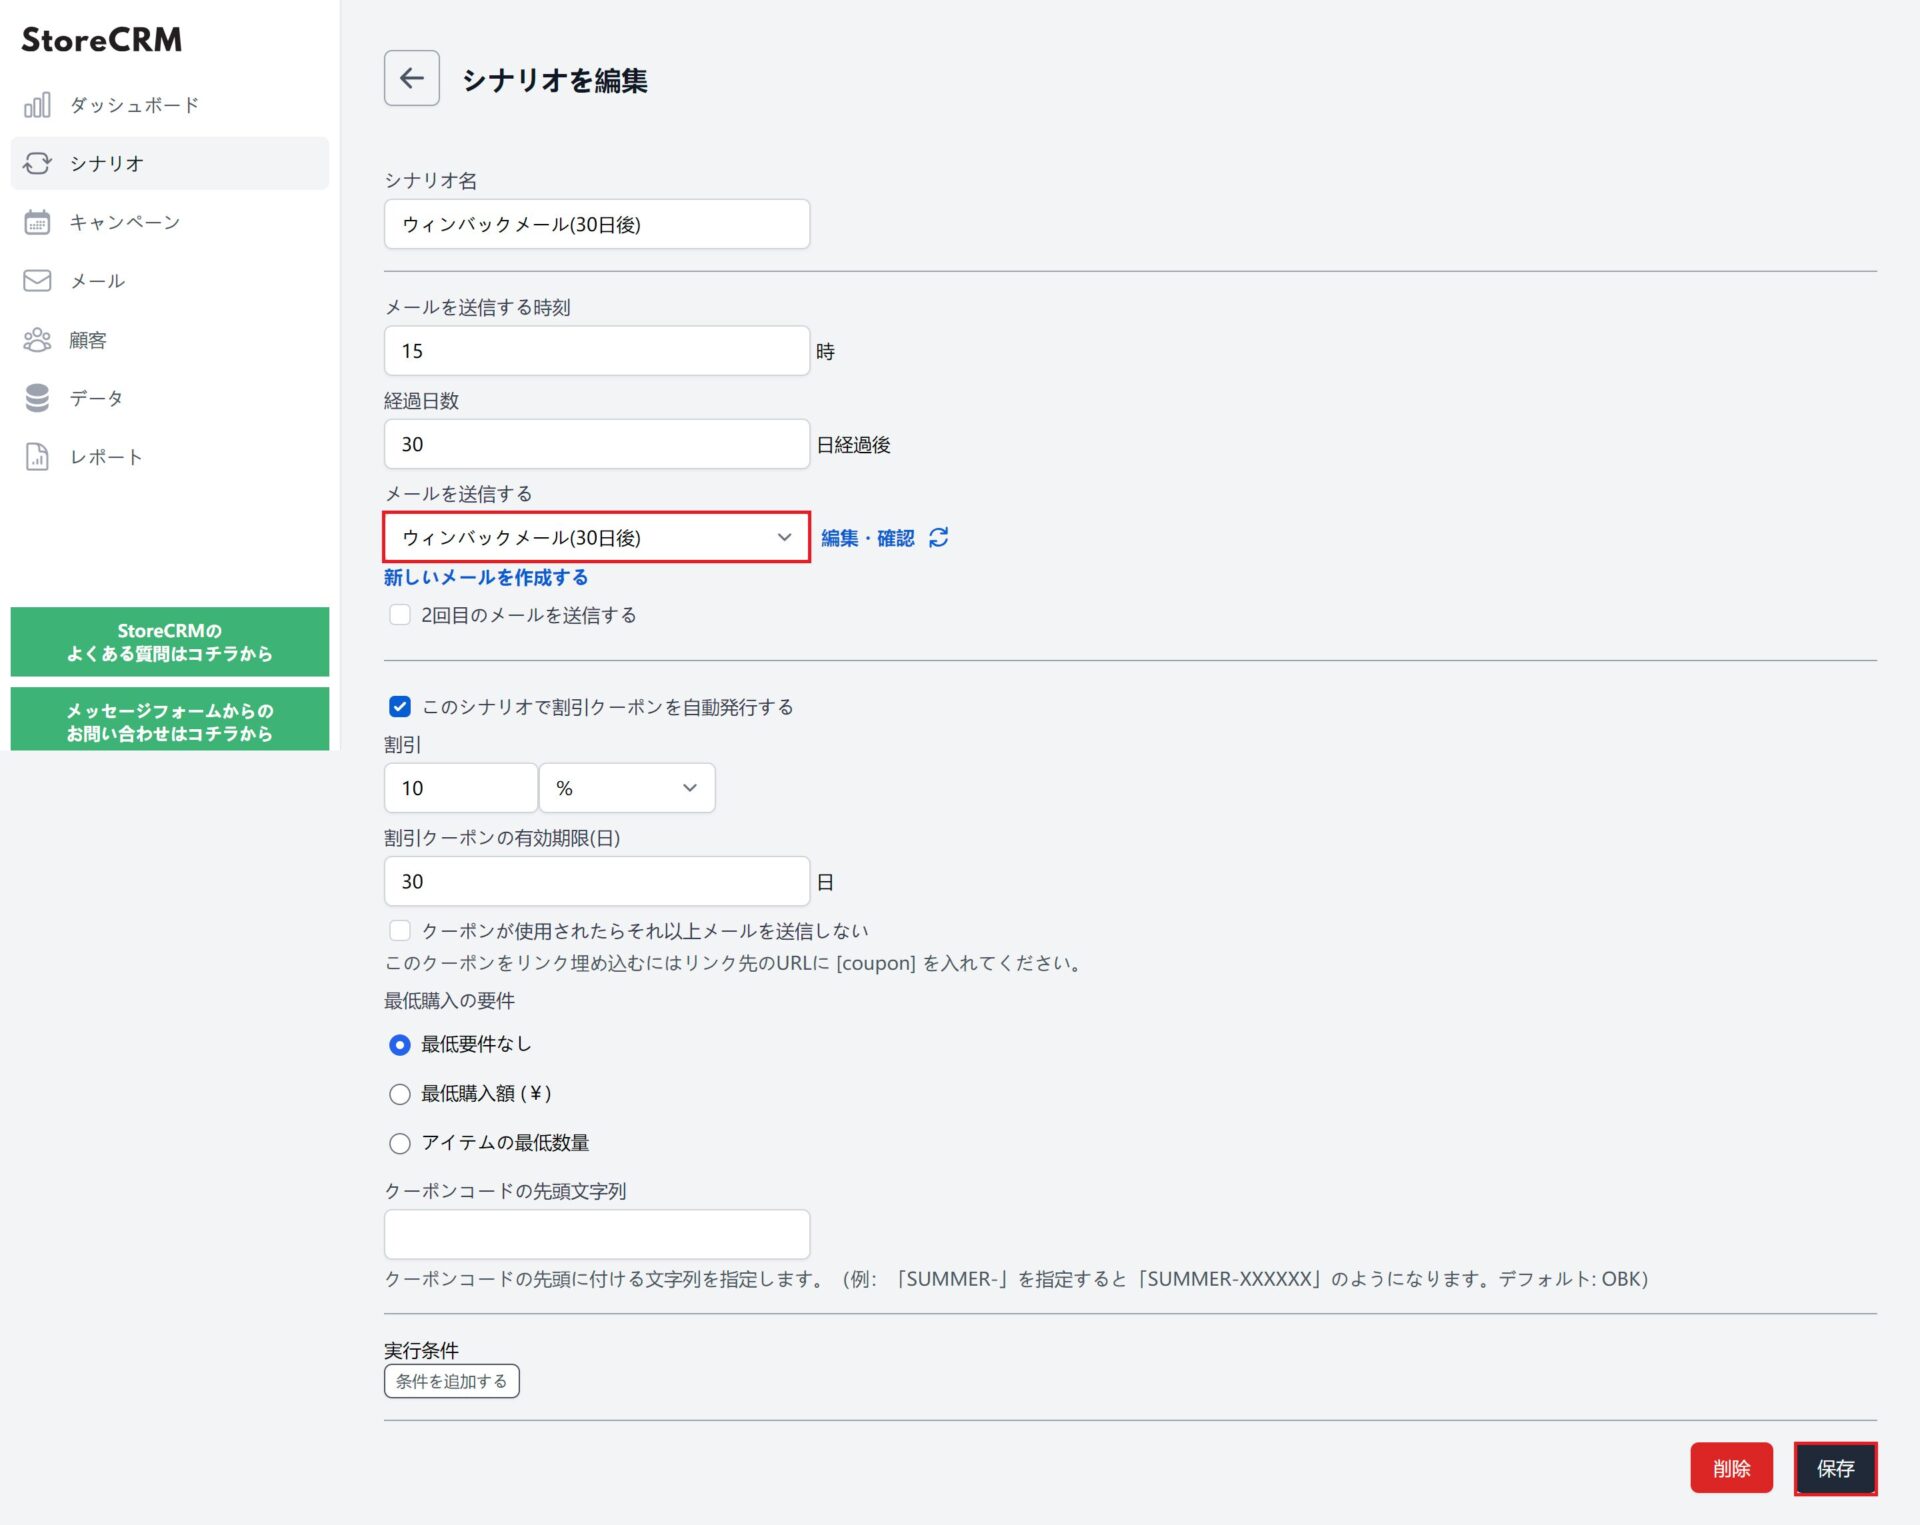
10. Set the email template to the email you just created (it is listed under its internal name). Select it and click [Save].
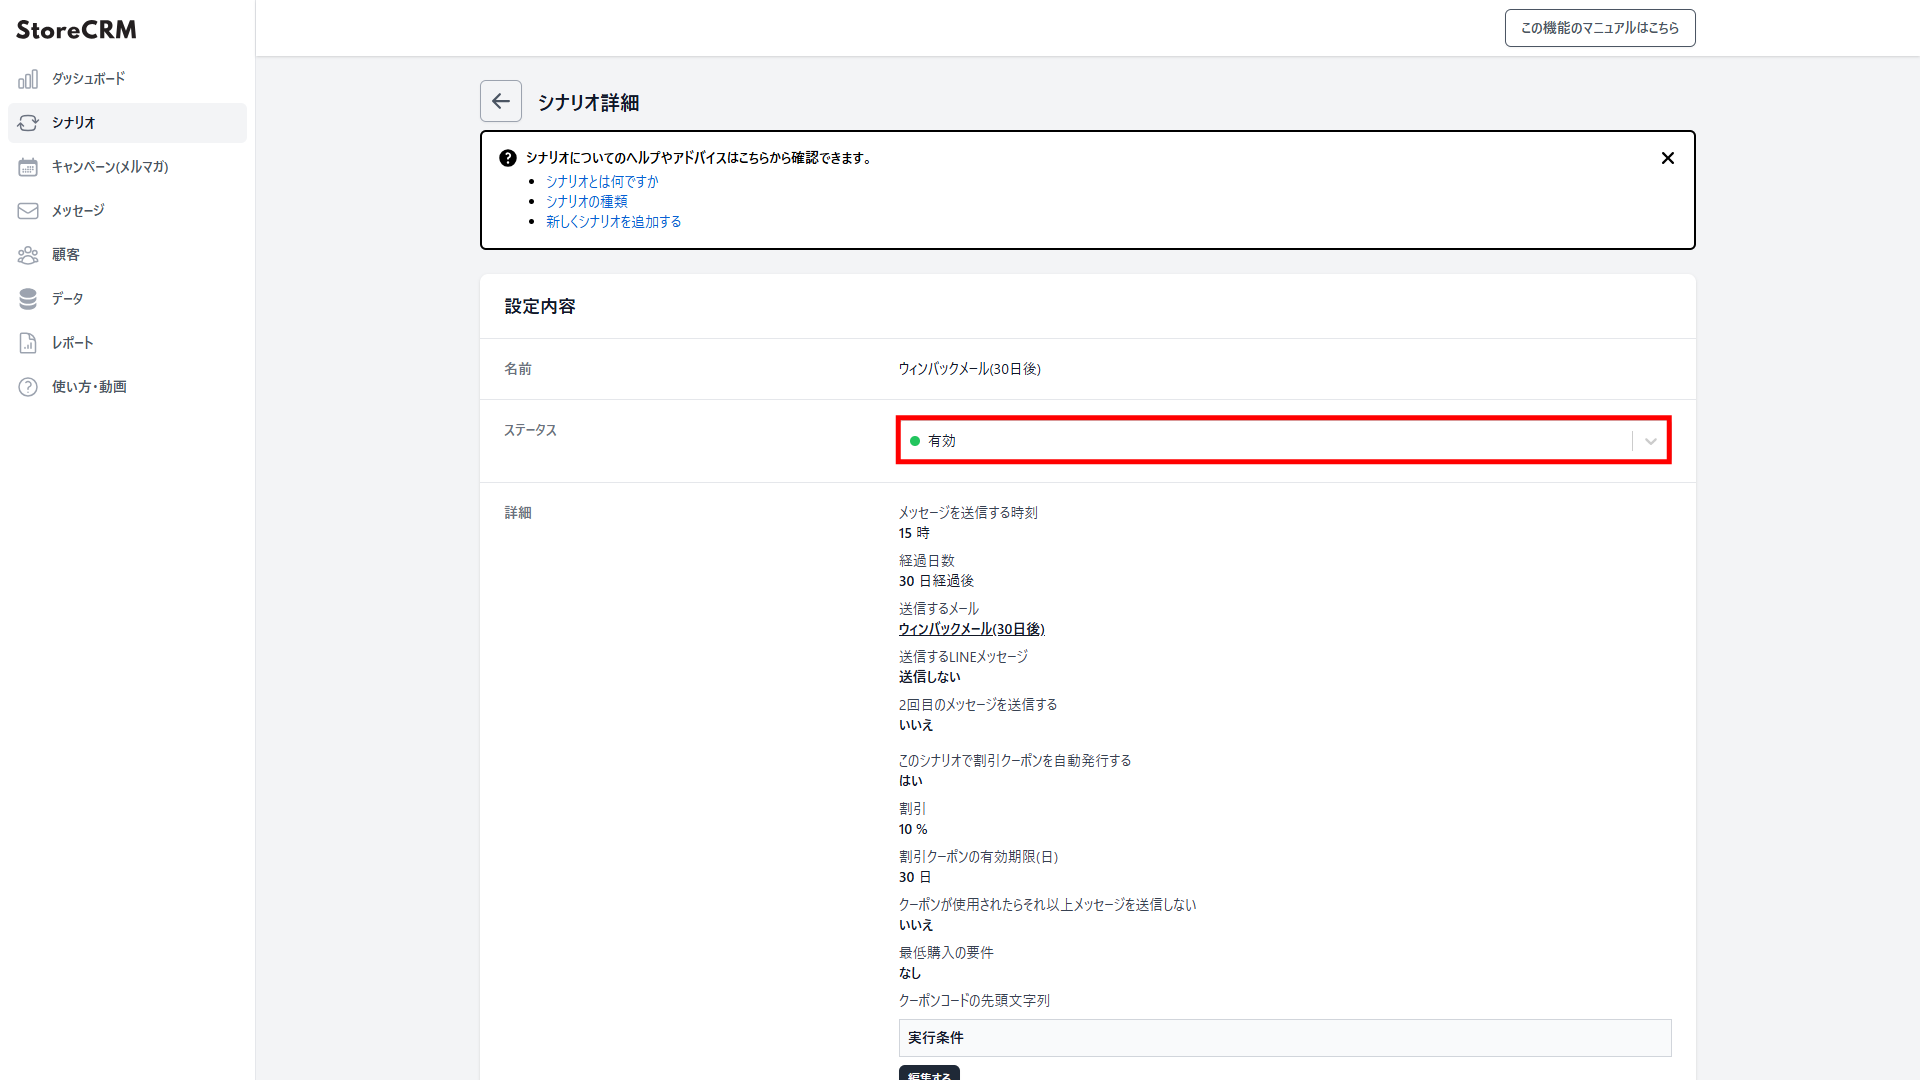
- Click [Save] and the automation detail page appears. Open the [Settings] > [Status] dropdown and set it to [Active], and the emails will go out according to the conditions you set. [Automation results] shows the revenue, open rate and other performance figures for the automation. That completes the automation.
Advanced customisation
About the flow editor
As the previous section shows, a general-purpose automation takes only a few steps to build. Once a store reaches a certain size, though, we often hear that merchants want something more complex — sending different emails depending on a customer's attributes or status.
For mid-sized and larger stores, and for anyone comfortable with CRM, StoreCRM offers a flow editor for building more advanced automations.
In this section we take the [win-back email (30 days)] automation from above and customise it in the flow editor, covering how the editor works and what to watch out for.
The customisation, and duplicating the automation first
Let us define what we want to build. In this example:
- Send the special coupon email only to customers who have ordered five or more times.
Before customising anything, duplicate the automation. When you already have a base automation like this one, duplicating it is the smoothest way to work.
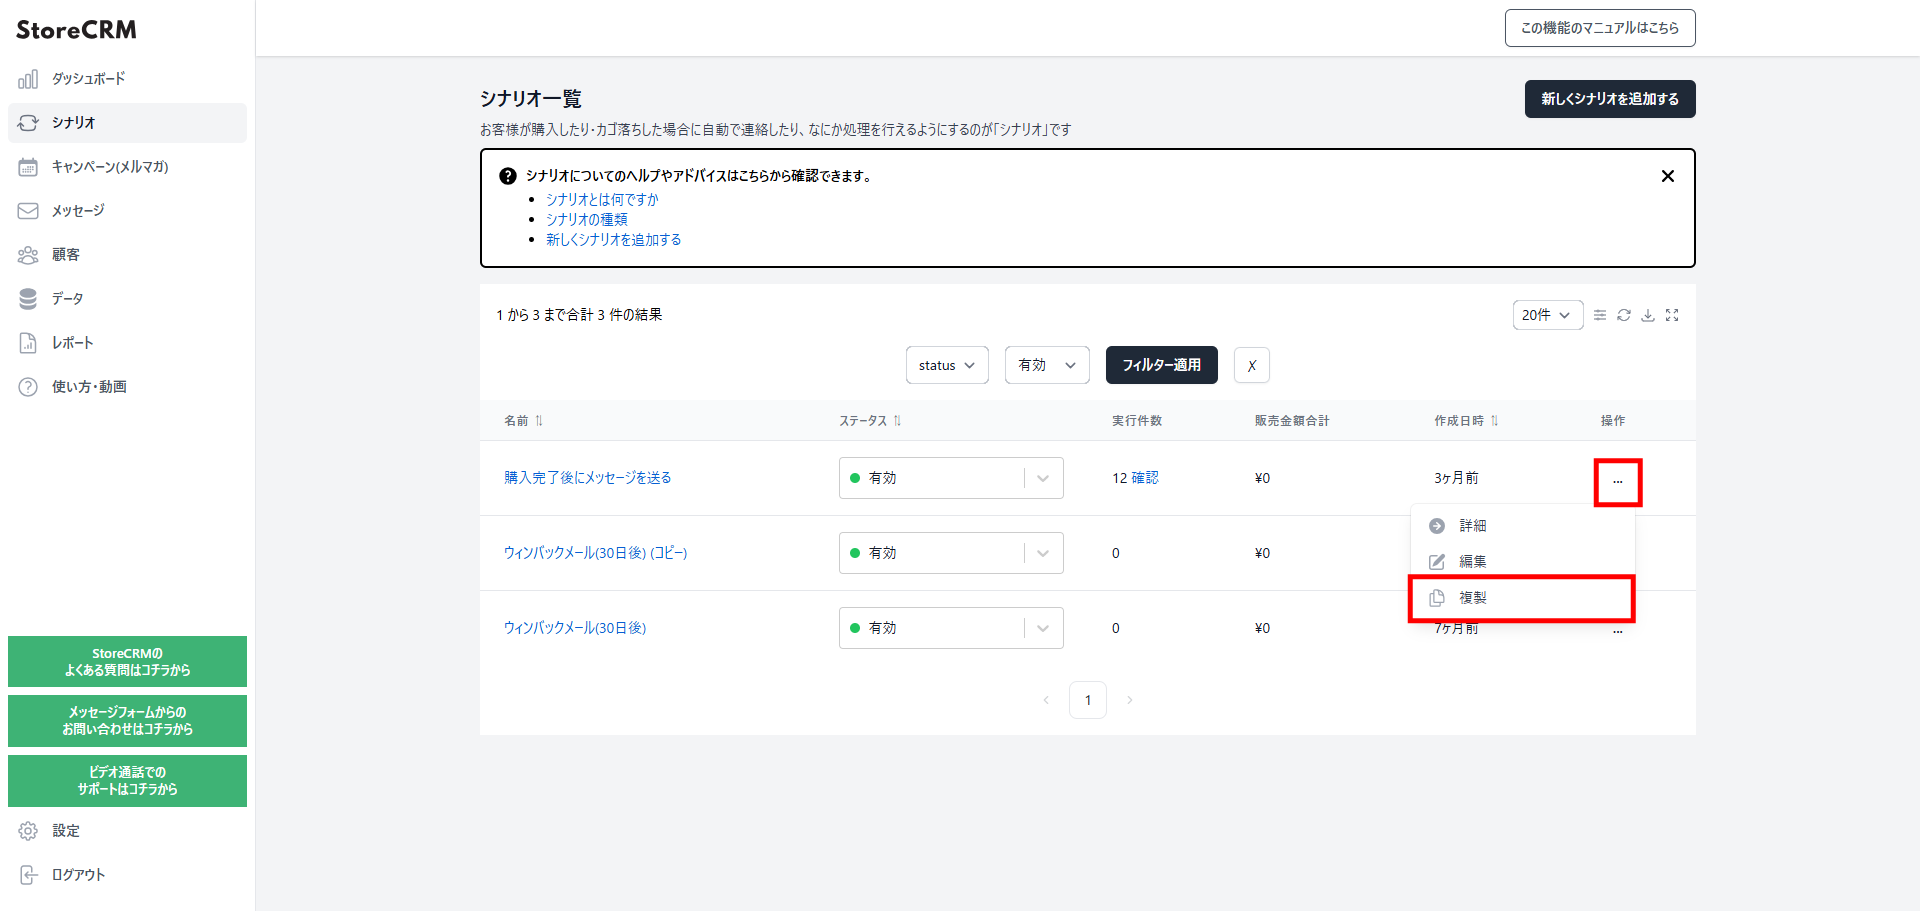
- Click [Automations] to open the list. Click […] to the right of the automation you built earlier and choose [Duplicate] from the menu.
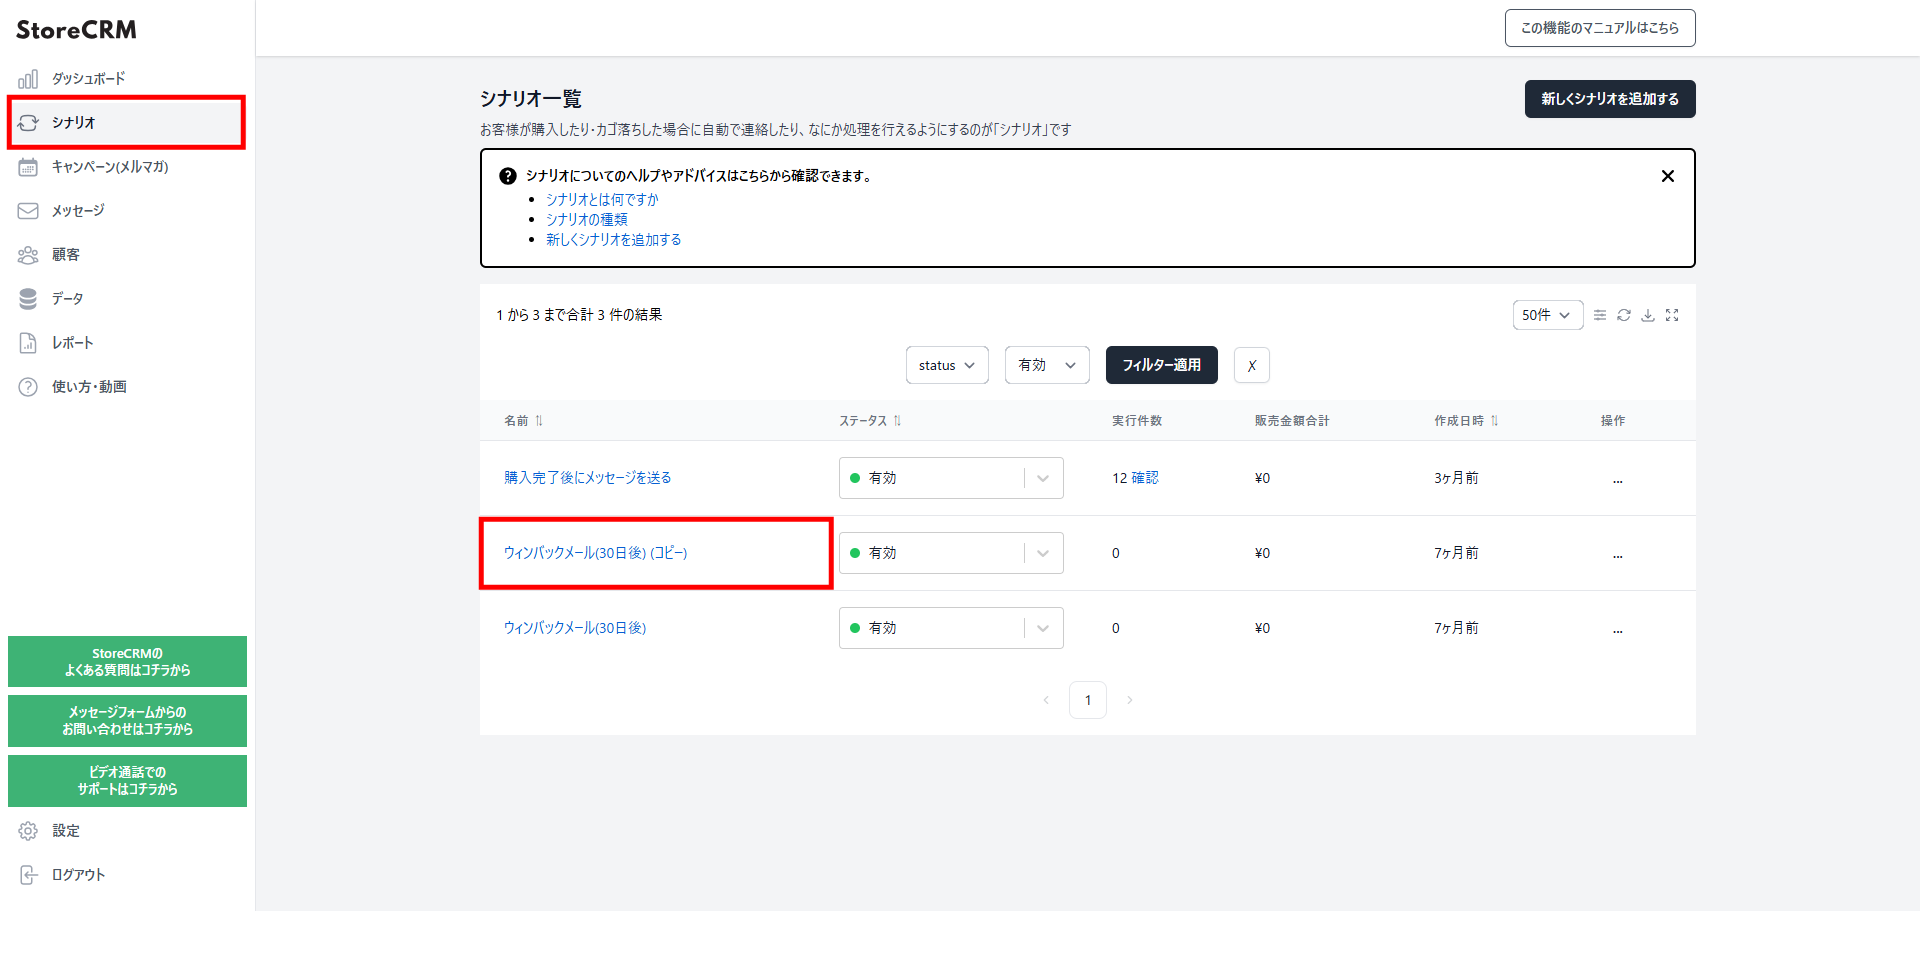
2. Click [OK] in the popup, and you should see a new automation with "(copy)" added to the name. That is the one we will customise. You can rename an automation from its edit screen.
Customising the automation
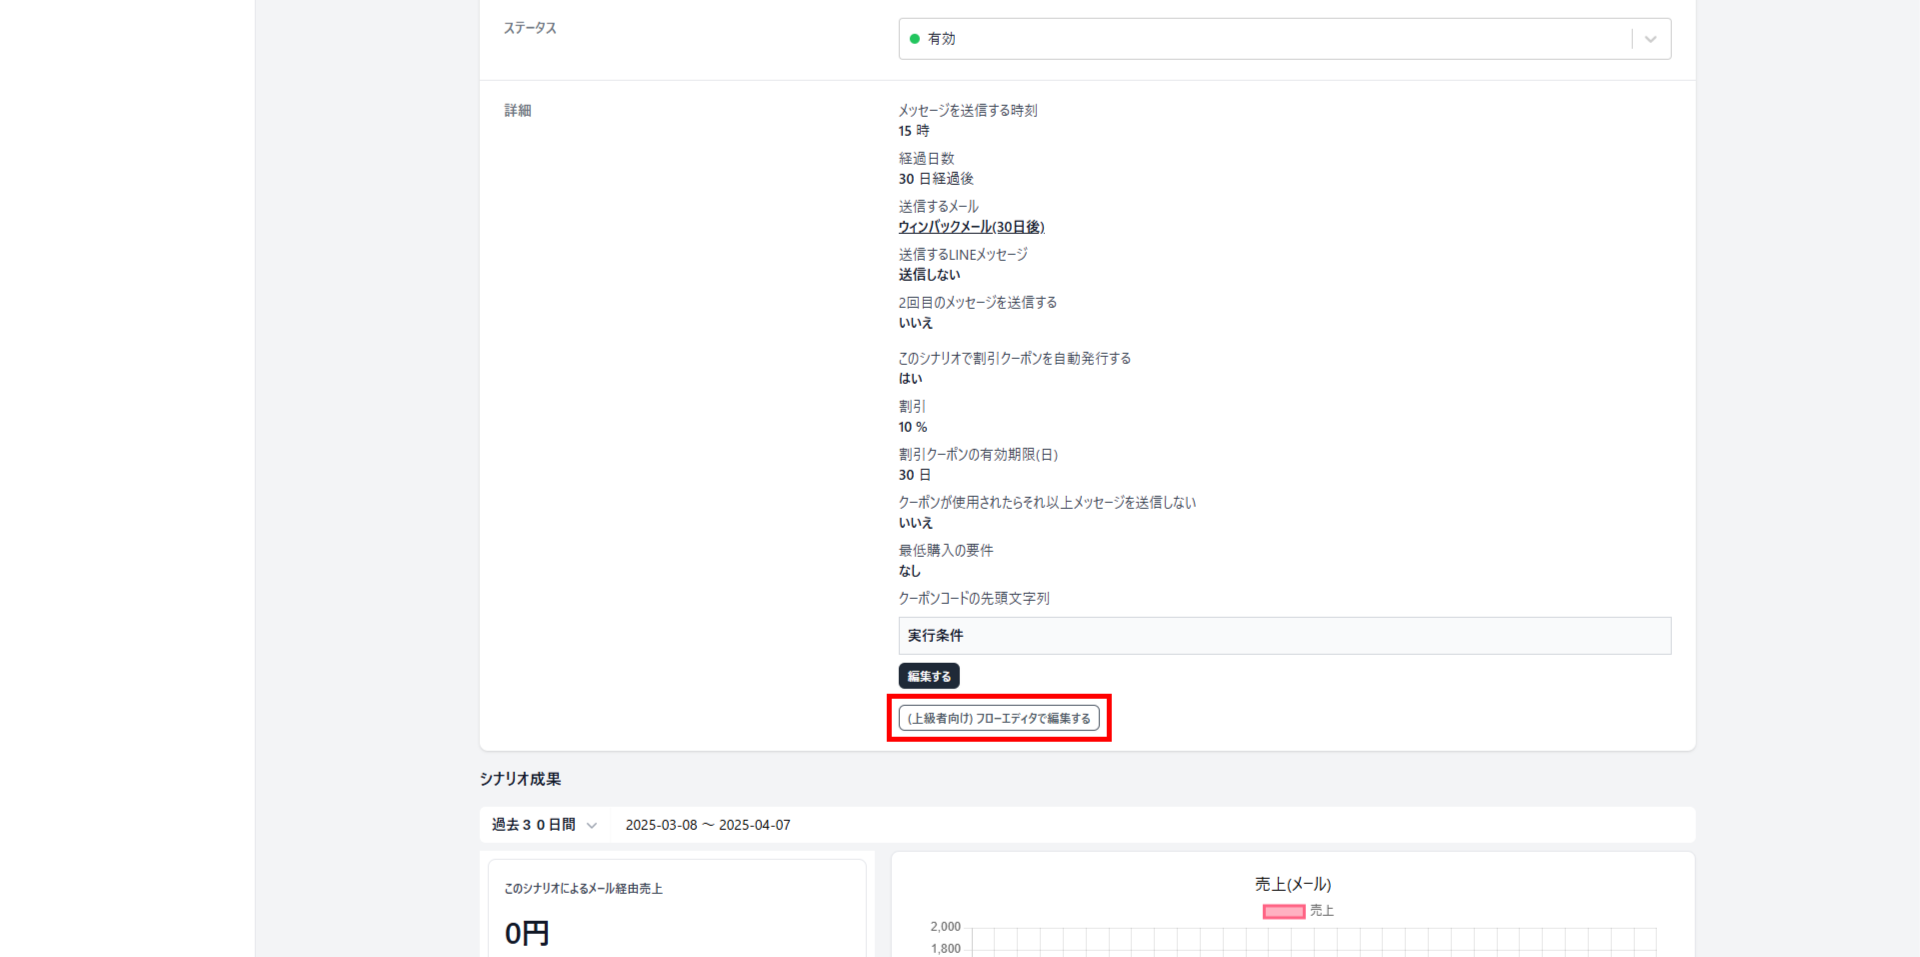
1. Open the detail page of the automation you want to customise. Click [Details] > [(Advanced) Edit in the flow editor]. Read the warning that appears, and click [OK] if you are happy to proceed.
Once you save in the flow editor, you cannot go back to the simple settings mode. If you want to experiment with an automation that is already live, always duplicate it and customise the copy.
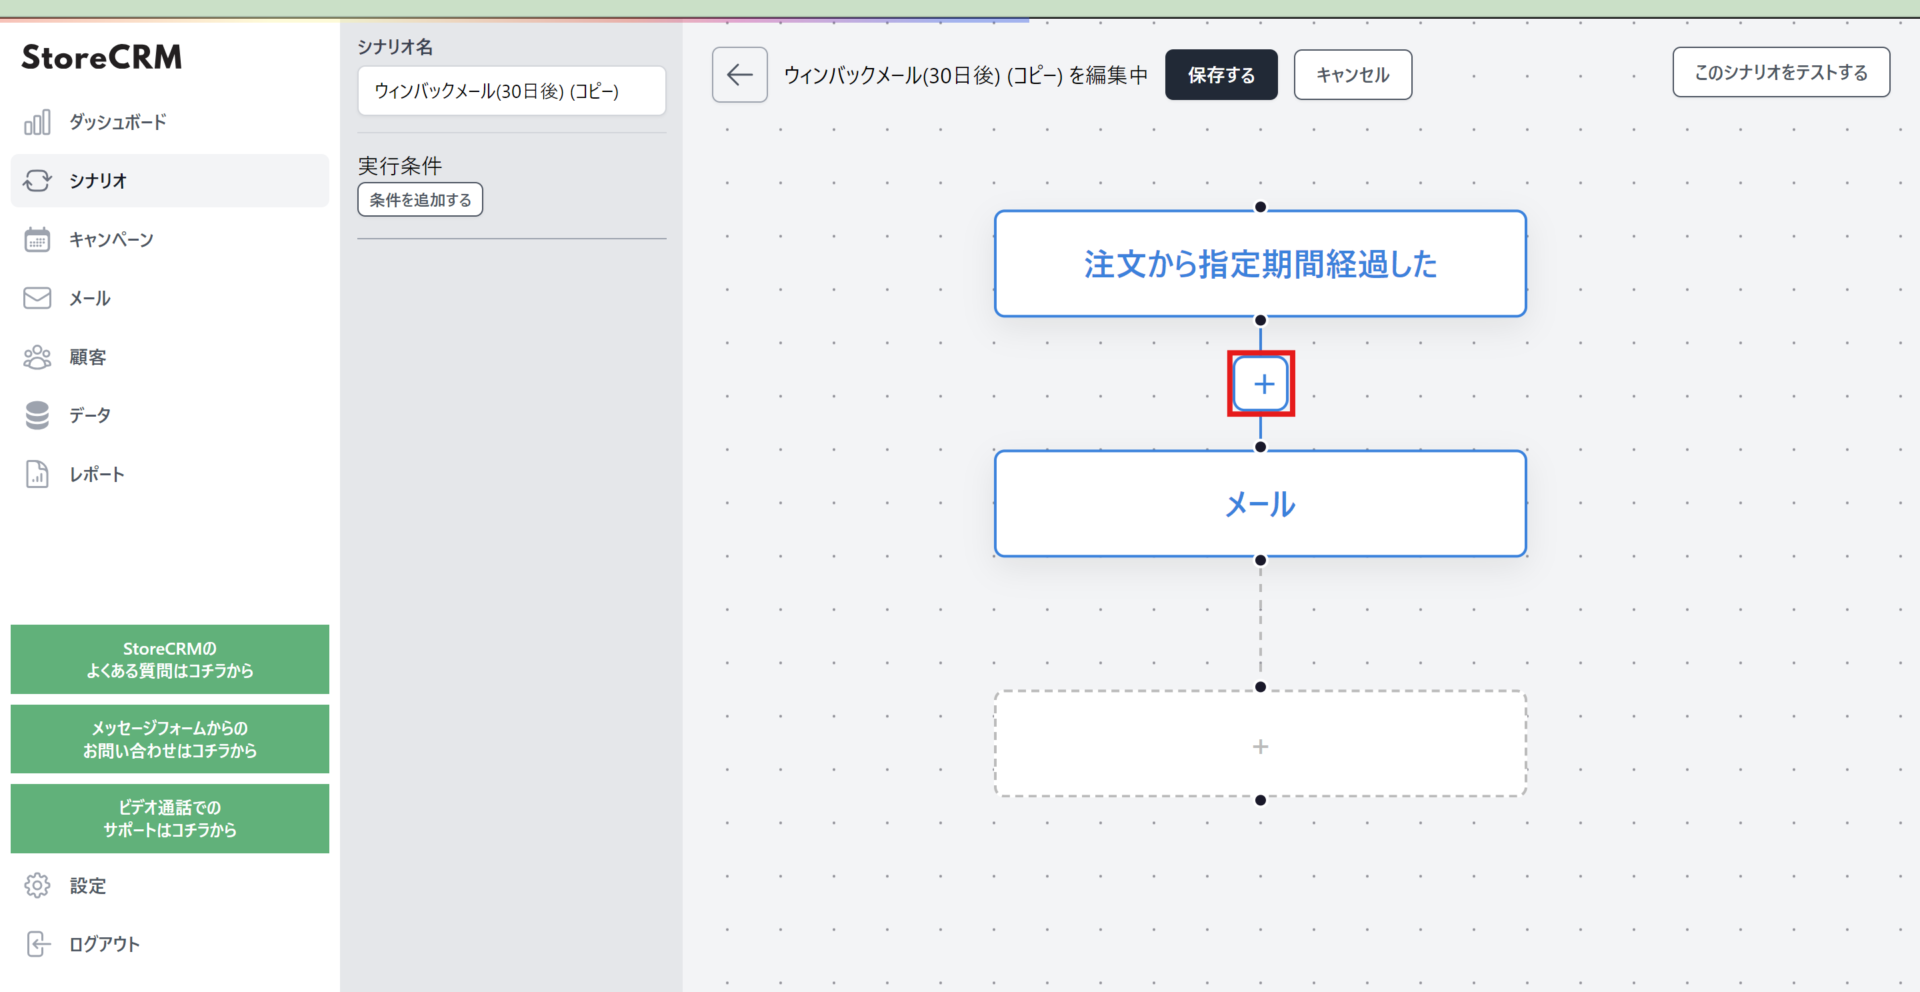
2. The flow editor opens. We want to narrow down who receives the email, so click the + between [Wait] and [Email].
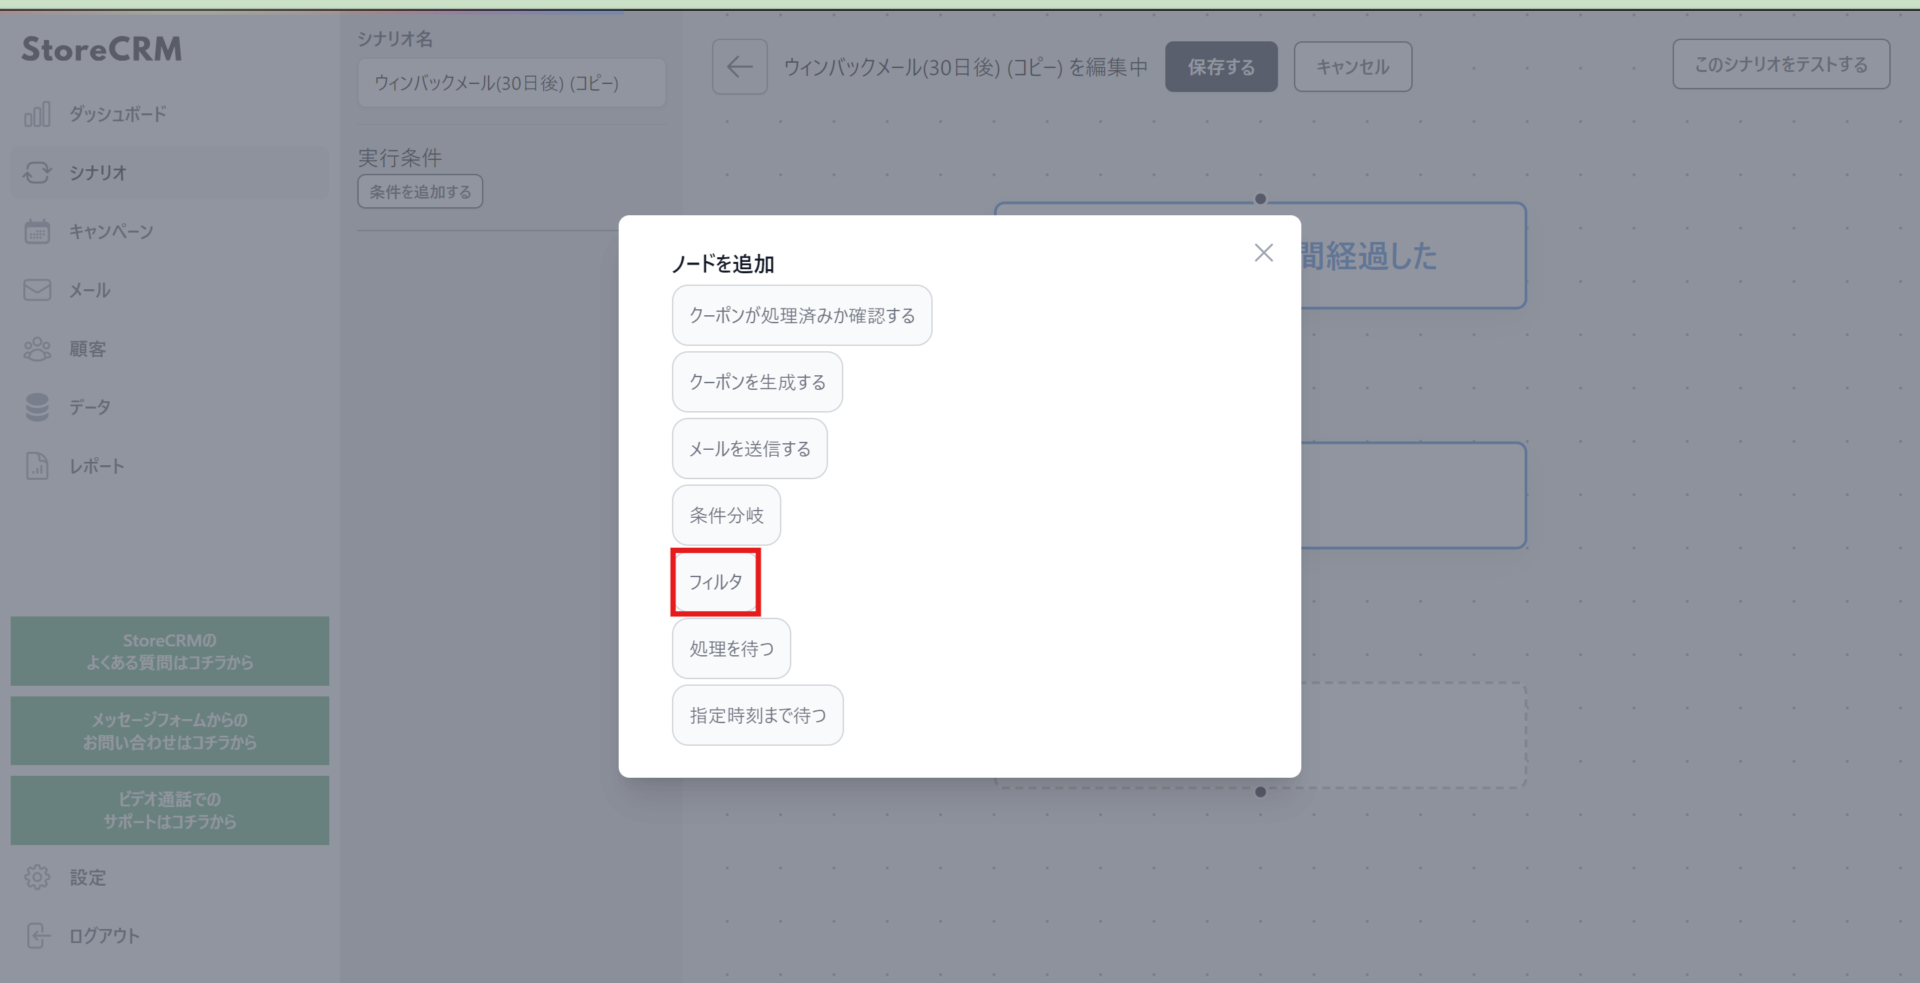
3. In the node picker, click [Filter].
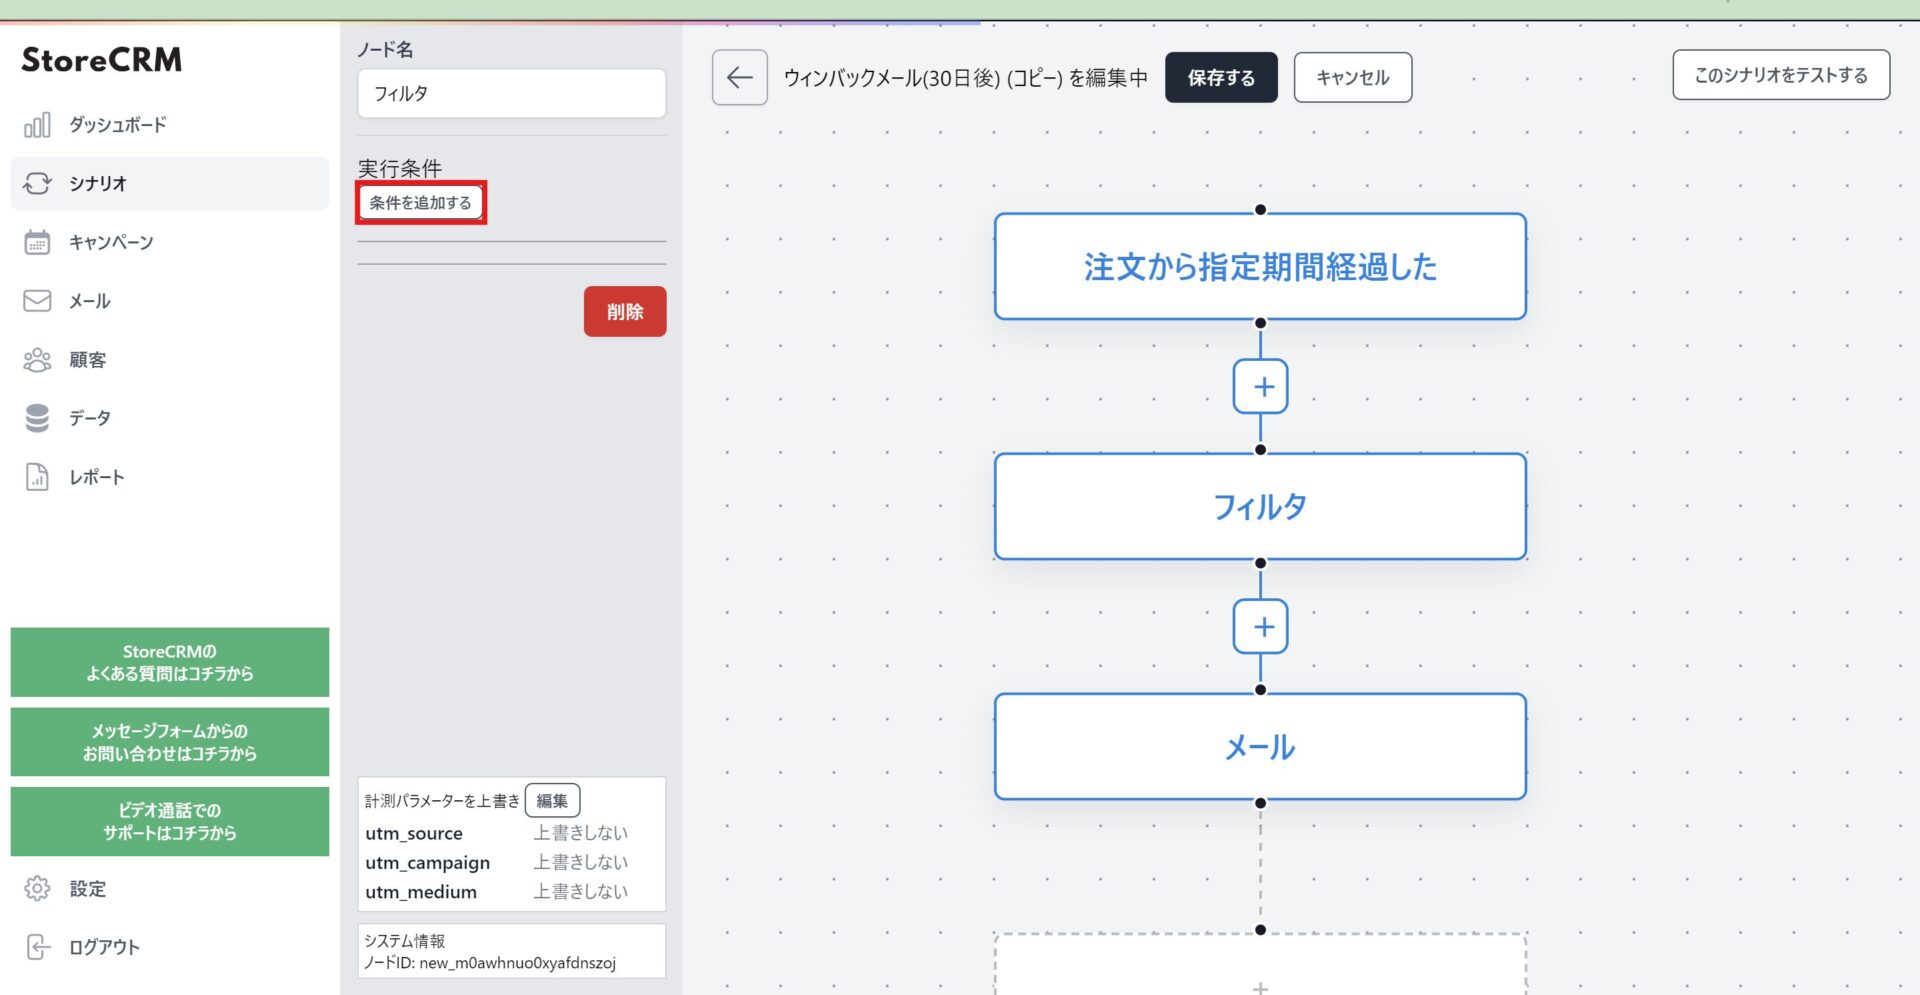
4. The filter node is created. Click the filter node, then click [Add condition].
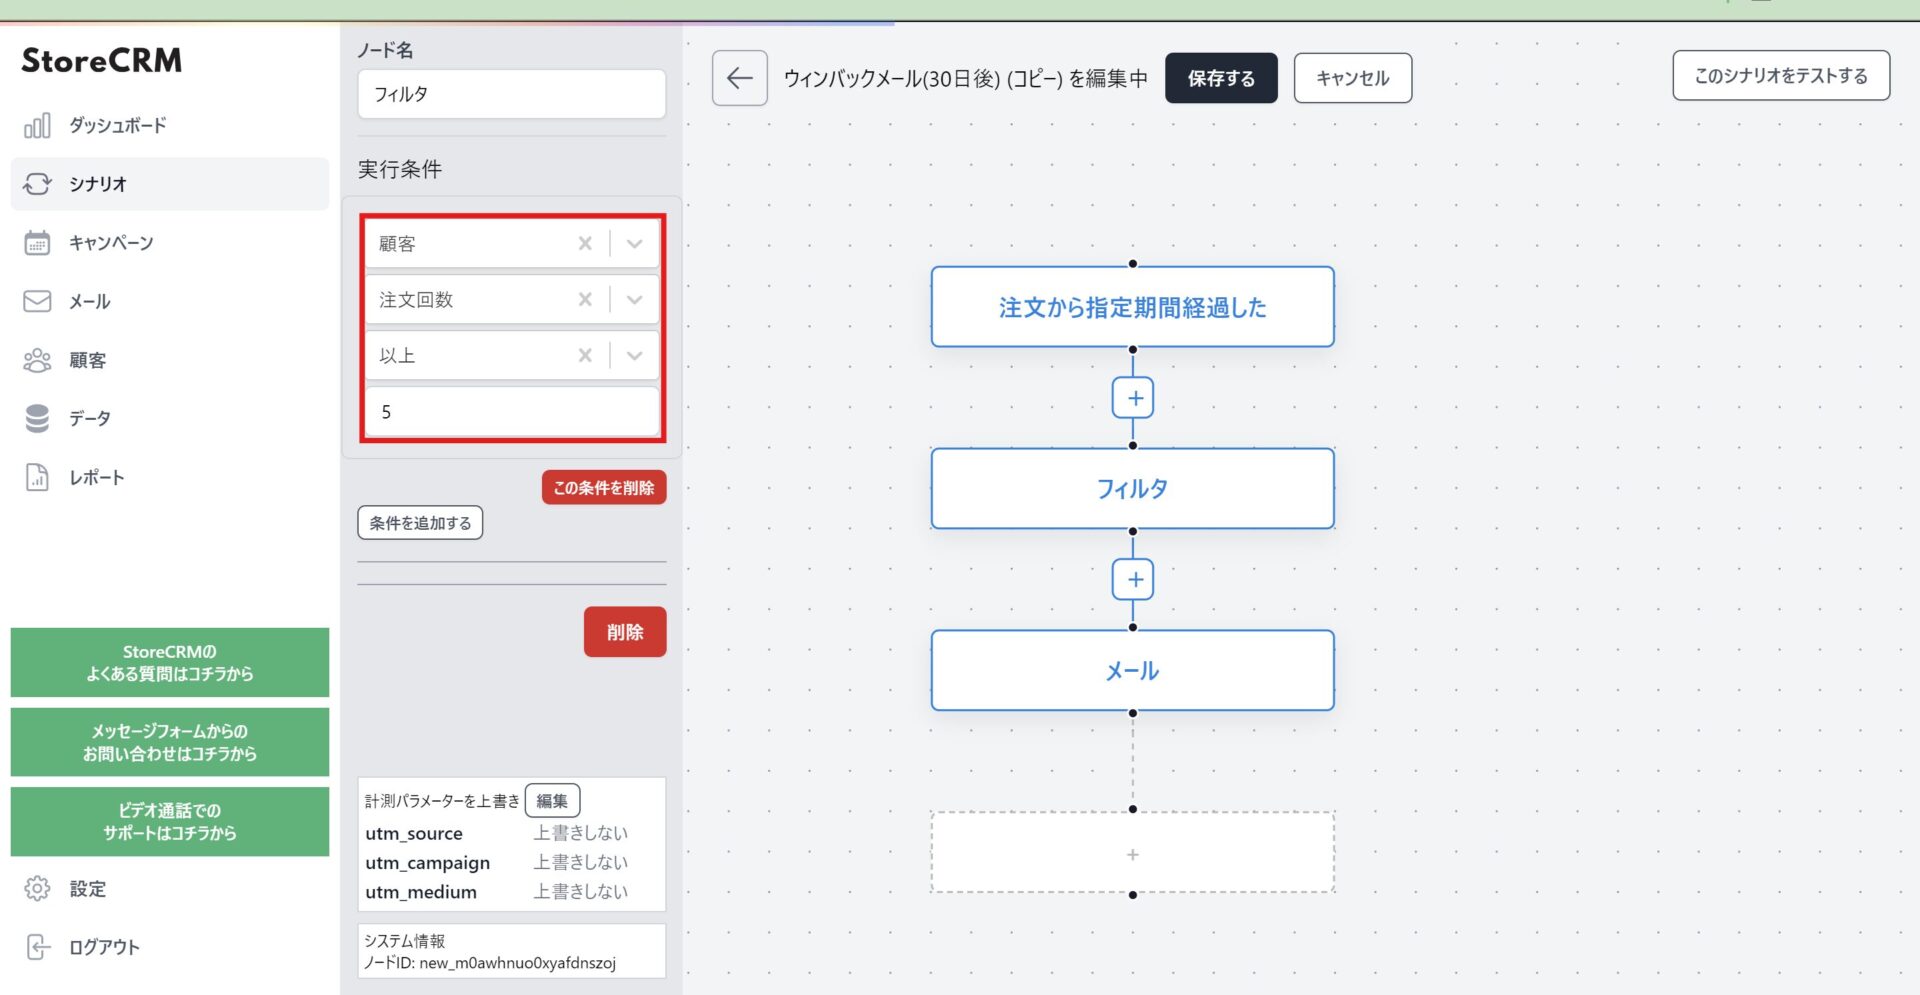
5. In the condition select boxes, choose [Customer] > [Order count] > [at least] and enter [5].
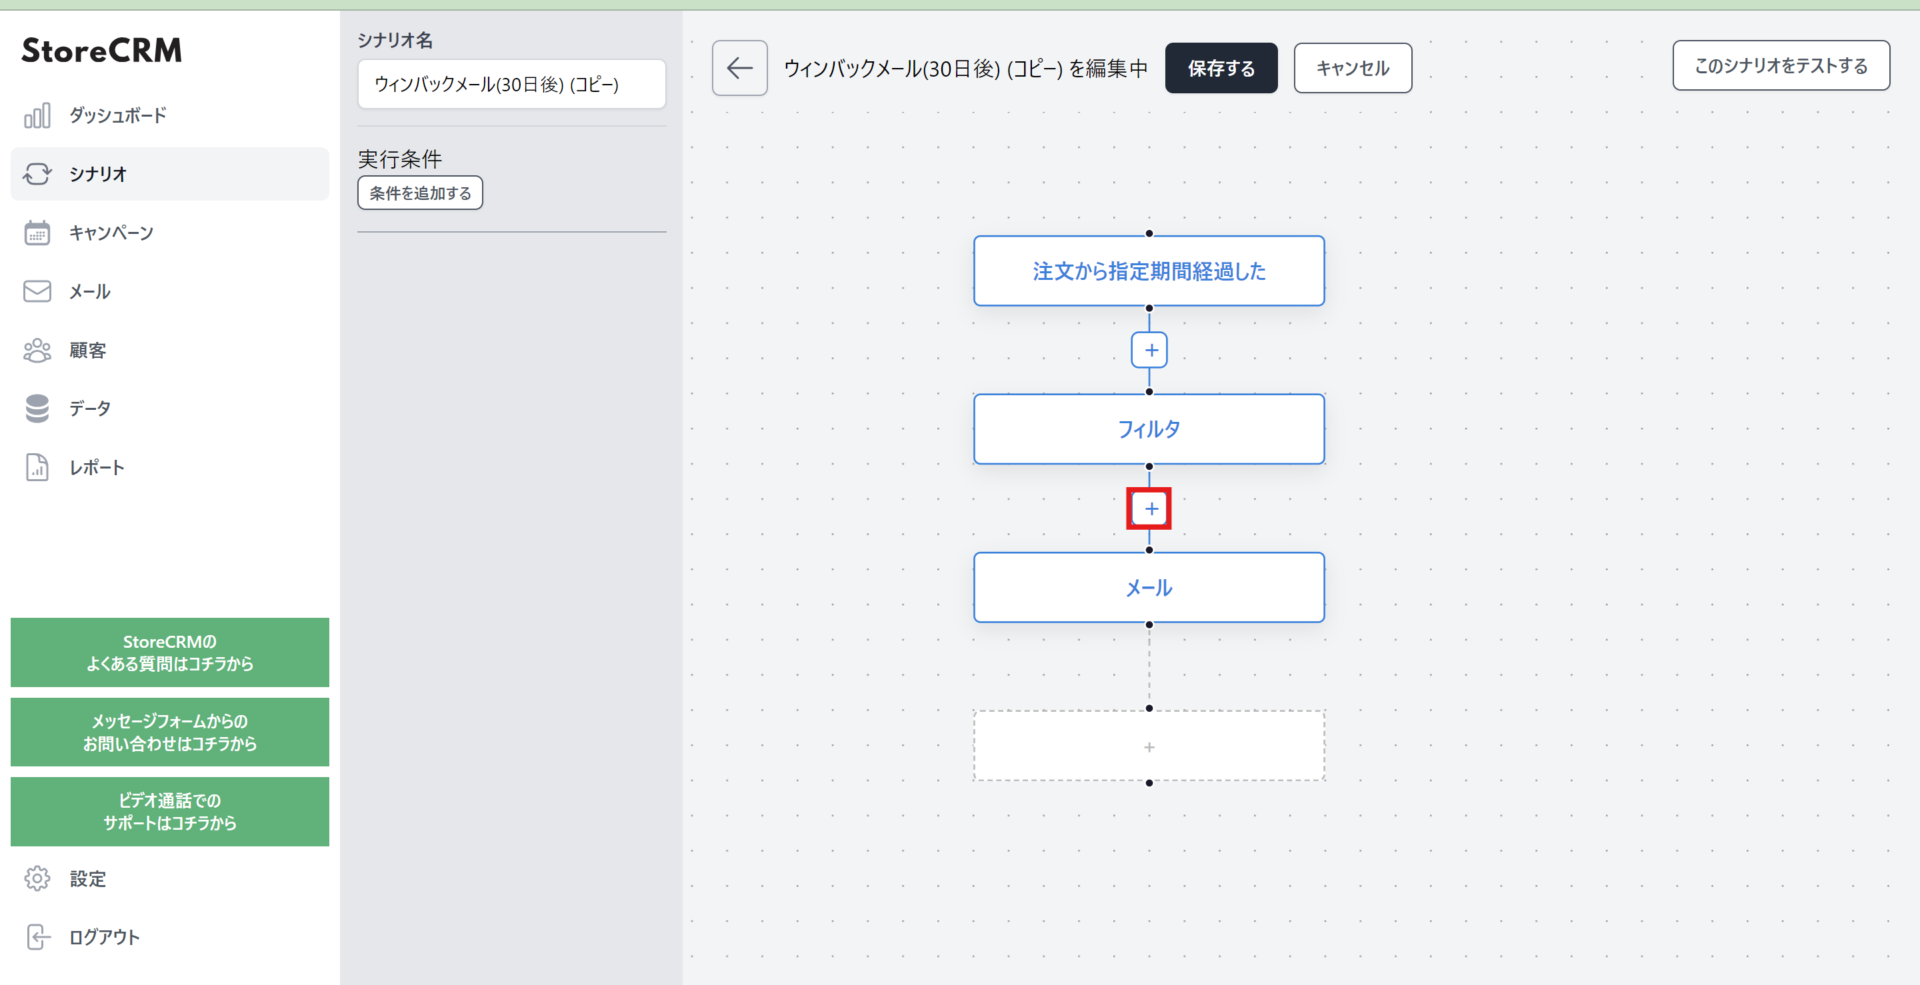
6. We want to create a special coupon for customers who have bought five or more times, so click the + between [Filter] and [Email].
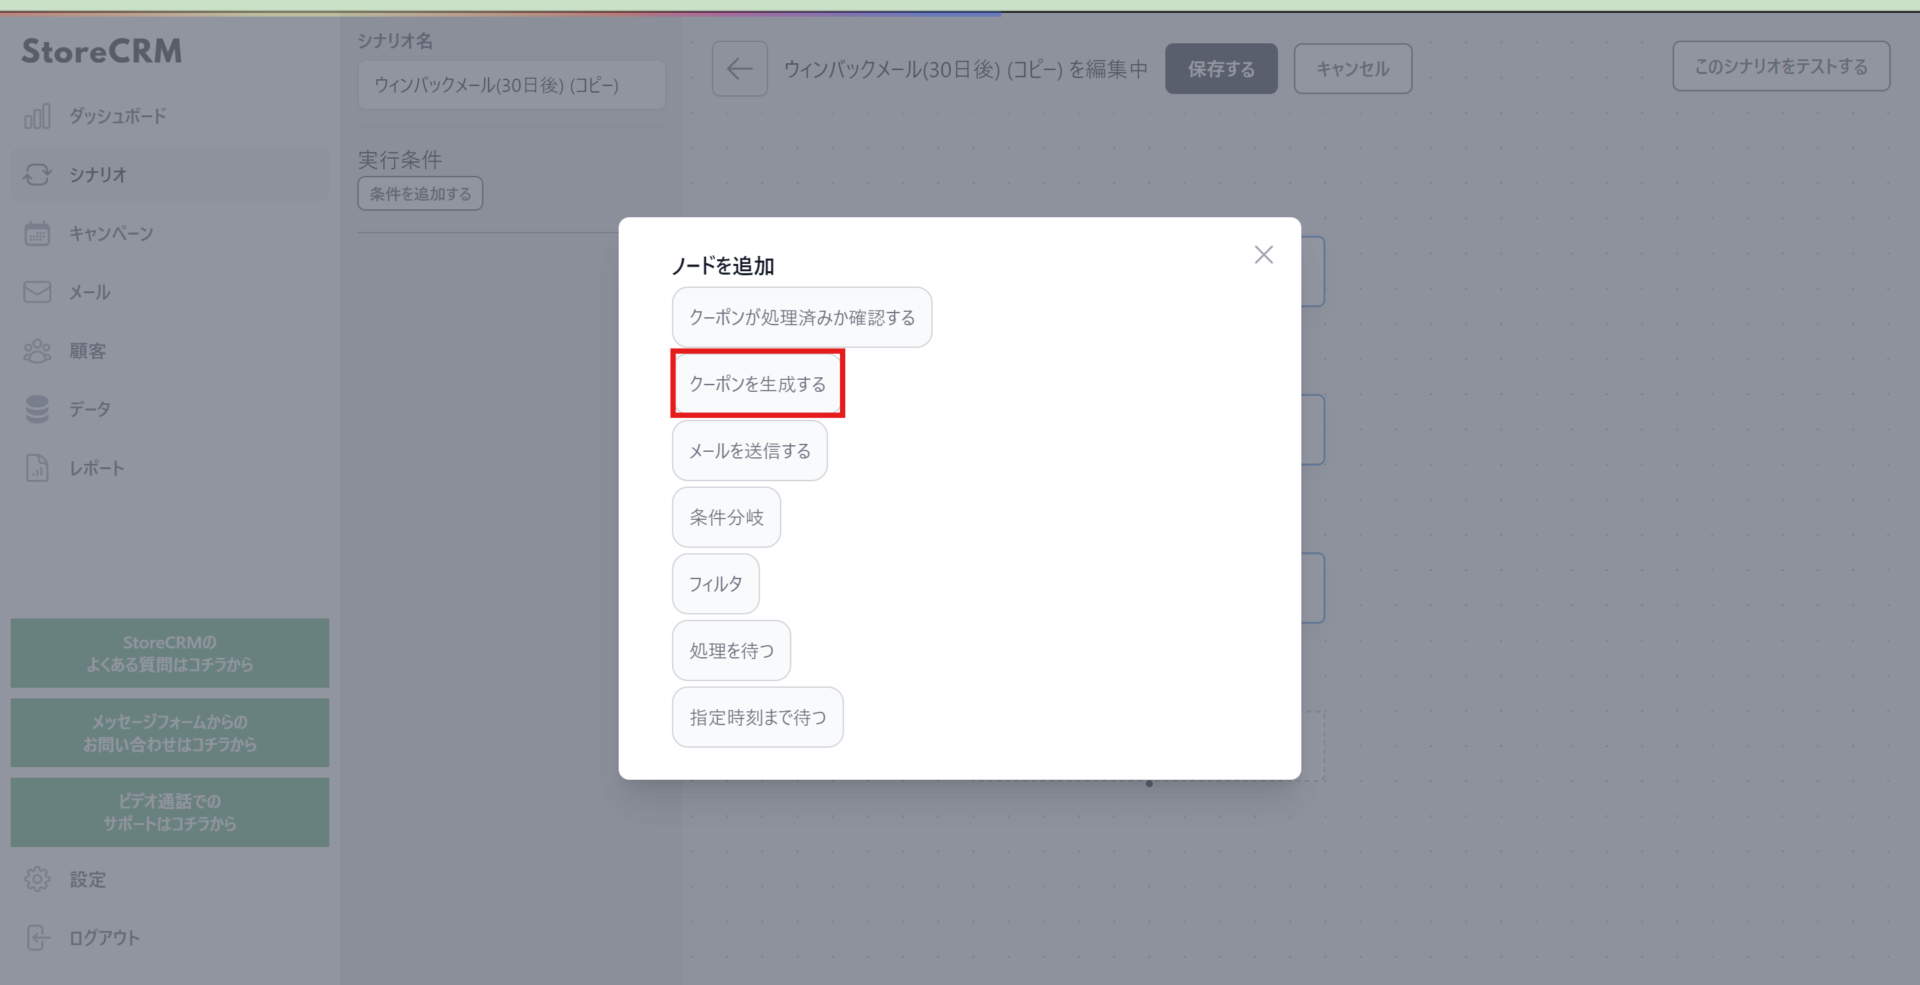
7. In the node picker, click [Generate a coupon].
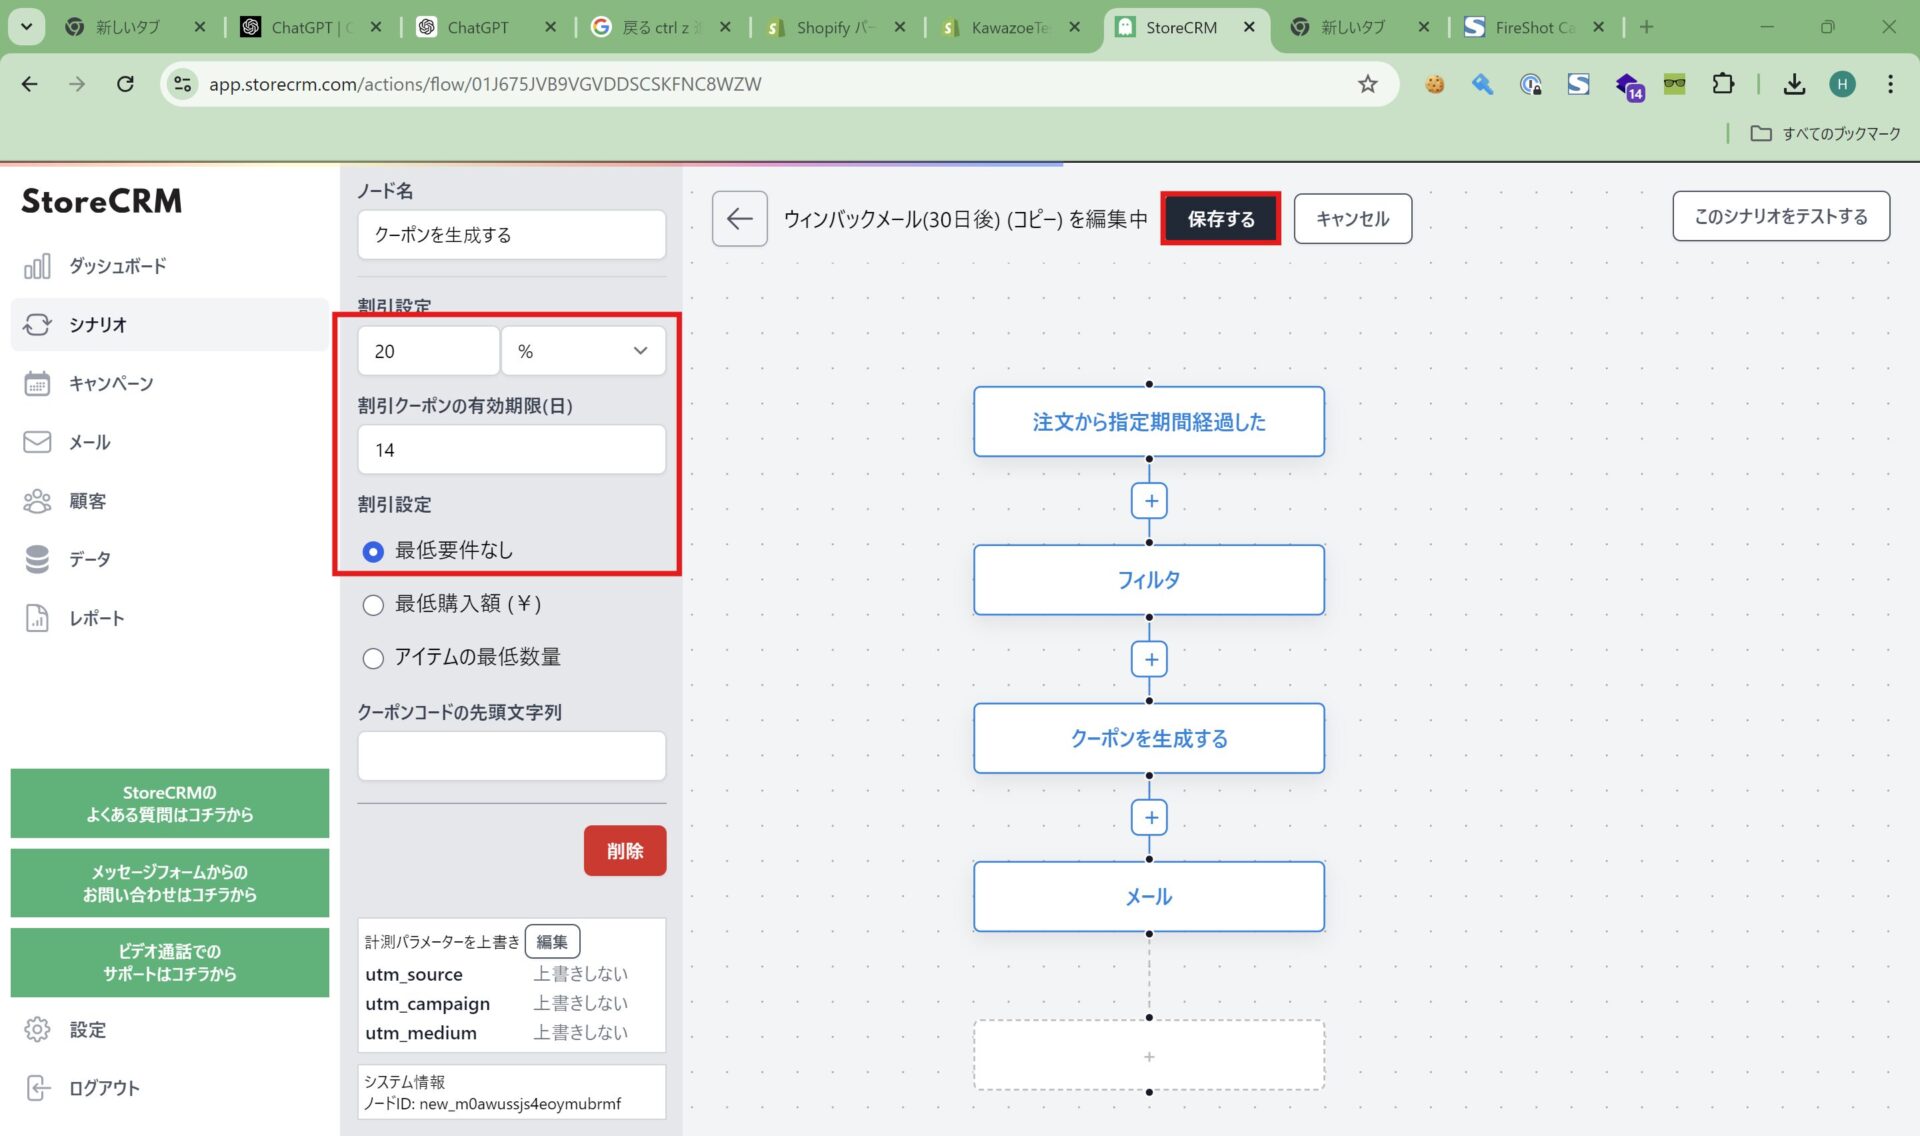
8. With the node created, configure the coupon. Then click [Save] to save the automation.
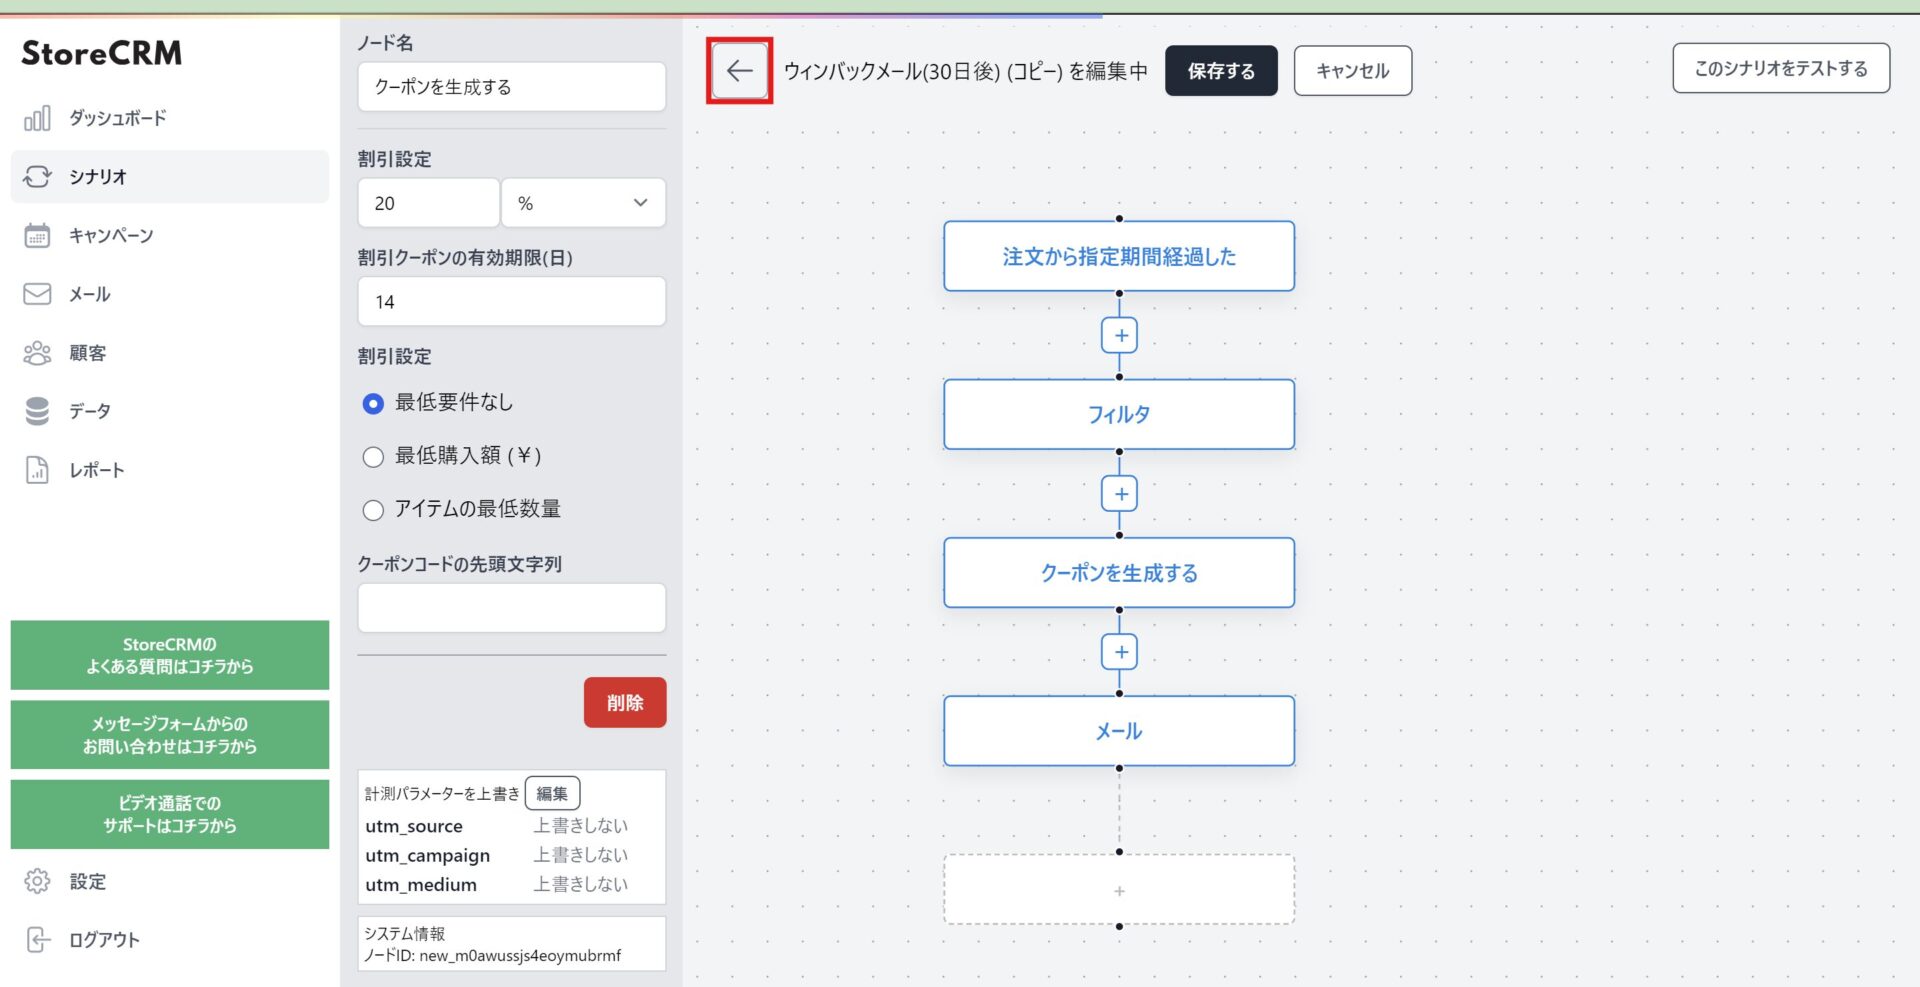
9. Once it is saved, click [←] at the top of the screen to return to the automation detail page.
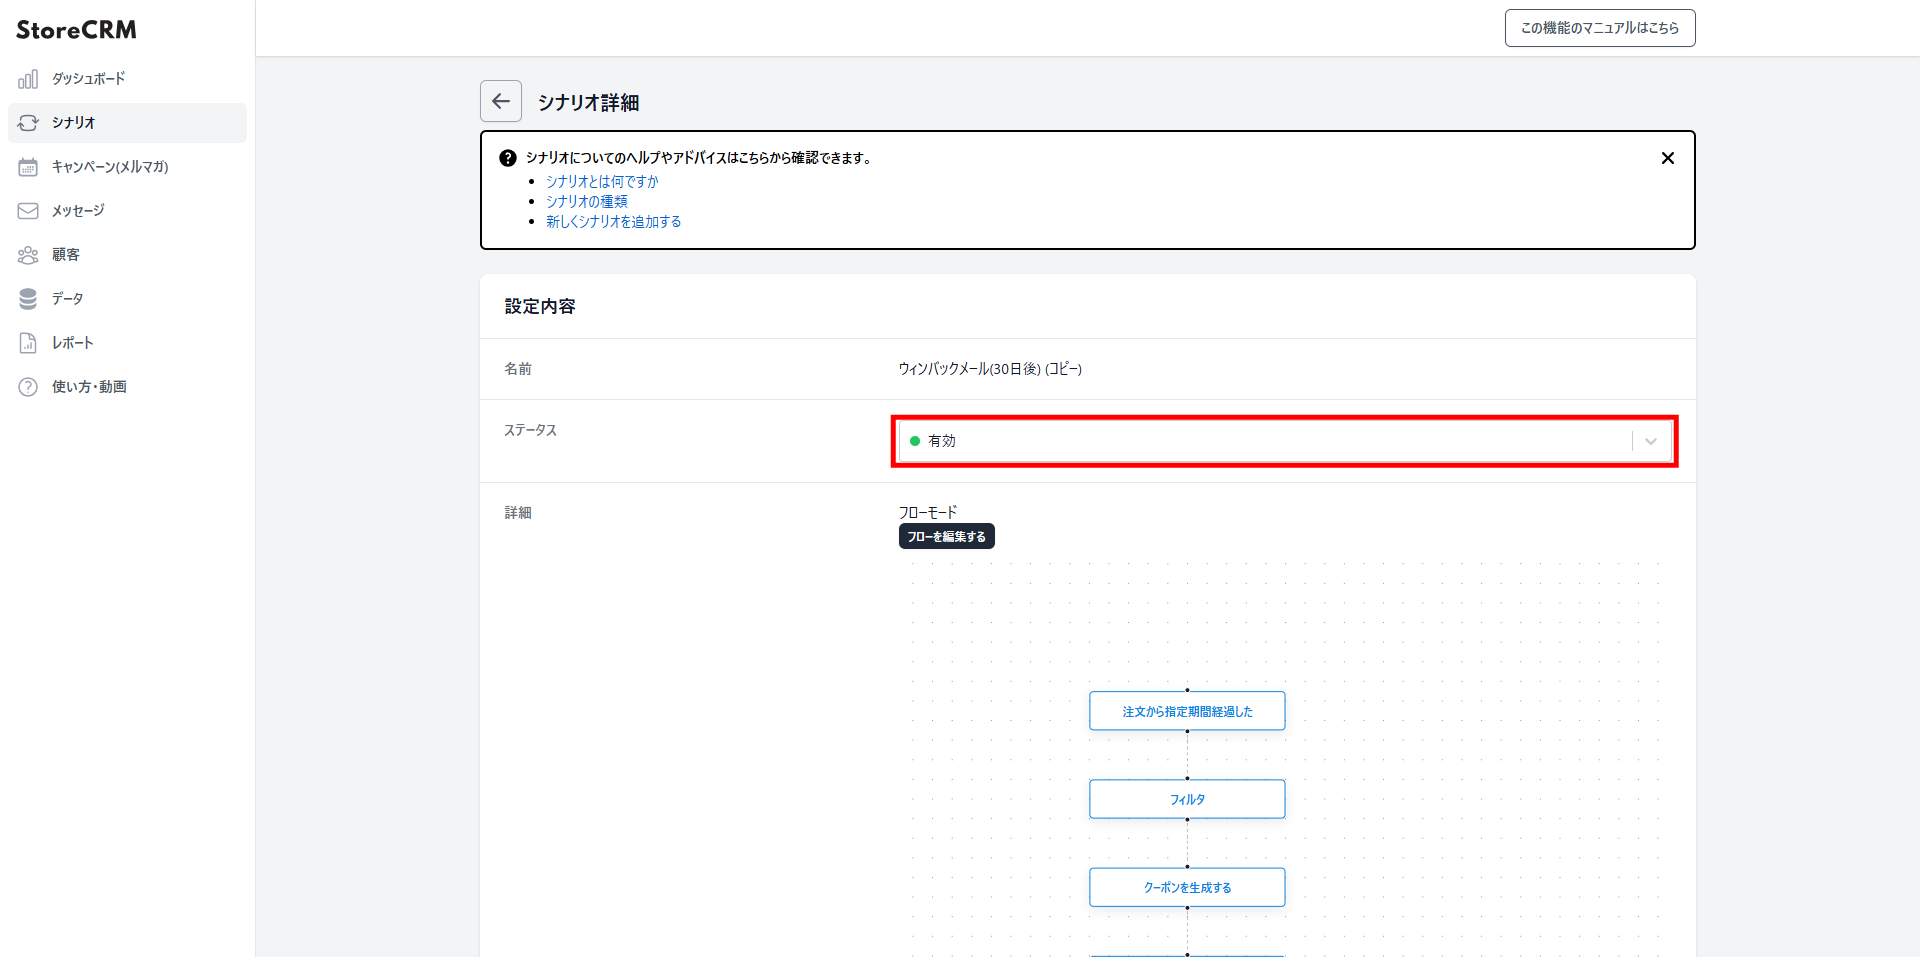
10. Open the [Settings] > [Status] dropdown, activate the automation, and this section is done.
Before you activate an automation, check that no other active automation uses the same trigger. Completely different automations are fine. This matters most with duplicates: make sure you actually want the original to stay active too.
Summary
StoreCRM lets you send win-back emails to lapsed customers whose interest has faded, and bring them back. It does not stop at sending the email — open rates, click rates and per-email or per-automation analysis all live in the same app.
We also offer support with the app's settings and consulting on growing revenue for customers who have adopted StoreCRM.
Feel free to get in touch through the contact form linked below.
Get in touch any time through the contact form.


