Table of Contents
ToggleClarifying the purpose of your marketing strategy is very important.IntroductionLet’s review the goal of the email scenario we are creating for subscription signups.
①Strengthening Customer Relationships and Improving Satisfaction
Sending a thank-you email right after a subscription can help build a stronger customer relationship.
You can also improve customer satisfaction by including usage instructions and support information.
②Creating Additional Purchase Opportunities Through Personalized Suggestions
By suggesting related products based on purchased items, you can offer highly relevant cross-sell opportunities.Providing exclusive coupons can also encourage customer purchases.
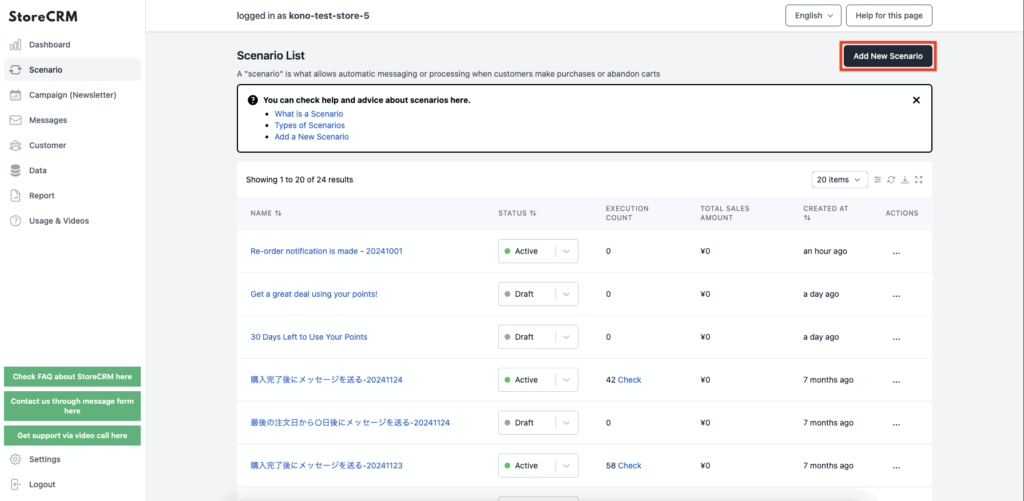
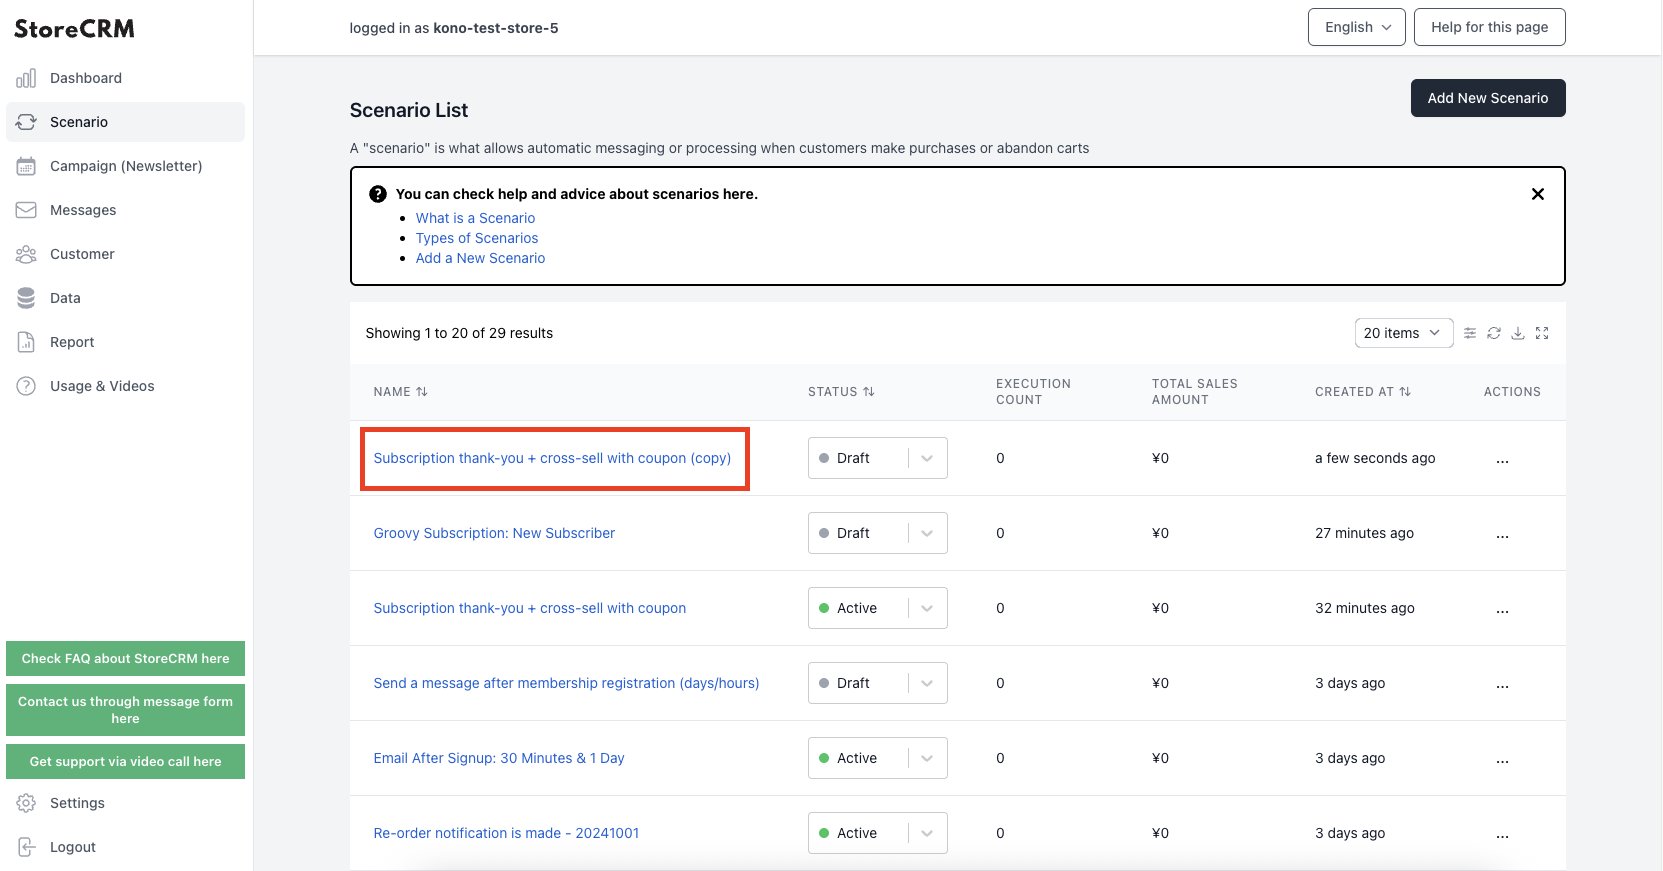
➀Click [StoreCRM App Screen] > [Scenario] to open the scenario list page.
Click [Add New Scenario] in the upper-right corner.
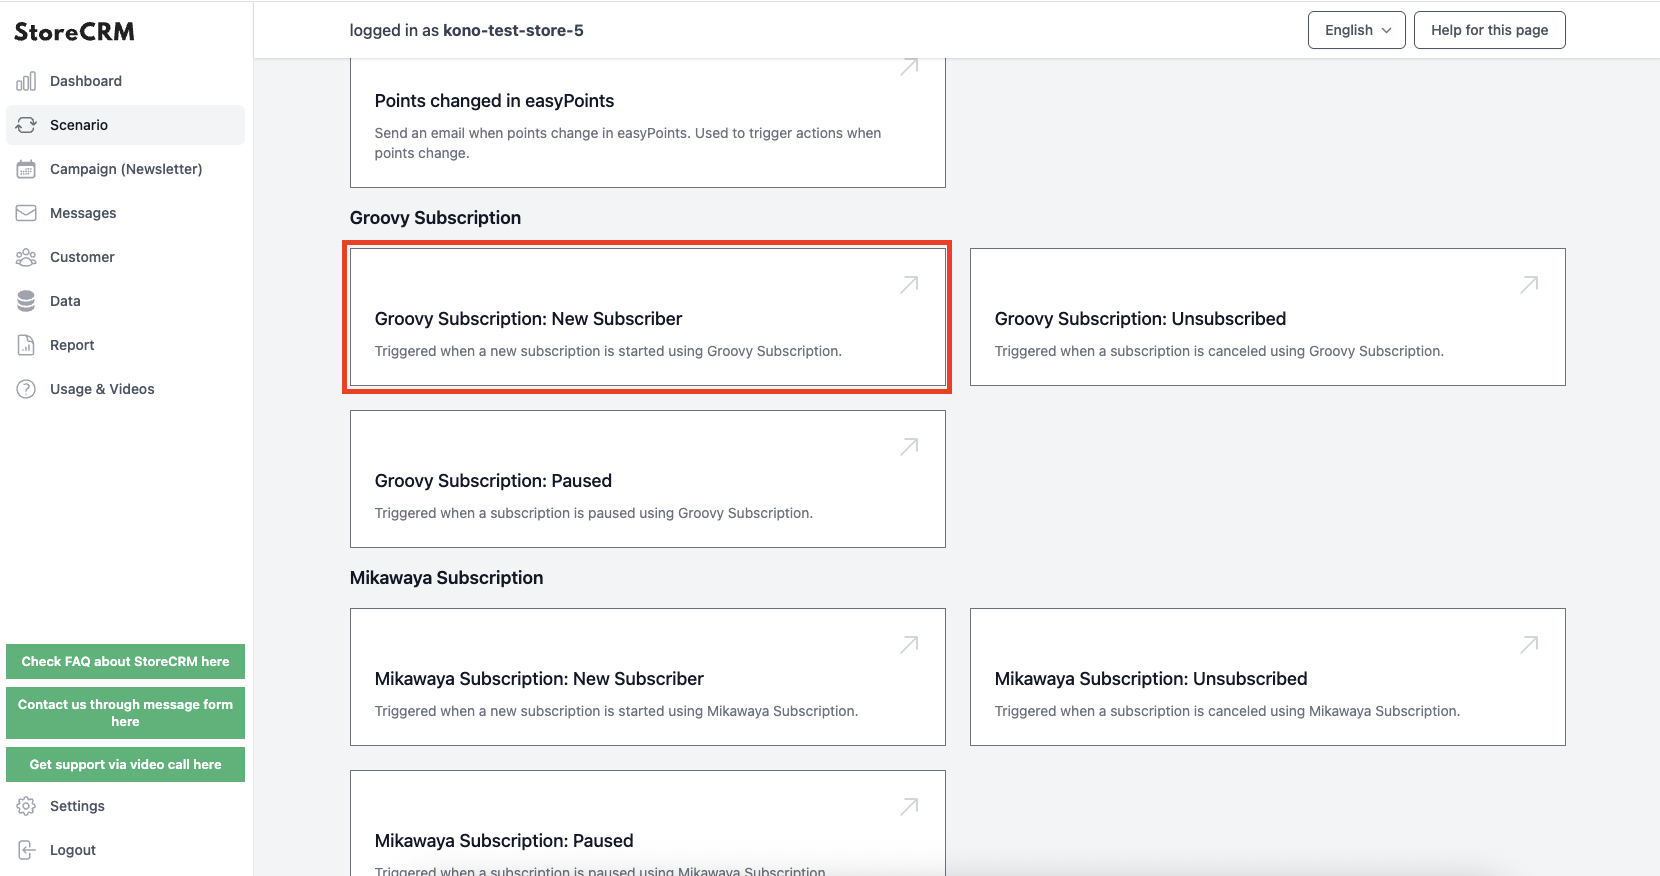
➁This time, we will create an email scenario for new subscribers using [Kantan Subscription] > [New Subscription for Kantan Subscription] and click it.
* If you are using Mikawaya Subscription or Teikikoubai, select the respective scenario from those sections.
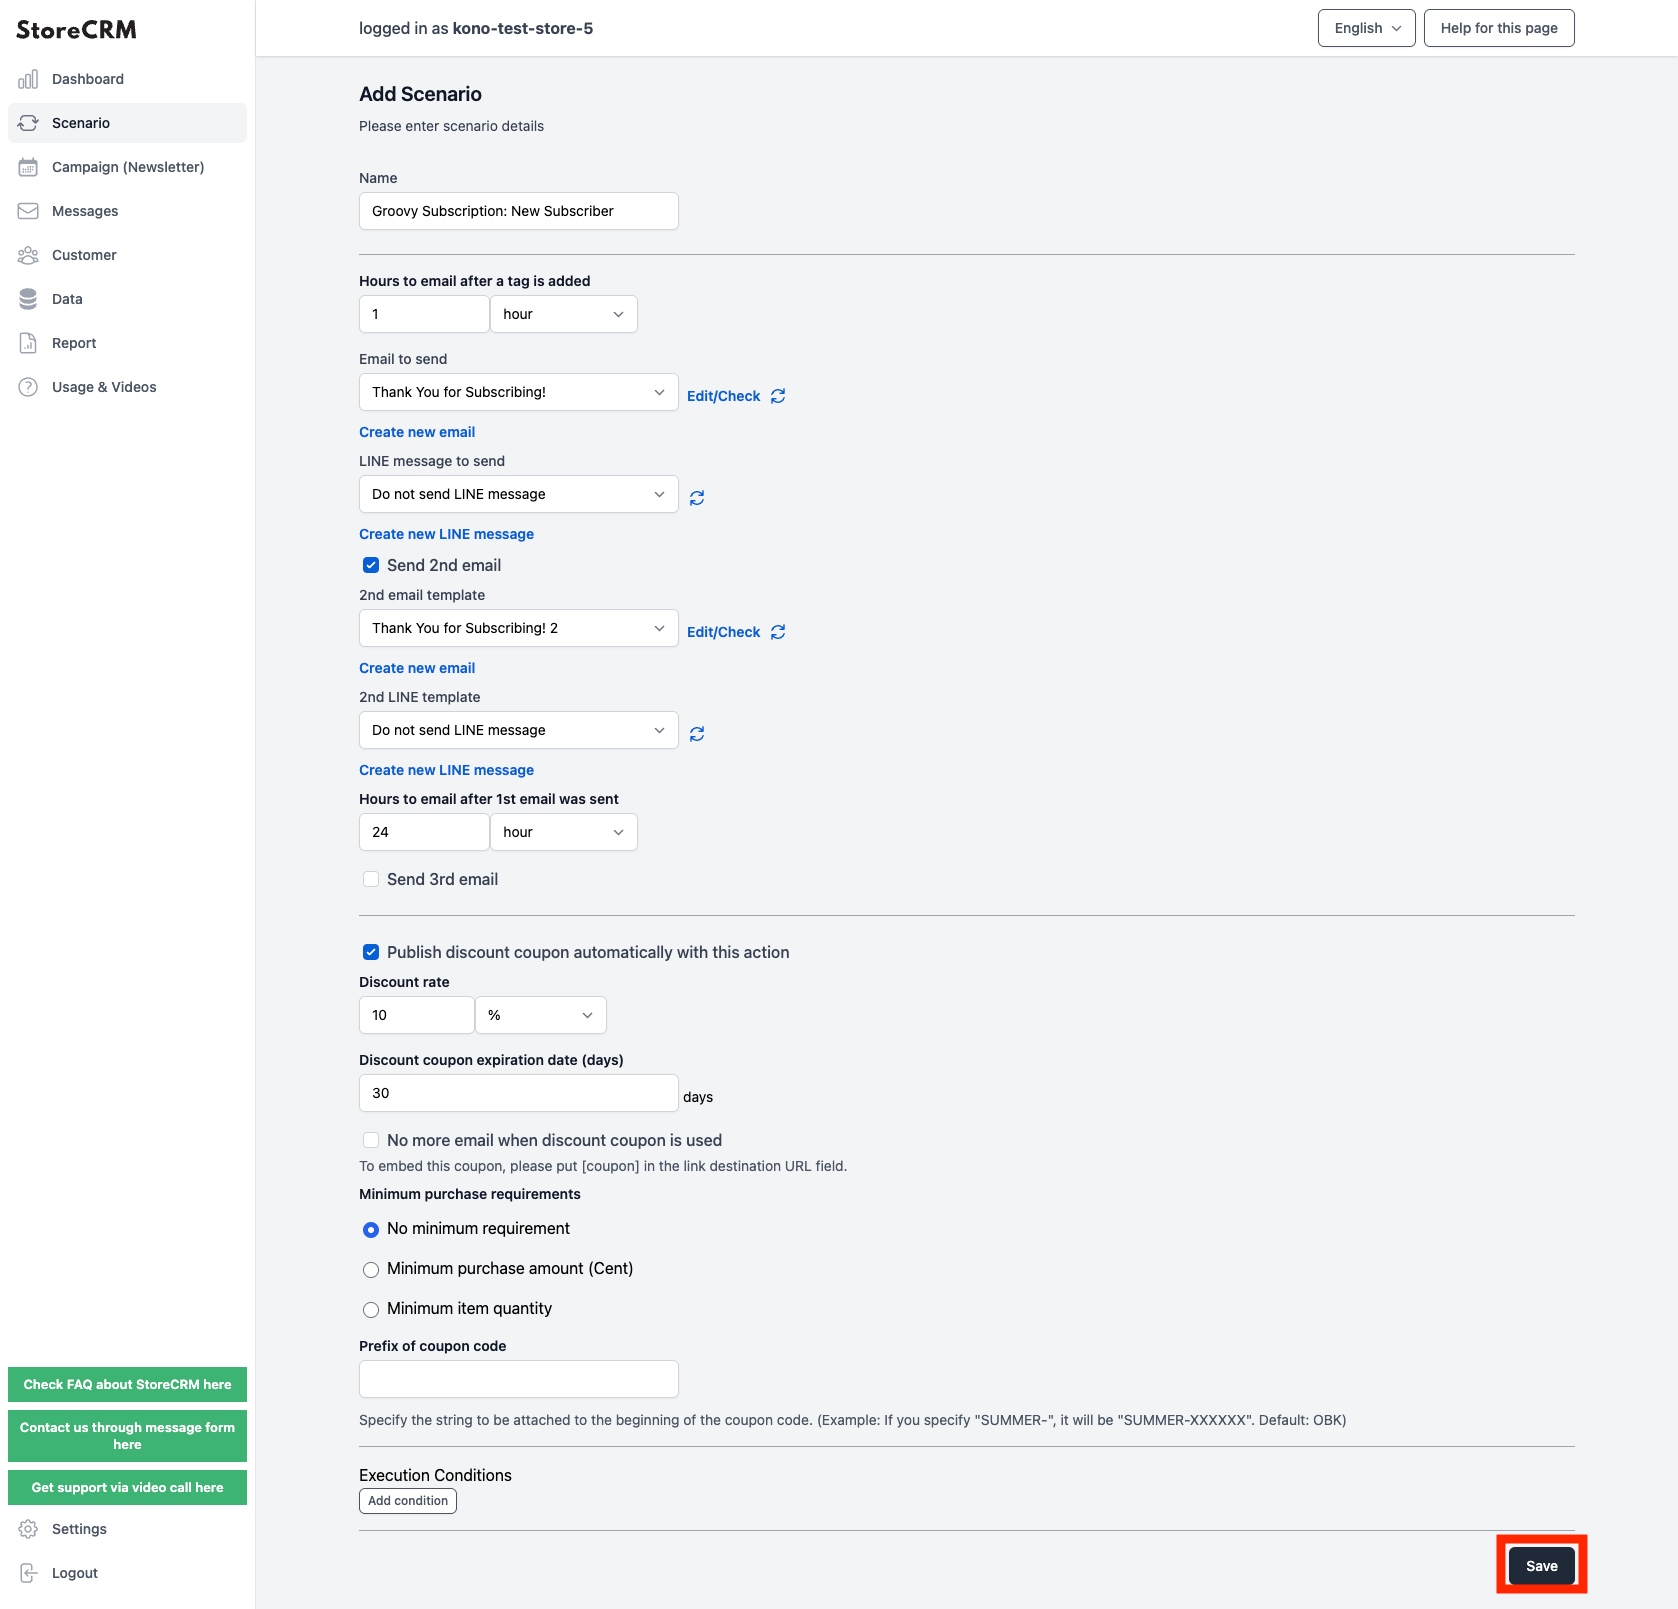
③The scenario settings screen will appear. Set the time and frequency for sending emails as specified below. Once done, click [Save] and click it.
・Send a thank-you email 1 hour after subscription
・Send a follow-up email with a coupon 1 day after the initial email
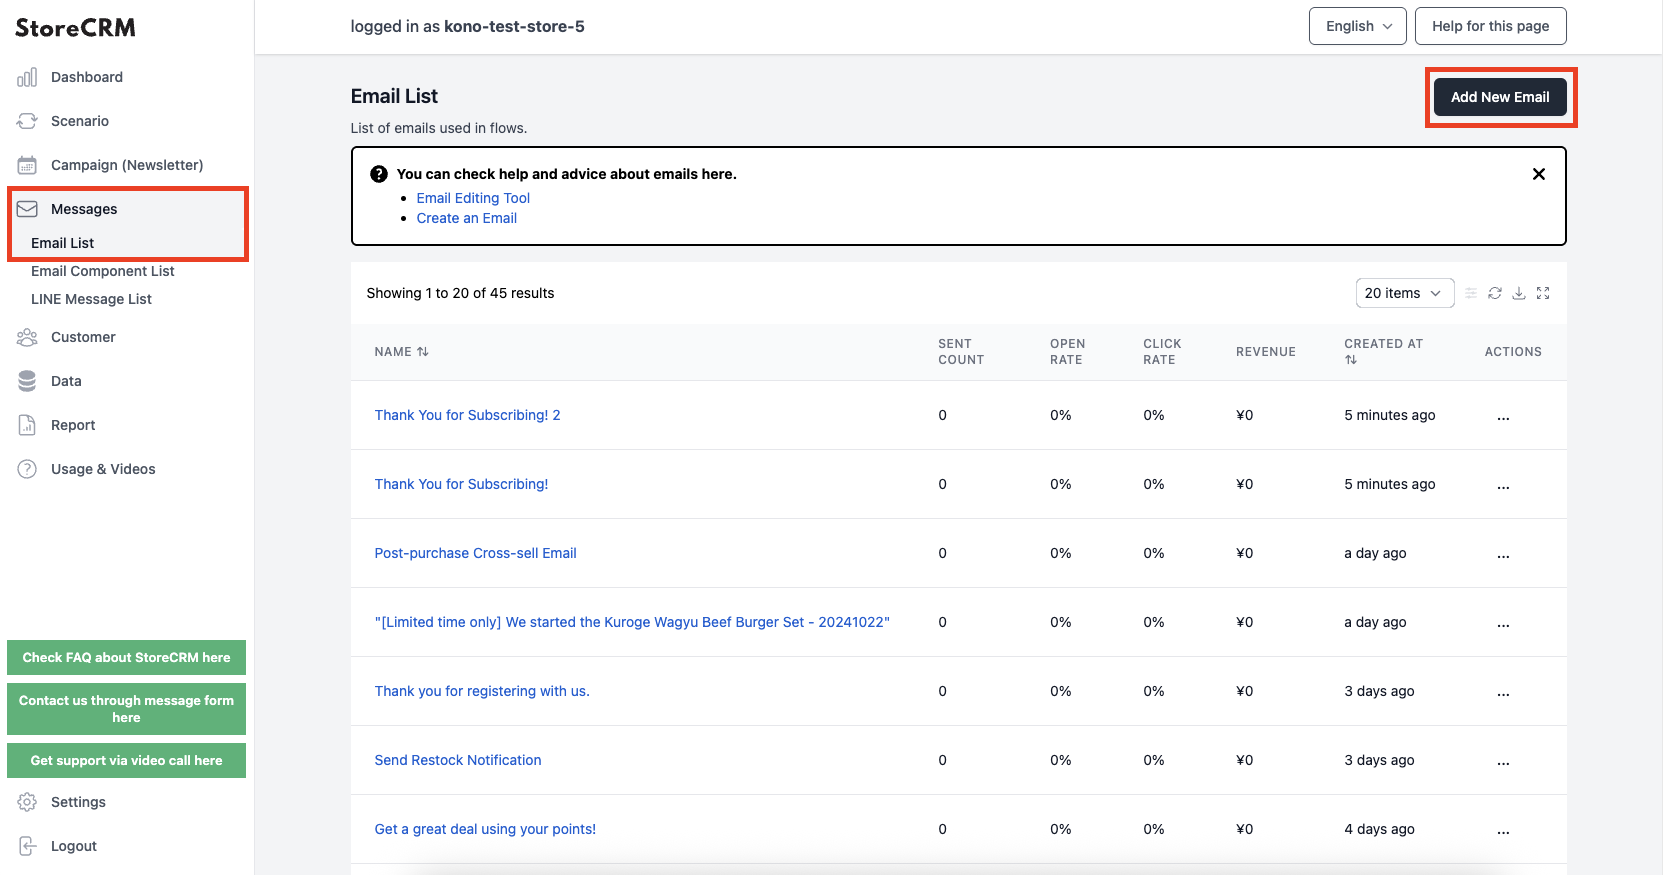
④Create the email to be sent.
From the left menu, select [Email] > [Email List], and when the email list screen opens, click [Add New Email] and click it.
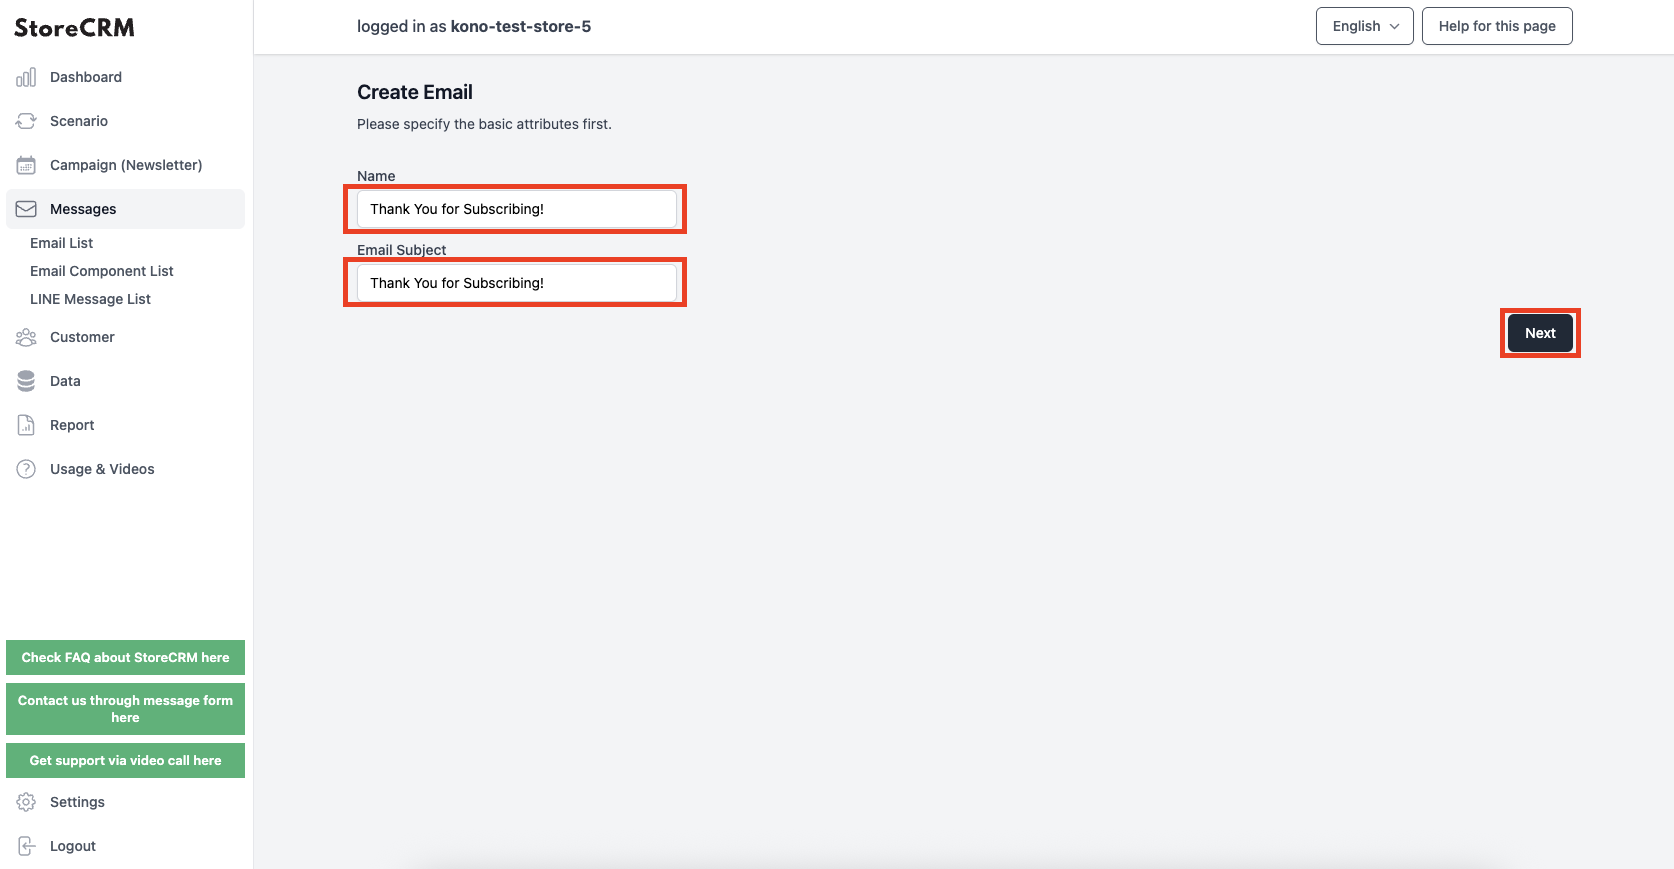
⑤The creation screen will appear. Enter a name for management under [Name] and a subject line under [Email Title].
Once completed, click [Next] and click it.
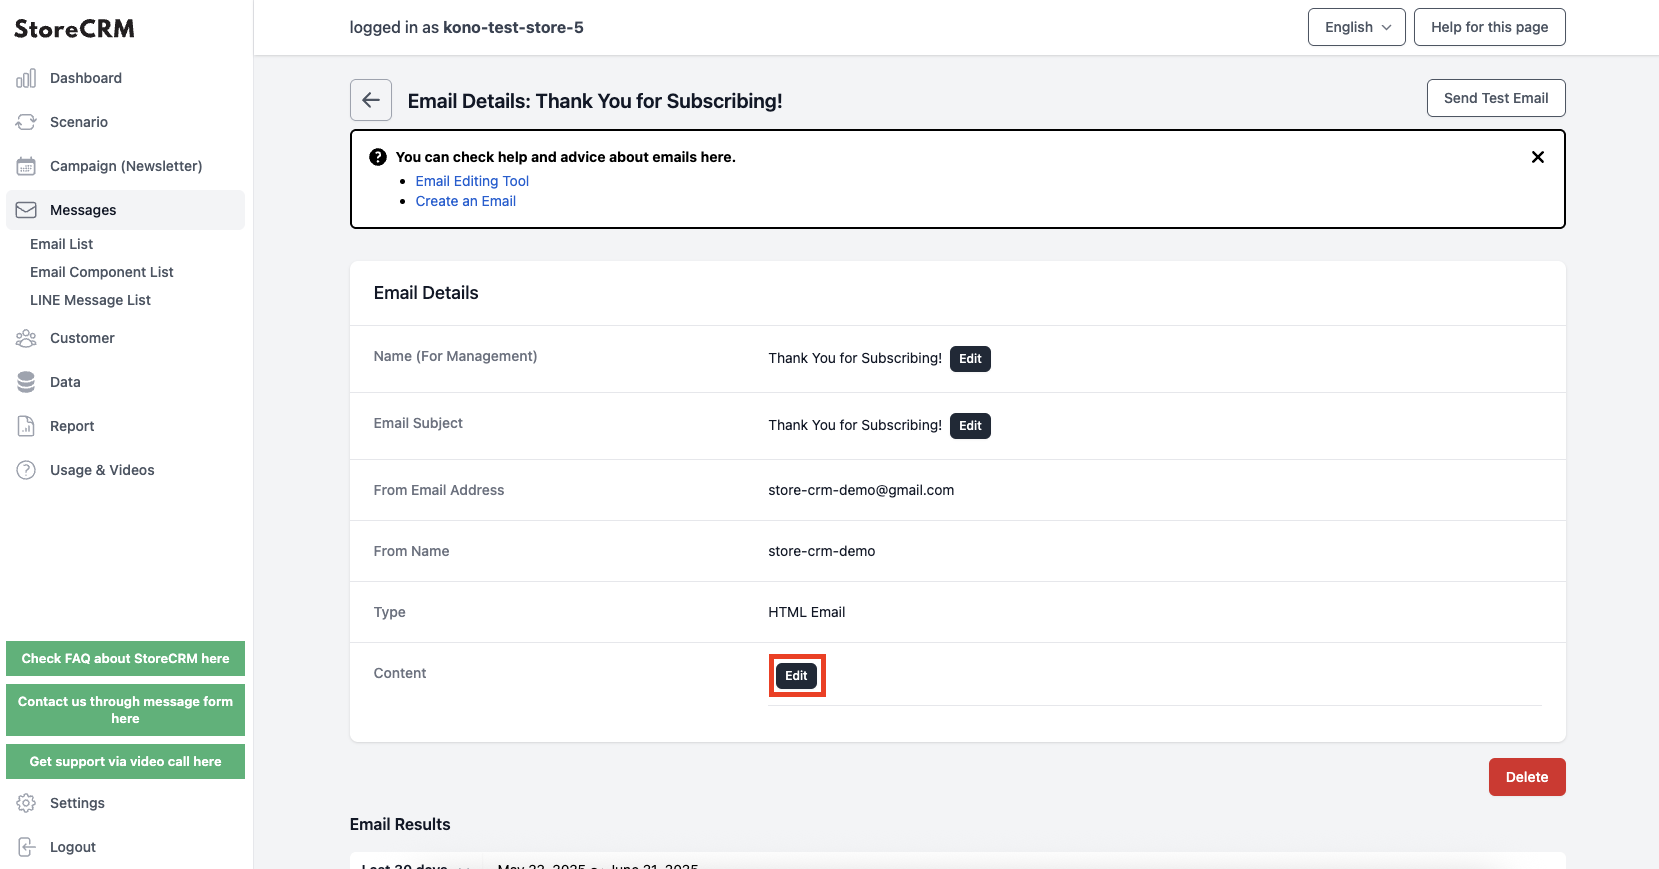
⑥The email will be created and the email details page will open. Click [Content] > [Details] and click it.
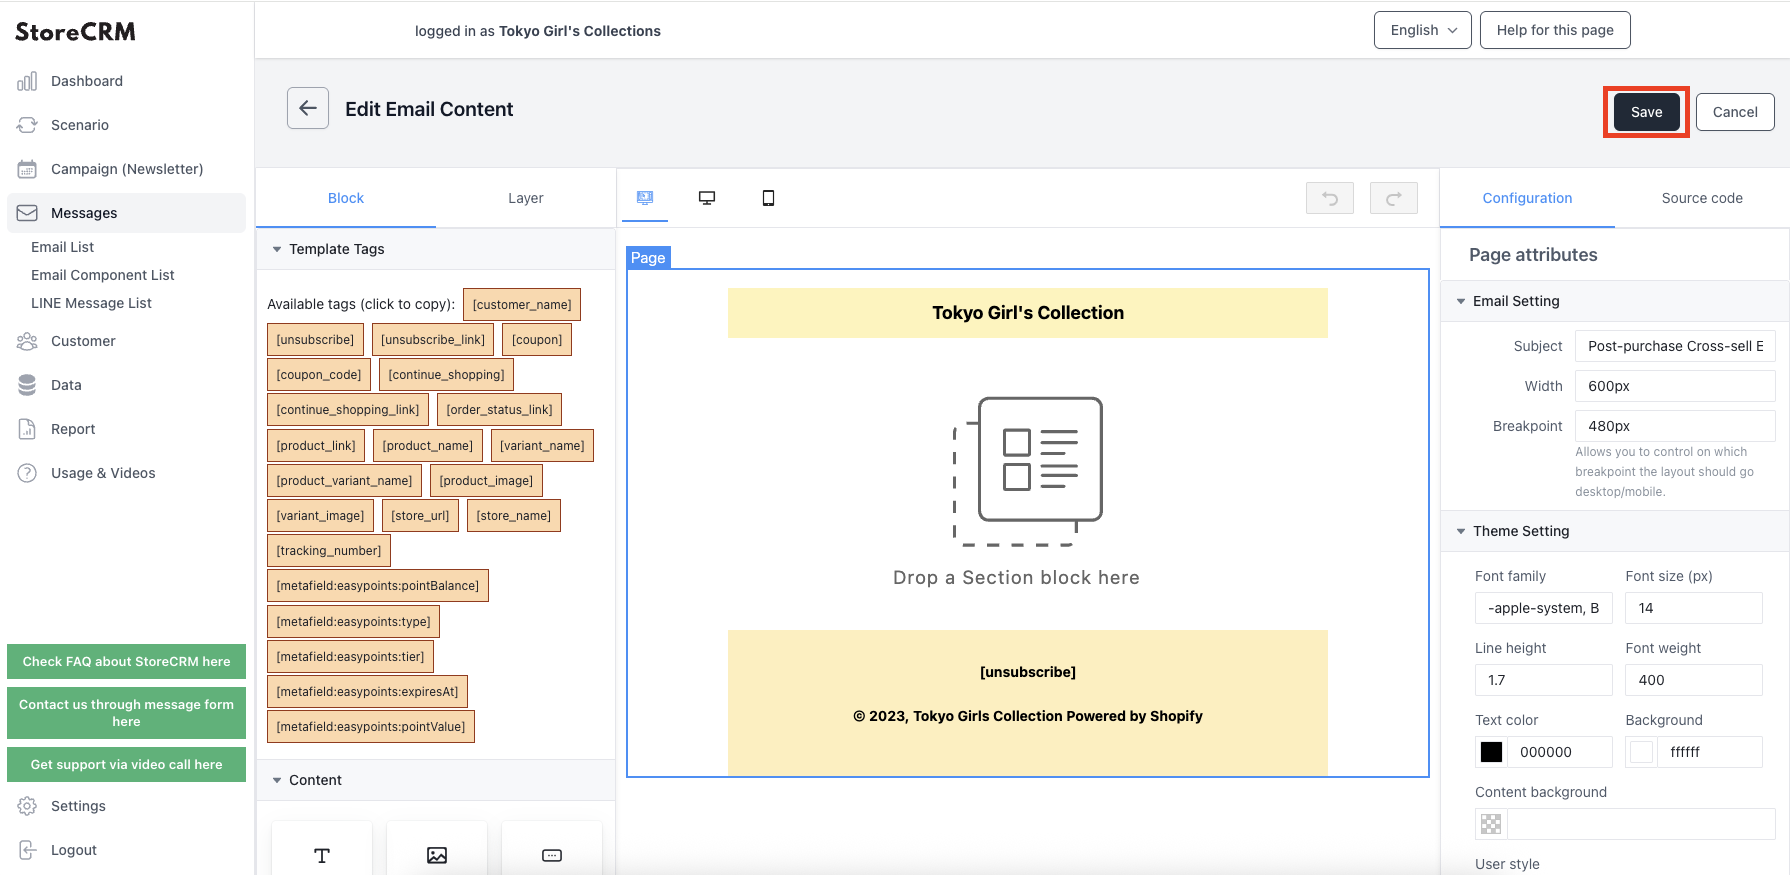
⑦The email editor screen will open. Drag and drop content to design your preferred layout.
Once completed, be sure to click [Save].
Repeat steps 4 to 7 to create the second follow-up email (with coupon) after subscription.
To embed a created coupon in the email, you need to place a button or link with the destination set to [coupon]. If embedding within the email, do so via [Content] > [Edit].
⑧Once the email is created, assign it to the scenario.</strong>
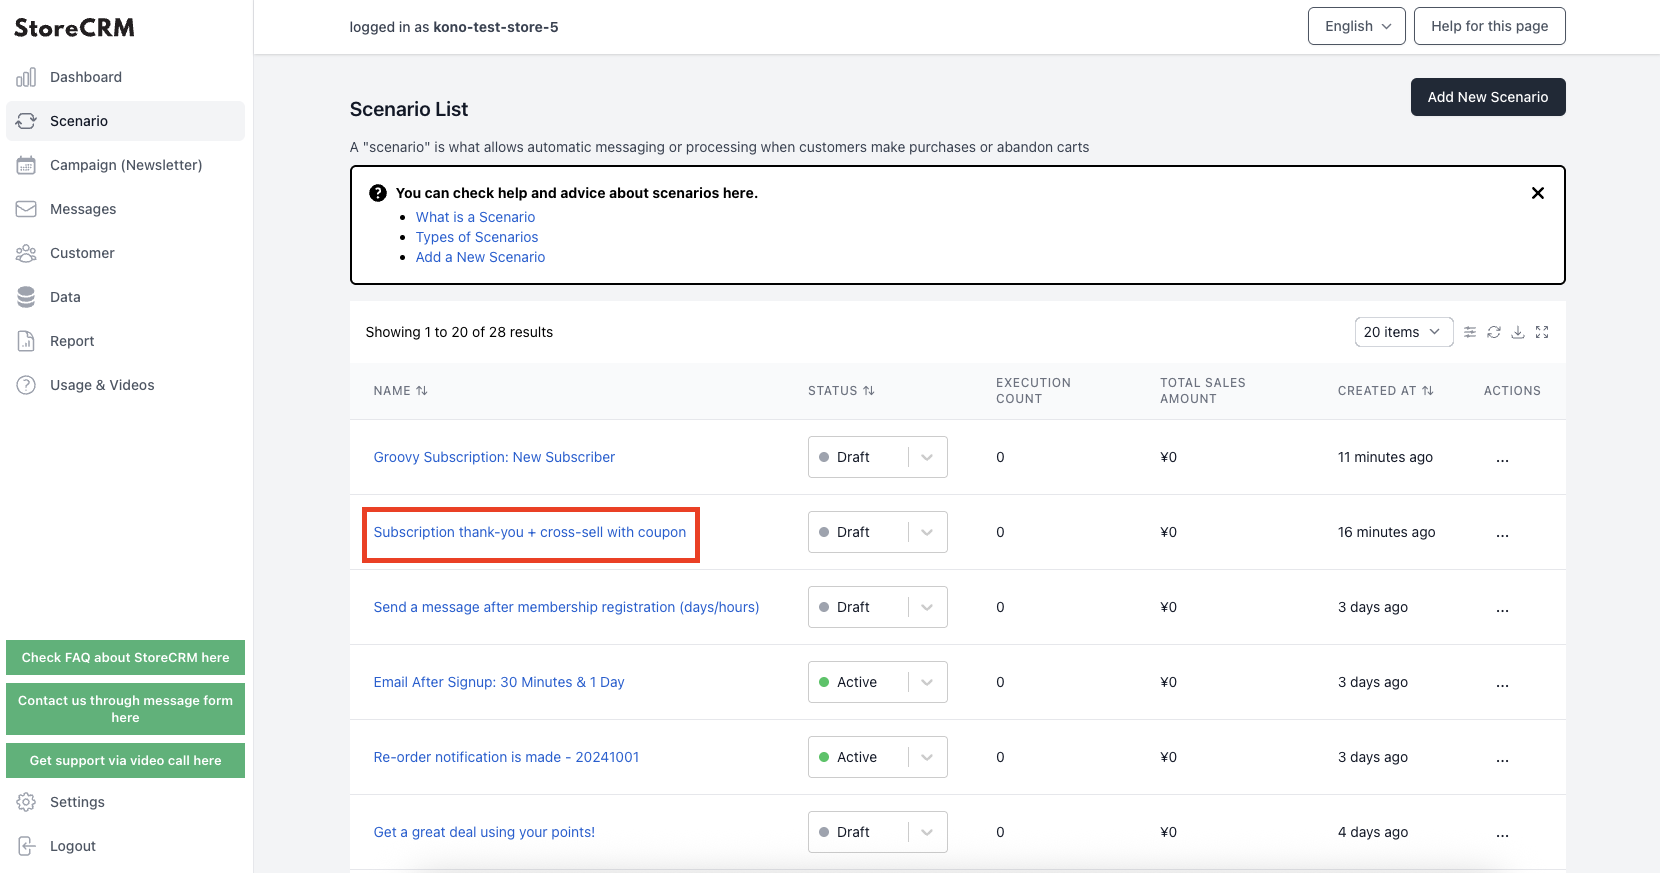
[Scenario] > [Scenario List] > [Created Scenario] and click it.
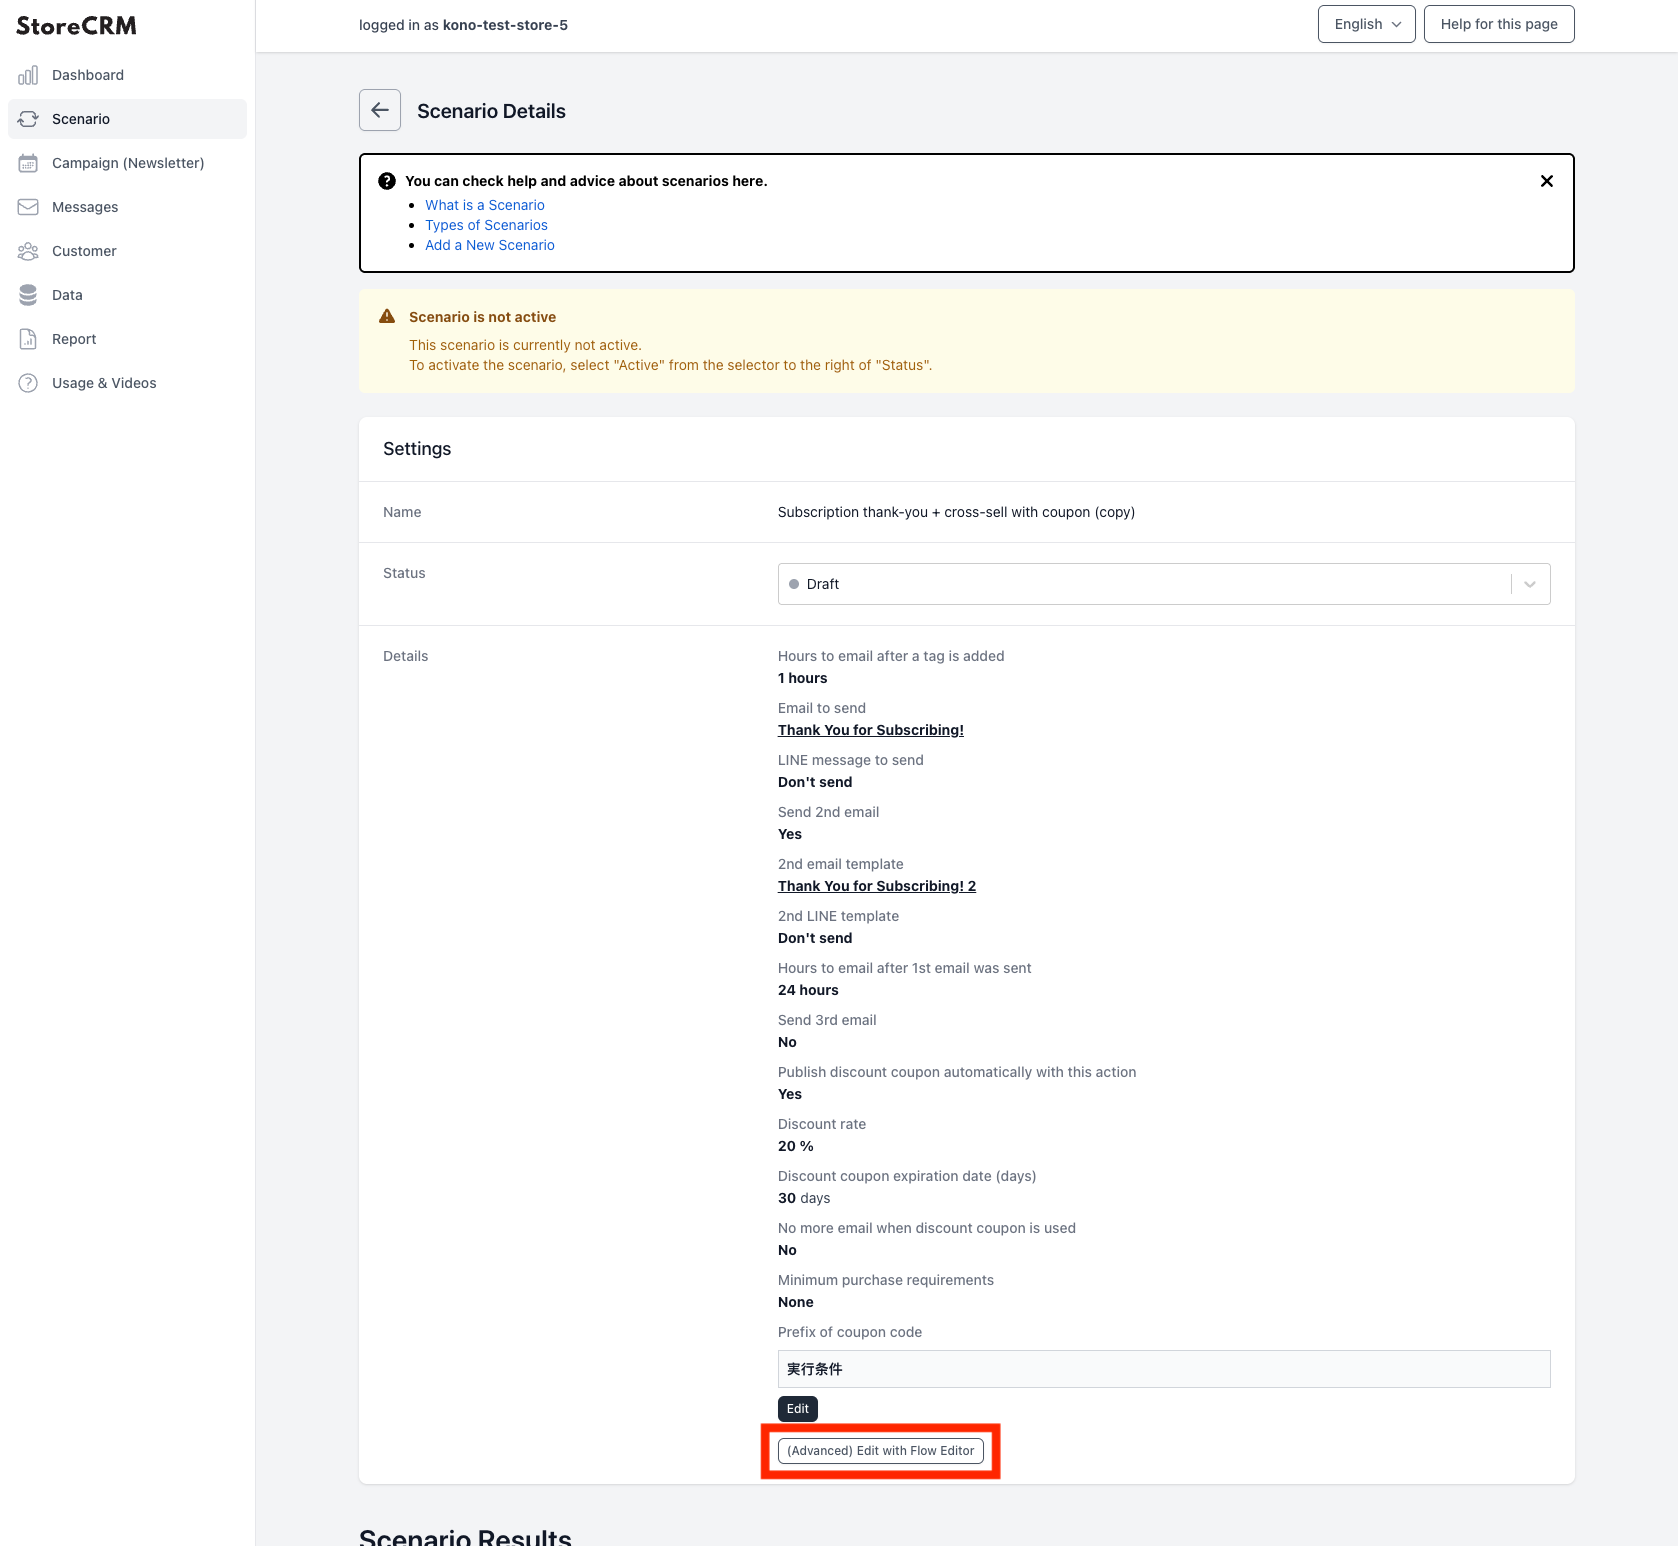
⑨The scenario details page will open, so click [Details] > [Edit] and click it.
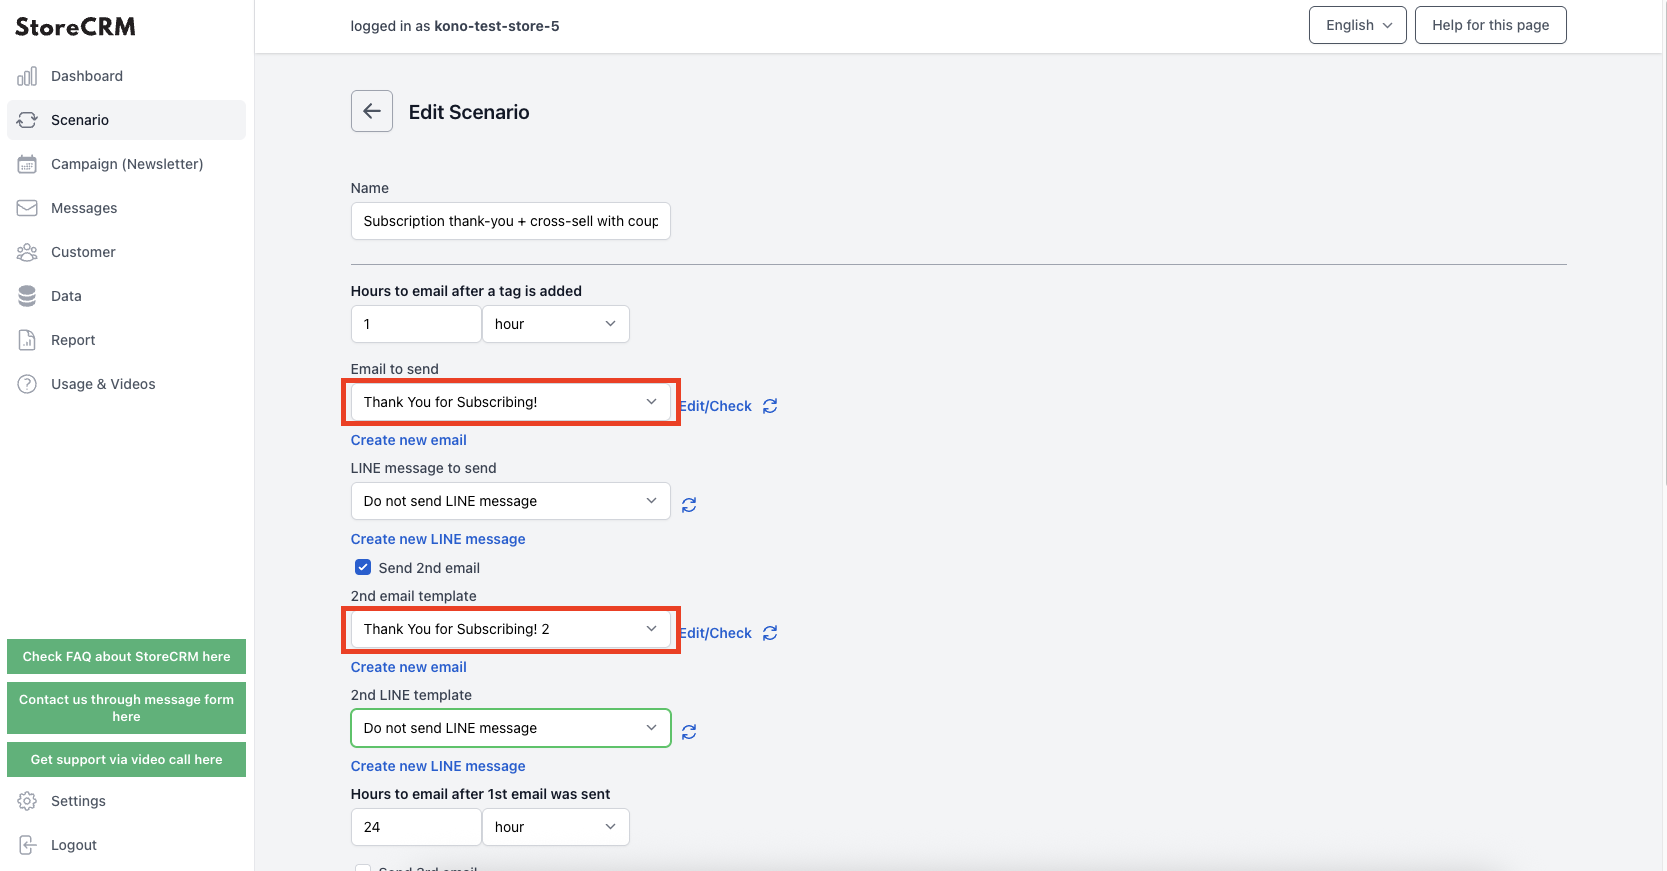
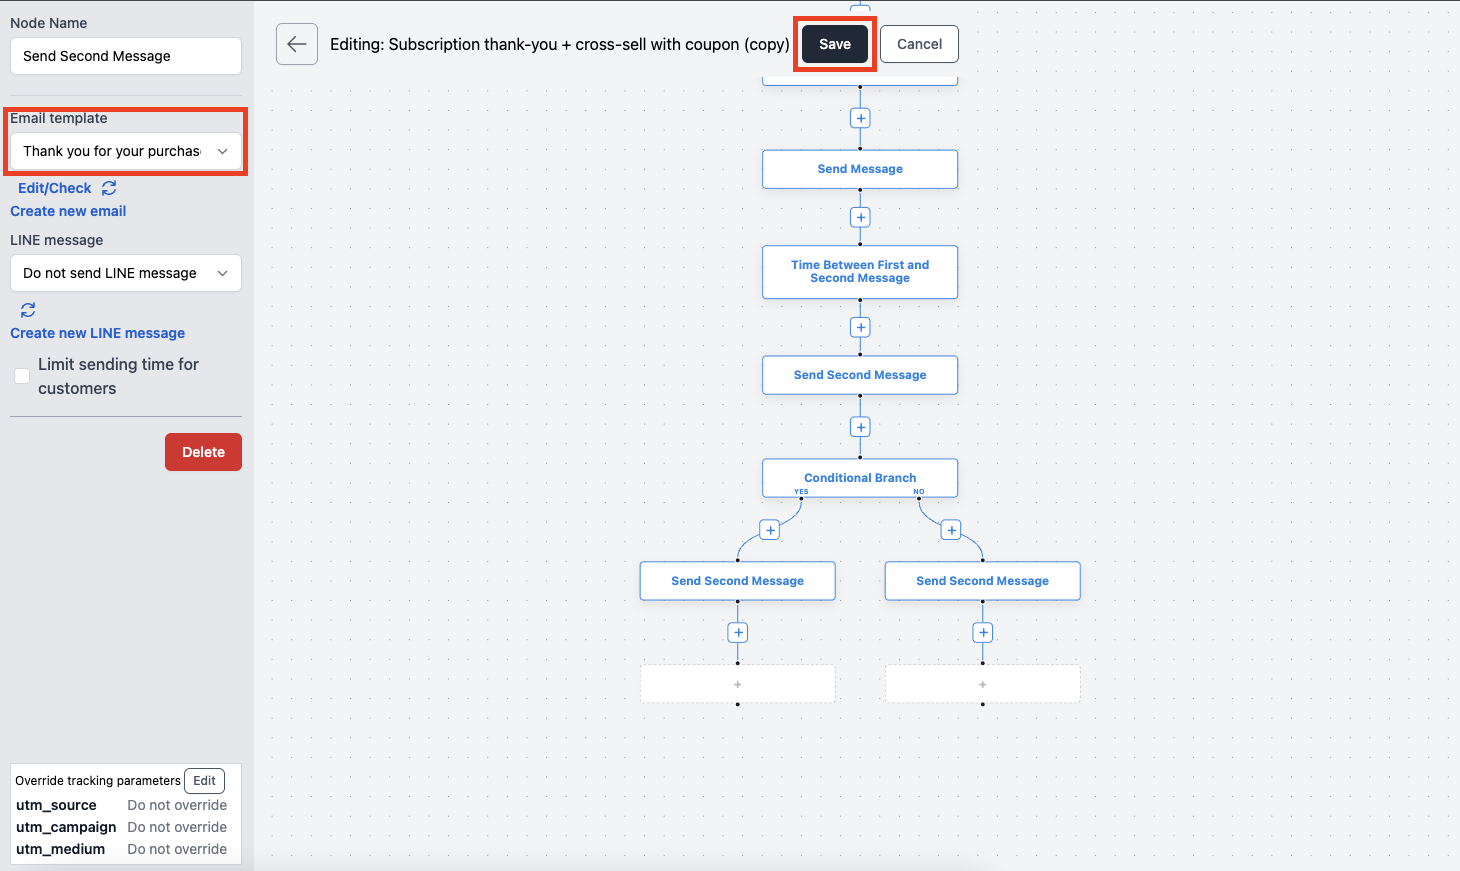
⑩Set the email template created in the previous step (the management name will be displayed).
After selecting, click [Save] and click it.
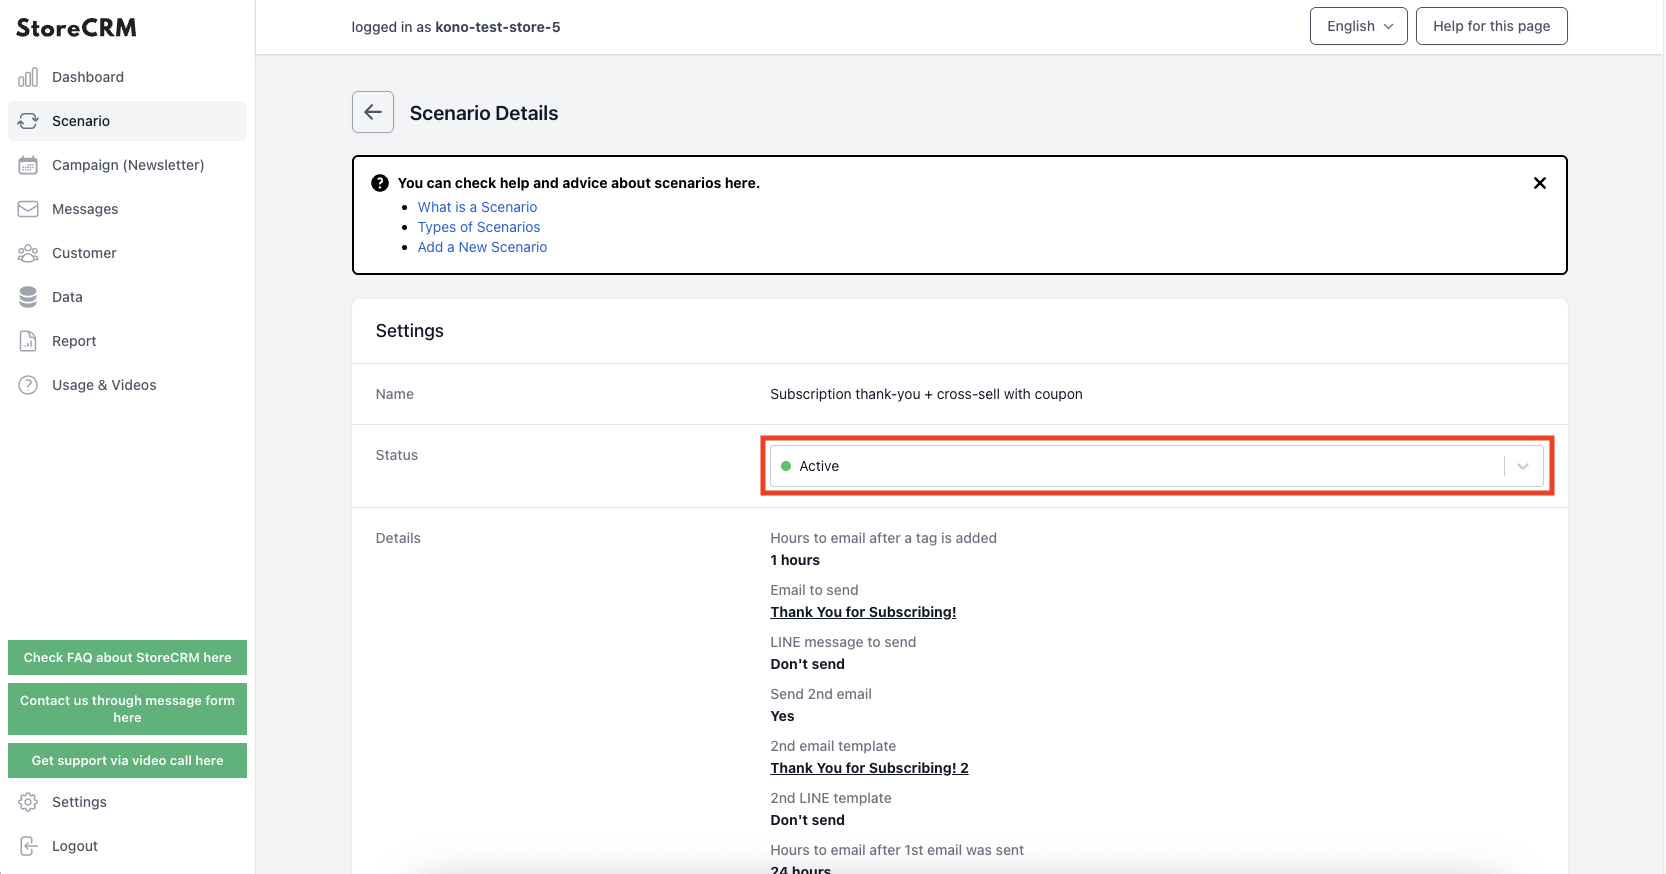
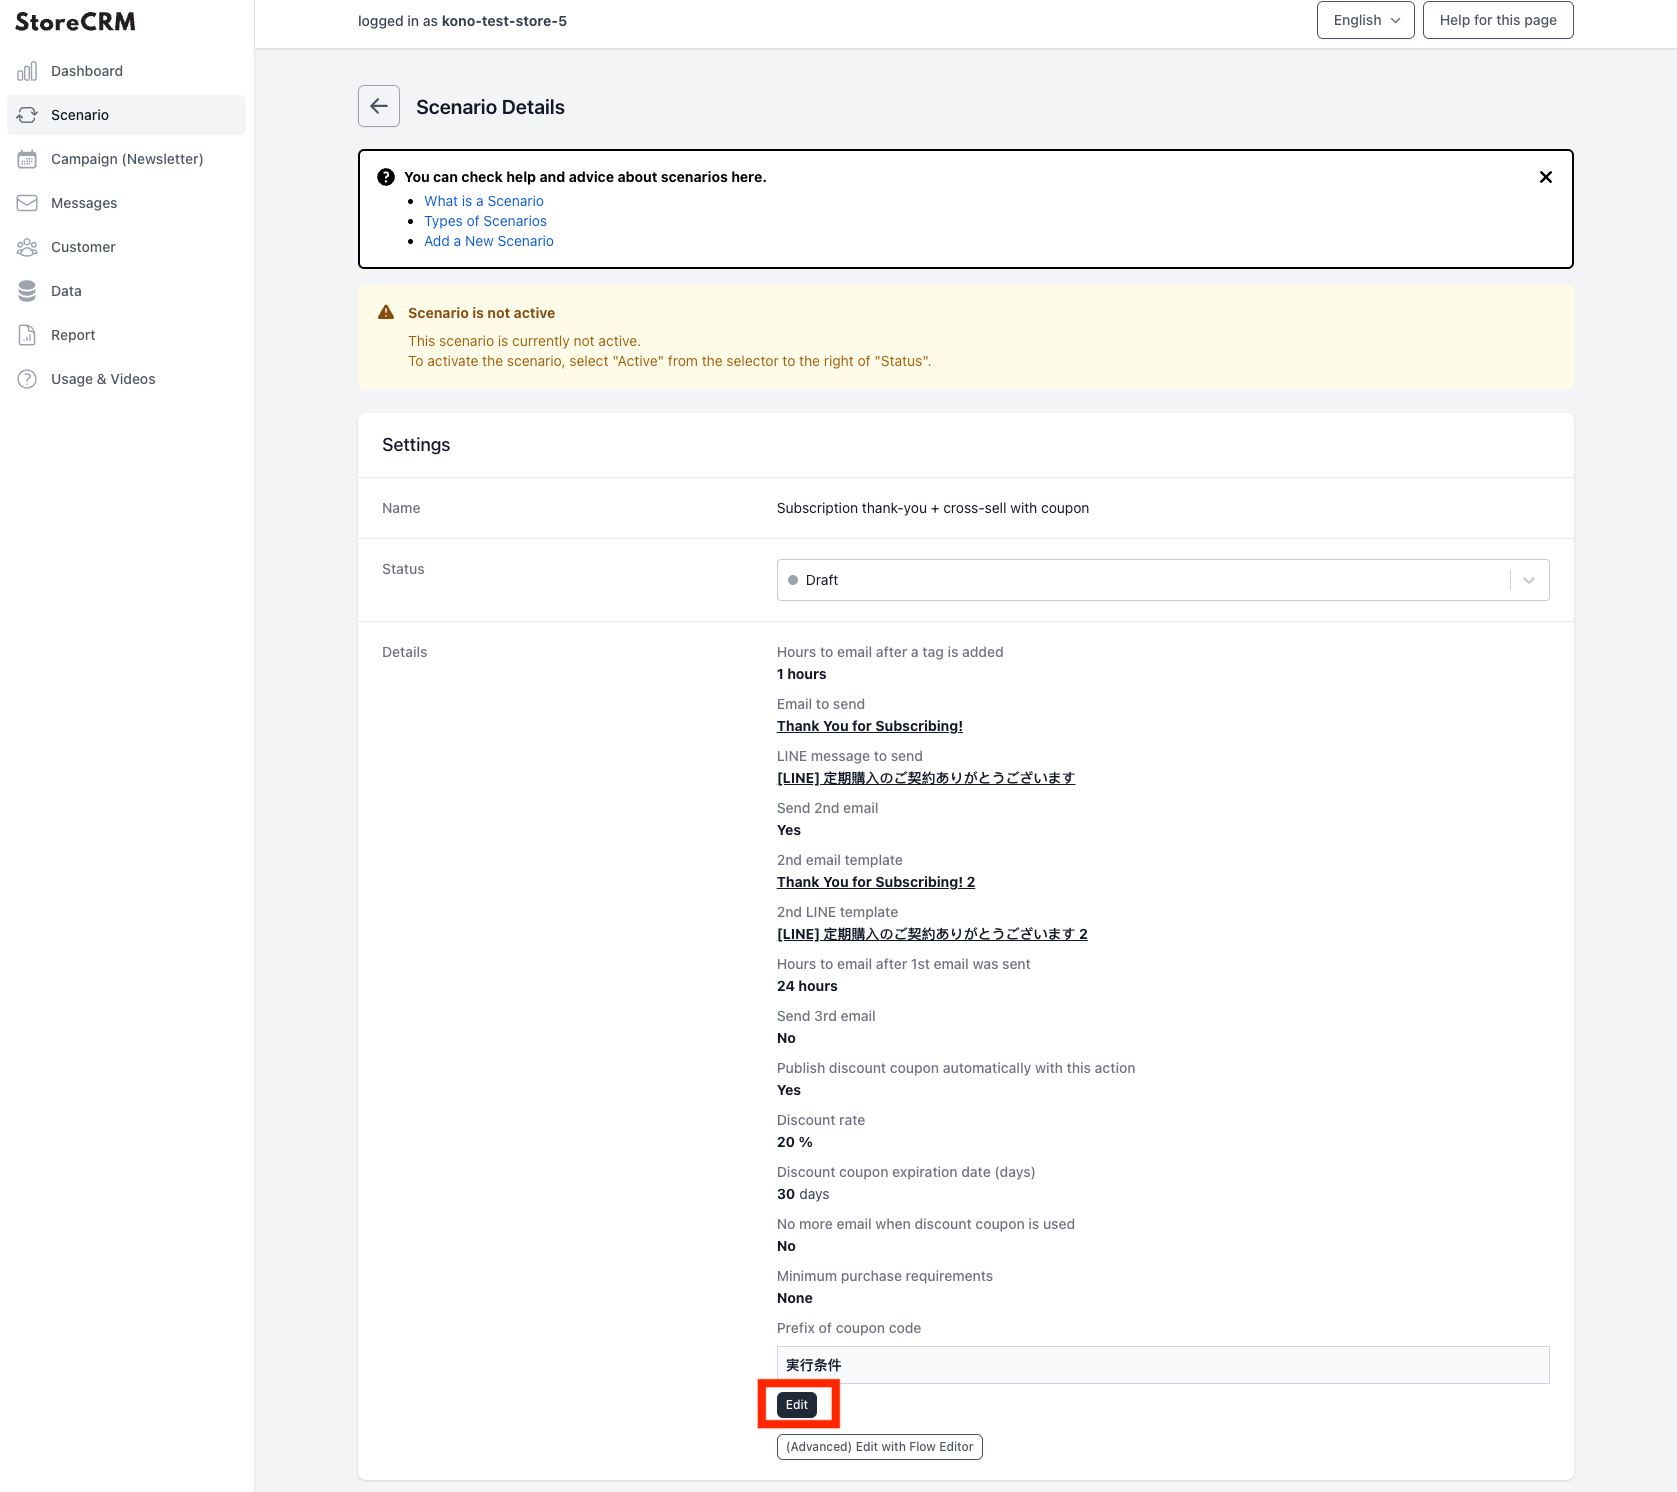
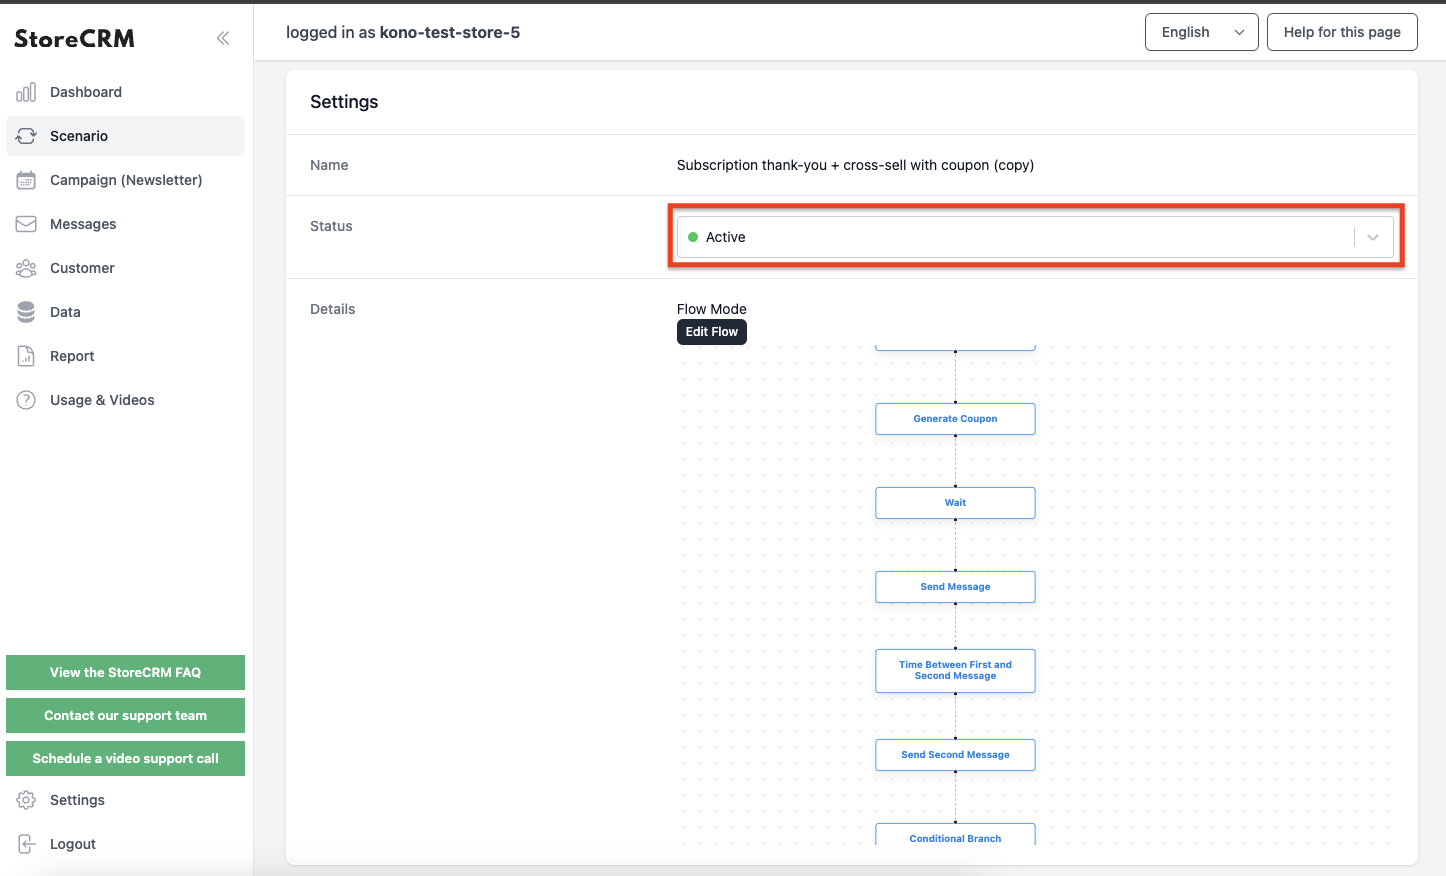
⑪Clicking [Save] displays the scenario details.
Toggle the switch under [Enabled?] to activate the scenario and send emails based on set conditions.
* You can track scenario results such as sales and email open rates via [Scenario Results].
This completes scenario creation.
Creating generic scenarios is simple and can be done in just a few steps, as shown in the previous section.
However, for larger stores, many users request more complex scenarios that allow emails to be segmented based on customer attributes or statuses.
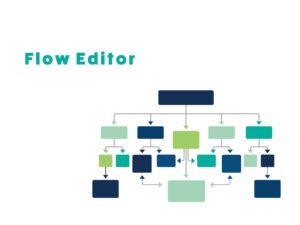
StoreCRM offers a Flow Editor feature designed for mid- to large-sized stores or CRM-savvy staff to create advanced scenarios.
In this section, we will use the [Cross-Sell Email Scenario After Purchase] created in the previous section as a base, and explain how to use and customize the Flow Editor.
First, we will define the specifications for the scenario to be customized using the Flow Editor.
This time, we will proceed with the customization based on the following specifications.
- For customers making their first purchase at the store, send a second email with a brand introduction and a special coupon.
- For customers making their second purchase, send a cross-sell email introducing related products.
Before customizing, duplicate the base scenario.
When a base scenario exists, duplication helps you customize smoothly.
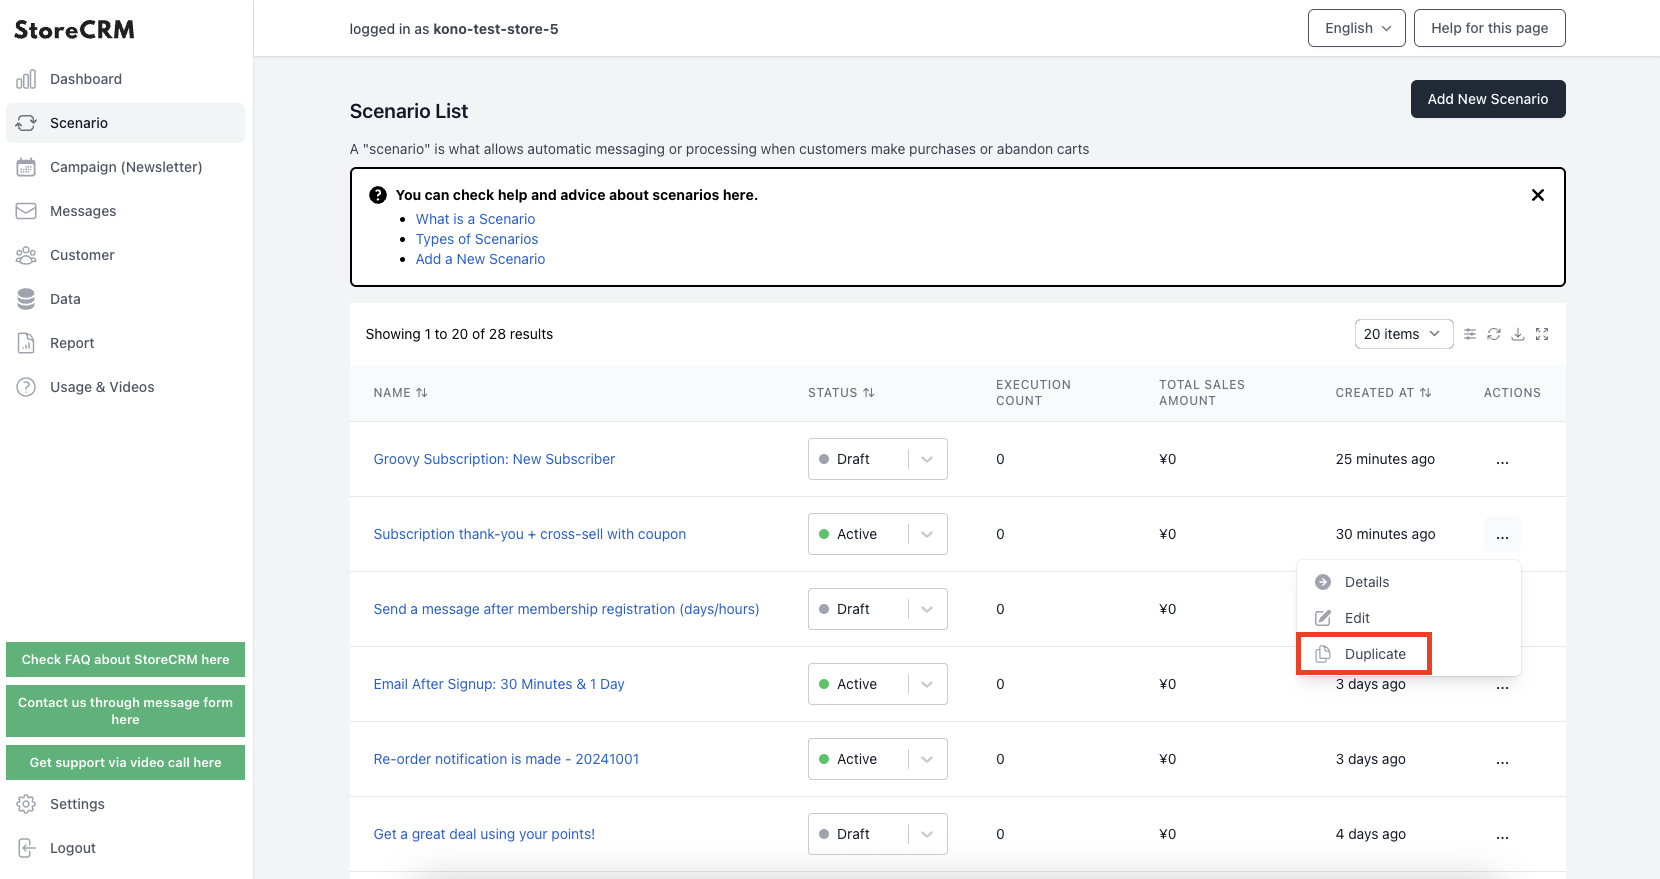
①Click [Scenario] to open the list. Click […] next to the scenario made earlier and choose [Duplicate] and click it.
➁A popup will appear. Click [OK], and if a scenario with “(Copy)” added to the name is created, the duplication is complete.
We will customize this duplicated scenario.
* The scenario name can be changed from the scenario edit screen.
Once a scenario is saved using the Flow Editor, you cannot revert to the simplified editing mode. If you want to test it on a live scenario, make sure to duplicate the scenario before customizing it.

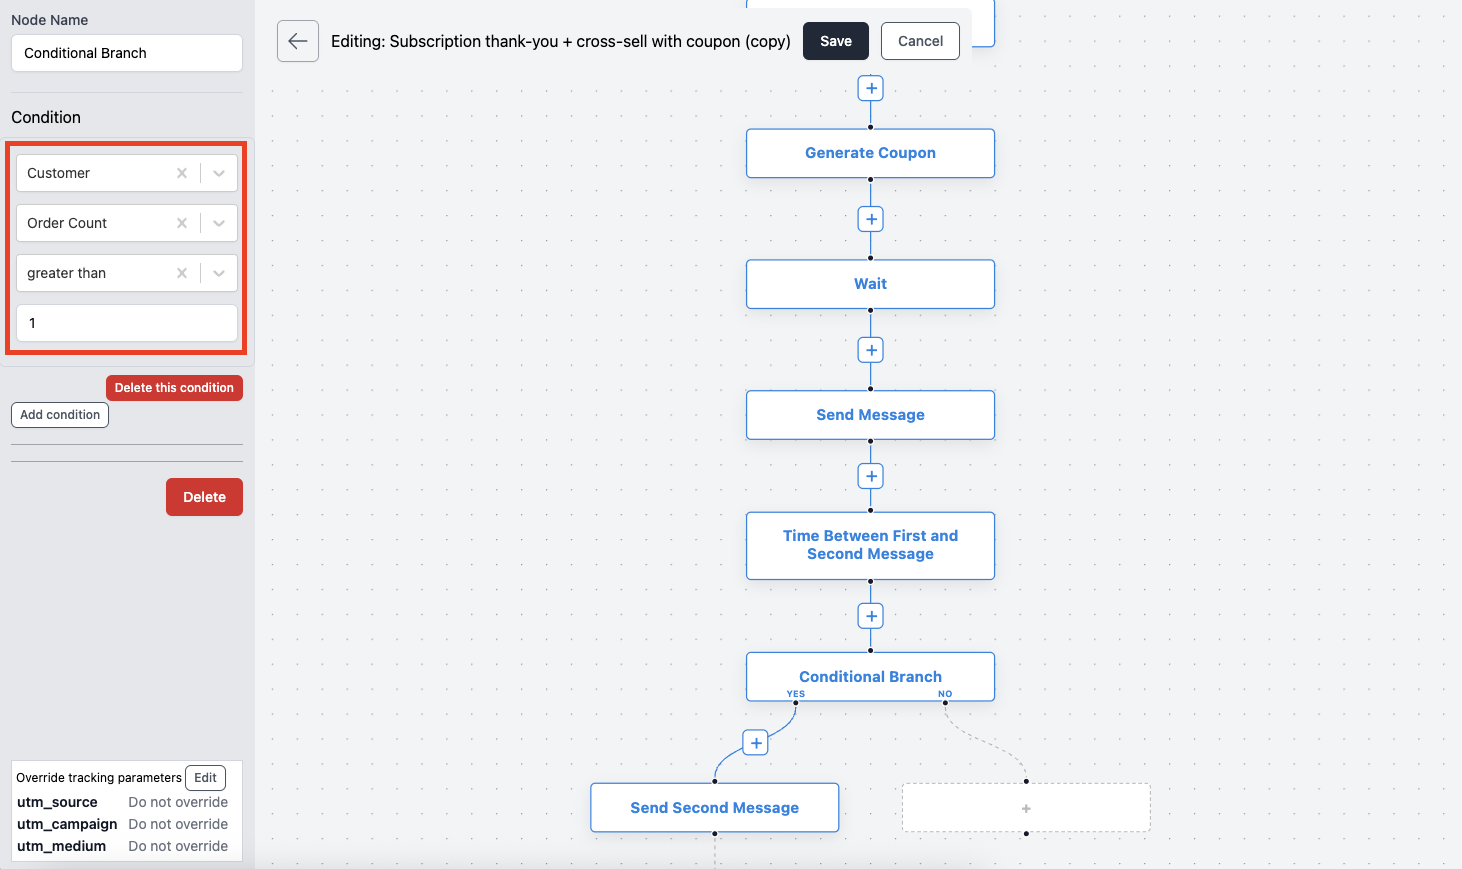
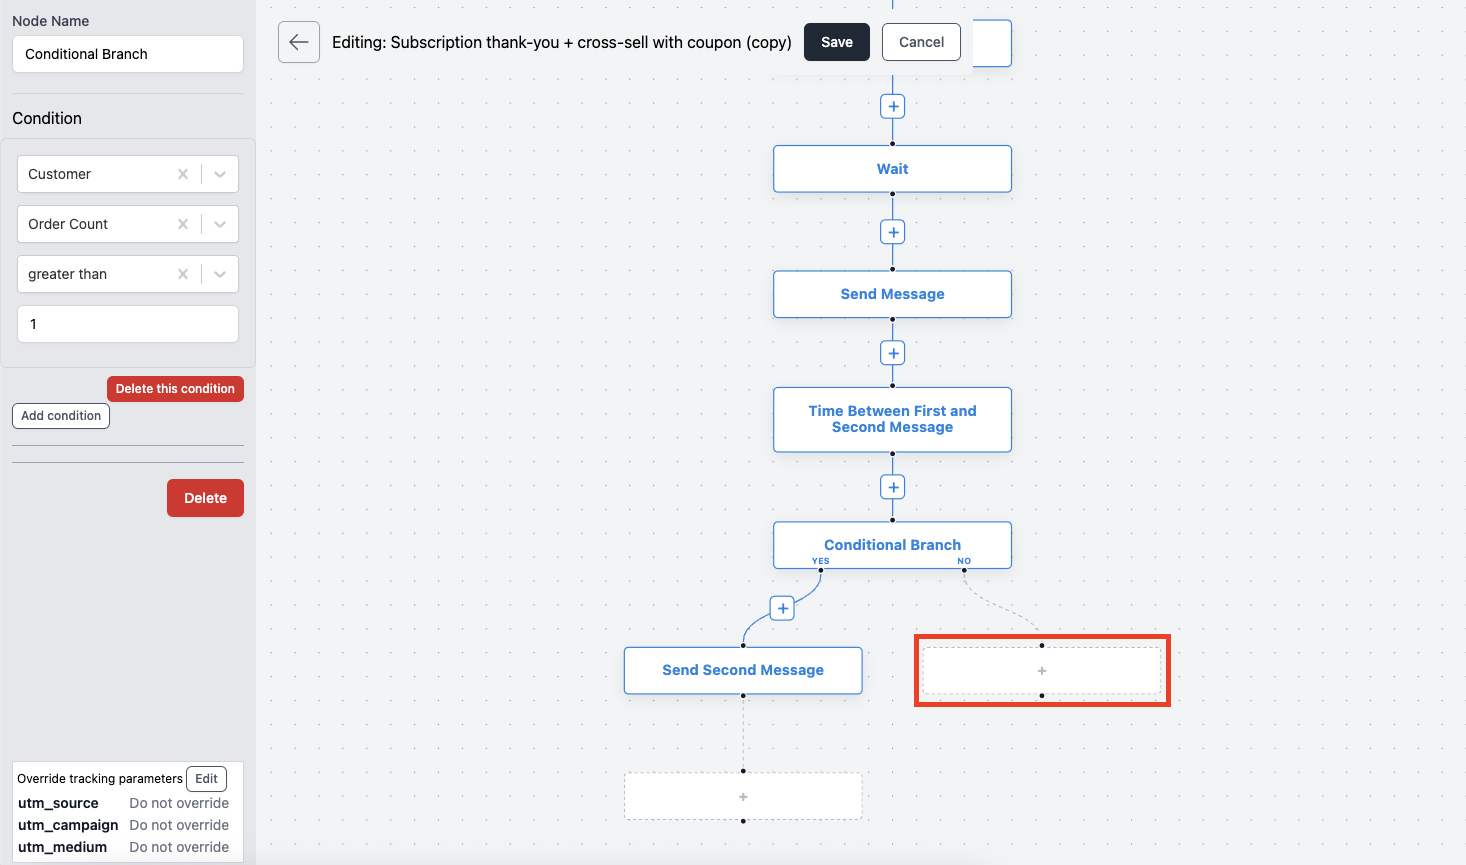
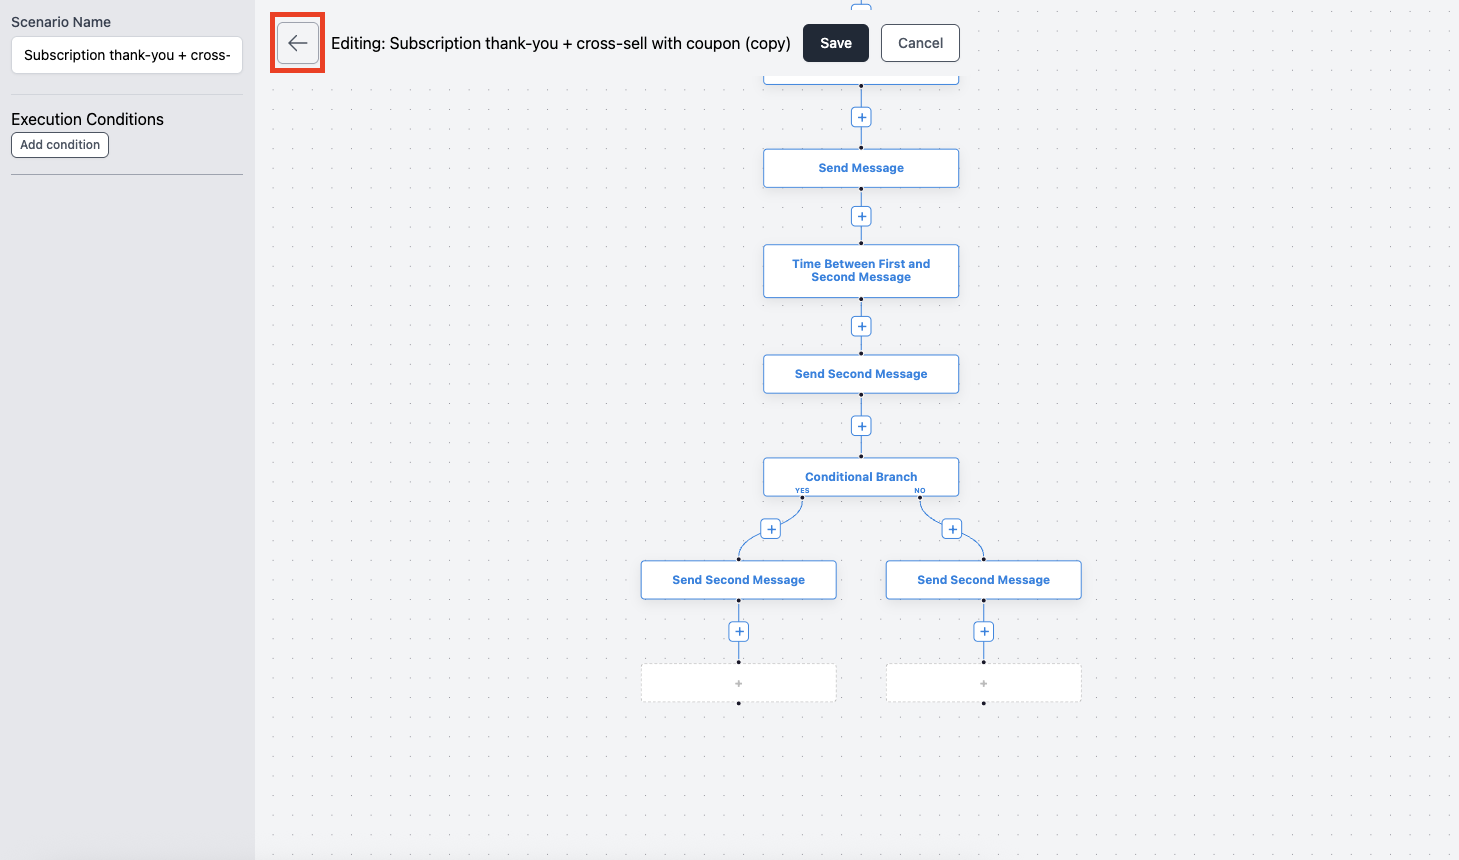
➁The Flow Editor screen will open. To differentiate the second email, click the + between [After 1st Email] and [Send 2nd Email].
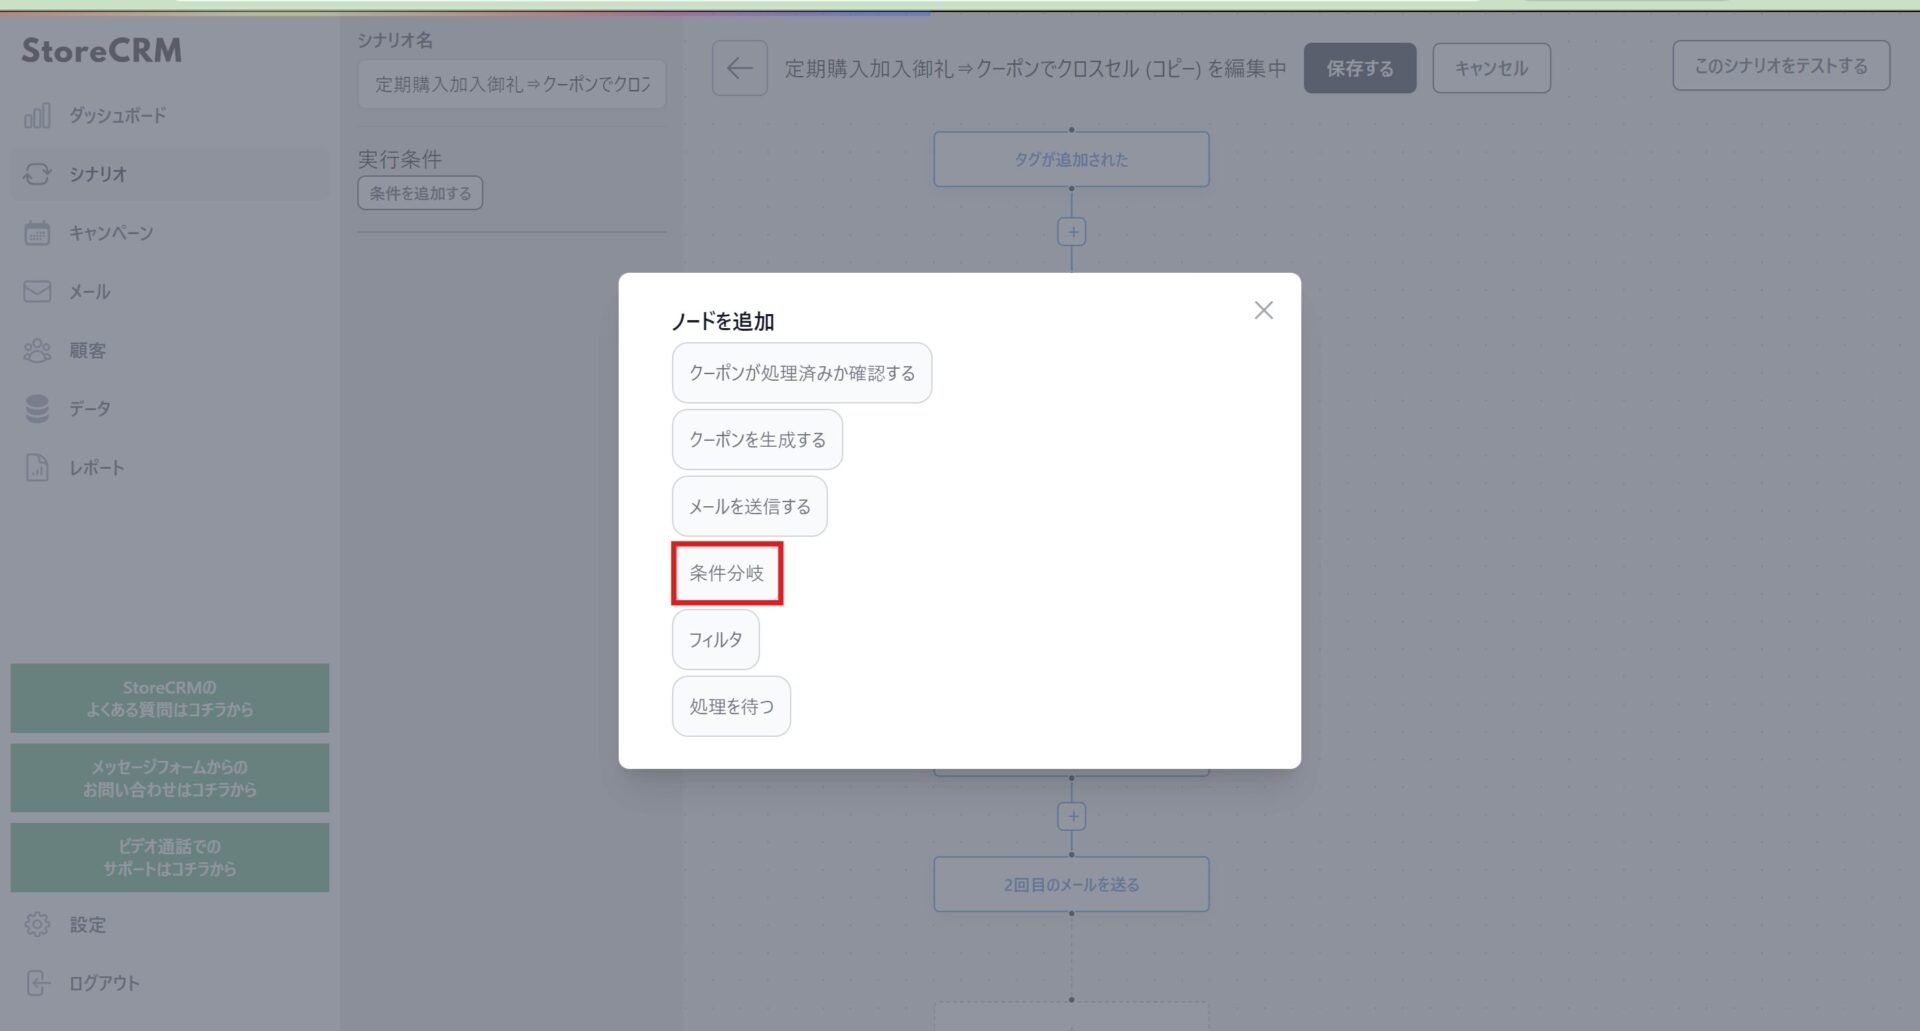
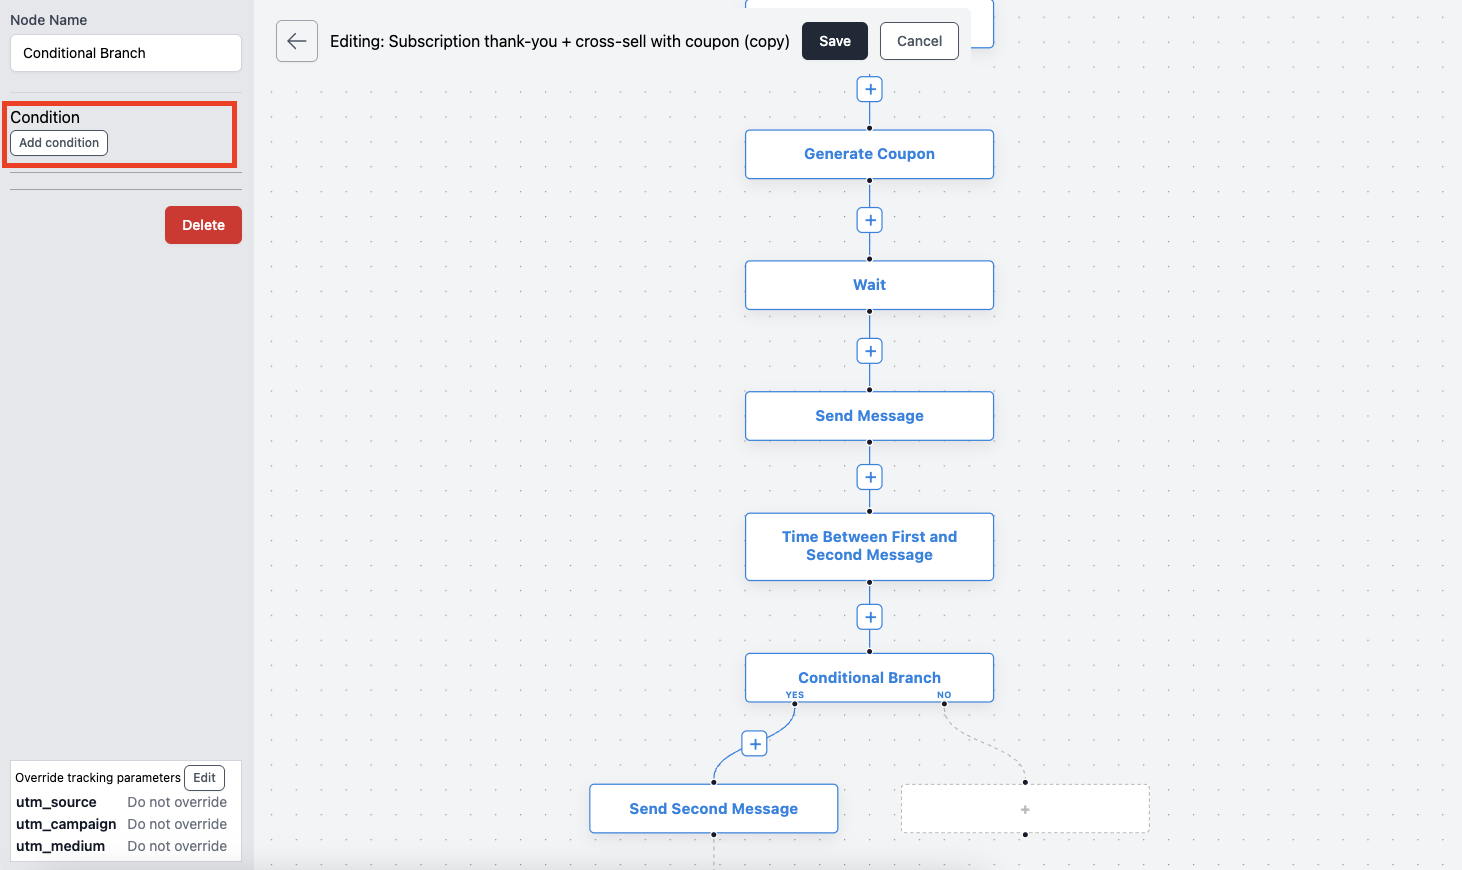
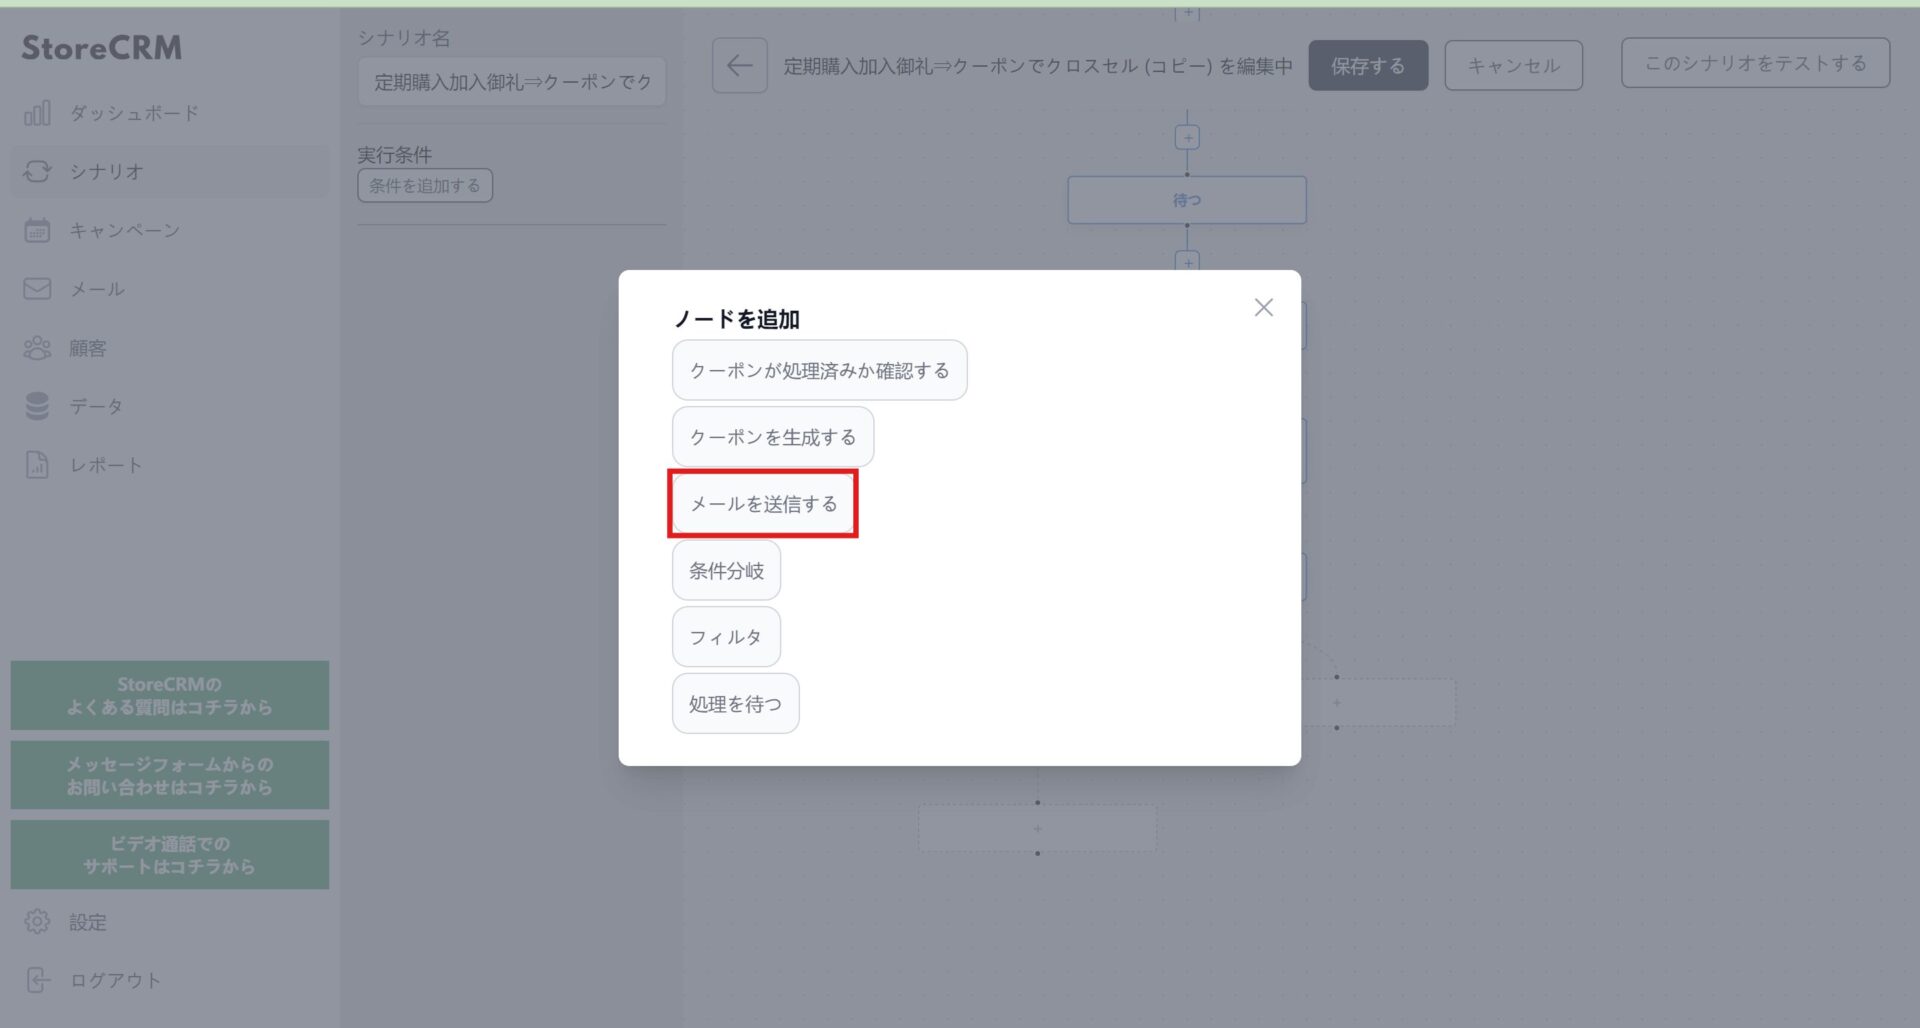
③When the node selection screen appears, choose [Conditional Branch] and click it.
Before enabling the scenario, ensure no other active scenario uses the same trigger. If the logic differs entirely, it is not an issue. If using a duplicated scenario, double-check whether the original should remain active.