
Introduction
With Shopify's new customer accounts, LINE Login is connected using OIDC (OpenID Connect) rather than the Multipass approach used before.
StoreCRM's OIDC support is what makes LINE Login possible on new customer accounts.
If you are still on classic customer accounts, follow the article below instead.
How to let customers sign up and log in to Shopify with LINE Login
The steps below use the free Dawn theme. Paid themes and heavily customised themes may have a different file structure; if that is the case, contact StoreCRM customer support and we can carry out the implementation for you. Feel free to get in touch through the contact form.
[Please note]
The LINE Login functionality described here is available only on Shopify Plus. We also support merchants considering a move to Shopify Plus, so feel free to get in touch through the contact form.
Related pages
How to let customers sign up and log in to Shopify with LINE Login
StoreCRM for LINE — the definitive Shopify and LINE integration app
How to connect Shopify with a LINE Official Account
How to add a LINE ID linking icon to your Shopify store
4 Shopify LINE ID linking apps compared
How to manage customers over LINE: 10 recommended CRM tools
Who this is for
- Stores on Shopify Plus
- Stores using Shopify's new customer accounts
- Anyone with permission to configure LINE integration in StoreCRM
Worth knowing before you start
- The steps differ from the LINE Login setup for classic accounts.
- Multipass is not available on new customer accounts, so OIDC configuration is required.
- If you are on classic accounts, use the article covering the classic procedure.
What you will build

Let us start with the signup screen you are building. Shopify's standard login and signup are replaced wholesale by the screen shown above.
Enabling OIDC in StoreCRM

1. In the StoreCRM admin, open [LINE settings] > [OIDC settings].

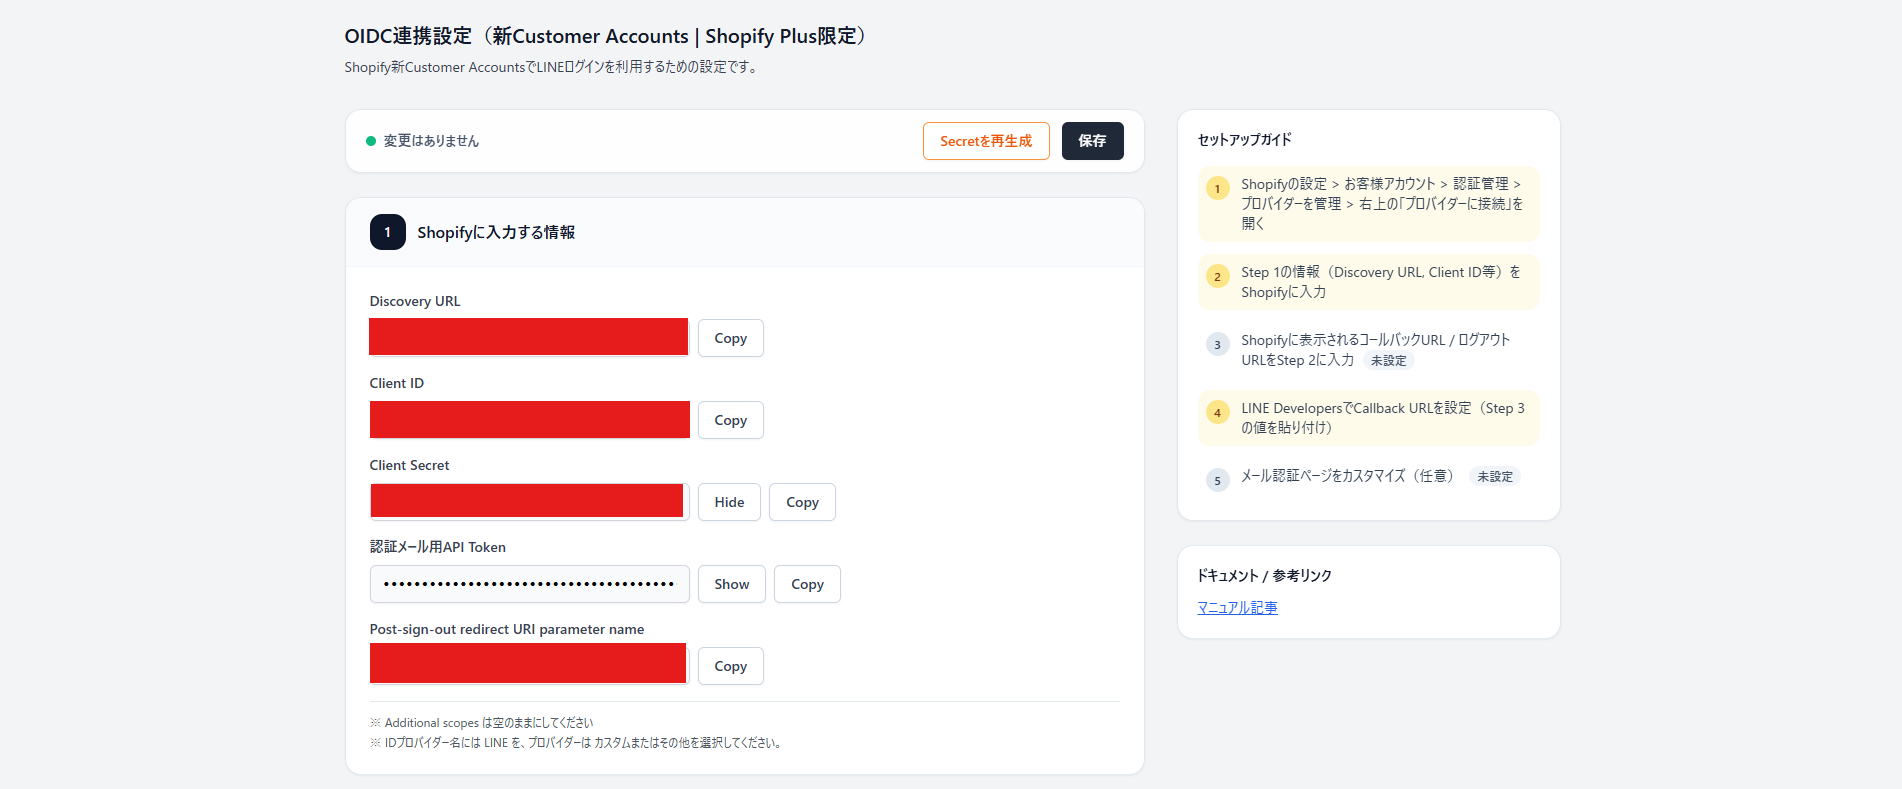
2. In the [OIDC integration (new customer accounts)] section, click [Enable OIDC integration].

**3. Make a note of the generated values:
- Discovery URL
- Client ID
- Client Secret
- Post-sign-out redirect URI parameter name (post_logout_redirect_uri)**
Connecting the identity provider in Shopify

1. Open [Settings] > [Customer accounts] > [Authentication] > [Manage].

2. Open [Identity providers] > [Manage providers].

3. Click "Connect provider".

4. Fill it in, noting the following. Give the identity provider any name that makes clear it is the StoreCRM provider. Set the provider type to [Custom or other].

5. Enter the values you noted from StoreCRM in the matching fields.
**- Discovery URL → Well-known or discovery endpoint URL *
- Client ID → Client ID
- Client Secret → Client secret
- Post-sign-out redirect URI parameter name → Post-logout redirect URI parameter name ***
Leave additional scopes (beyond openid and email) empty.

6. Click save.
Copying the URLs Shopify generates back into StoreCRM
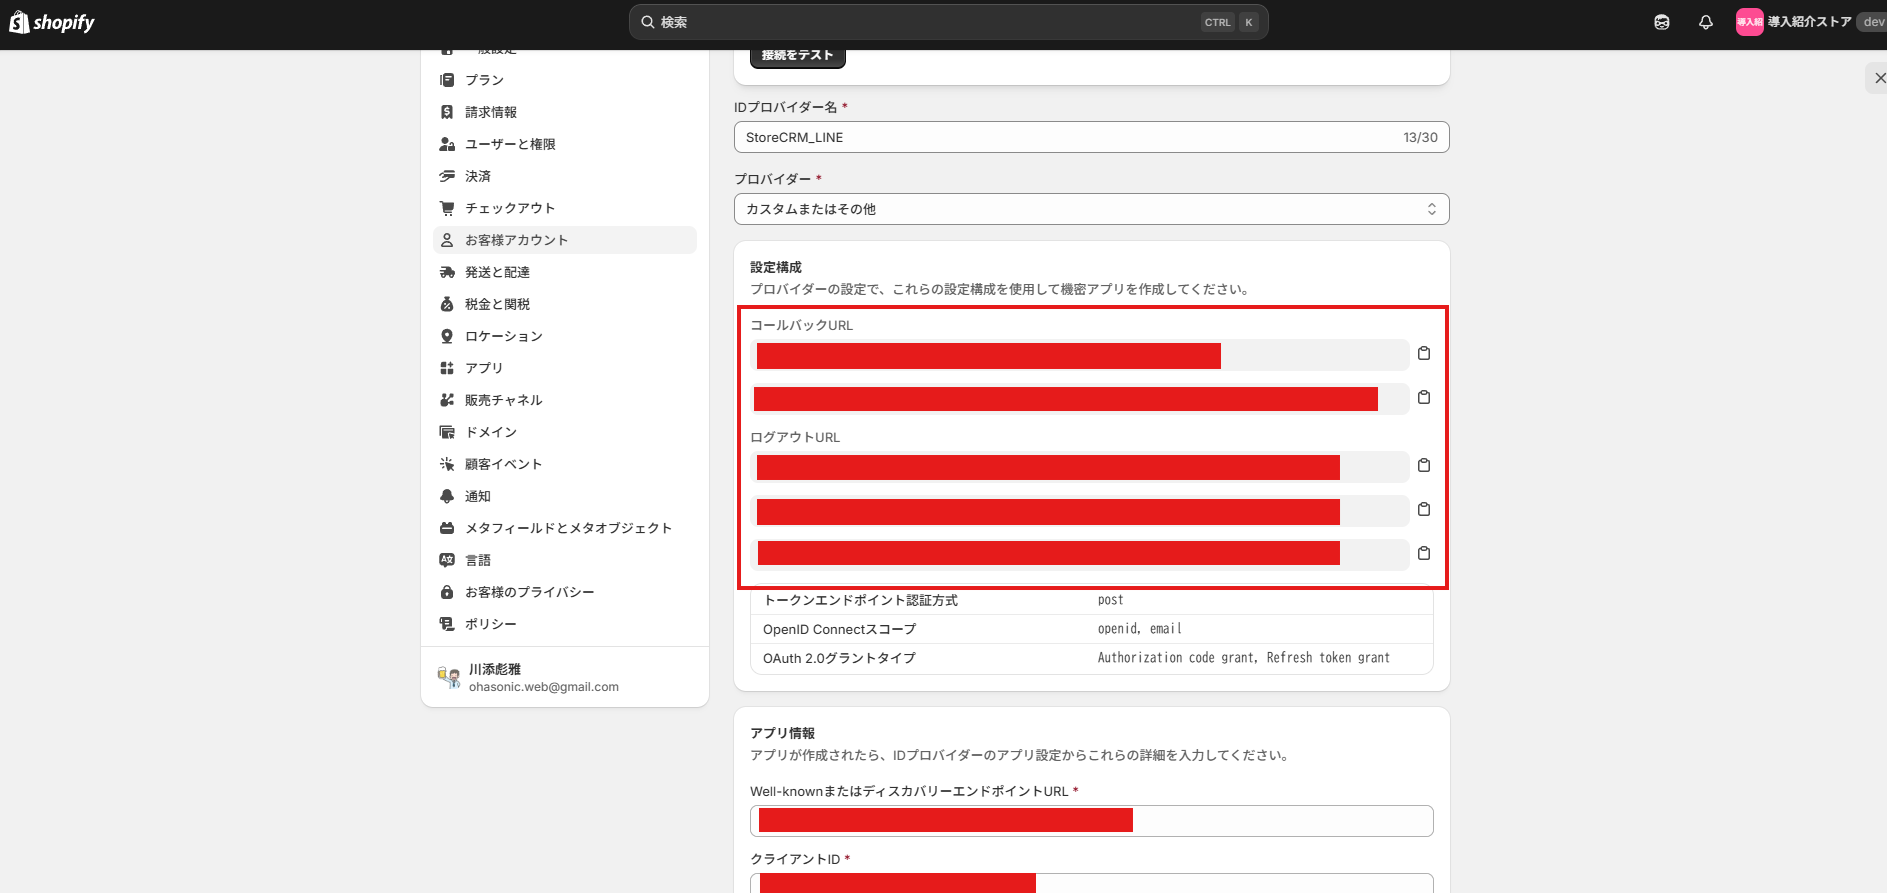
1. Make a note of the "callback URL" and "logout URL" shown on Shopify's identity provider settings screen.
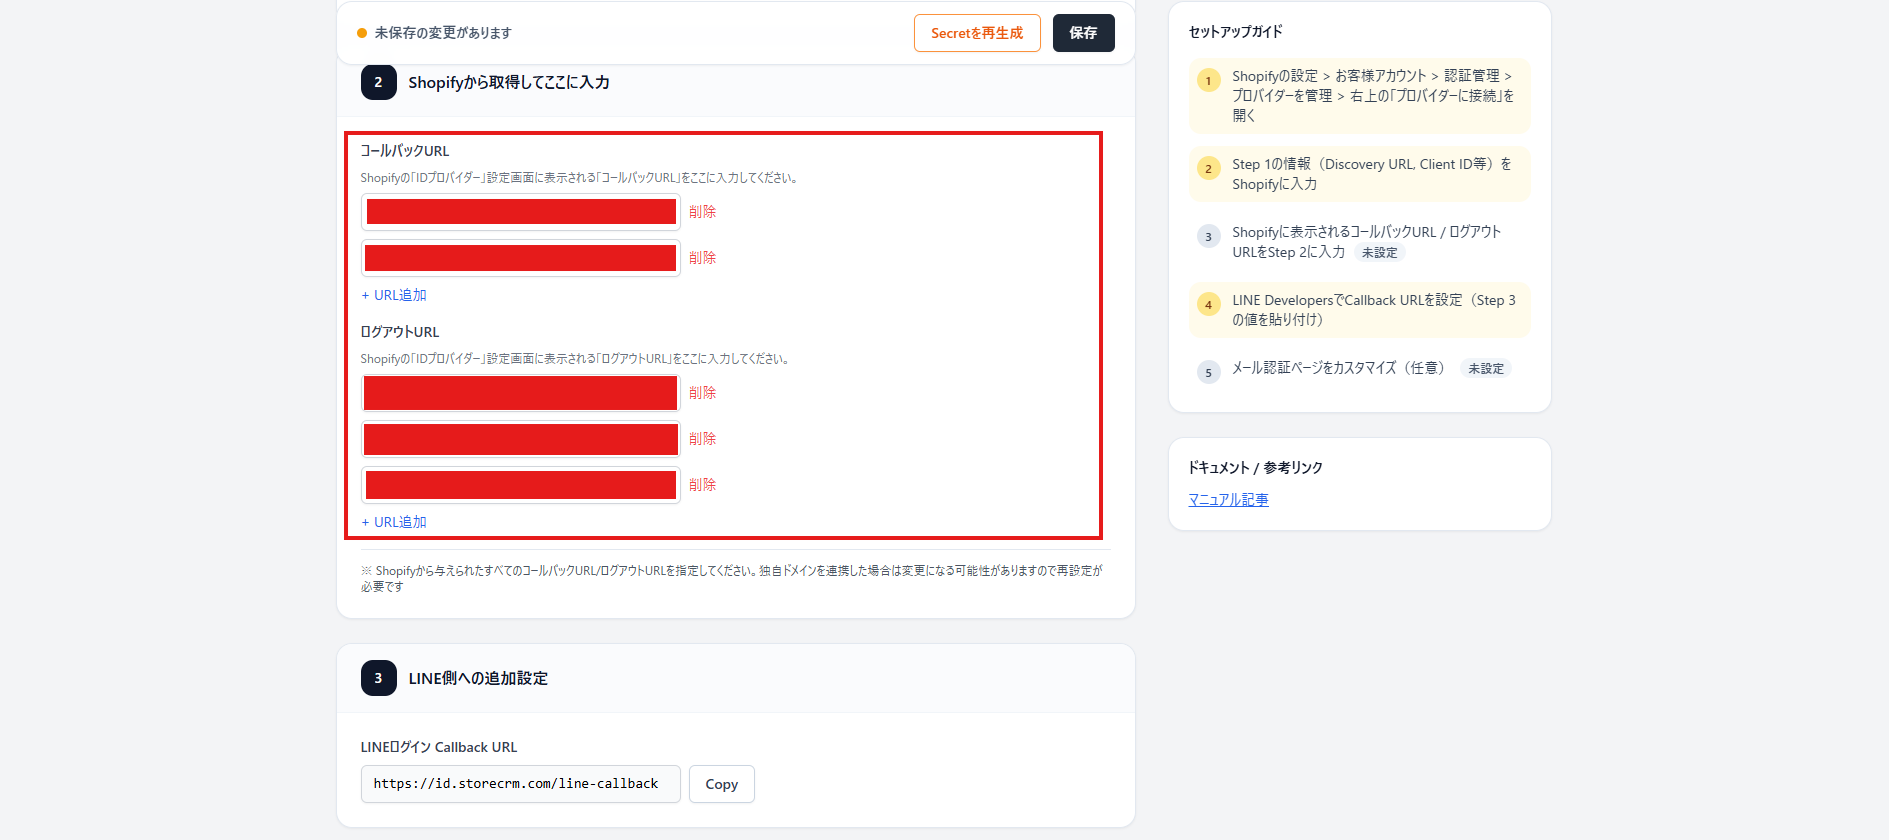
2. Back in the StoreCRM settings, register every [callback URL] and [logout URL]. Register all of them, not just one of each.
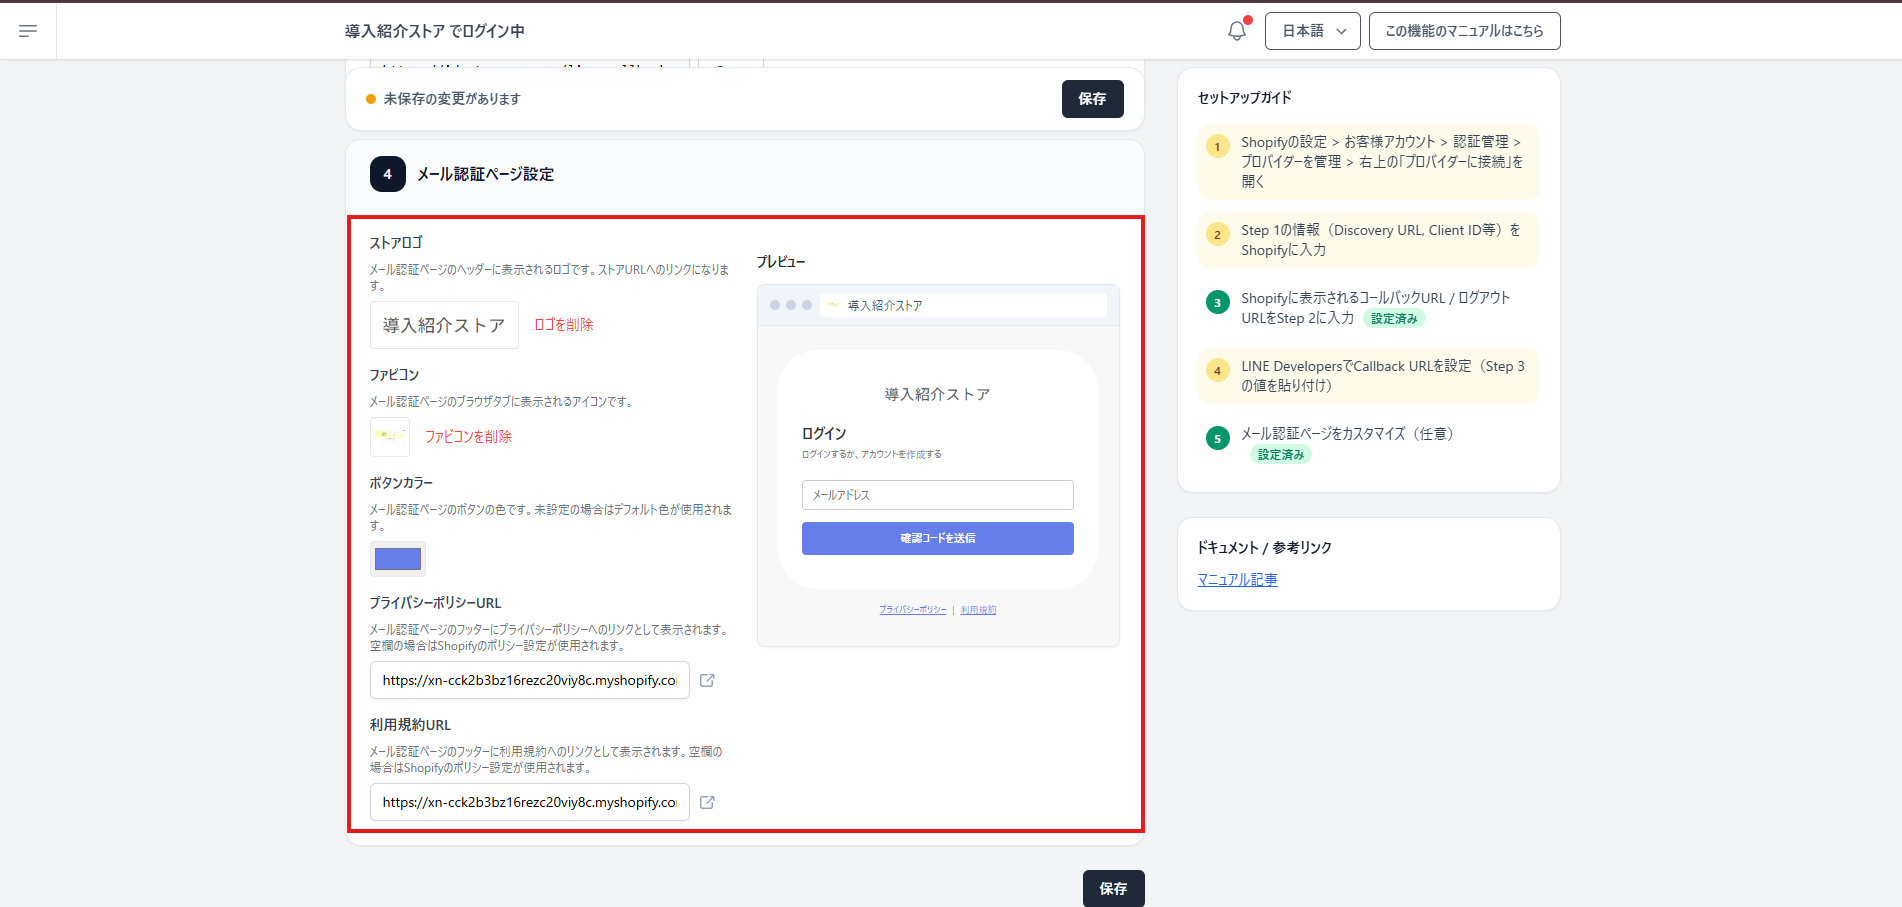
3. Set the store logo, favicon and store page links that appear on the login screen.
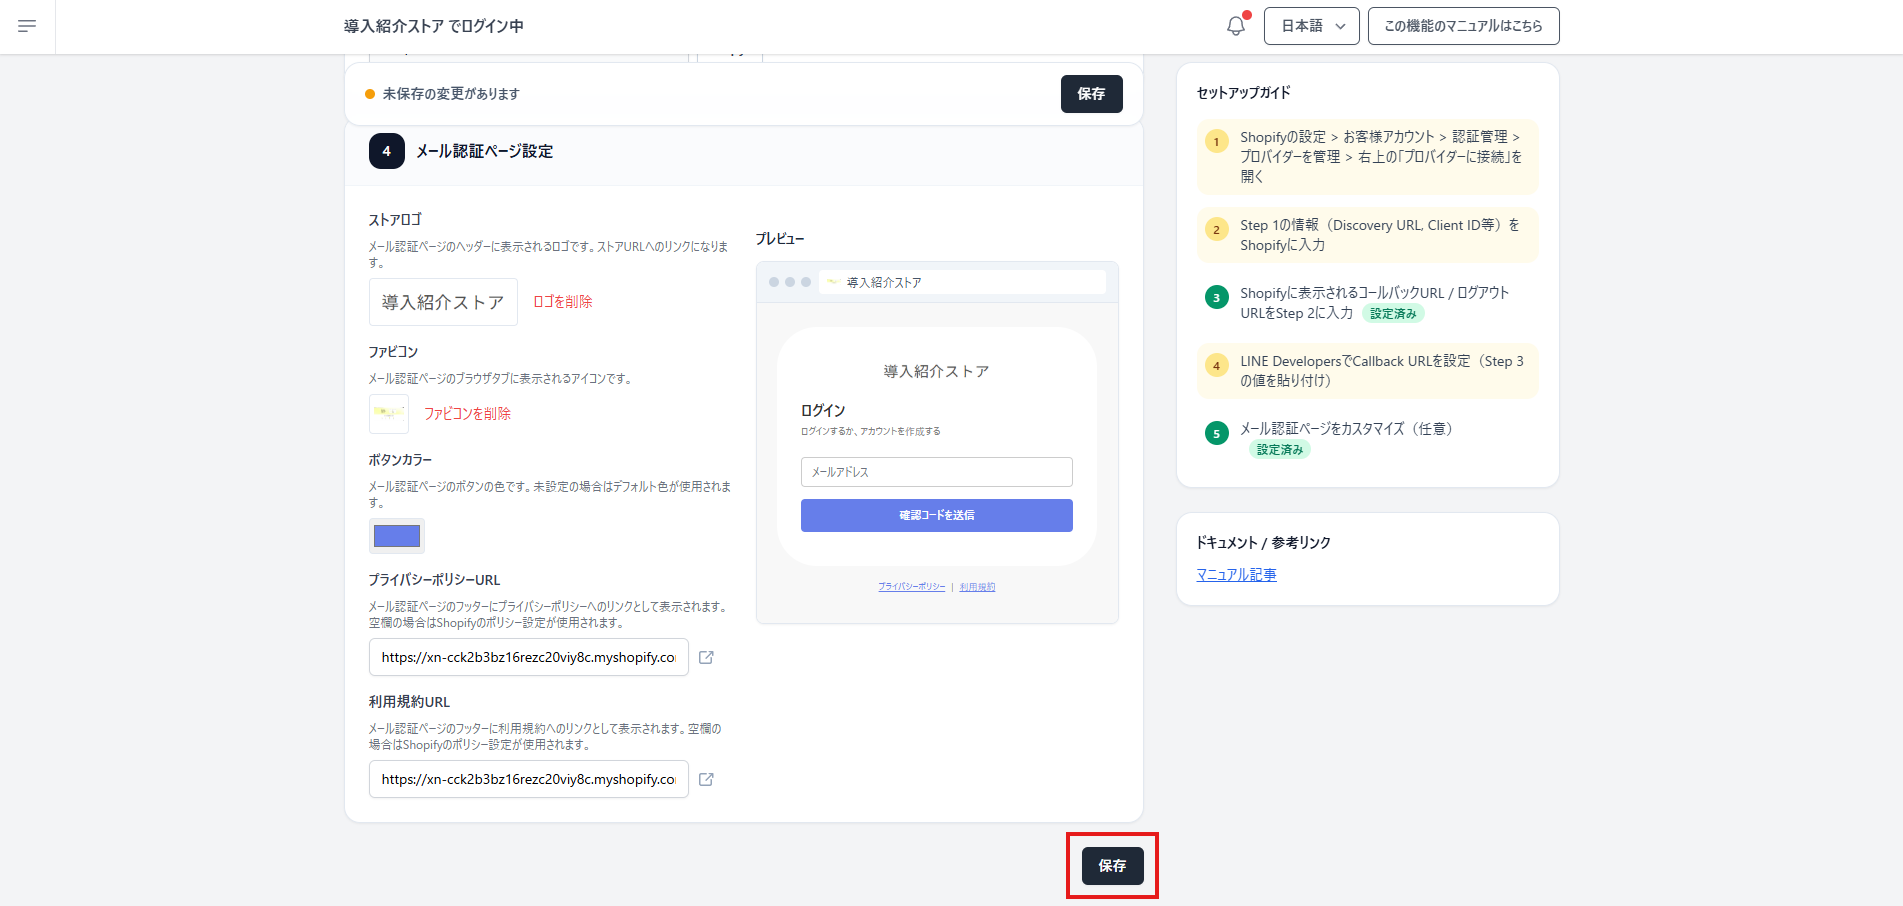
4. Click [Save] when you are finished.
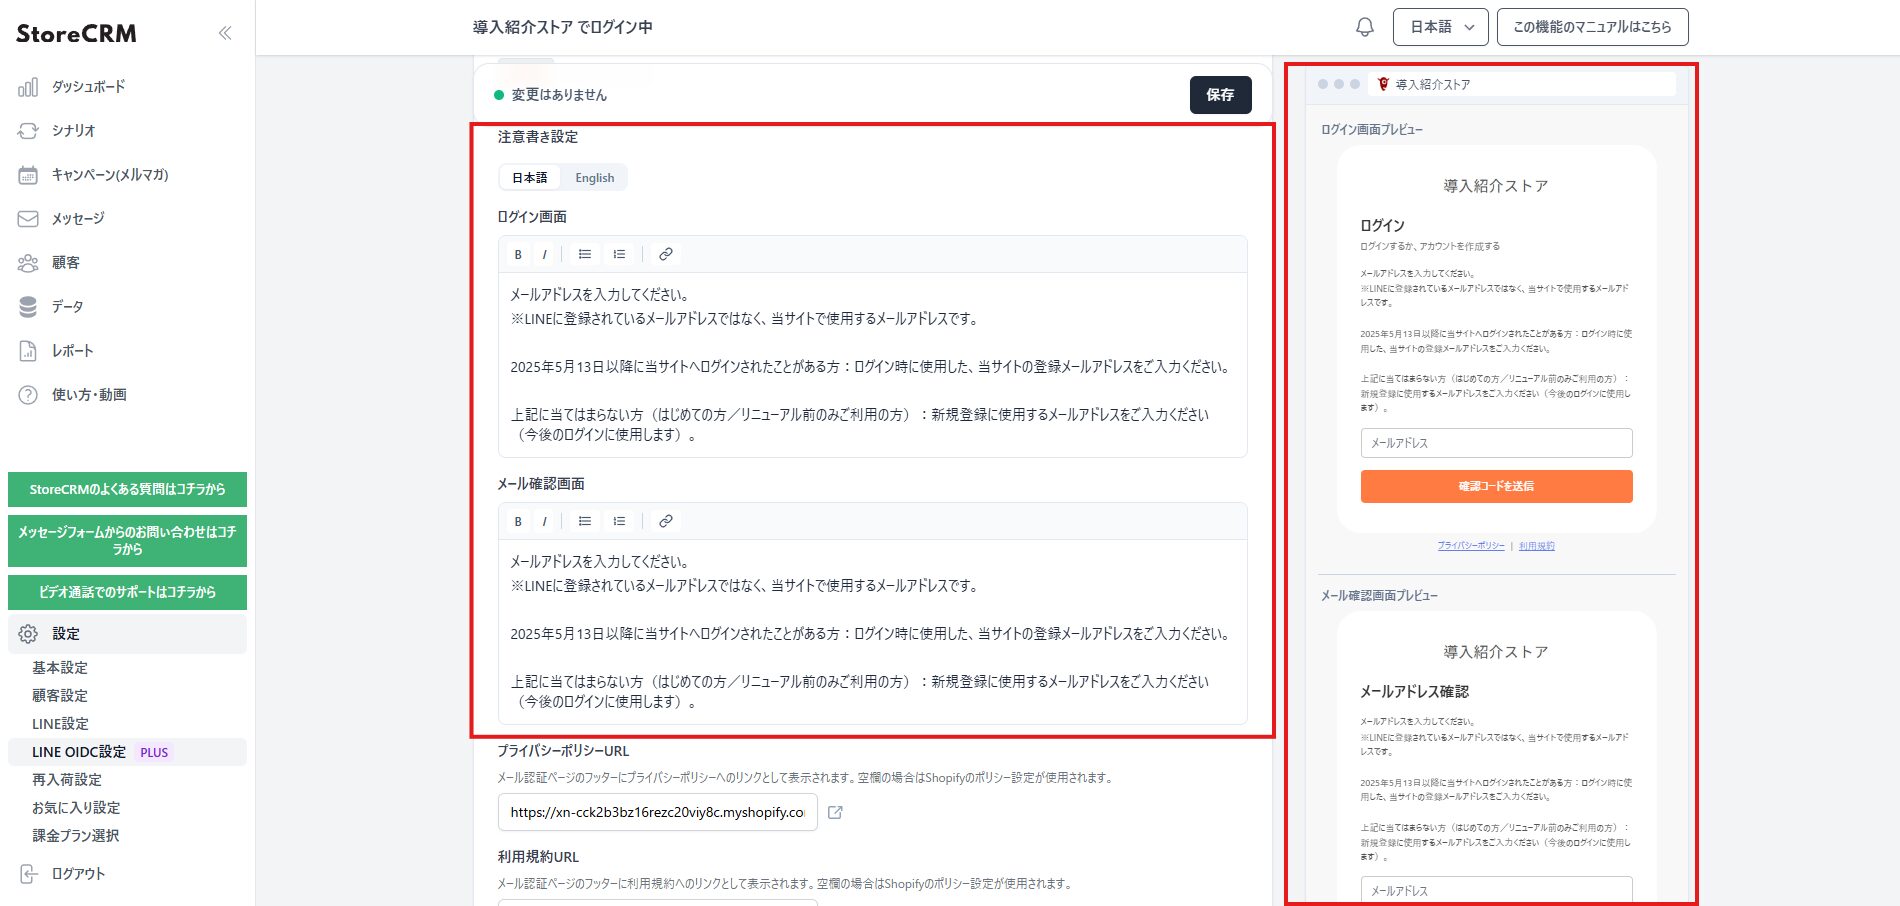
5. If you need a notice on the login screen or the email verification screen, set it here. Japanese and English are supported. As of 23 March 2026, which language is shown follows the browser's language setting.
Setting the callback URL in LINE Developers
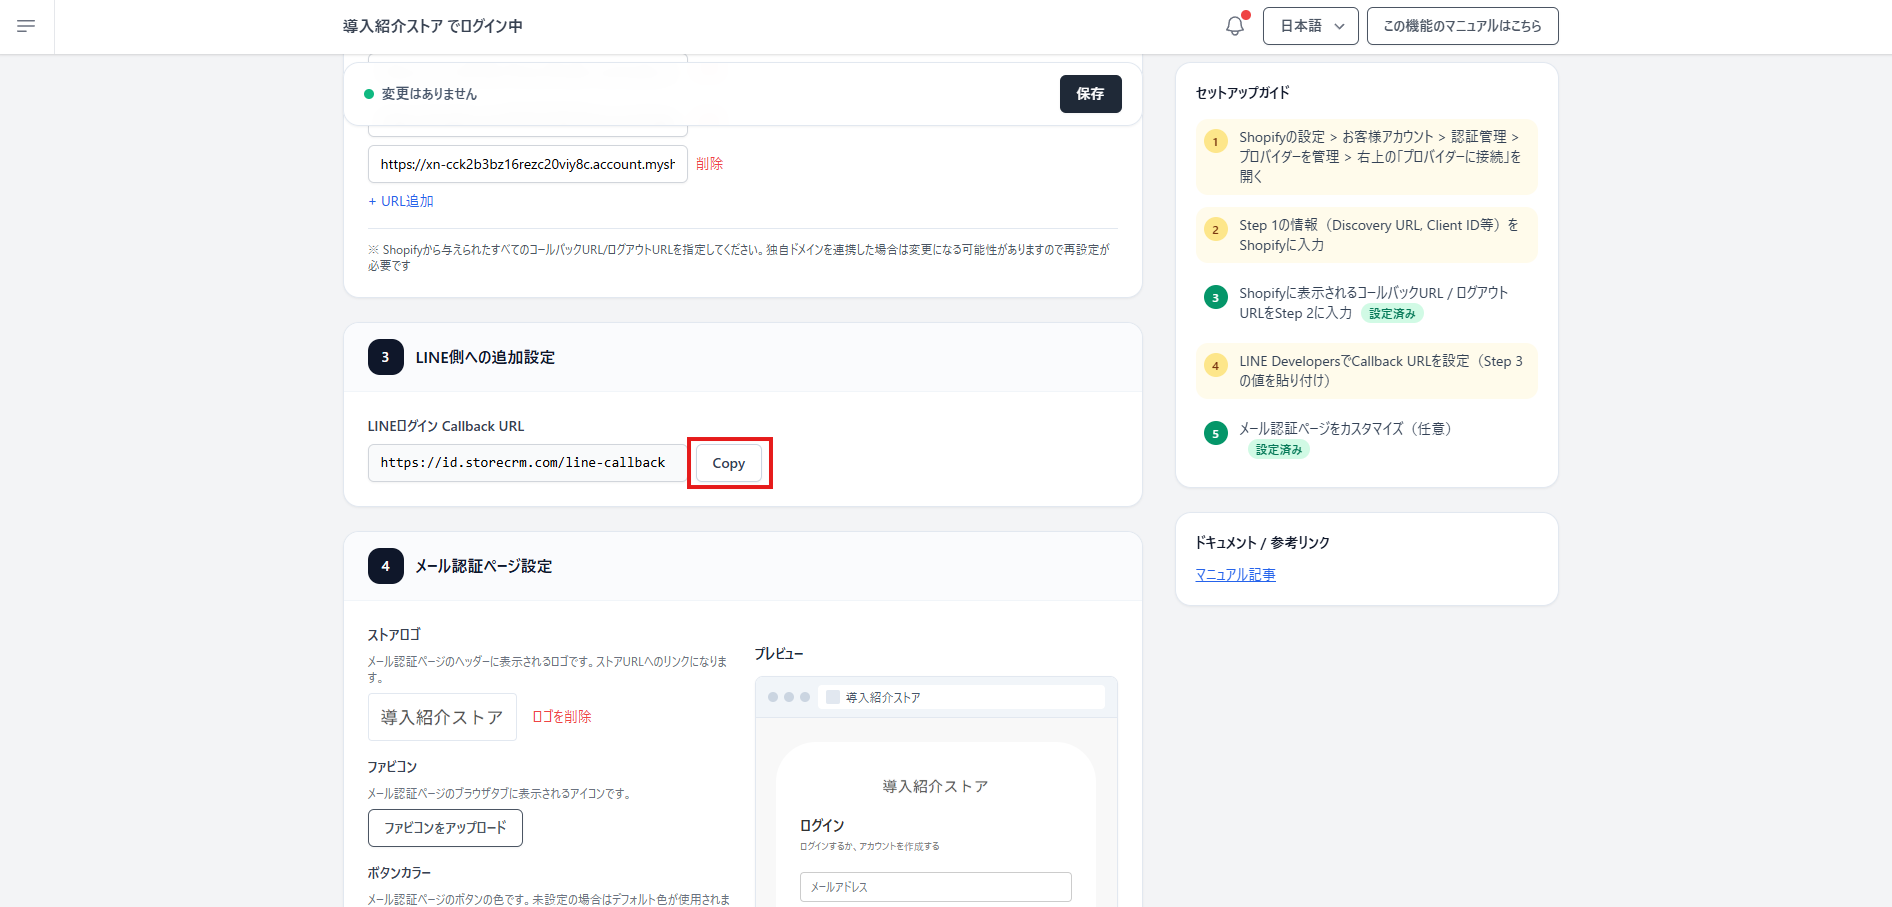
1. Make a note of the [LINE Login callback URL] shown at step 3 of StoreCRM's LINE OIDC settings screen.
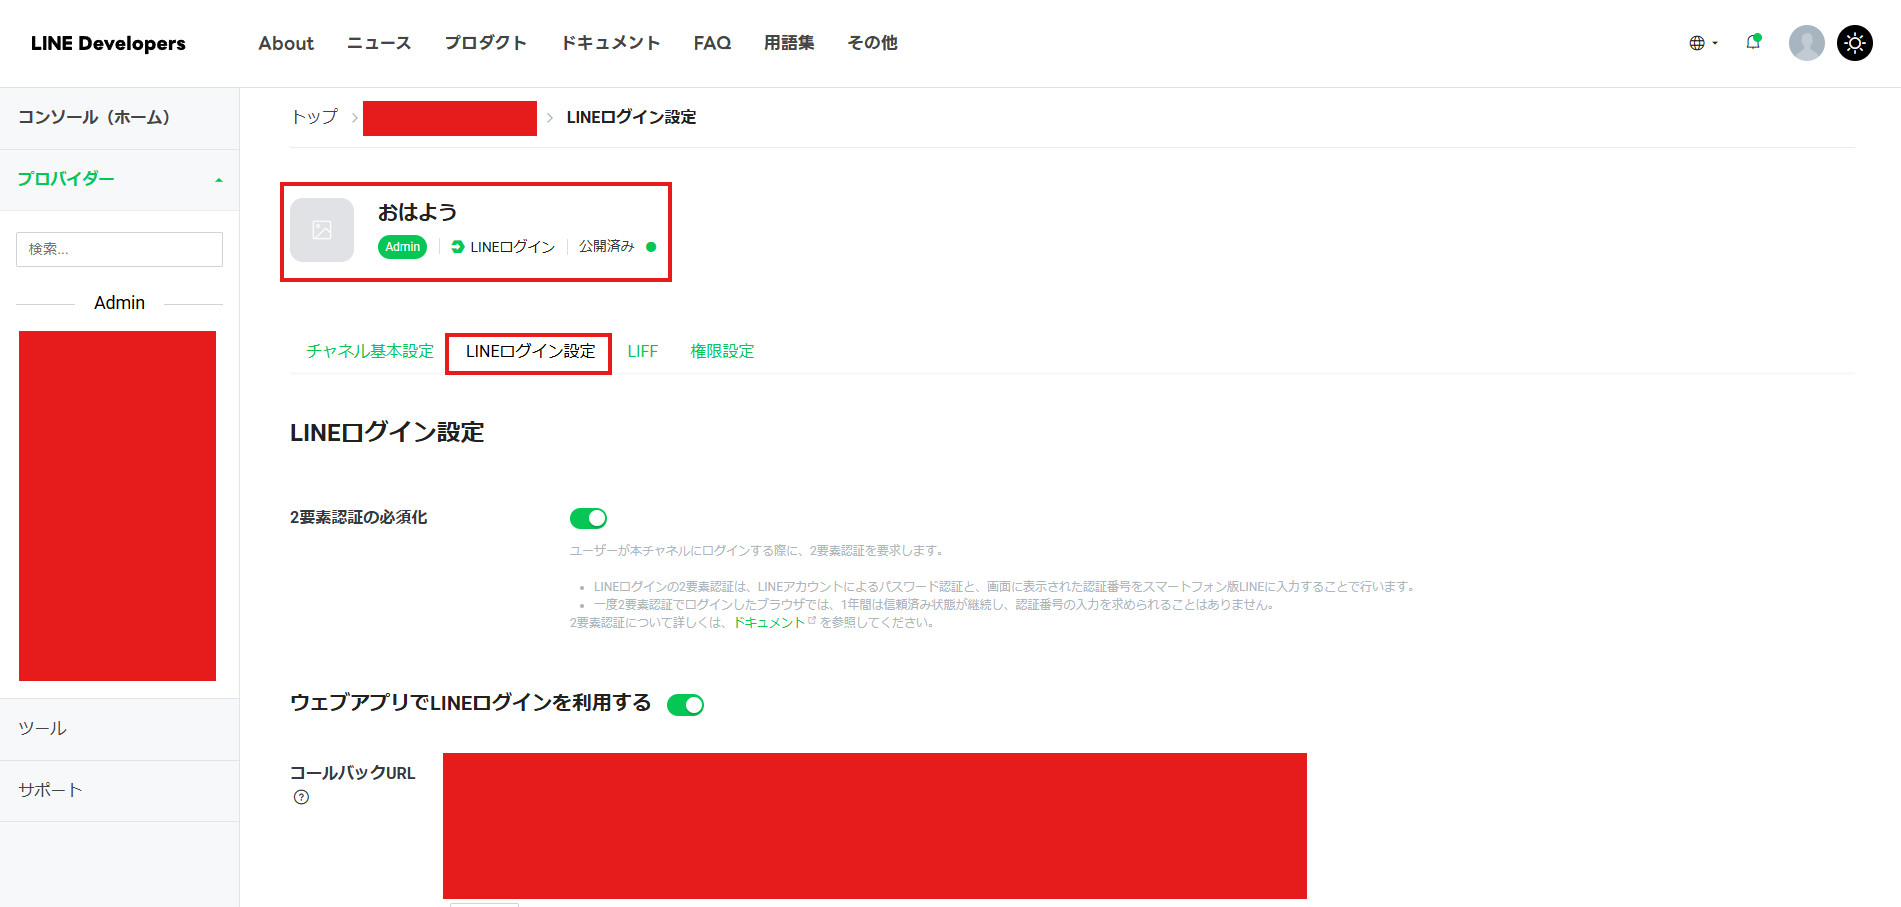
2. Open LINE Developers and go to [LINE Login channel] > [LINE Login settings].
LINE Developers → https://developers.line.biz/ja/ LINE integration must already be set up.
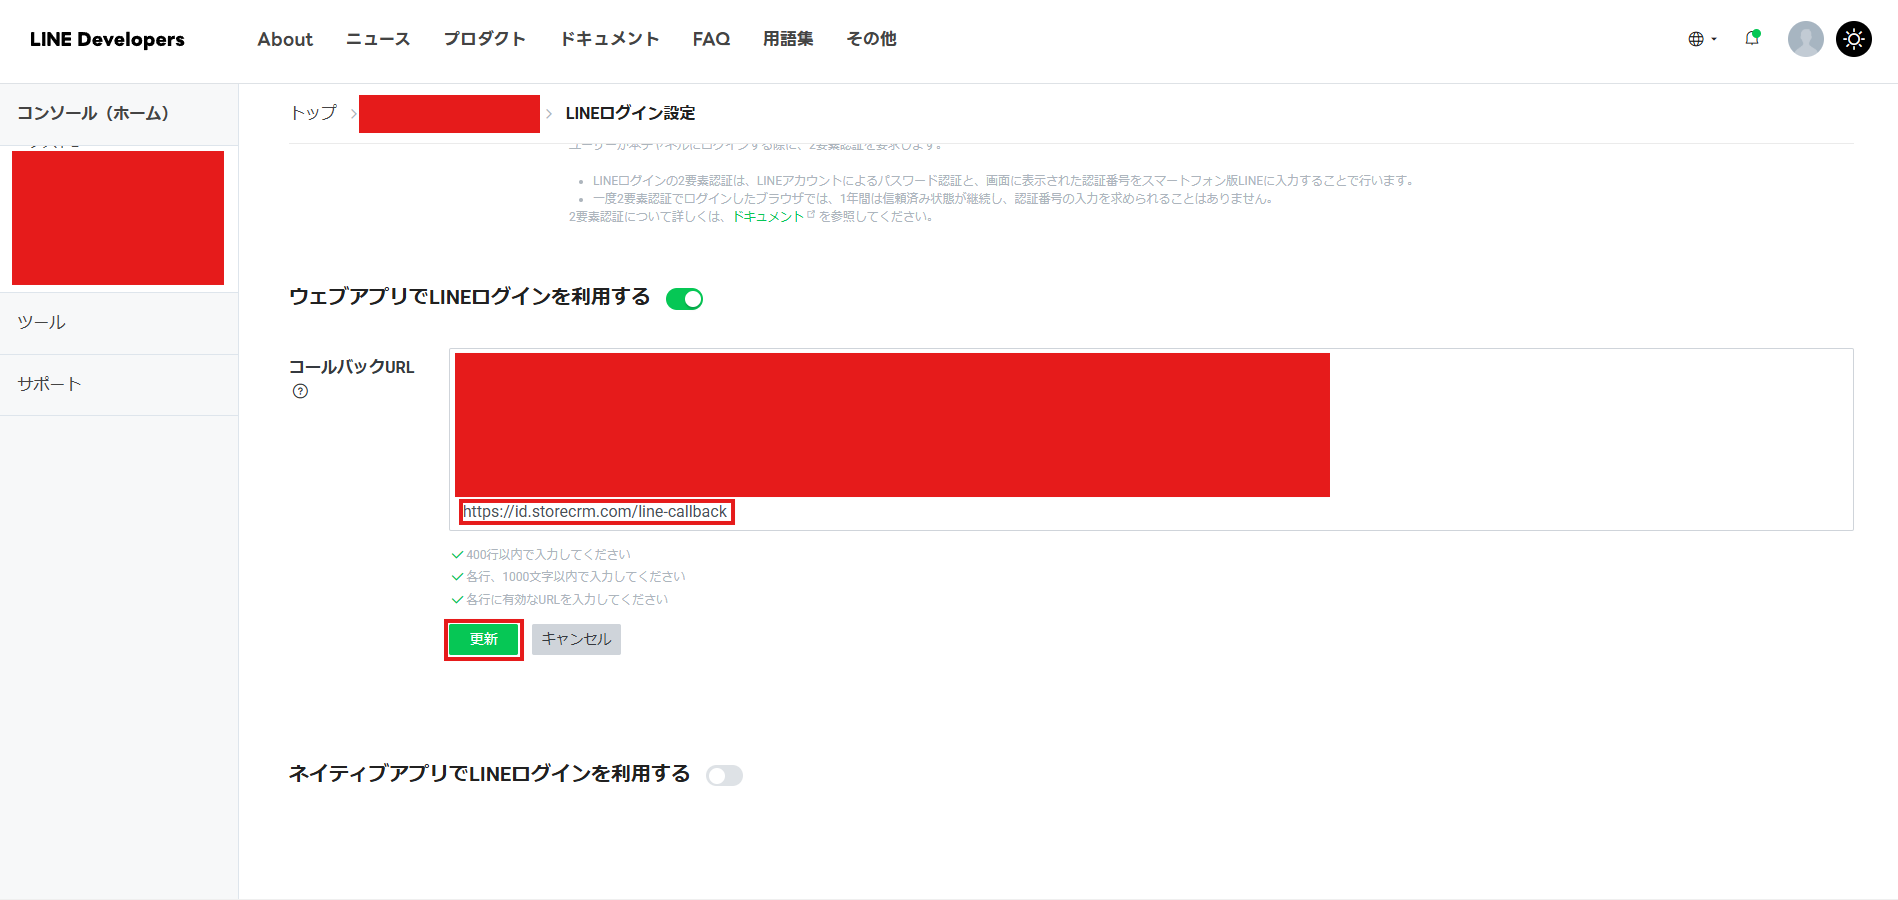
3. Click [Edit] next to the callback URL and enter the URL you noted. Remember to click [Update] afterwards.
Testing it
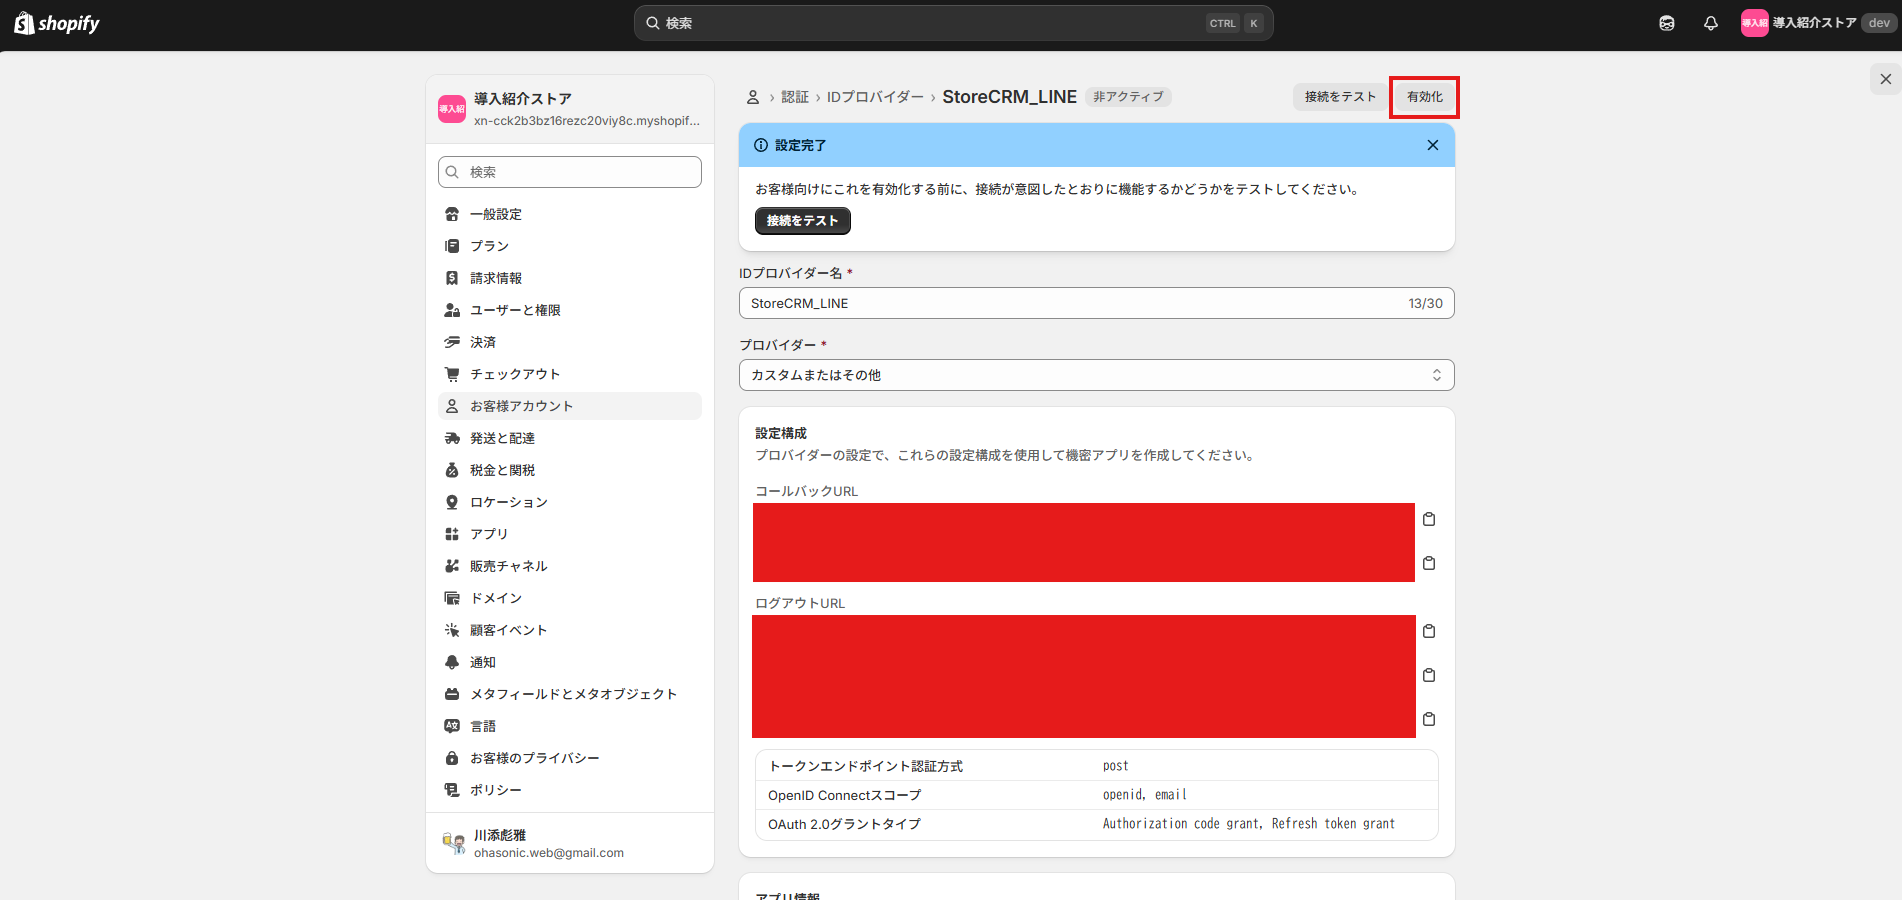
Start by clicking [Activate] to activate the provider.
! The intended order is test the connection, confirm it works, then activate — but as Shopify currently behaves, the connection test is unavailable until you activate. Note that activating switches the provider over to StoreCRM's, so we recommend confirming the behaviour on a development store before applying it to your live store. !
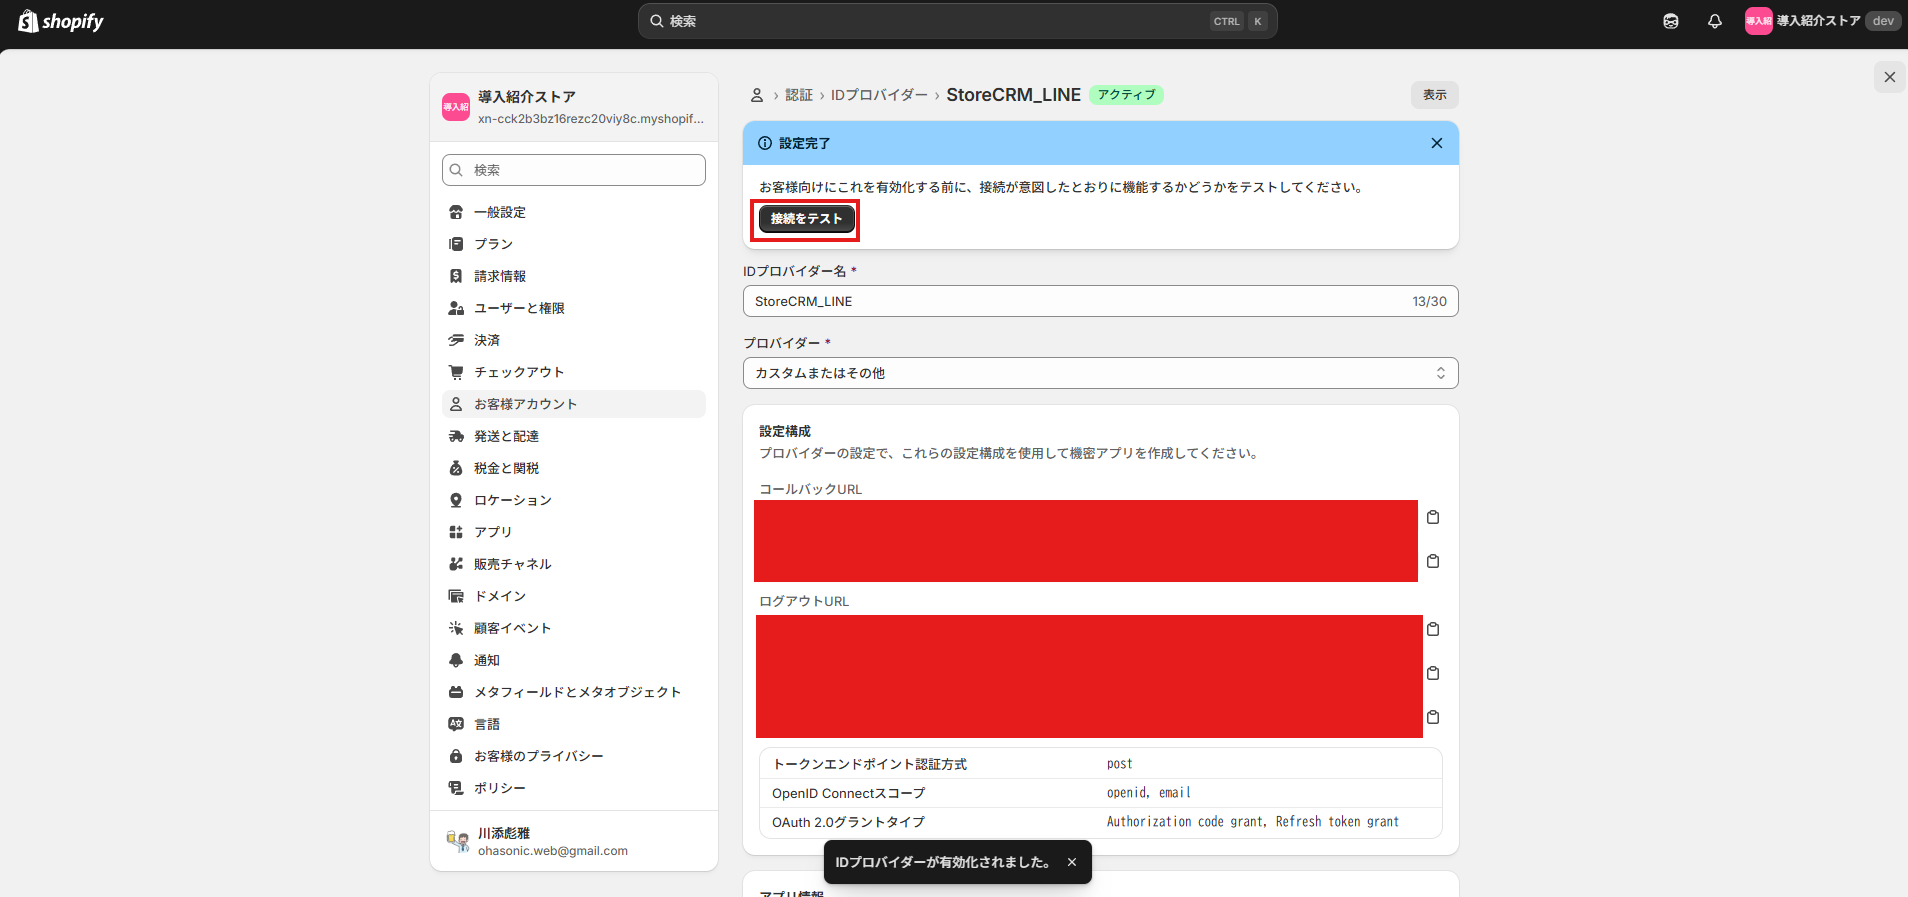
2. Once it is activated, run the connection test to confirm the configuration. Click [Test connection].
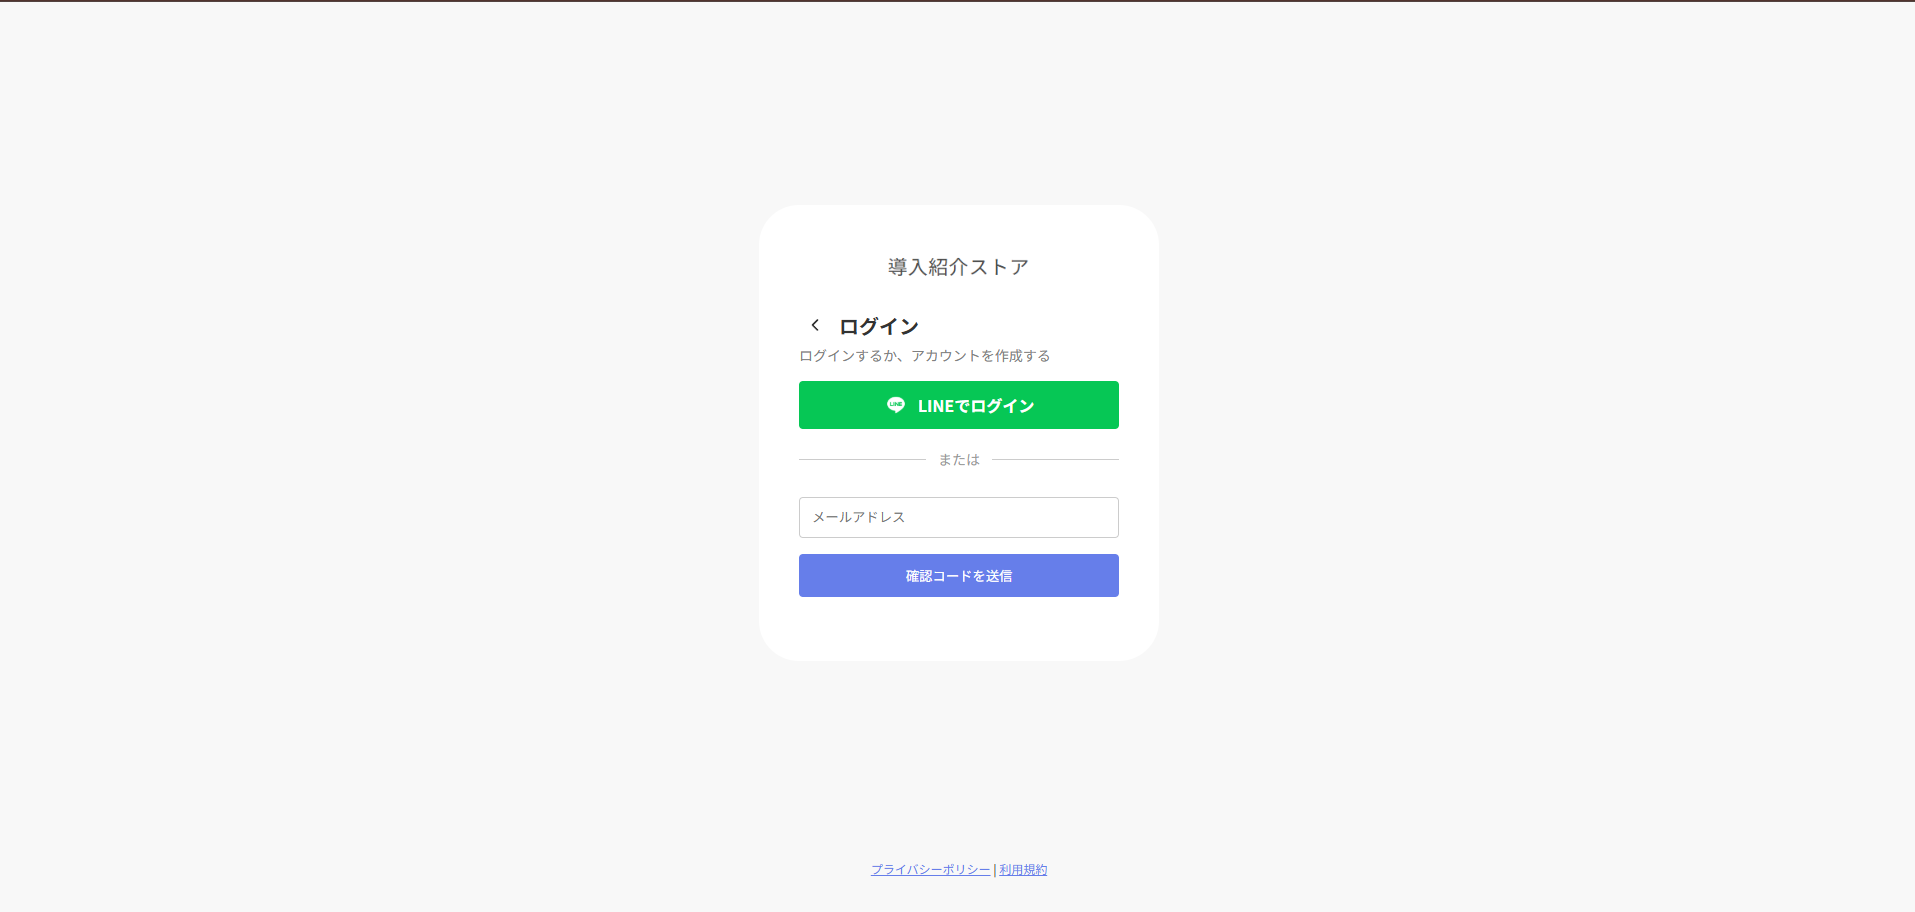
3. The StoreCRM login screen appears; test authentication with email or with LINE.
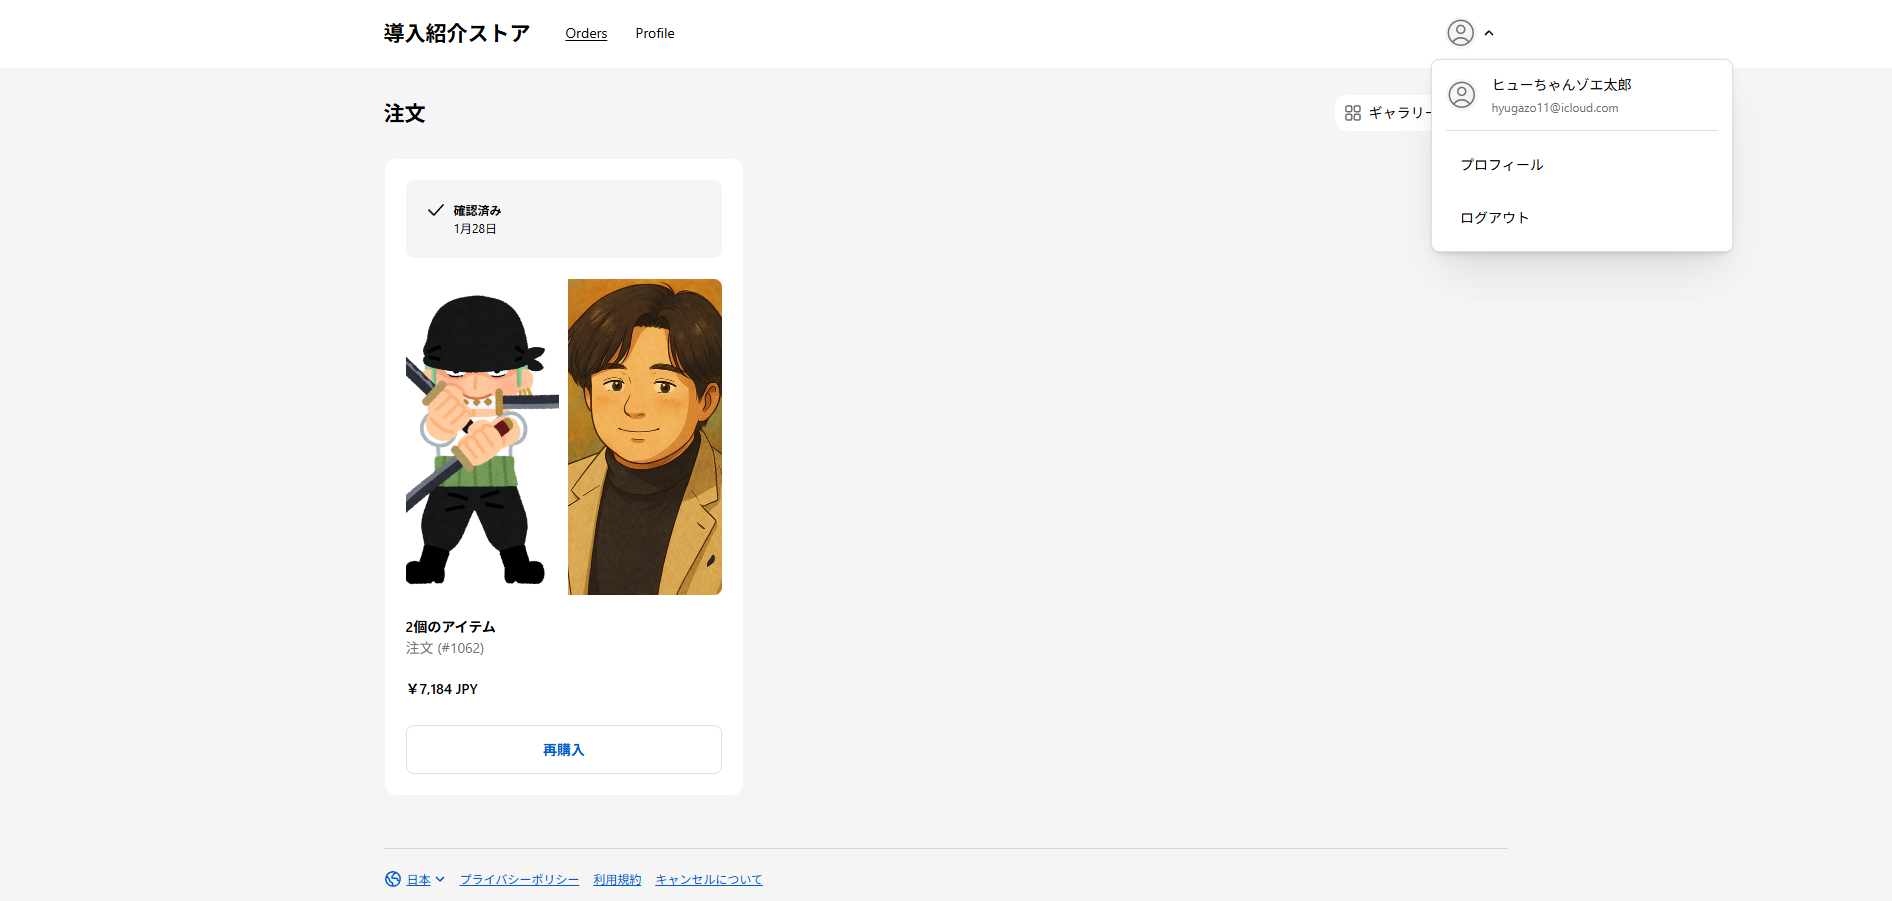
4. Authenticate with LINE and with an email address, confirm that you land on the orders page, and the setup is complete.
Common stumbling blocks
- If you regenerate the client secret, you must update the secret on the Shopify side too.
- After changing your store's custom domain, the callback and logout URLs Shopify issues can change, so they must be re-entered in StoreCRM.
- Following the classic account procedure will not work on new customer accounts. Use the OIDC procedure.
Summary
Simply having customers think "logging in with LINE on the new customer accounts is handy" lowers the barrier to signing up dramatically. With OIDC support in StoreCRM, that small convenience becomes a mechanism for growing revenue and winning repeat customers. If you are not yet using LINE Login on new customer accounts, StoreCRM makes it easy to get started.


