
Introduction
This article explains how to use StoreCRM to email customers who subscribe to a recurring order on Shopify, and what to watch out for, by actually building an automation that emails customers when they start a new subscription.
The ecommerce market keeps growing, and with more competitors than ever, acquiring new customers keeps getting harder. In that environment, growing an ecommerce store depends on increasing revenue from existing customers and raising LTV (lifetime value).
Subscriptions are one of the most effective ways to do that: they give you stable revenue over the long term.
Subscribers also stay interested in your store, so pairing subscriptions with email deepens the relationship and creates opportunities to cross-sell related products.
With StoreCRM, everything from the conditions that target subscribers to the emails themselves takes only a few steps.
You can also see open rates, click rates and email-attributed revenue at a glance inside the app.
Combining subscriptions with email strengthens the customer relationship and raises LTV through cross-selling, so put StoreCRM to work and start emailing your subscribers.
Supported apps and the customer actions that trigger an email
StoreCRM supports a range of subscription apps. Emails can be triggered not only when someone subscribes but also when they cancel or pause.
Supported apps
- Mikawaya Subscription (Floor Standard Inc.)
- Teikikobai (Huckleberry Inc.)
- Kantan Subscription (Groovy Media Inc.)
Customer actions that act as triggers
- Starting a subscription
- Cancelling a subscription
- Pausing a subscription
Building the email automation (an email when someone subscribes)
The goal of the automation
Being clear about what a campaign is for matters. So let us start with the goals of the [email on subscription] automation we are about to build.
1. A stronger relationship and higher satisfaction Thanking the customer immediately after they subscribe strengthens the relationship. Including how to use the product and where to get support raises satisfaction too. 2. Personalised suggestions that create additional purchases Introducing products related to what they bought makes for a much better-targeted cross-sell. An exclusive coupon adds further reason to buy.
Building the automation
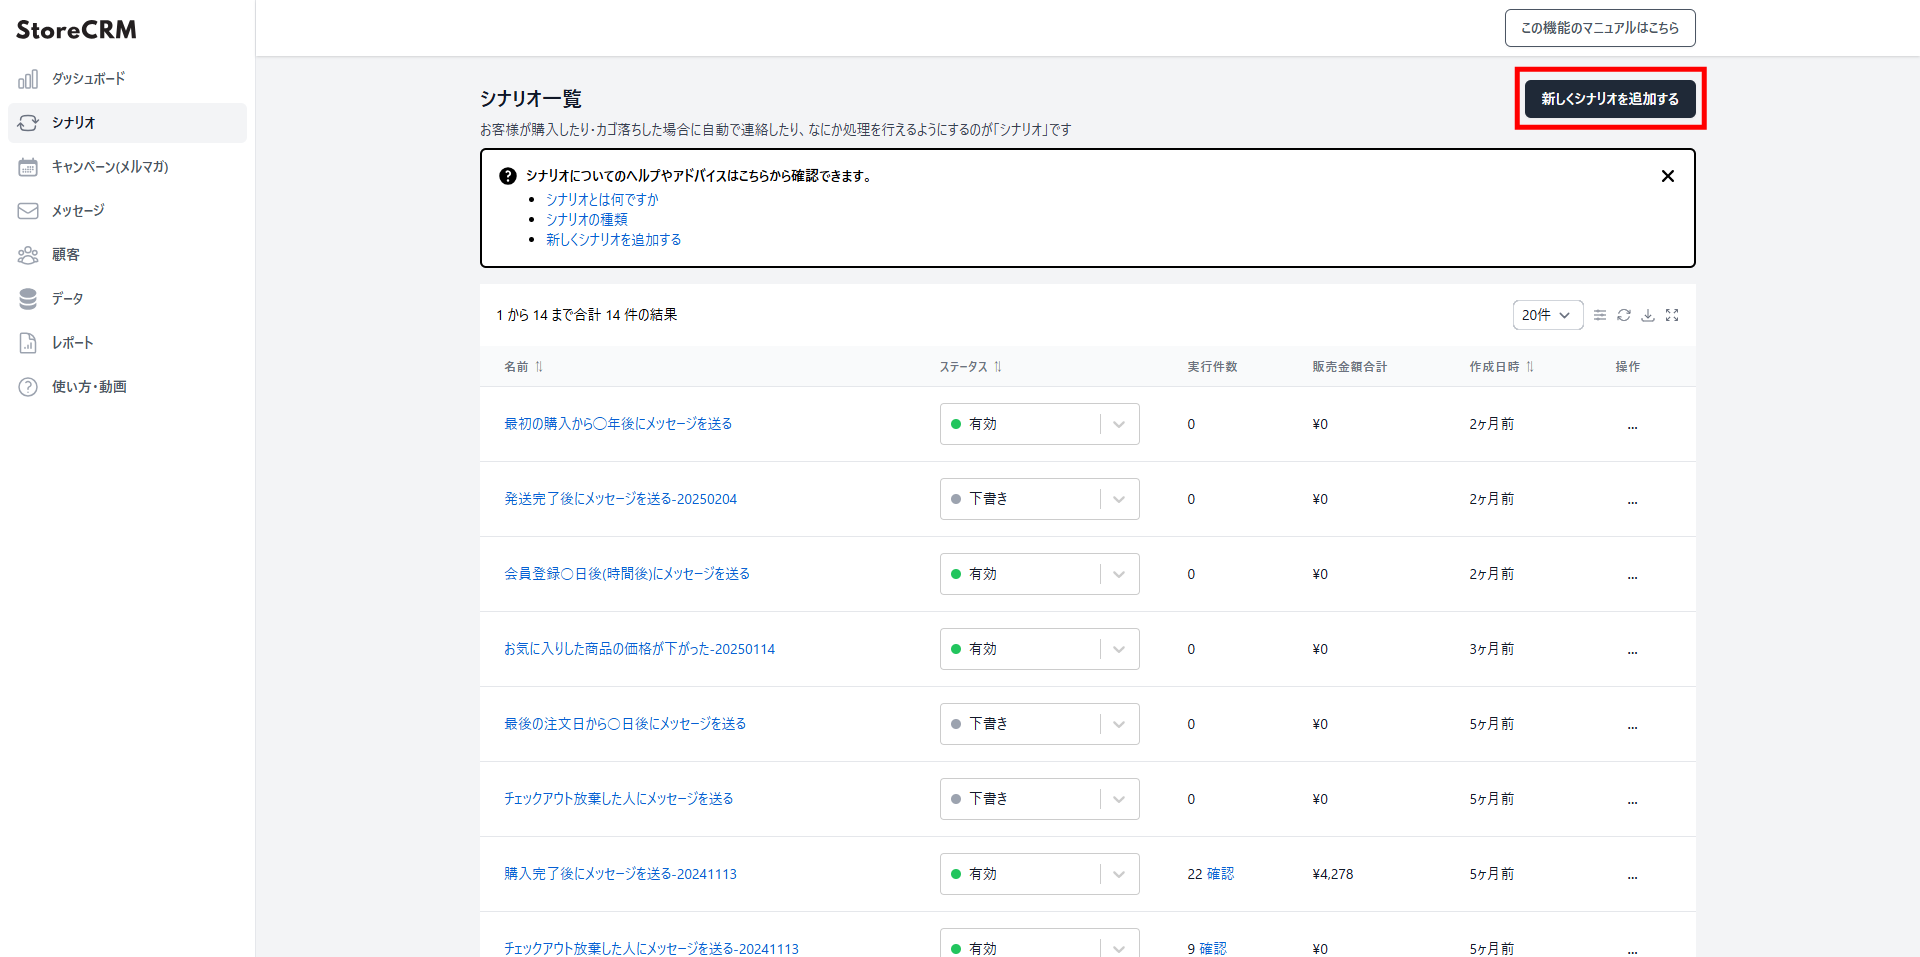
1. Open the automation list from [StoreCRM app] > [Automations]. Click [Add new automation] at the top right.
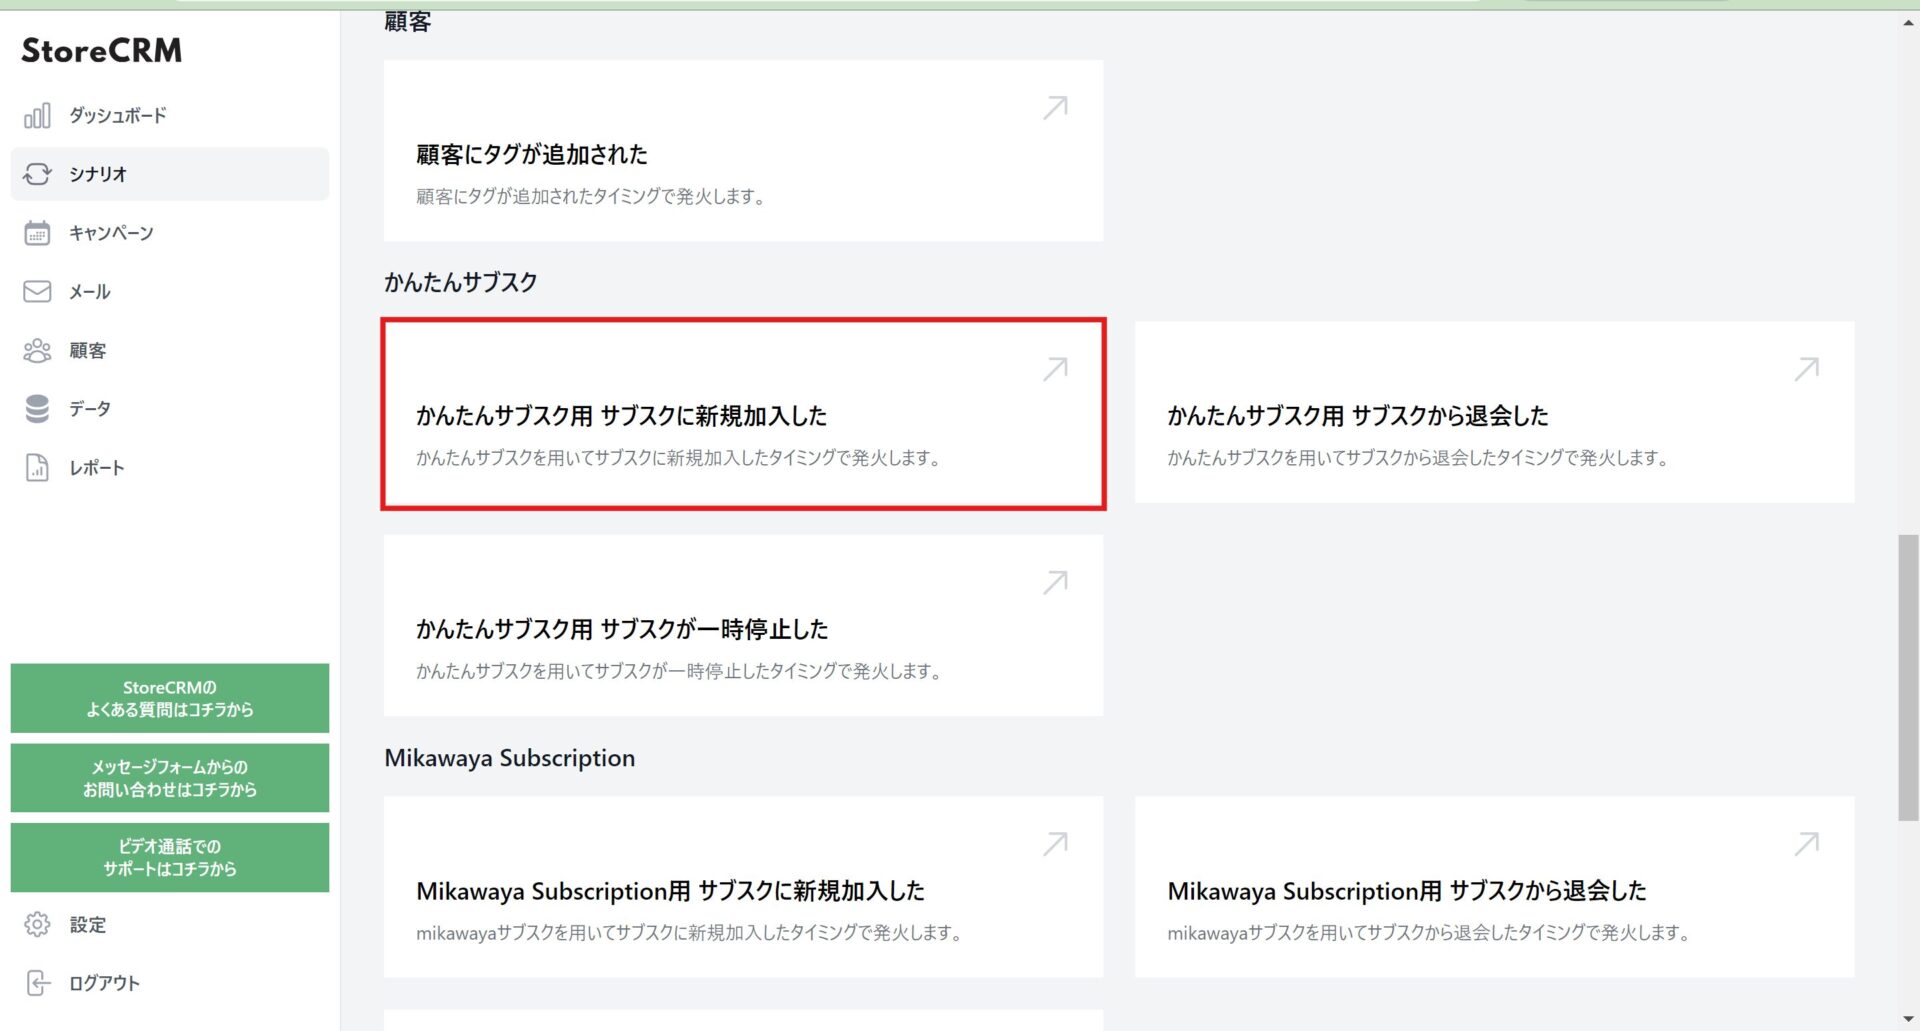
2. We are building an automation that fires after a Kantan Subscription signup, so click [Kantan Subscription] > [Kantan Subscription: new subscription started].
If you use Mikawaya Subscription or Teikikobai, choose the automation from the [Mikawaya Subscription] or [Teikikobai] section instead.
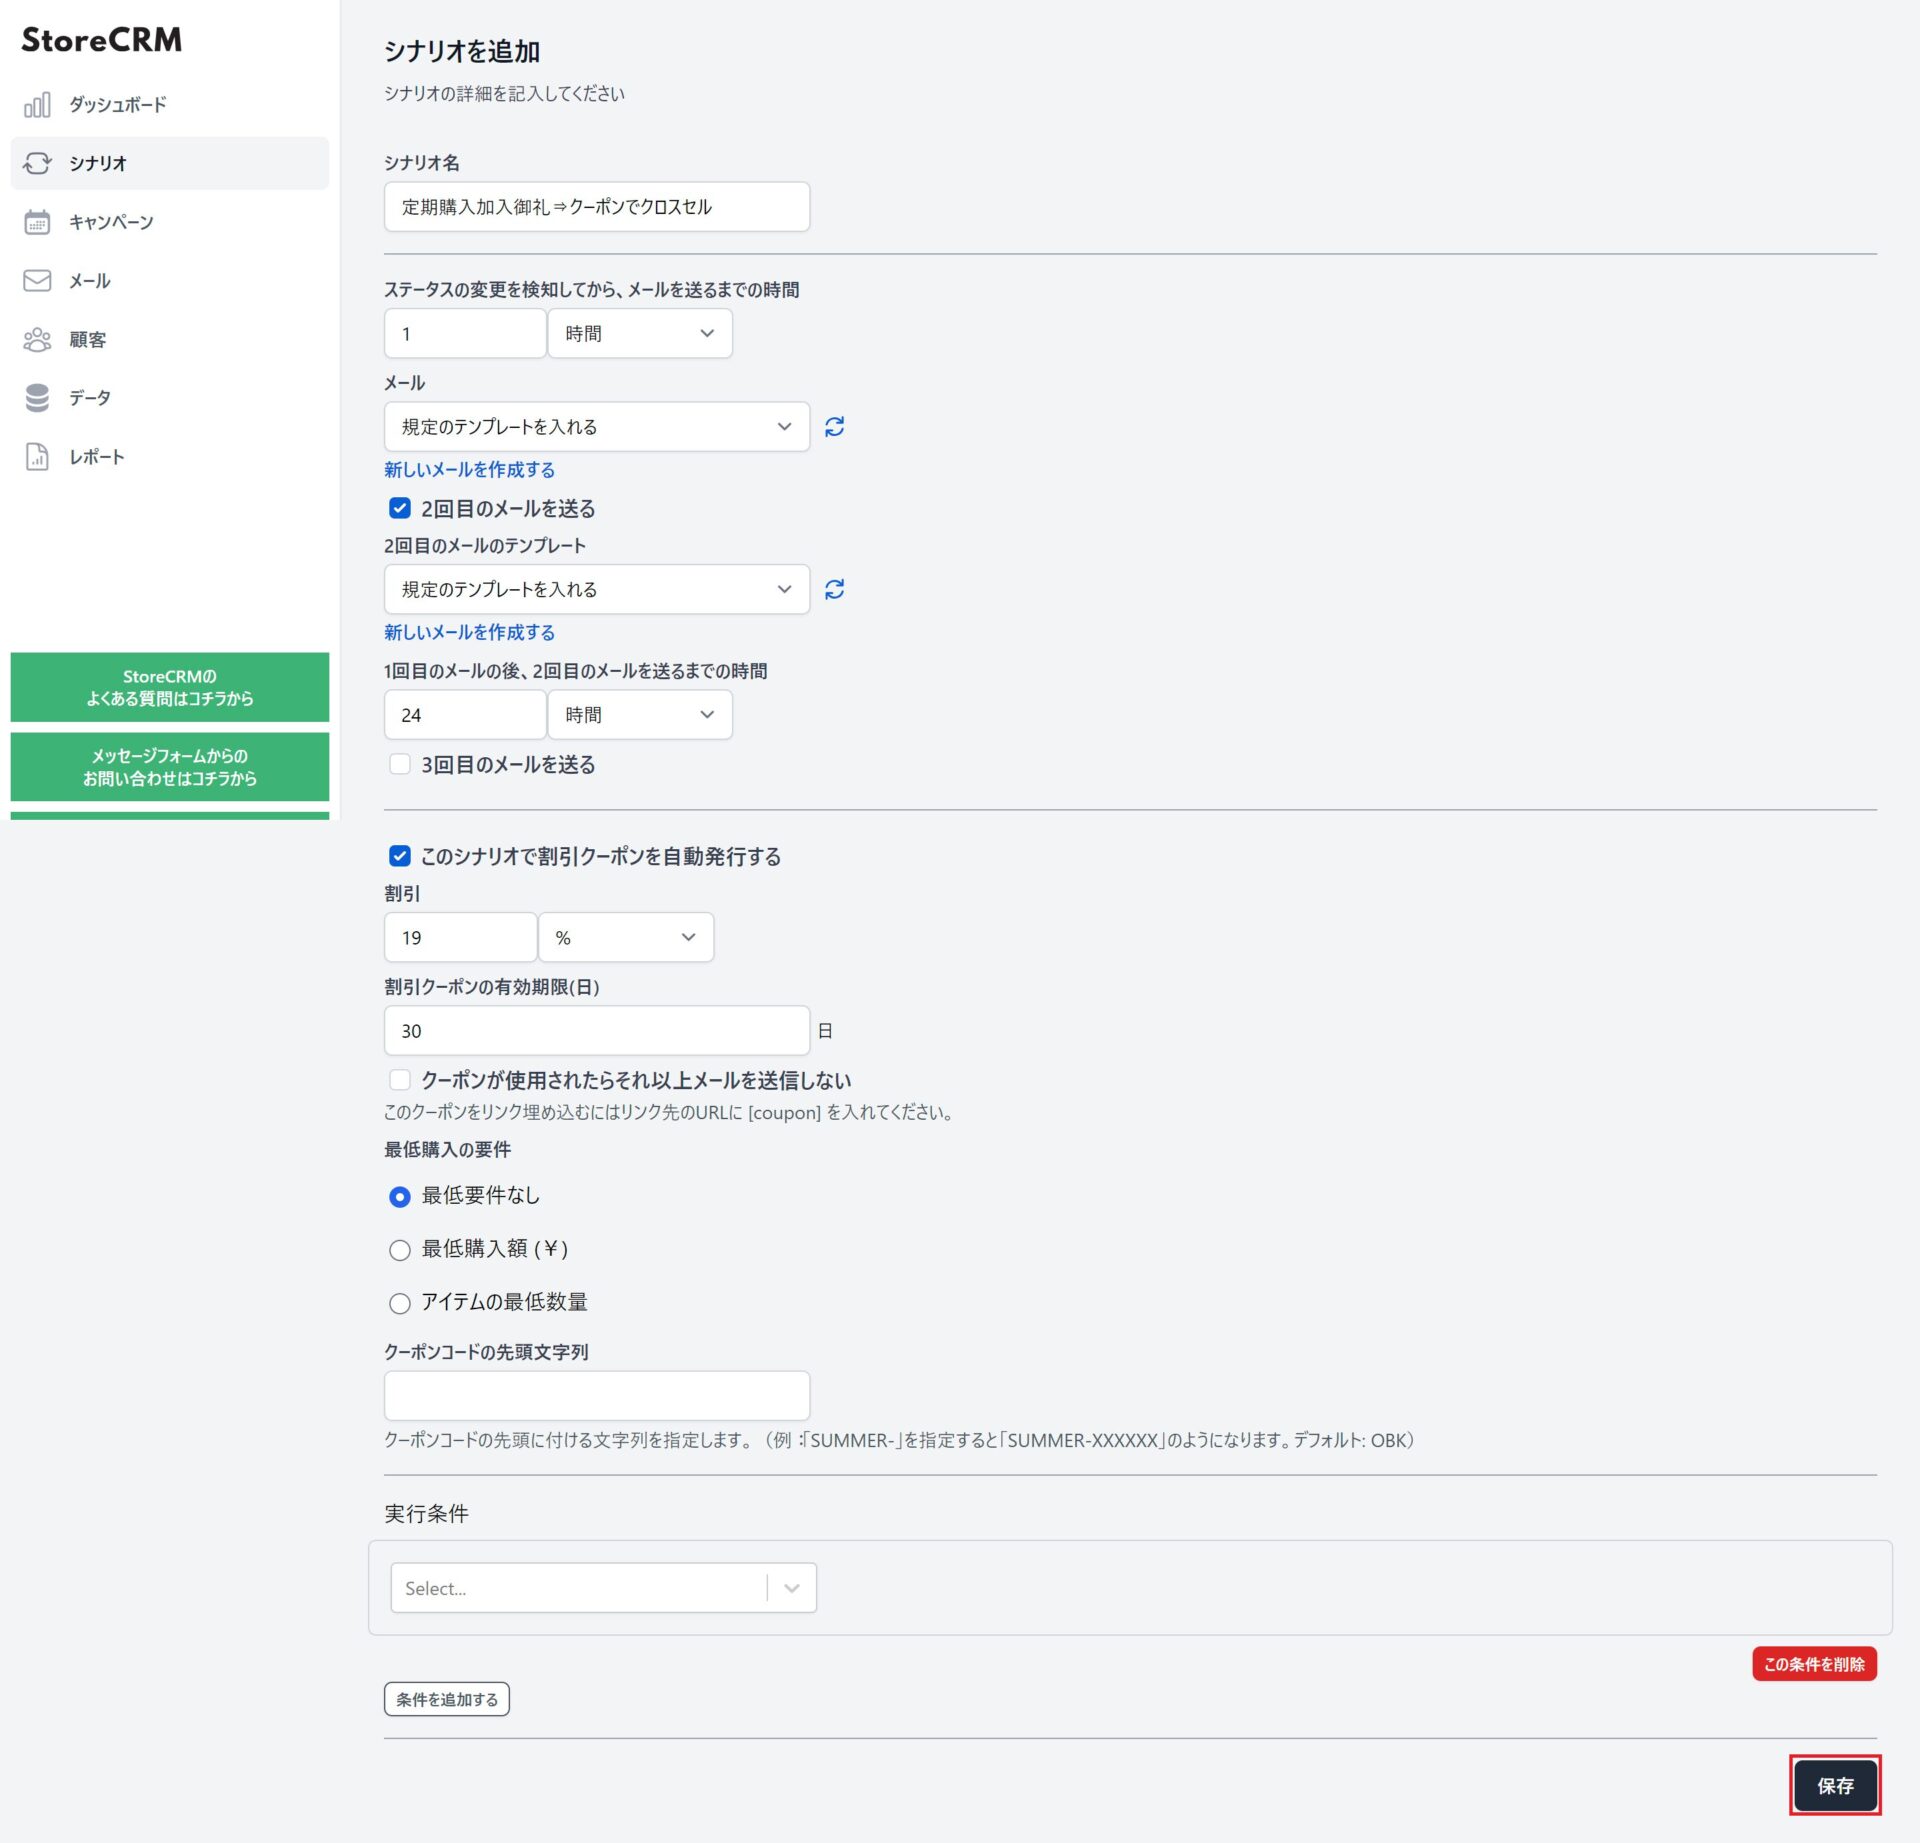
3. The automation settings appear; set when the emails go out and how many there are. Here we used the following. When you are finished, click [Save] at the bottom right.
- Send a thank-you email one hour after the subscription starts.
- Send an email with a coupon one day after the first email.
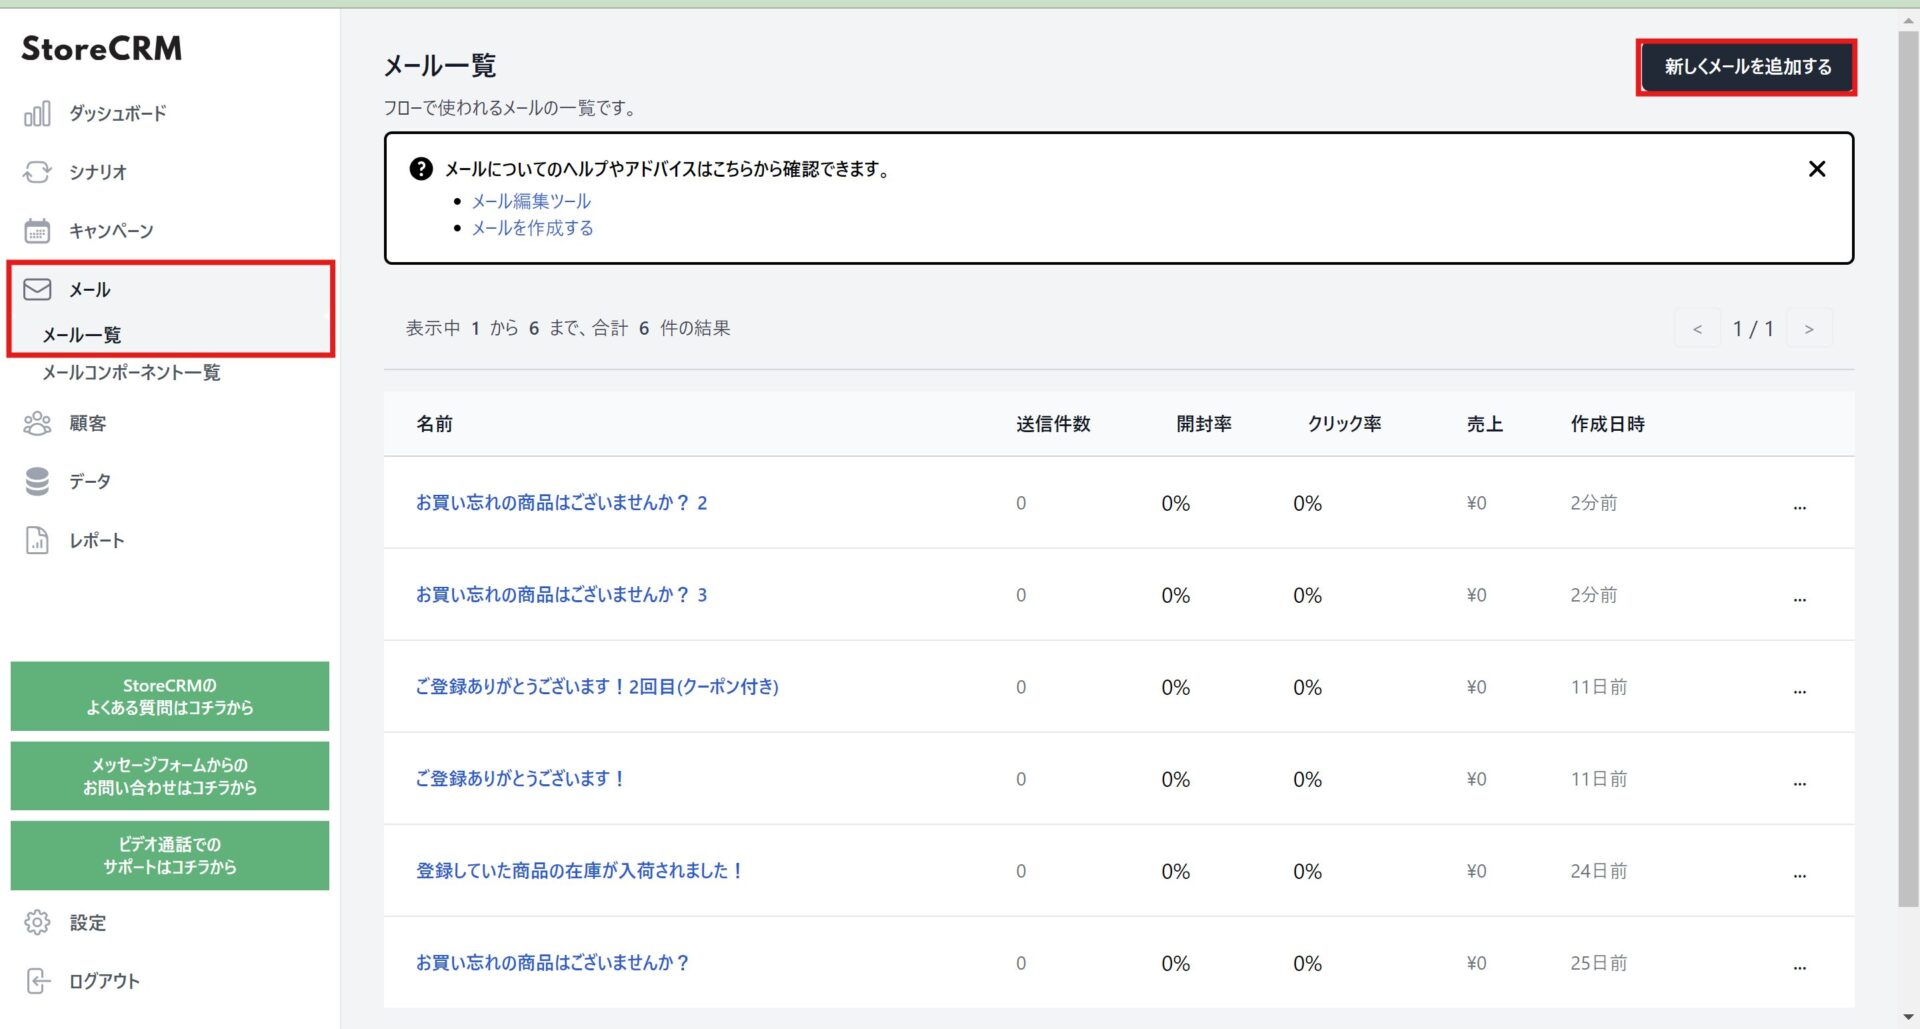
4. Next, create the emails.
Select [Email] > [Email list] in the left-hand menu to open the email list, then click [Add new email] at the top right.
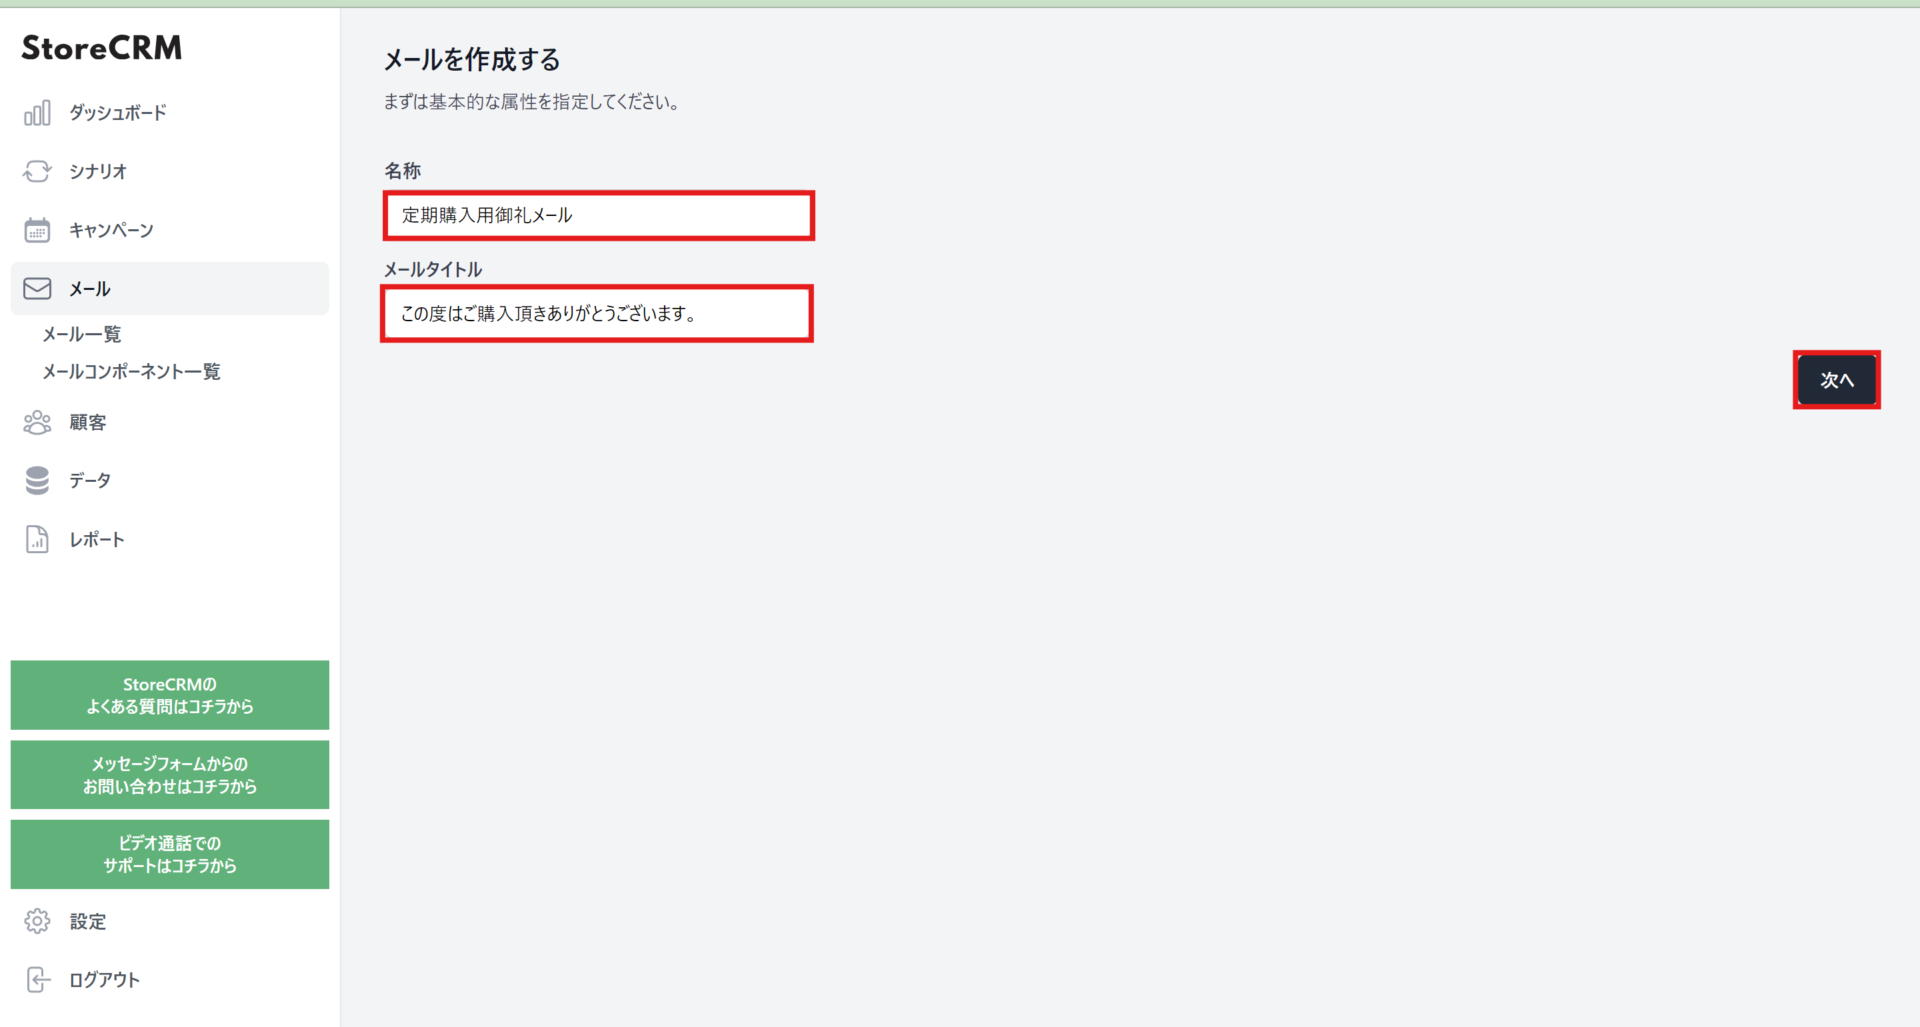
5. On the creation screen, enter an internal name under [Name] and the subject line under [Email title]. When you are done, click [Next].

7. The email editor opens. Drag and drop content blocks to lay the email out however you like. When you are finished, remember to click [Save]. Repeat steps 4 to 7 to create the second email, the post-subscription cross-sell with a coupon.
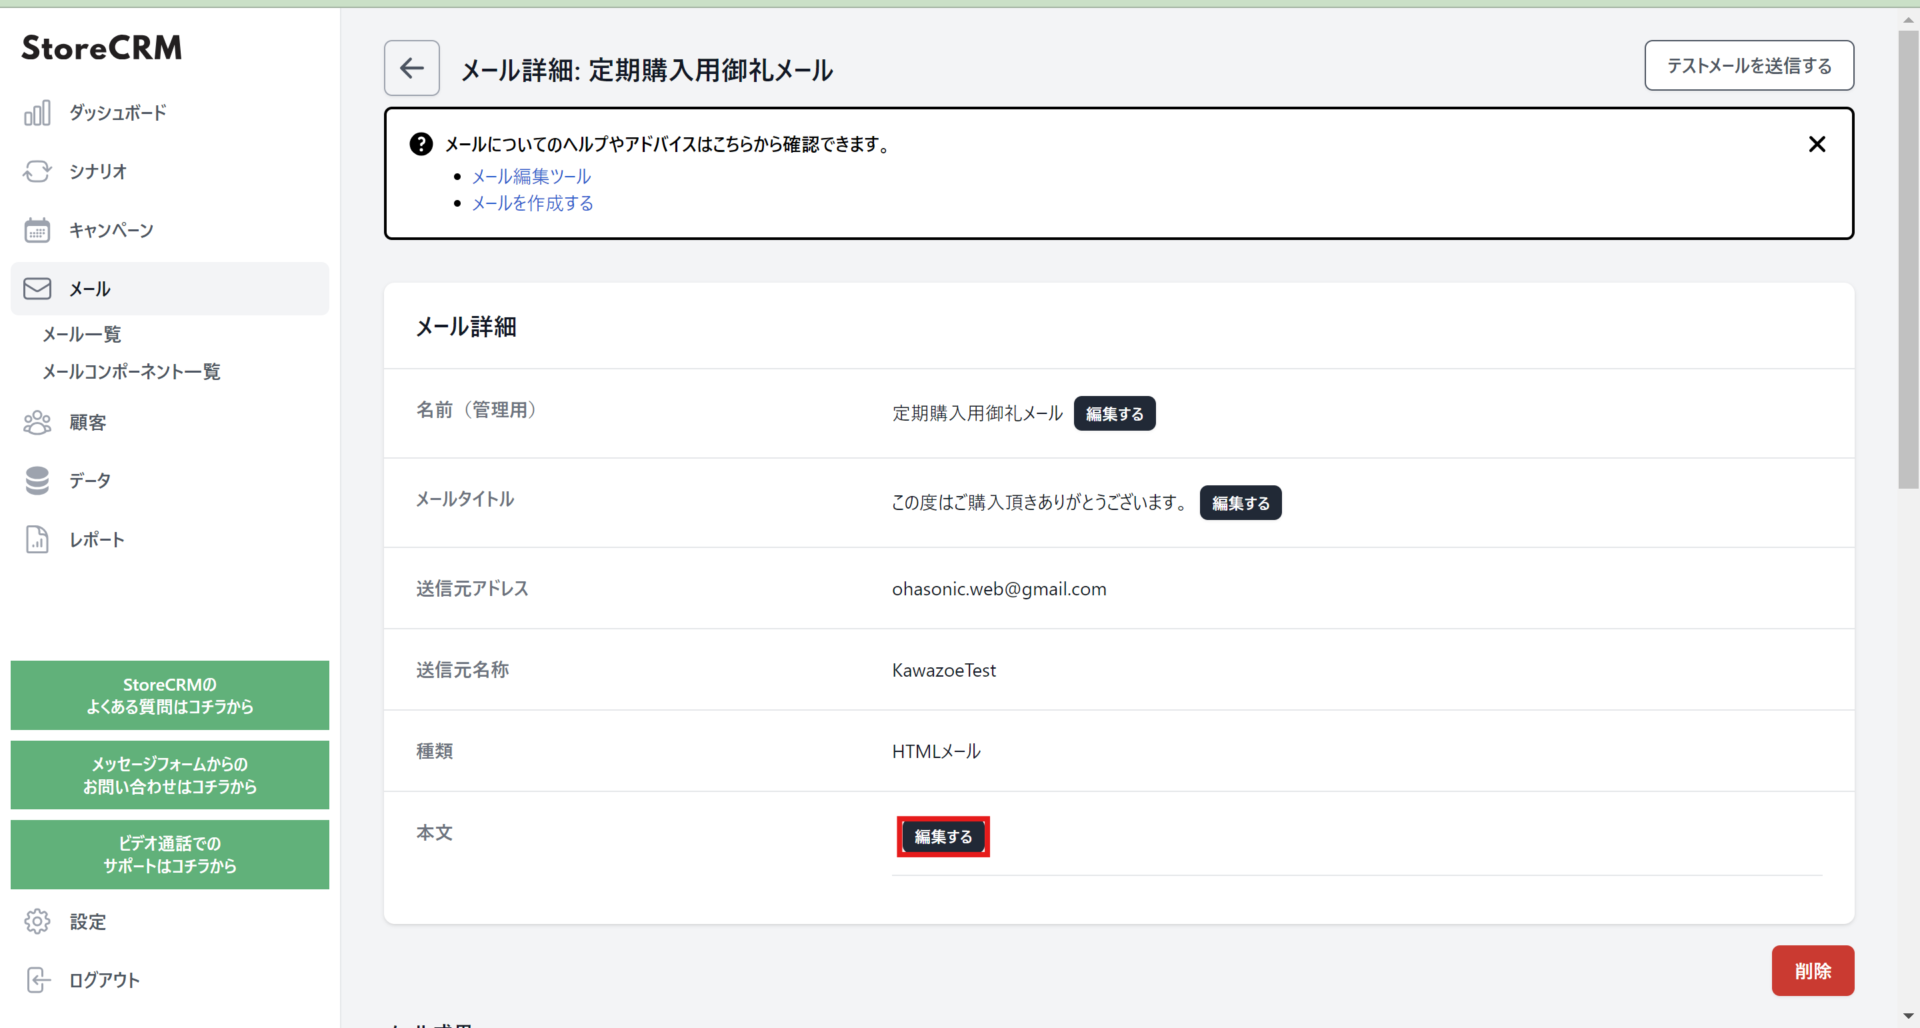
To embed a coupon in an email, add a button or link whose destination is set to [coupon]. Do that from [Body] > [Edit].
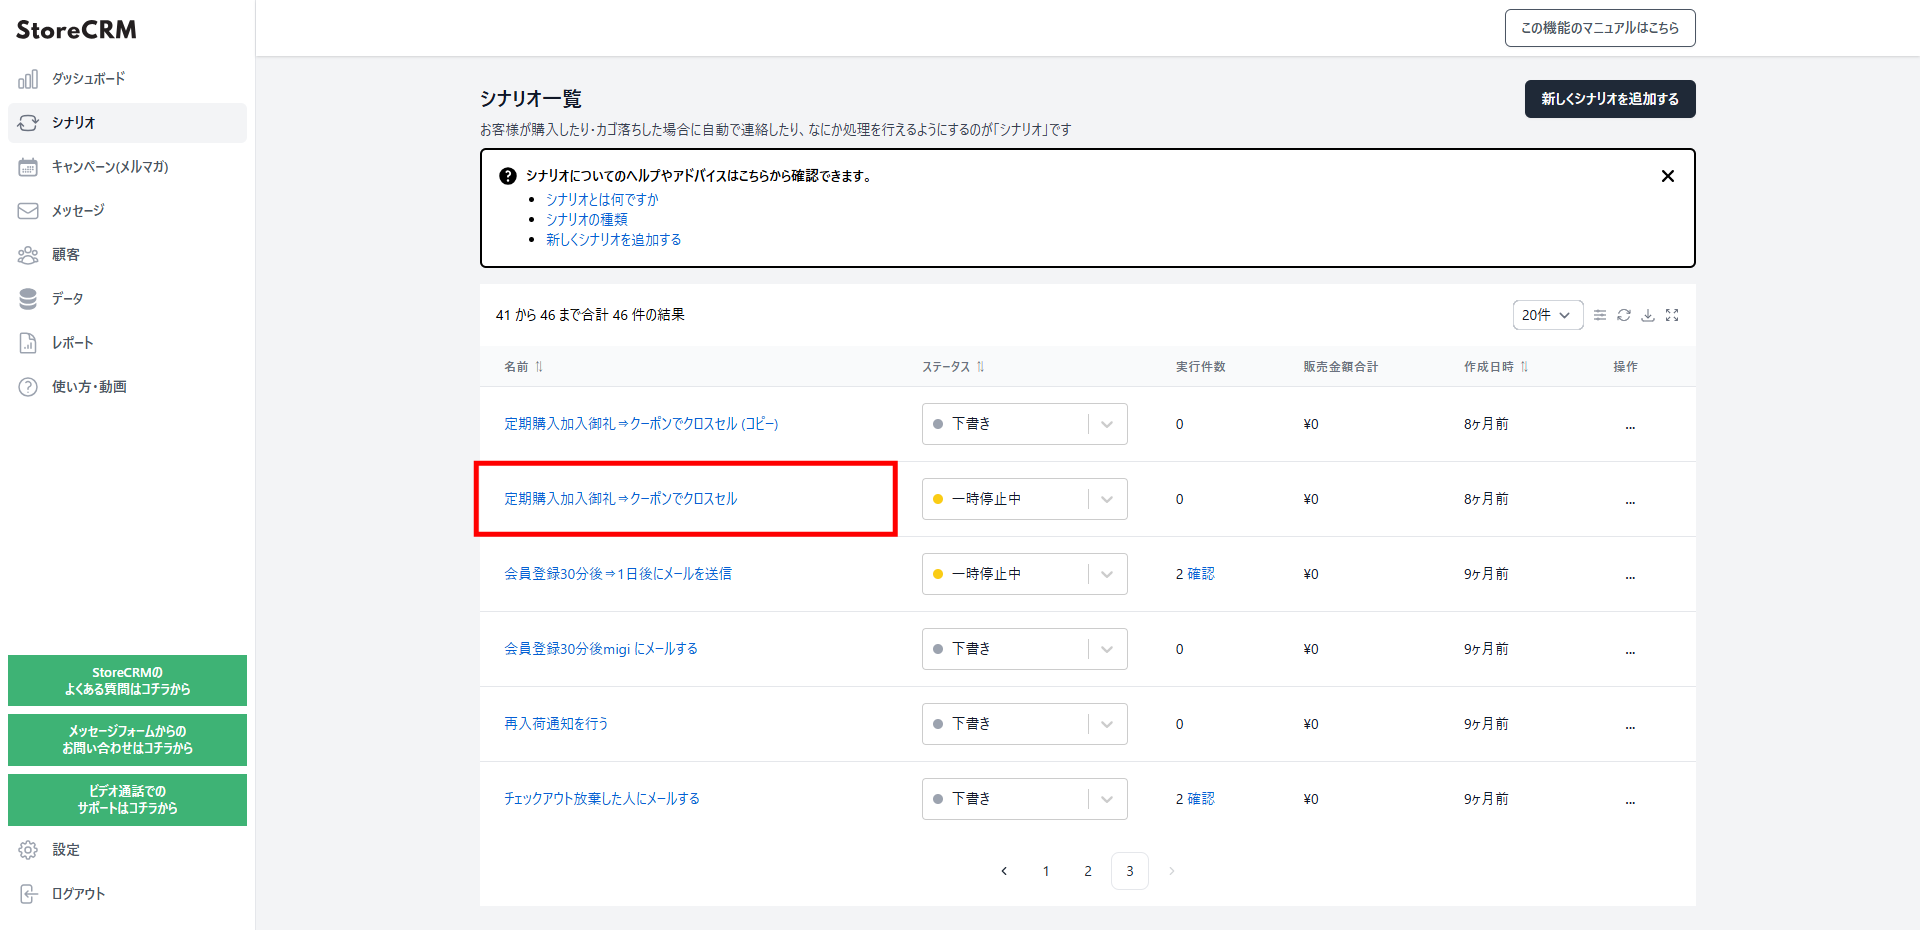
8. With the emails written, attach them to the automation. Click [Automations] > [Automation list] > the automation you created.
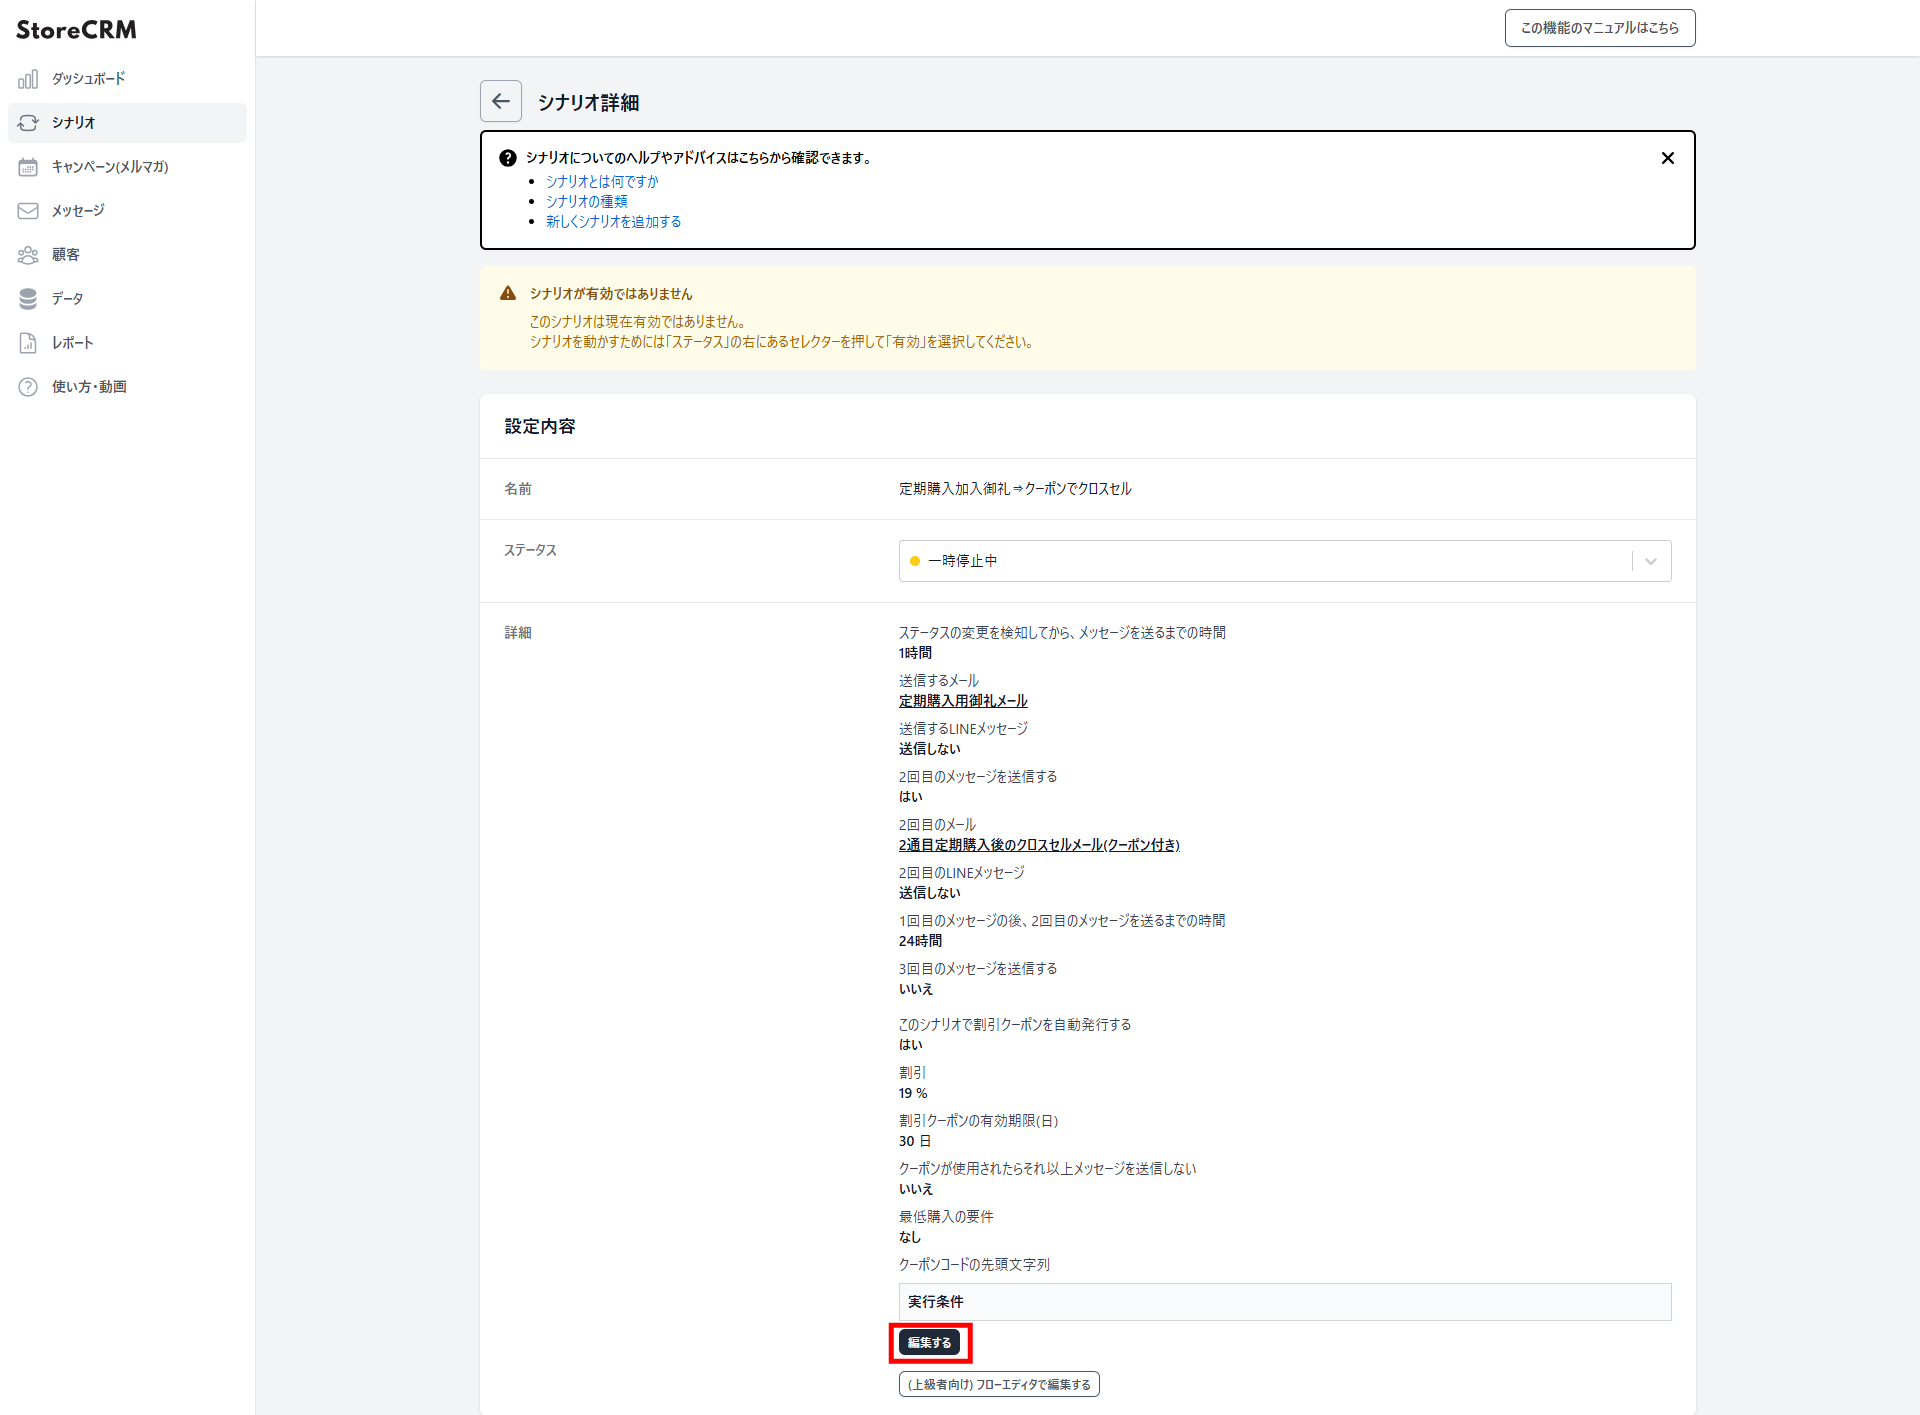
9. On the automation detail page, click [Details] > [Edit].
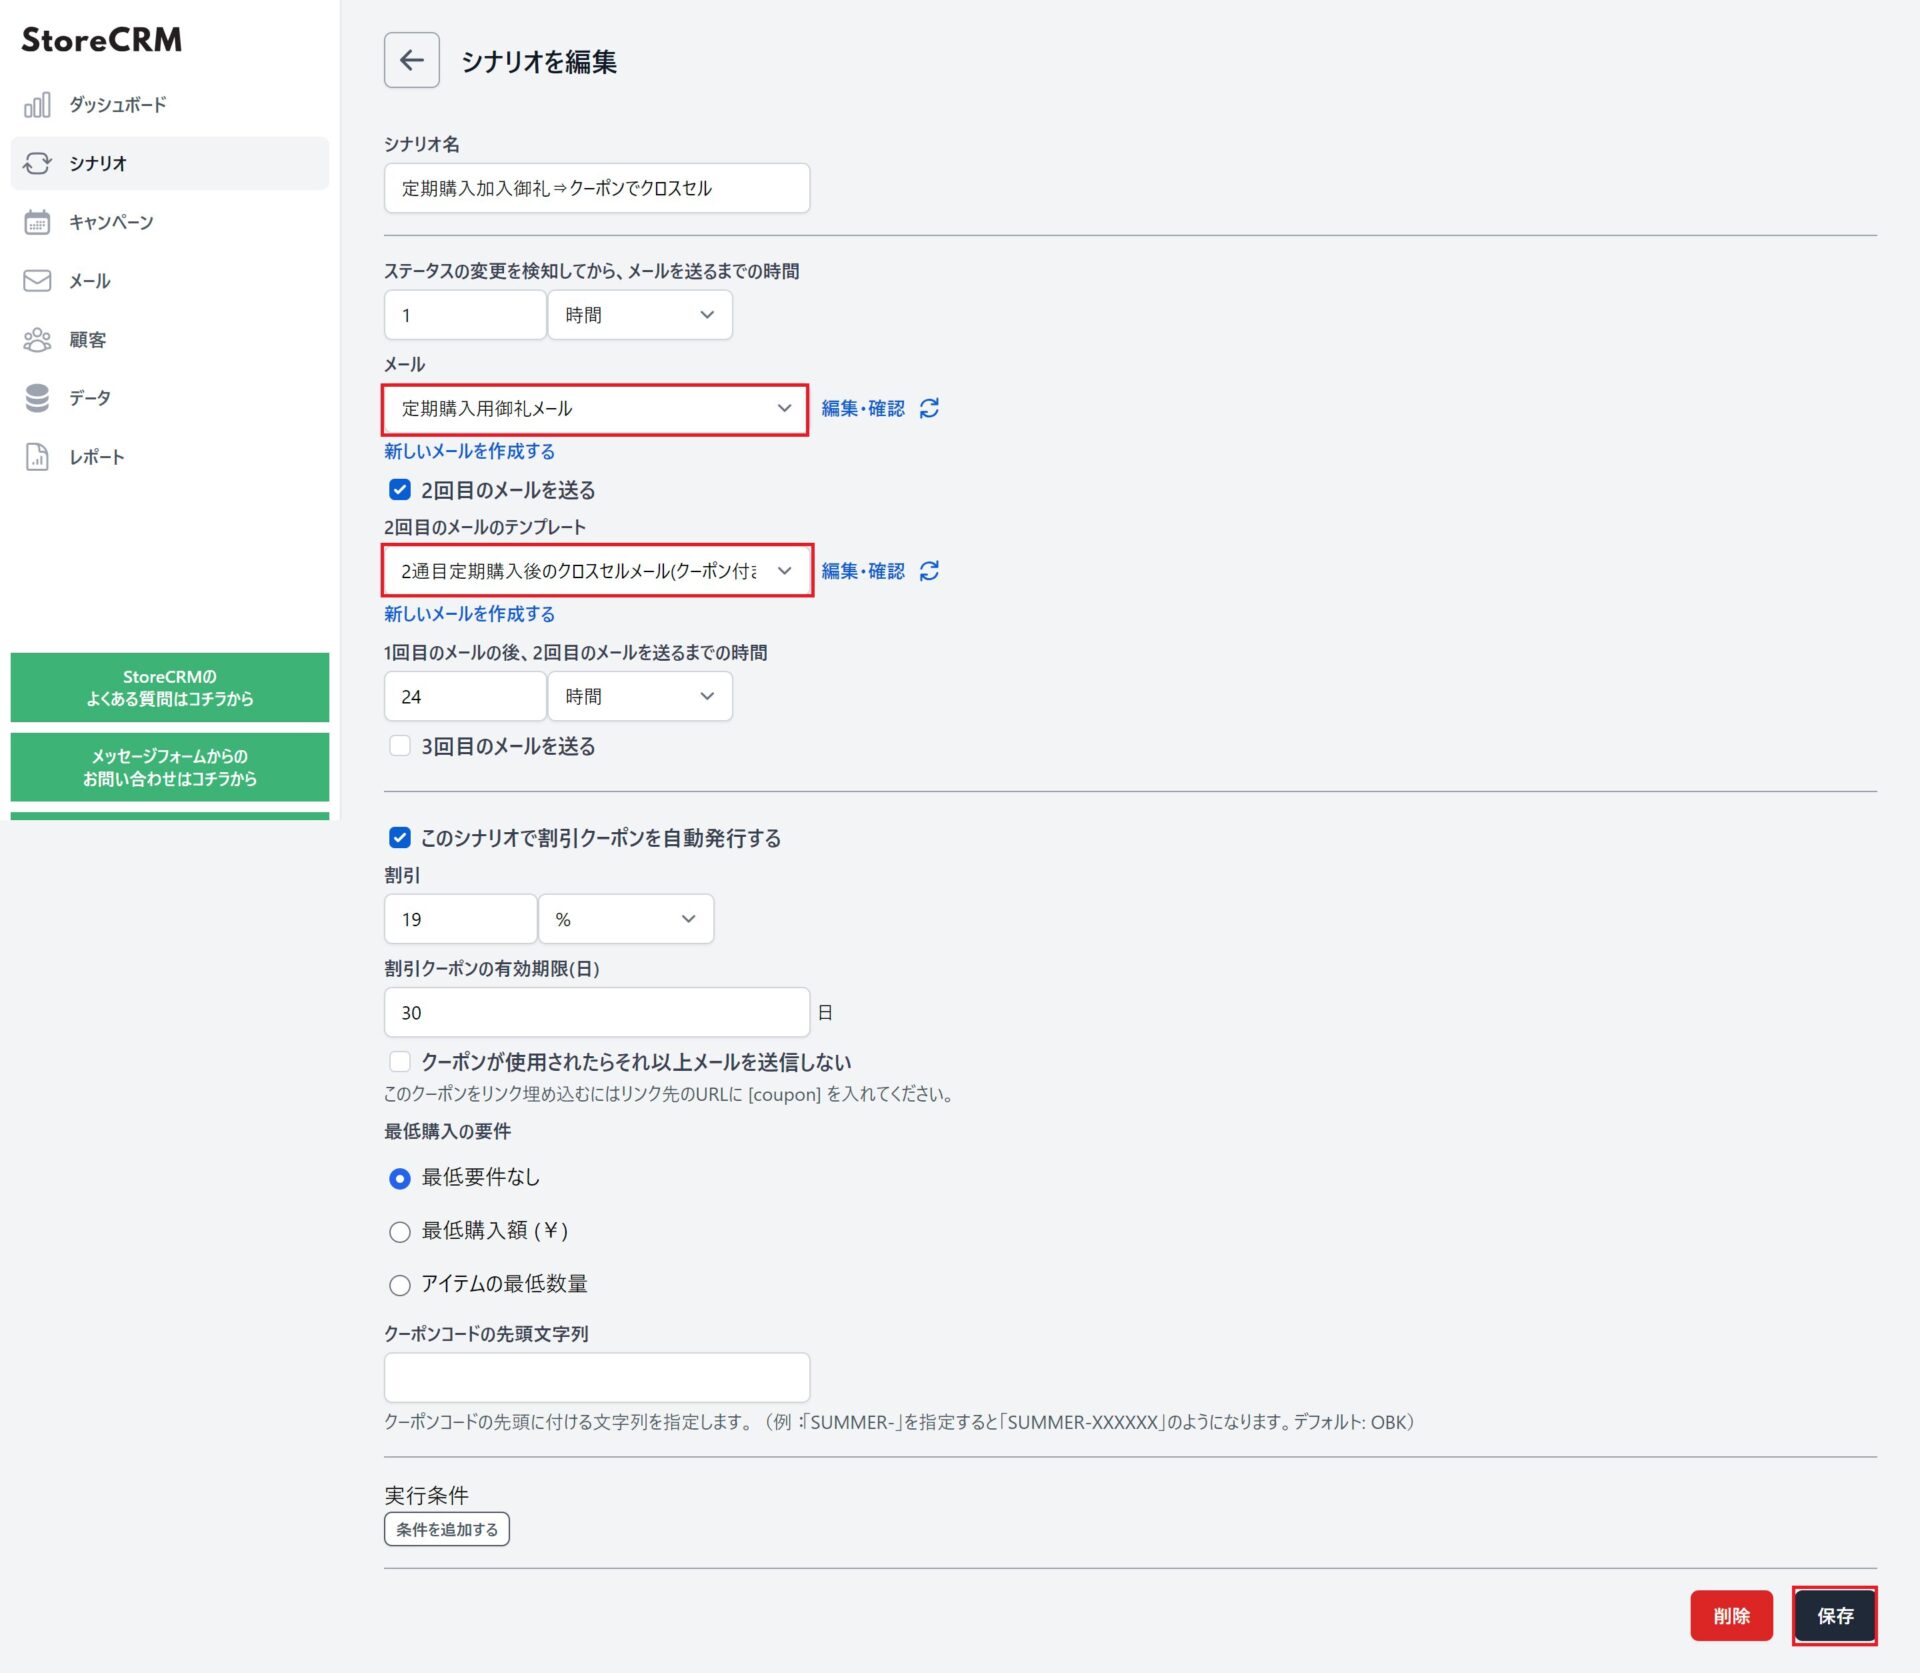
10. Set the email templates to the emails you just created (they are listed under their internal names). Select them and click [Save].
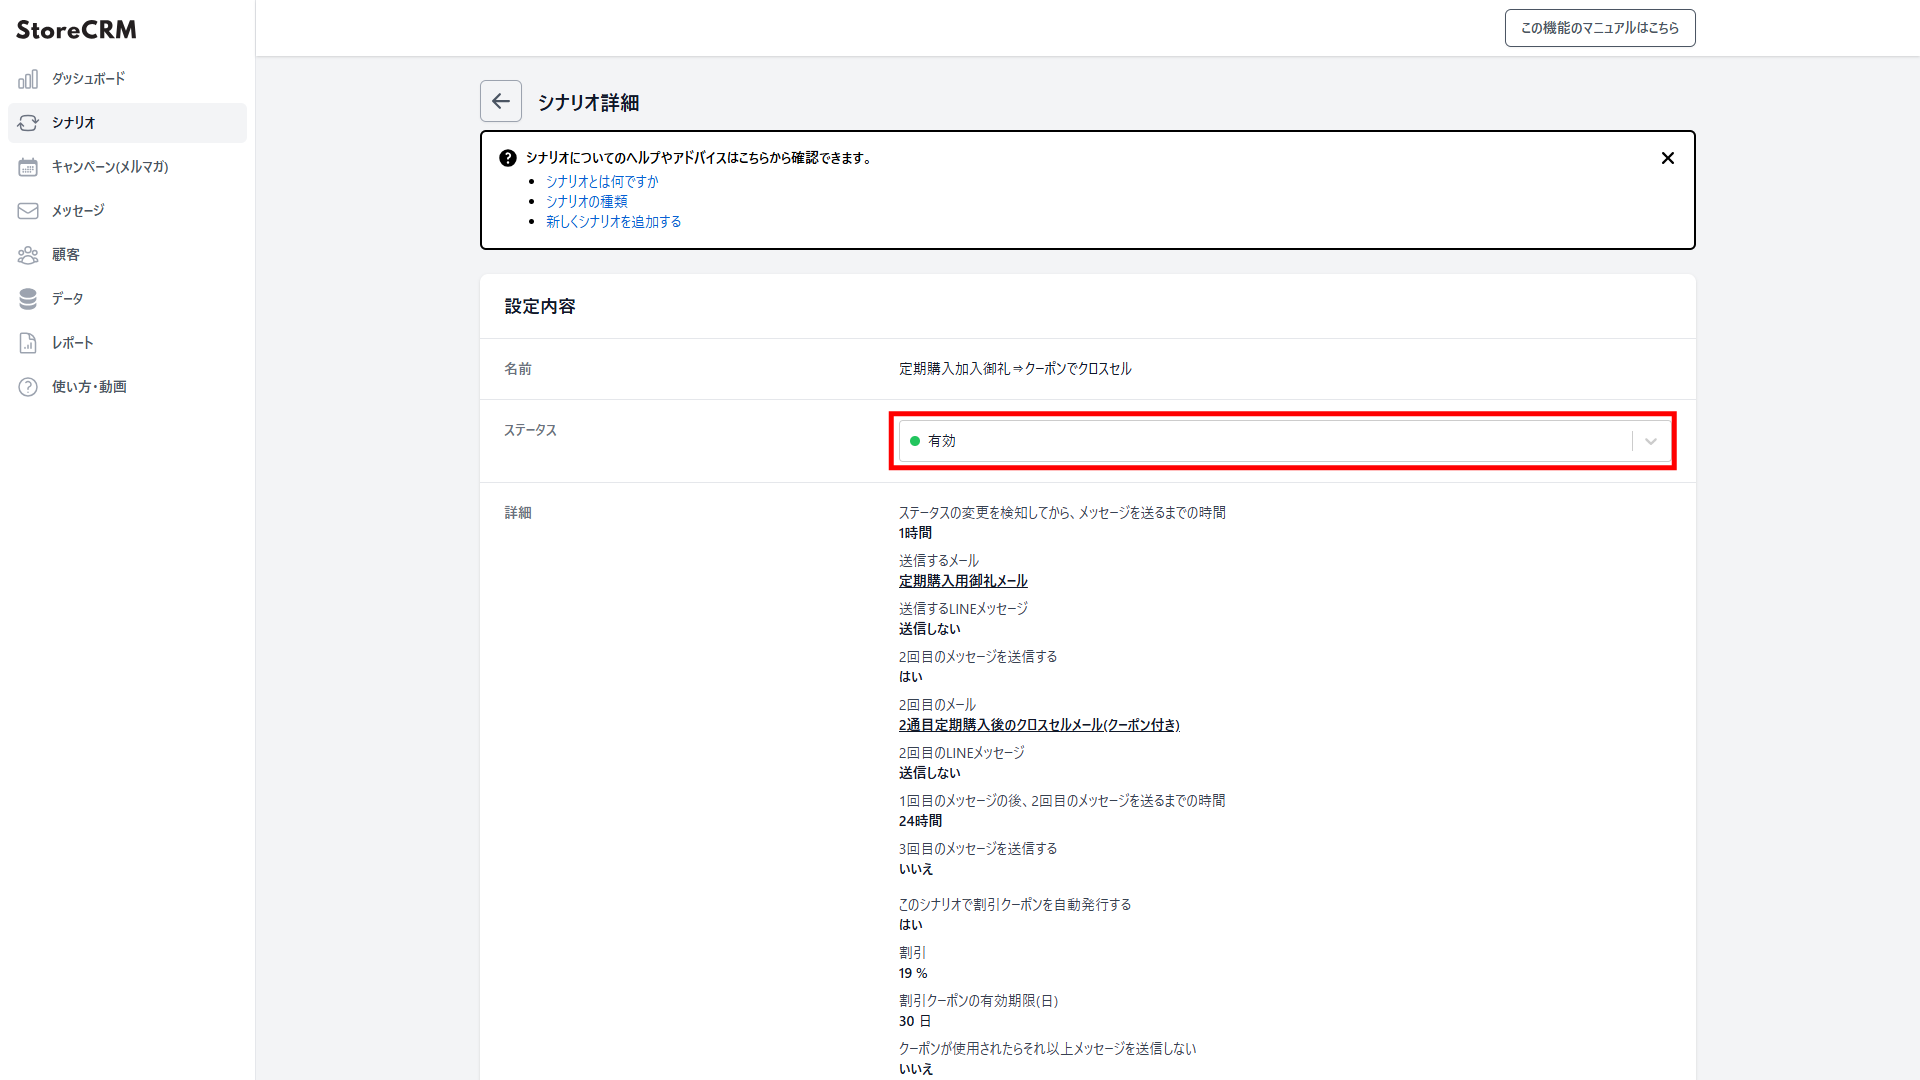
- Click [Save] and the automation detail page appears. Use the [Settings] > [Status] dropdown to activate the automation, and the emails will go out according to the conditions you set. [Automation results] shows the revenue, open rate and other performance figures for the automation. That completes the automation.
Advanced customisation
About the flow editor
As the previous section shows, a general-purpose automation takes only a few steps to build. Once a store reaches a certain size, though, we often hear that merchants want something more complex — sending different emails depending on a customer's attributes or status.
For mid-sized and larger stores, and for anyone comfortable with CRM, StoreCRM offers a flow editor for building more advanced automations.
In this section we take the [email on subscription] automation from above and customise it in the flow editor, covering how the editor works and what to watch out for.
The customisation, and duplicating the automation first
Let us define what we want to build. In this example:
- Customers buying from the store for the first time receive a second email introducing the brand, with a special coupon.
- Customers buying for the second time receive a cross-sell email featuring related products.
Before customising anything, duplicate the automation. When you already have a base automation like this one, duplicating it is the smoothest way to work.
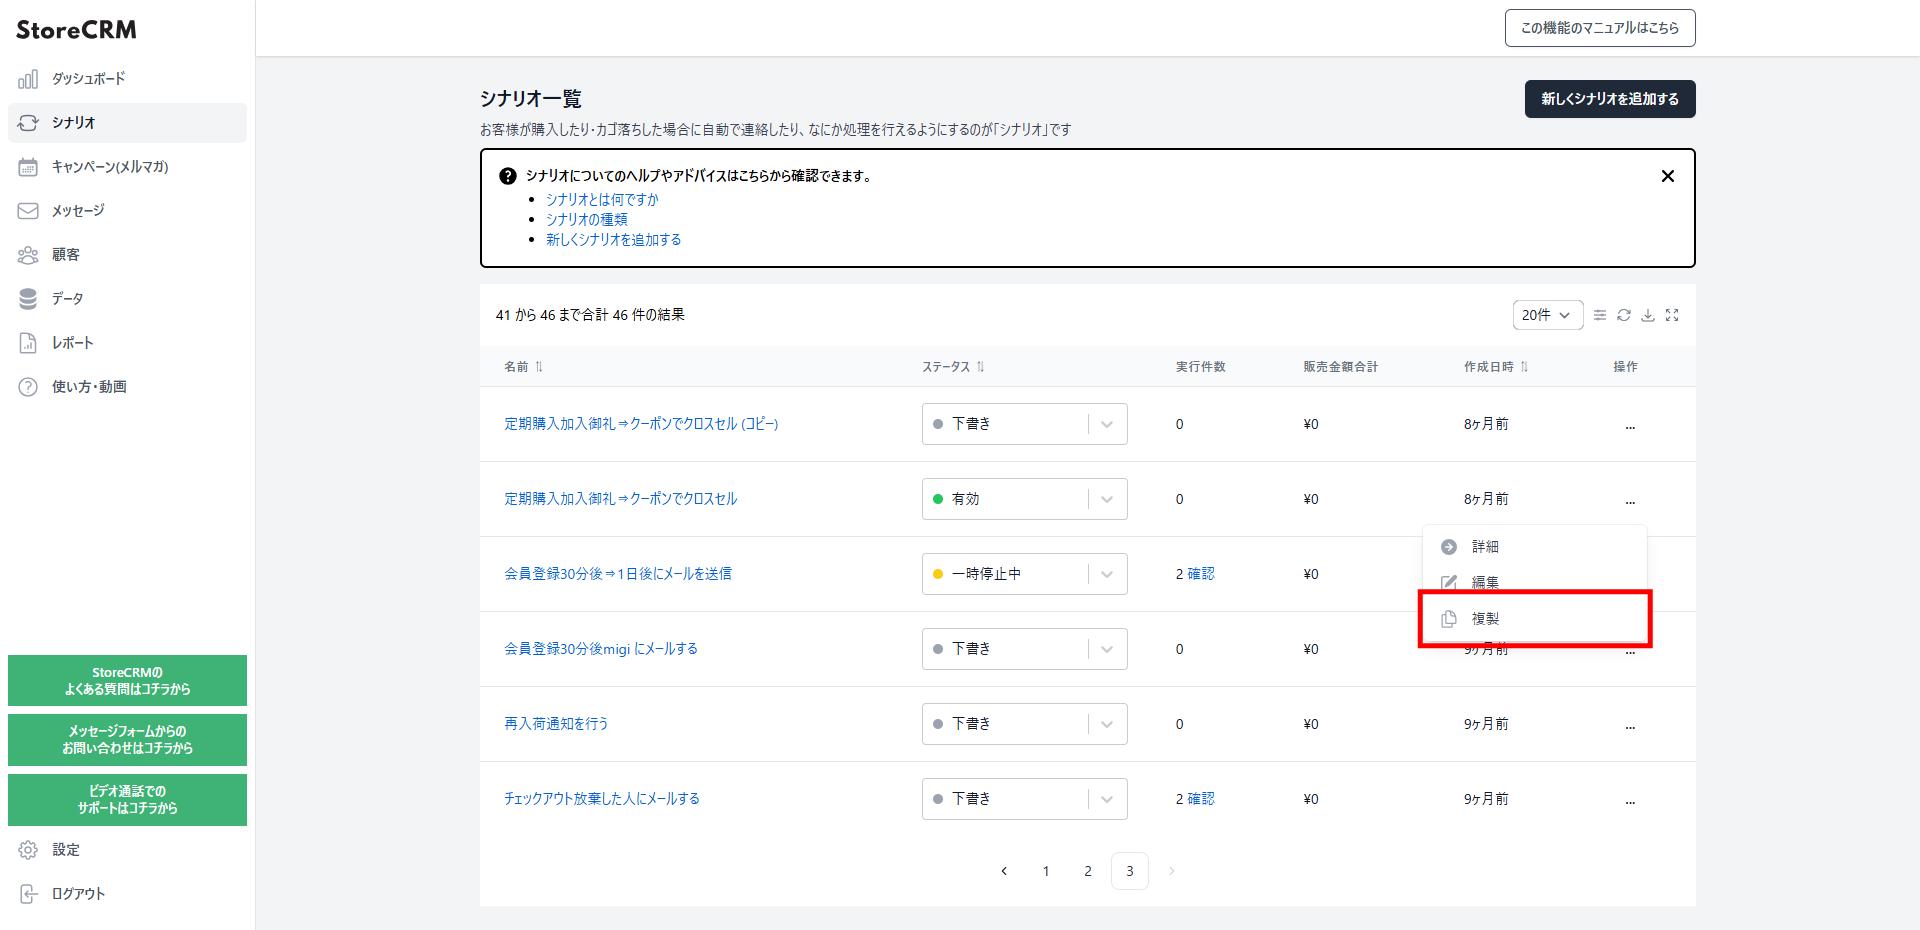
- Click [Automations] to open the list. Click […] to the right of the [subscription thank-you, then coupon cross-sell] automation you built earlier and choose [Duplicate] from the menu.
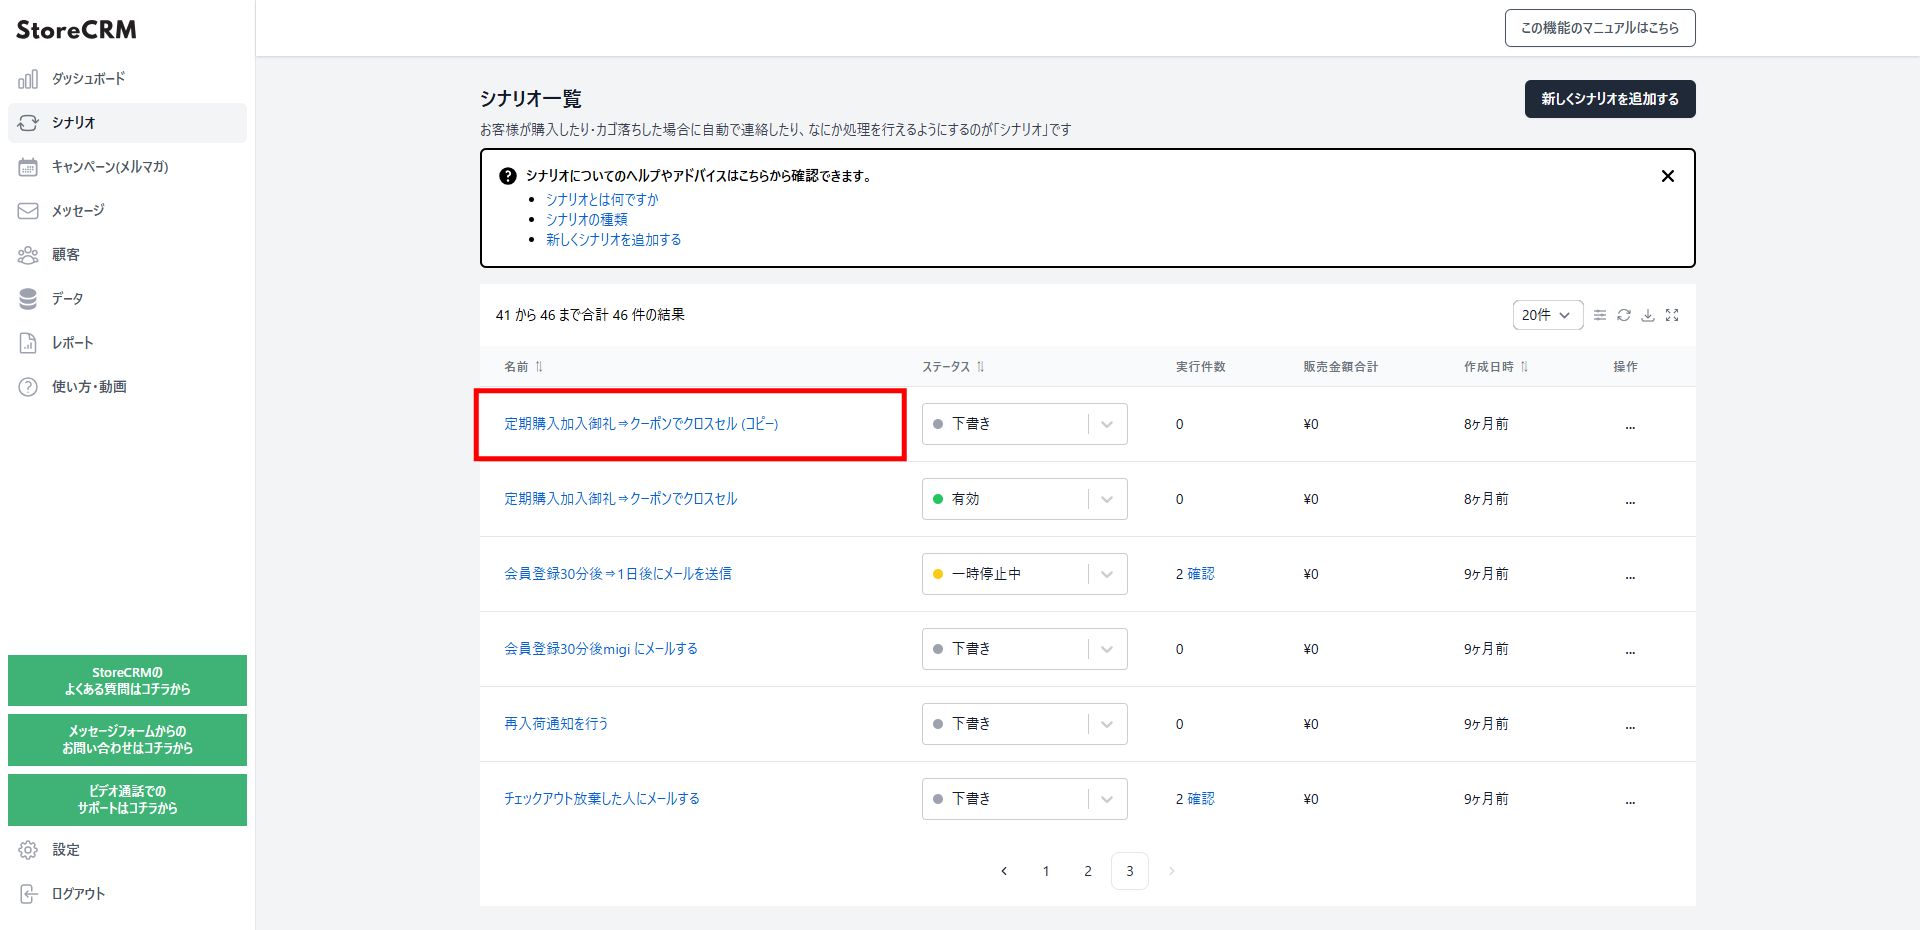
2. Click [OK] in the popup, and you should see a new automation with "(copy)" added to the name. That is the one we will customise. You can rename an automation from its edit screen.
Customising the automation
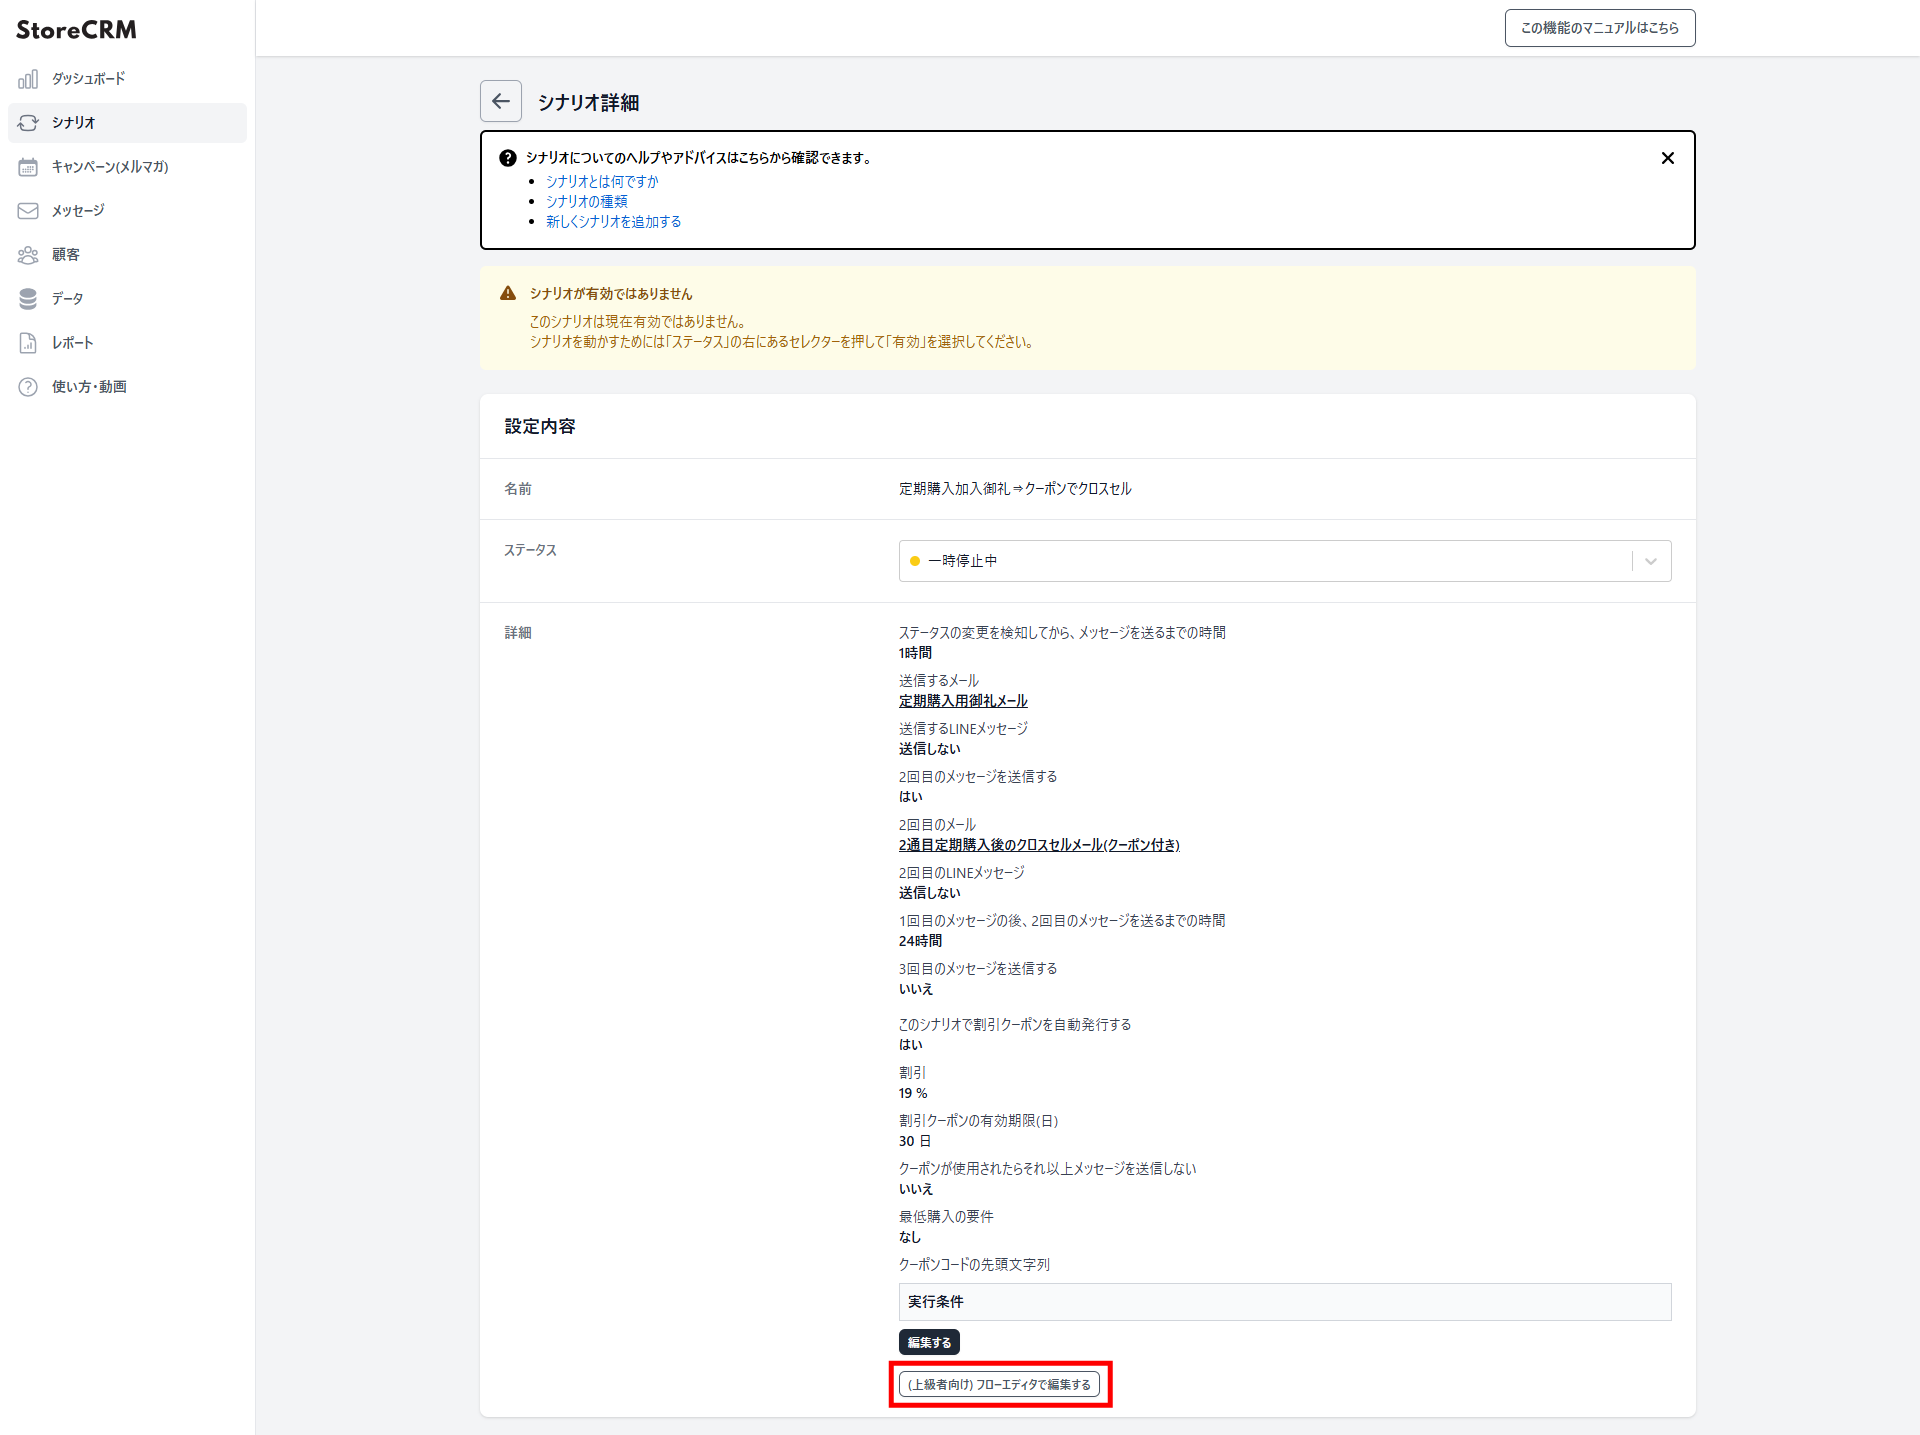
1. Open the detail page of the automation you want to customise. Click [Details] > [(Advanced) Edit in the flow editor]. Read the warning that appears, and click [OK] if you are happy to proceed.
Once you save in the flow editor, you cannot go back to the simple settings mode. If you want to experiment with an automation that is already live, always duplicate it and customise the copy.
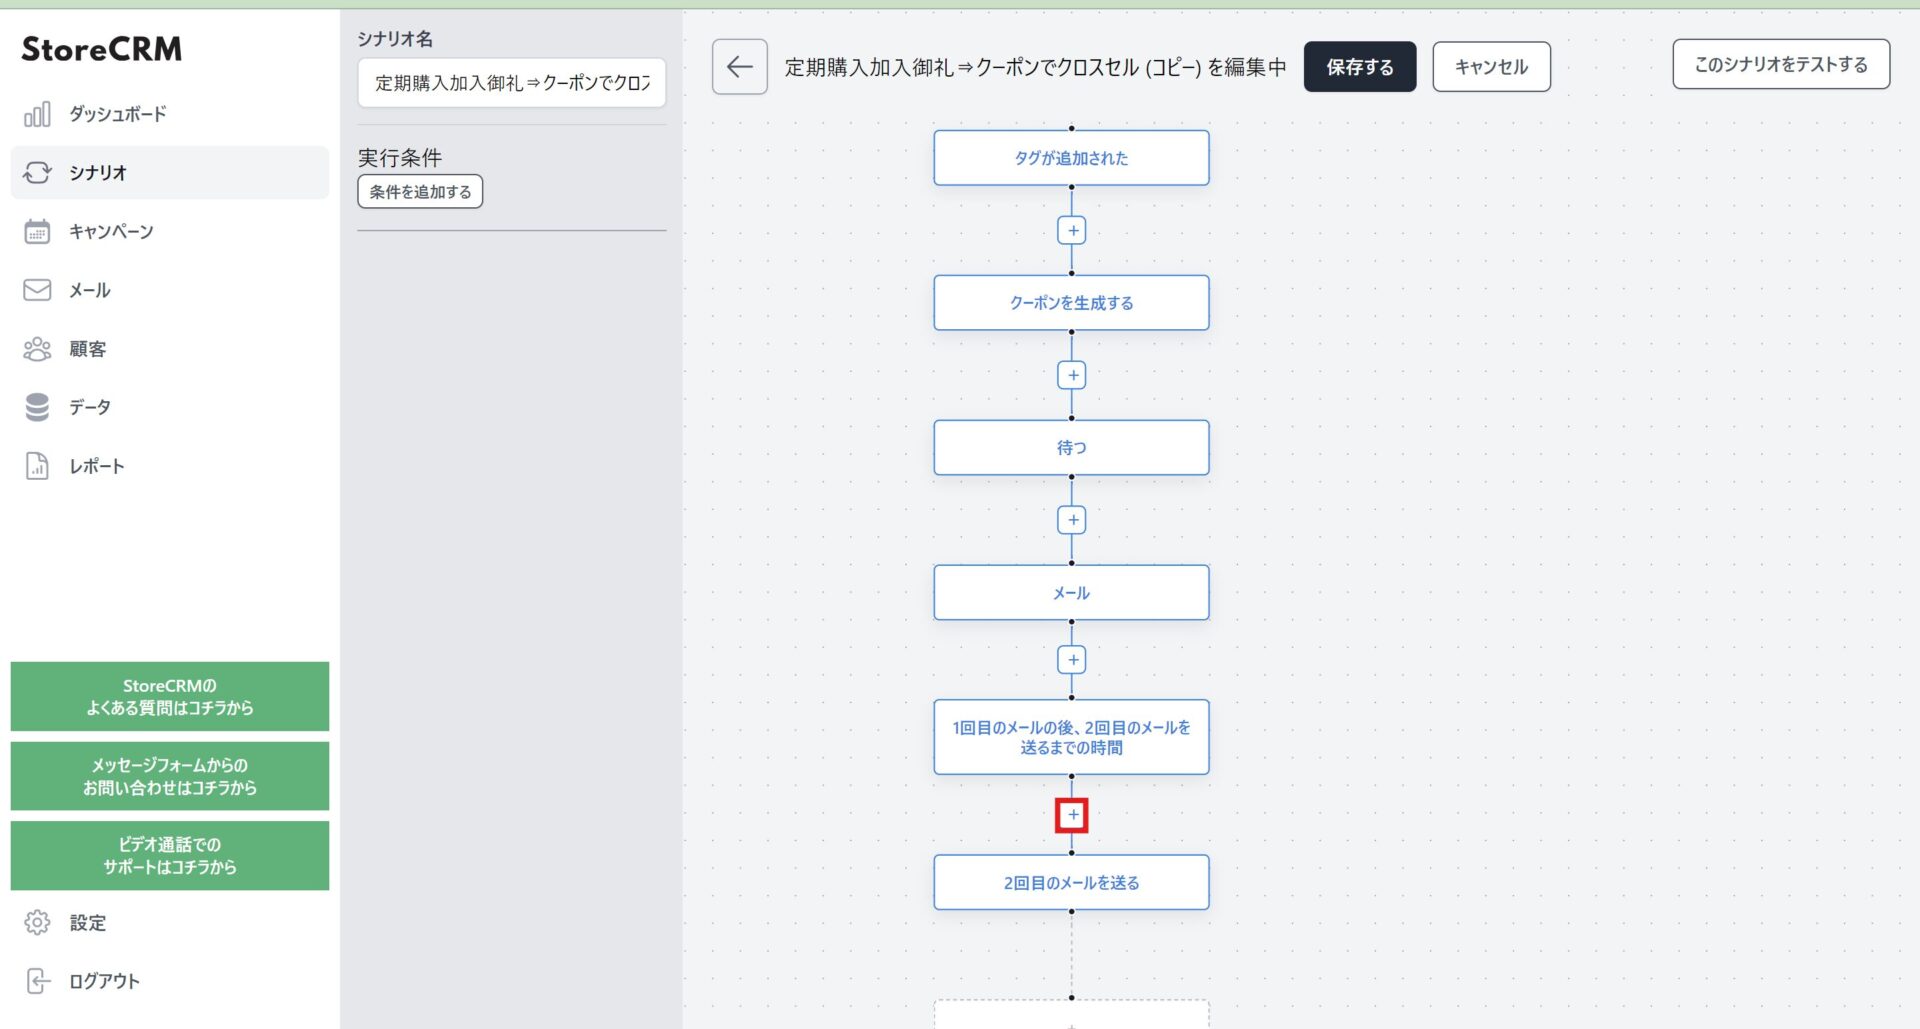
2. The flow editor opens. We want to branch on the second email, so click the + between [After the first email…] and [Send the second email].
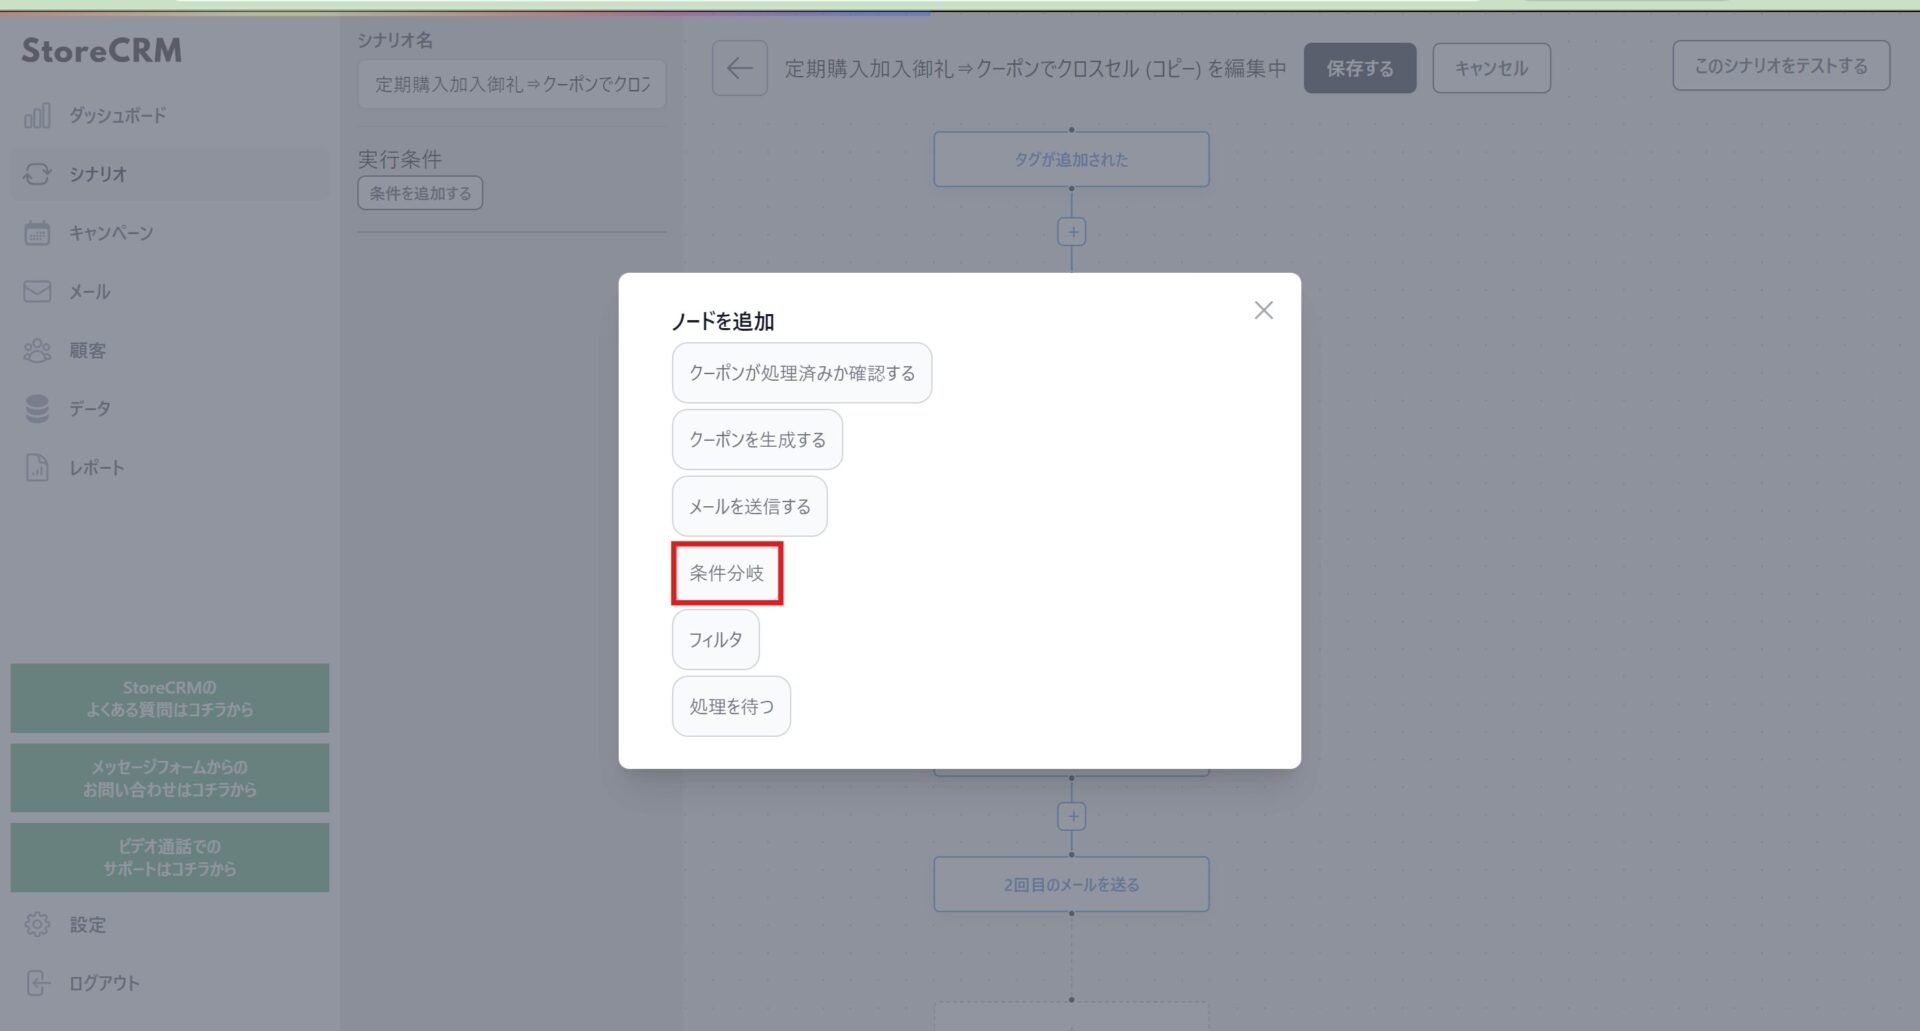
3. In the node picker, click [Condition].

4. The condition node is created. Click it, then click [Add condition].
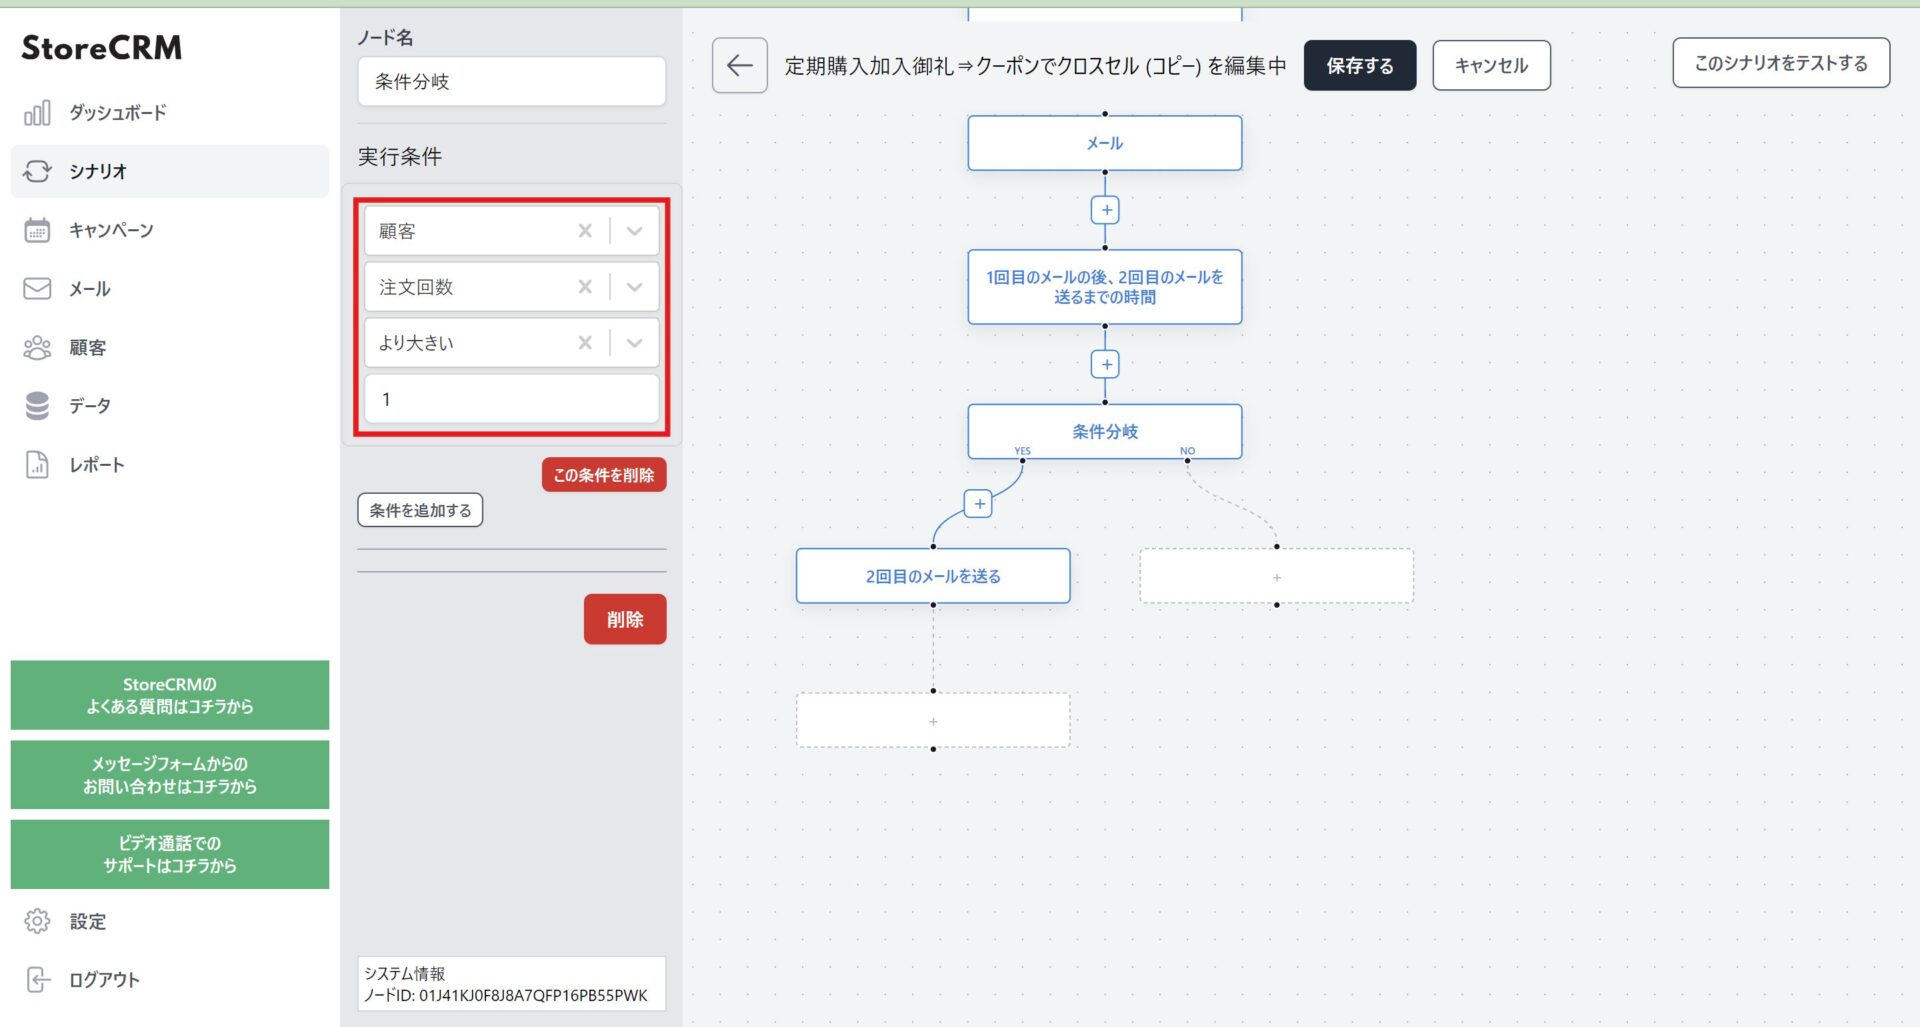
5. In the condition select boxes, choose [Customer] > [Order count] > [greater than] and enter [1].
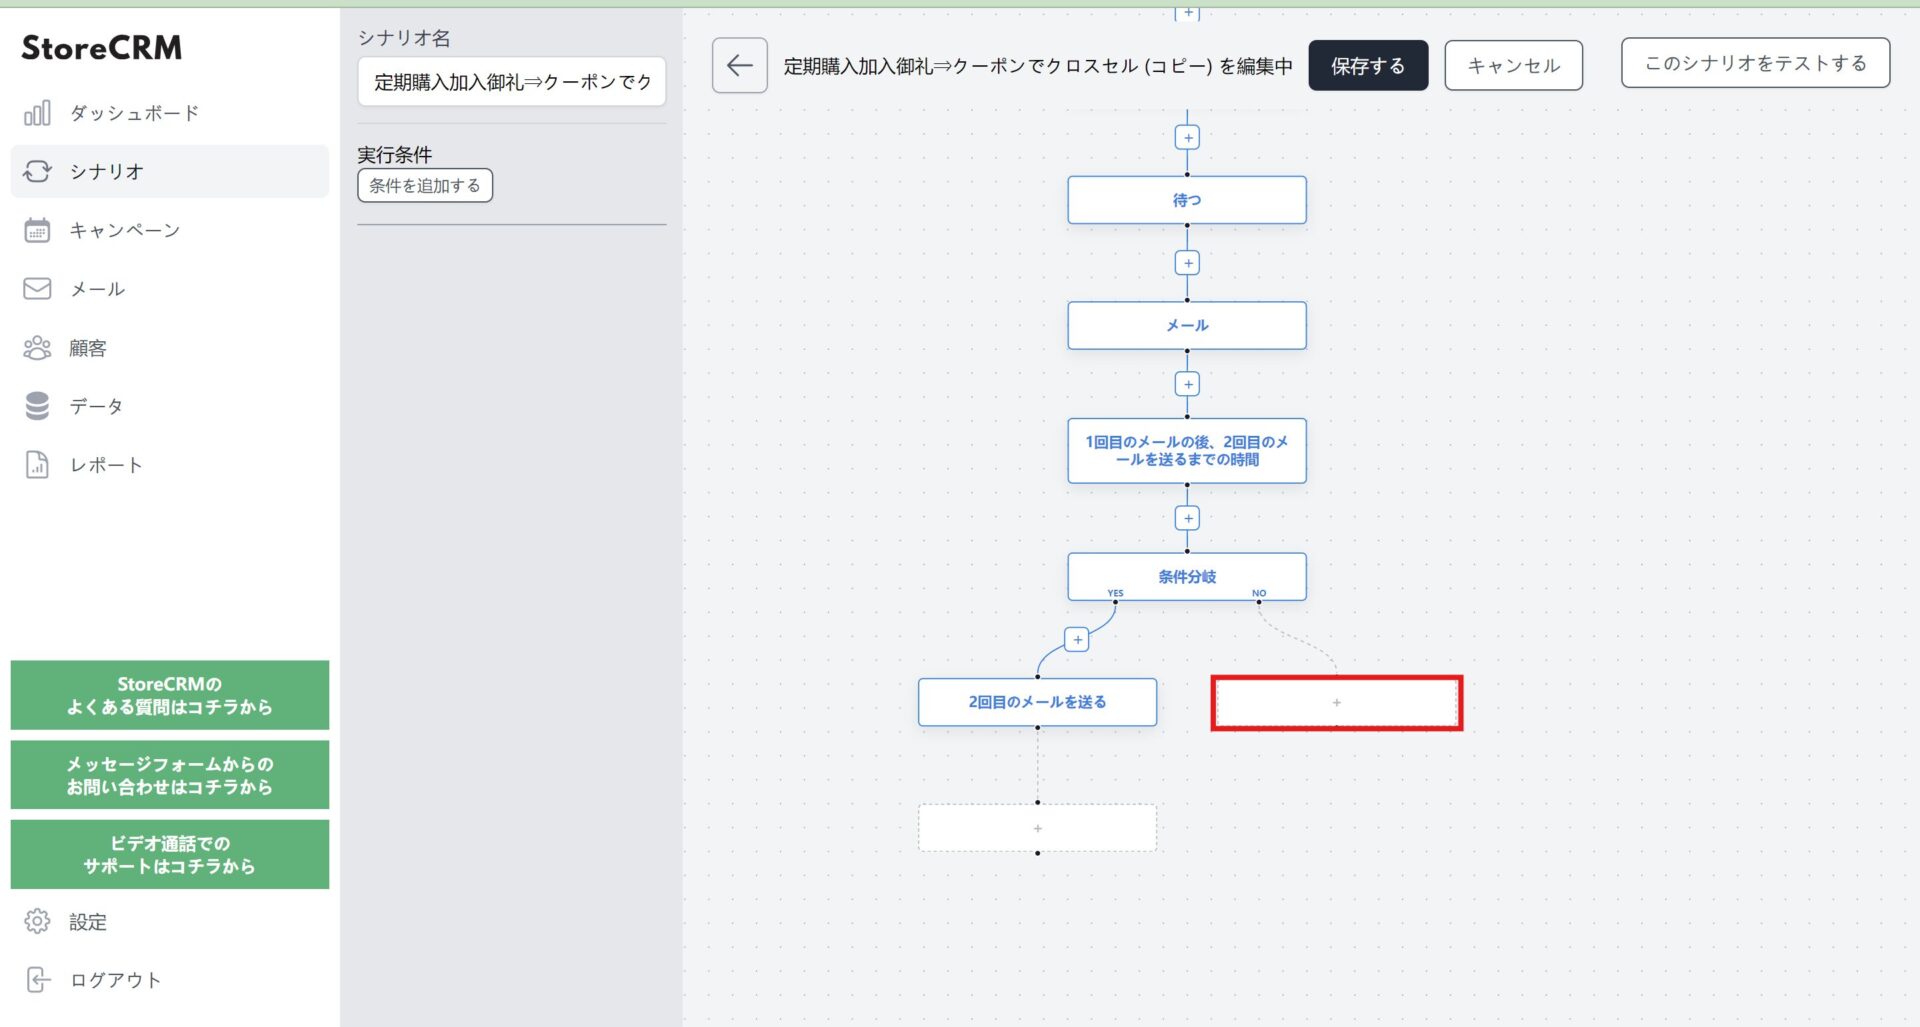
6. We want to email first-time buyers, so click the + on the NO branch to add an action.
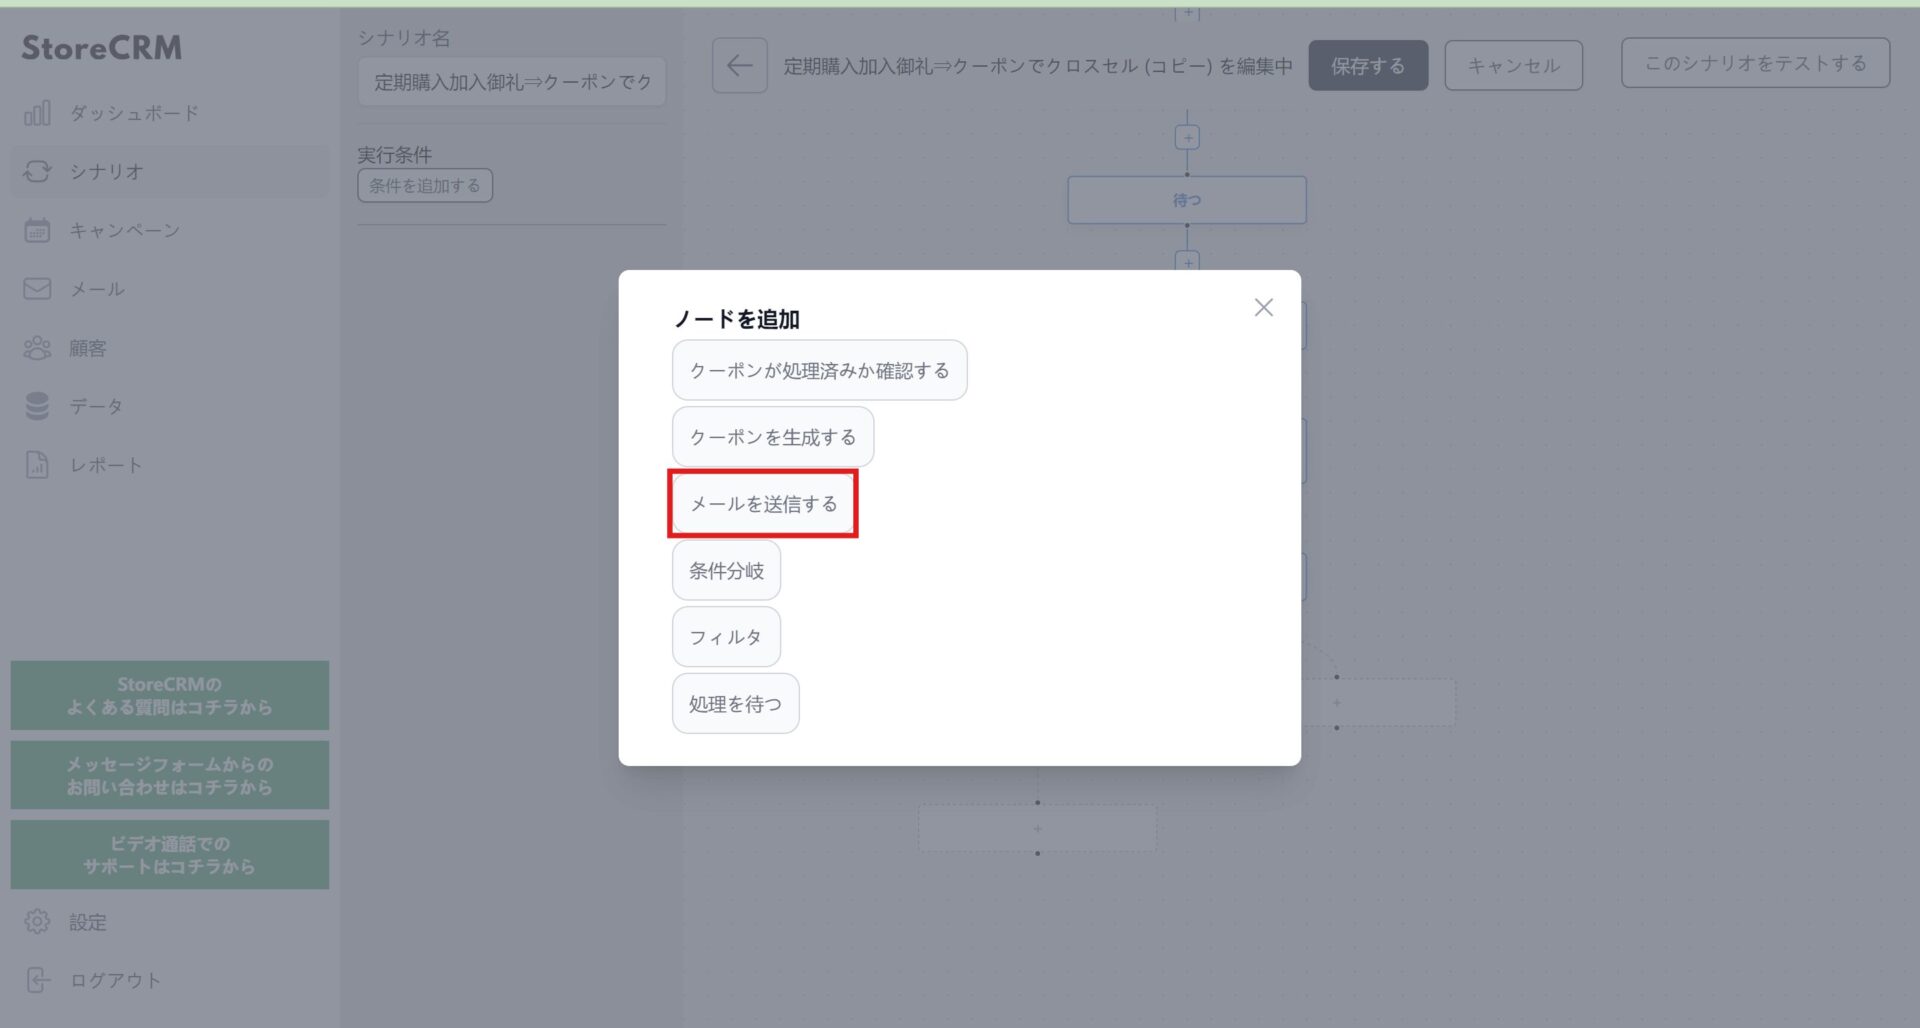
7. In the node picker, click [Send an email].
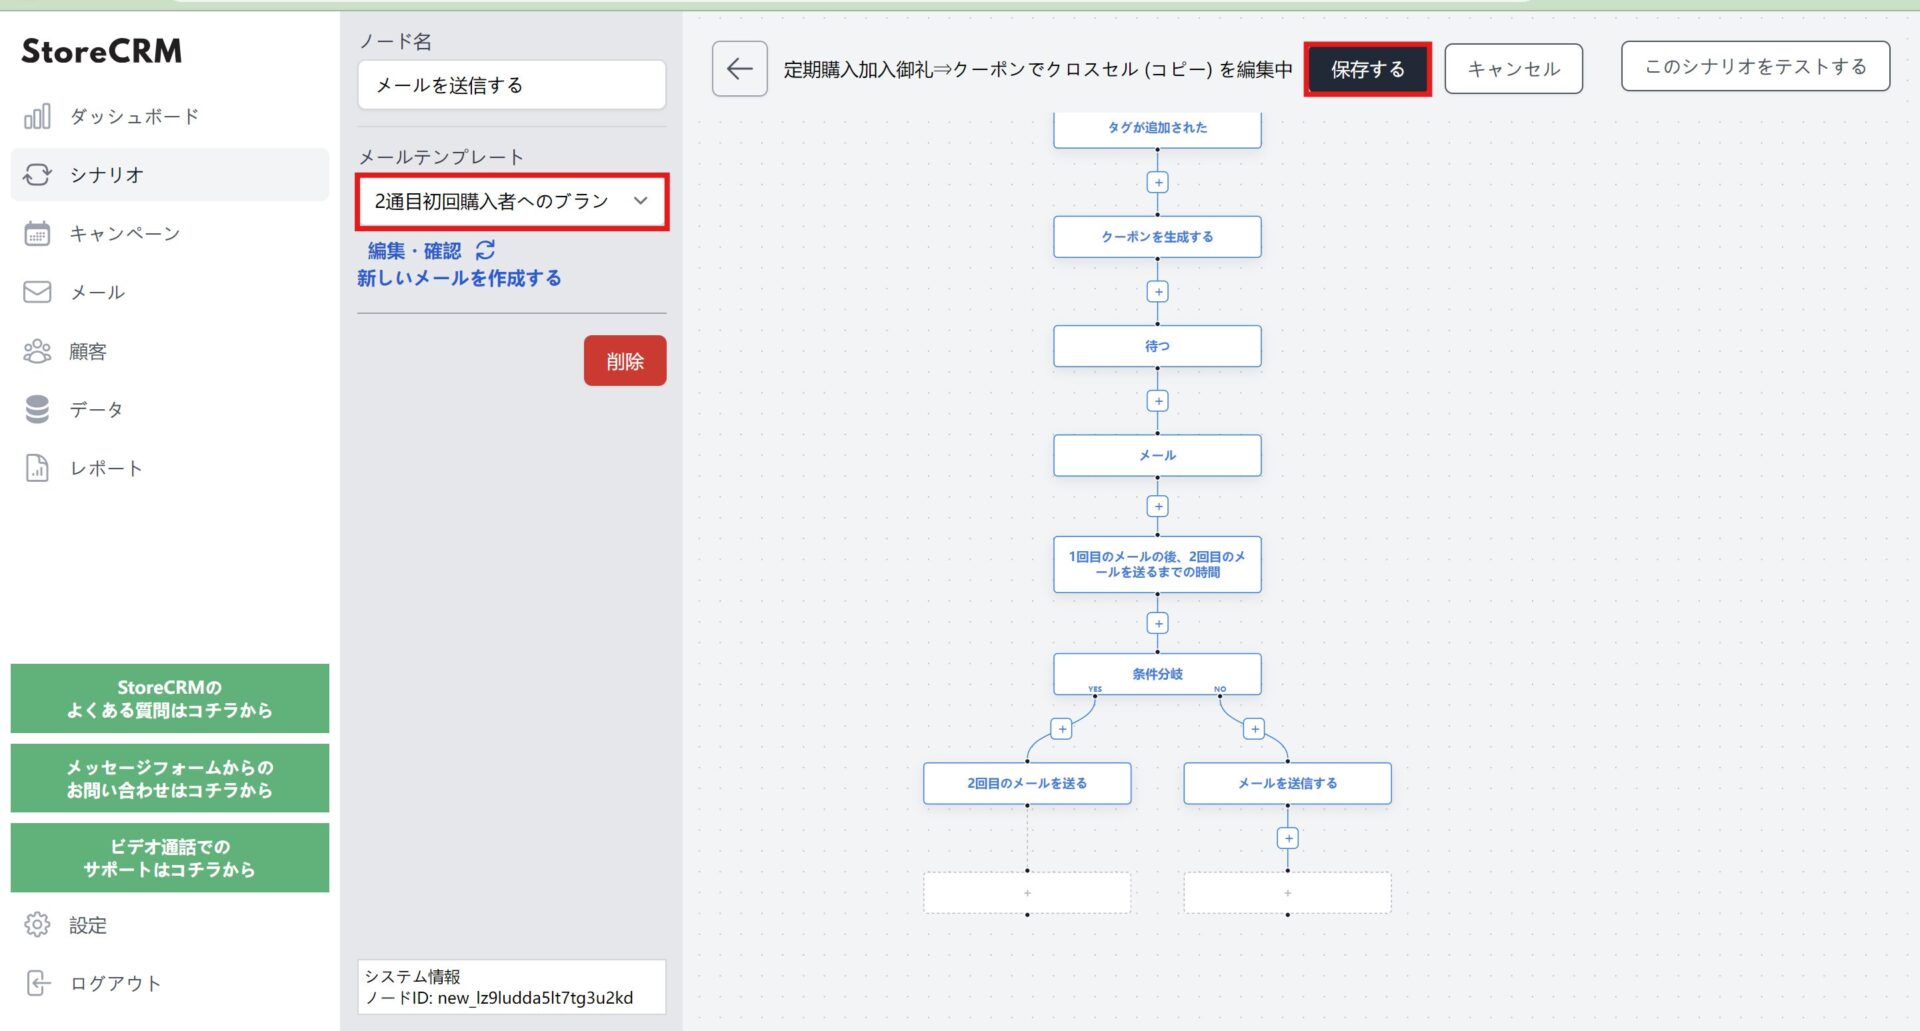
8. With the node created, select the email template you want to send, then click [Save] to save the automation.
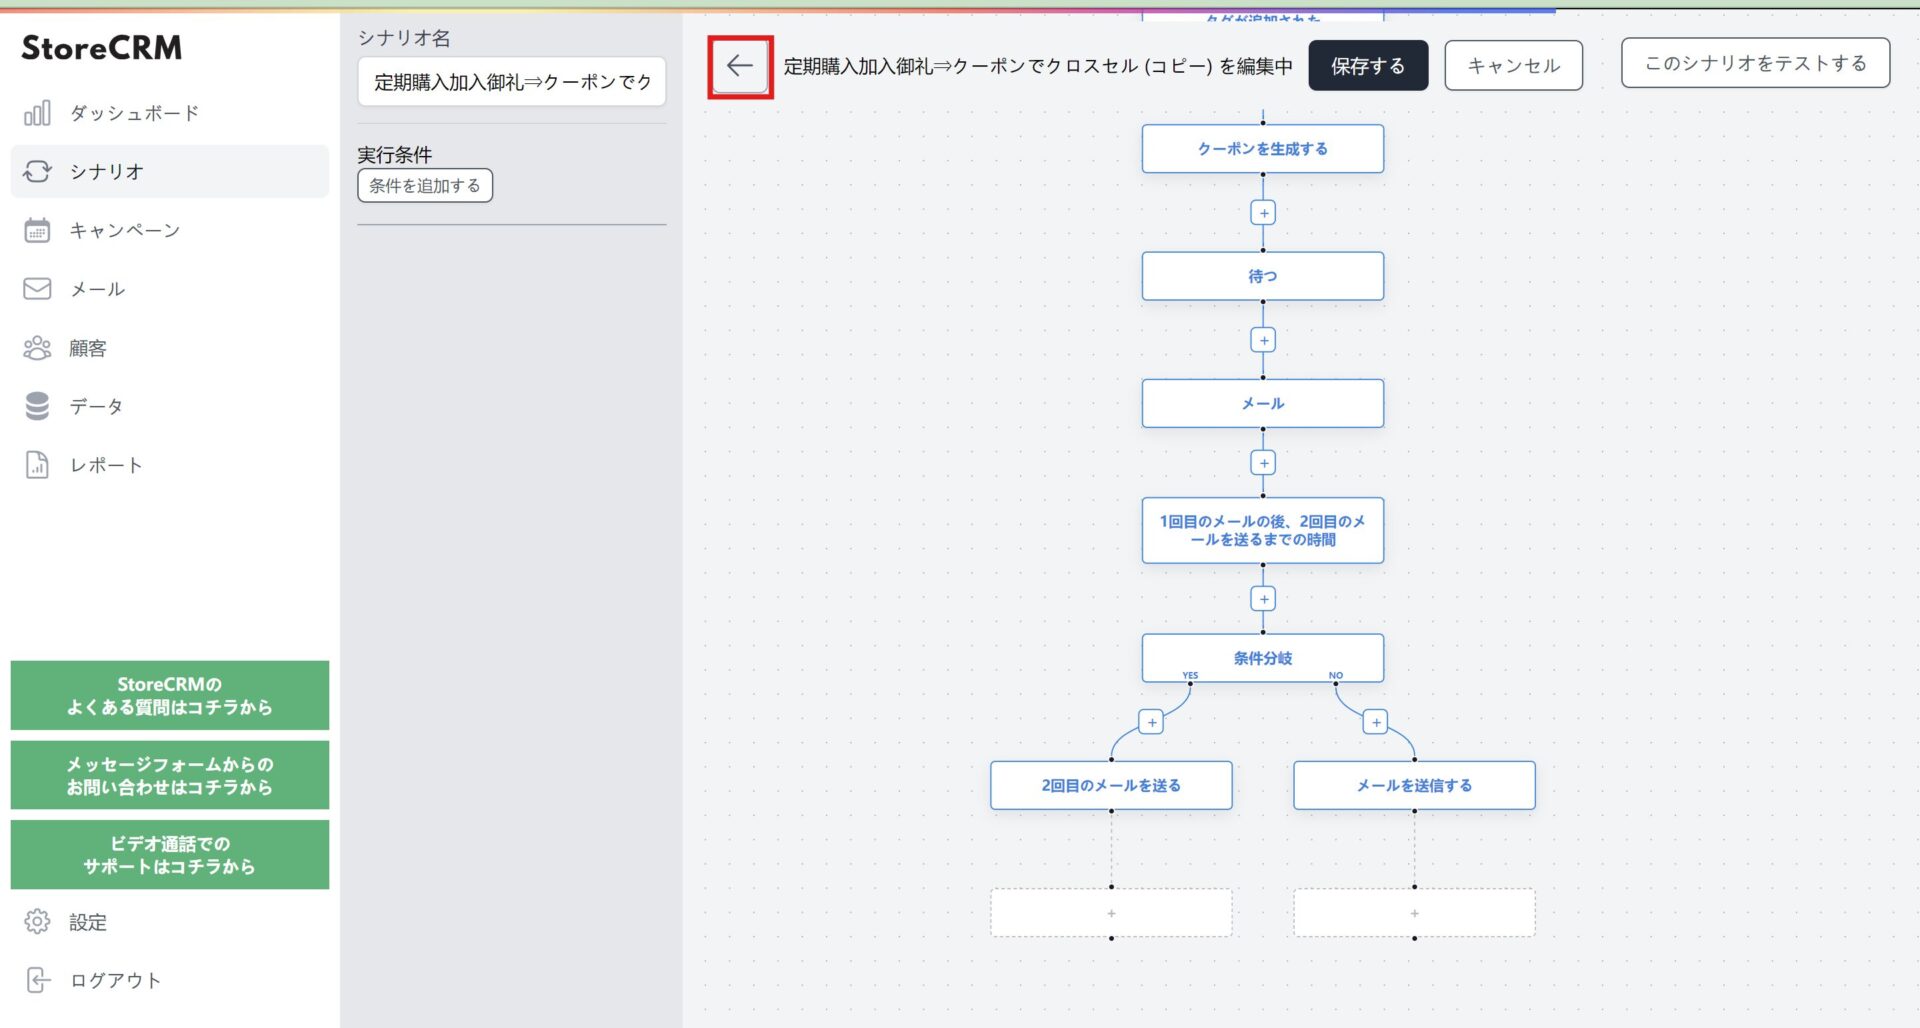
9. Once it is saved, click [←] at the top of the screen to return to the automation detail page.
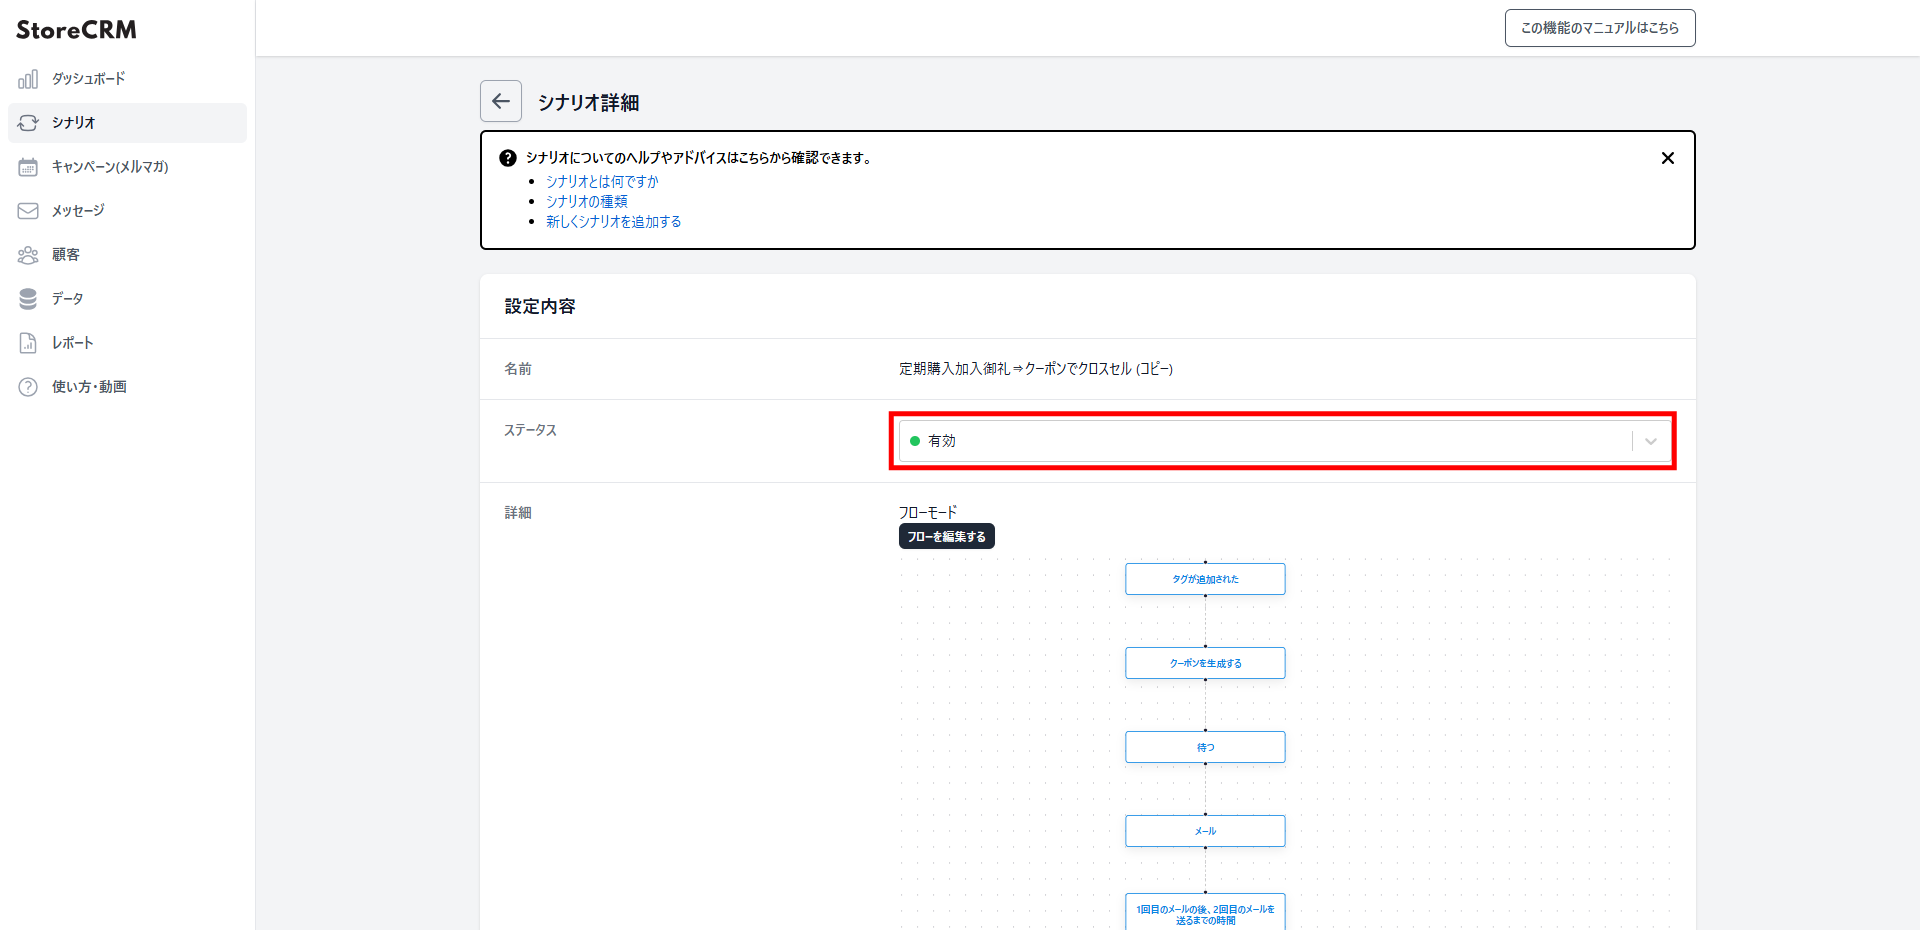
10. Open the [Settings] > [Status] dropdown, activate the automation, and this section is done.
Before you activate an automation, check that no other active automation uses the same trigger. Completely different automations are fine. This matters most with duplicates: make sure you actually want the original to stay active too.
Summary
With StoreCRM working alongside your subscription app, email strengthens the customer relationship and grows revenue through cross-selling. It does not stop at sending the email — open rates, click rates and per-email or per-automation analysis all live in the same app.
We also offer support with the app's settings and consulting on growing revenue for customers who have adopted StoreCRM.
Feel free to get in touch through the contact form linked below.
Get in touch any time through the contact form.


